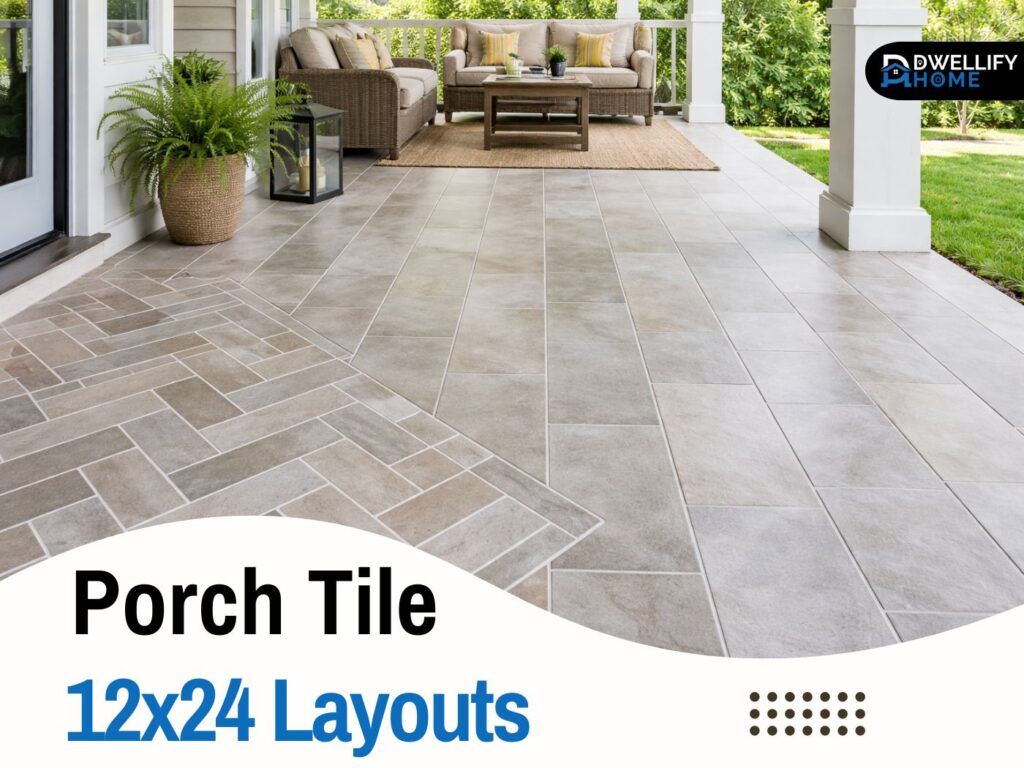
When someone asks me to plan porch tile 12×24 layouts, I usually start by looking down at the slab, not at a sample board. Outdoors, the pattern only looks good if the porch drains right, stays safe when wet, and doesn’t develop lippage that catches your toe.
The nice thing about 12×24 tiles is the clean look and fewer grout lines. The tricky part is that bigger tiles show every little issue, especially on porches that have slope, sun exposure, and occasional water.
Snippet-Ready Definition:
Porch tile 12×24 layouts refer to the pattern, direction, and spacing used when installing 12×24 tiles on porches, balancing appearance, drainage, slip safety, and durability in outdoor conditions.
Mission Statement:
At Dwellify Home, our mission is to share clear, experience-based guidance that helps homeowners make confident, practical decisions about their living spaces, indoors and out, without confusion or hype.
Quick decision guide — choose the best 12×24 porch tile layout for your space
If you want the simplest, most reliable option, go with a 1/3 offset running bond. It hides small inconsistencies better than a straight stack, and it’s usually kinder to slightly bowed tiles.
If your porch is narrow like a hallway, vertical stacking or running the long side of the tile in the direction you walk can make it feel longer and more intentional. For small porches, diagonal layouts can make the footprint feel bigger, but you’ll have more cuts.
If you want a clean modern look and your slab is flat, straight stacked 12×24 looks sharp. If you want a feature that feels custom, a small herringbone section near the door can do a lot without turning the whole job into a cutting marathon.
Quick Guide Table: Best 12×24 Porch Tile Layout Choices
| Porch Situation | Best Layout Choice | Why It Works Outdoors |
| Uneven or sloped porch | 1/3 offset running bond | Reduces visible lippage and hides minor slab issues |
| Narrow porch or entry | Vertical stack or lengthwise run | Makes the space feel longer and cleaner |
| Small porch | Diagonal (45°) | Visually widens tight spaces |
| Modern, flat porch | Straight stacked grid | Clean look when slab prep is excellent |
| Feature entry area | Herringbone (partial use) | Adds detail without overcomplicating cleaning |
Simple Step-by-Step: Planning Porch Tile 12×24 Layouts
- Check slope first
Confirm water drains away from the house before choosing a pattern. - Pick layout based on slab condition
Flatter slabs allow stacked layouts. Slightly uneven slabs do better with staggered patterns. - Decide tile direction early
Run tiles parallel to the longest wall or main walking direction for better flow. - Dry-layout before installing
Lay a few tiles loose to see cut sizes and grout alignment. - Confirm slip resistance
Make sure the tile finish is outdoor-rated, especially near doors and steps.
Top 12×24 porch tile layout options
1/3 Offset running bond — the most recommended offset for 12×24
This is the staggered 12×24 tile pattern I recommend most often because it balances style and real-world performance. With rectangular tiles, a 50 percent offset can highlight tile bowing, which is one of the main reasons people end up with visible lippage.
On a porch, a 1/3 offset usually keeps the surface looking smoother. It also hides dirt patterns better than a full grid because the grout lines don’t all line up in one direction.
Straight stacked grid — clean and modern
A straight stack gives you that crisp, lined-up look. It’s the style people pick for modern homes, and it works beautifully when the base is properly prepped.
The honest warning is that straight stacking doesn’t forgive much. If the porch slab has waves, or the installer doesn’t use a leveling system, the grid pattern makes every uneven tile edge easier to notice.
Herringbone 45 or 90 — classic, high-end, durable look
Herringbone looks great in entry zones because it adds movement and visual interest. On porches, I like it best in a defined section, like a “welcome mat” area near the door, rather than across the whole porch.
It does take more cuts and planning, so it costs more in labor and usually wastes more tile. But if you want a porch that feels thoughtfully designed, this pattern delivers.
Vertical stack — makes narrow porches feel longer
Vertical stacking is one of the easiest ways to visually stretch a narrow porch or a front walkway. It’s a simple layout, but it can make the space feel organized and less choppy.
If your porch is long and skinny, stacking the tile lengthwise often looks calmer than breaking the run with a lot of stagger. It also pairs nicely with modern trim and clean lines.
Diagonal 45 — makes the porch feel larger
Diagonal 12×24 tile layout is a classic trick for small areas. Angling the tile draws your eye across the space instead of straight down a wall line, which can make tight porches feel wider.
The tradeoff is cutting. You’ll have more waste, more edge finishing, and you need a steady layout line so the diagonals don’t drift.
Bonus patterns — use selectively, not everywhere
Basketweave accents, corridor-style patterns, or inserted herringbone details can work well on porches when used with restraint. I’ve done this on porches where the homeowner wanted something unique but still easy to clean.
A good approach is keeping most of the porch in a simple pattern and adding a border or a small feature panel. That way, it feels custom without becoming busy.
Porch-specific rules that indoor tile guides often miss
Outdoors, your porch is dealing with temperature swings, moisture, and sometimes freeze-thaw depending on your climate. Even in warm areas, sun exposure and rain can cause expansion and contraction that indoor floors don’t see.
The other big difference is drainage. Many porches have a slight slope away from the home. Your layout needs to respect that slope and your installer needs to set tiles so water doesn’t pond along edges or at the threshold.
Safety first — slip resistance for outdoor porch tile
I always talk about traction before we finalize a tile. A porch gets wet shoes, dusty wind, and sometimes a thin film of pollen or mud. That’s where a tile that feels “fine” indoors can turn slick outdoors.
Look for outdoor-rated porcelain with a textured or lightly structured finish. You don’t need a tile that feels like sandpaper, but you do want something that gives your shoe a bit of bite when it’s damp.
Pay extra attention around steps, edges, and the immediate entry zone. Those are the places where people tend to turn quickly or carry groceries, and a slip-resistant surface matters most.
Material matters — what to choose for a porch and what to avoid
For most porches, porcelain is the safest bet. It’s dense, handles moisture well, and holds up to seasonal changes better than many softer materials. When someone asks me what lasts, outdoor-rated porcelain usually wins.
Stone can work, but it’s more maintenance and the performance depends on the specific stone and finish. If you love the natural look, a good compromise is a porcelain stone-look tile with the right outdoor finish.
What I avoid is indoor-only polished tile outdoors. It might look great for a week, but it can be slippery and it often doesn’t handle weather exposure as well as you’d hope.
The lippage plus warpage section — why offsets fail and how to prevent it
Lippage is when one tile edge sits higher than the tile next to it. On porches, you notice it more because sunlight hits at a low angle and shadows make every edge look sharper.
With large format tile, bowing can happen during manufacturing. That’s why the 1/3 offset running bond is often better than 50 percent offset. It reduces the chance that the highest point of one tile lands right next to the highest point of another.
Here’s what actually helps on real jobs:
- Start with a flat base. This is the biggest factor.
- Use the right trowel and back-butter when needed.
- Use a leveling system, especially for straight stacked 12×24.
- Don’t try to “tight joint” everything. A sensible grout joint width can hide tiny variation.
- Dry lay a few tiles and check how they sit before committing to a pattern.
Layout planning that makes the porch look intentional
Before any thinset is mixed, I like snapping layout lines and doing a quick dry layout. You’d be surprised how many porches look off just because the cuts land in the wrong places.
A simple rule that works: avoid tiny slivers at the most visible edges. If the front edge of your porch is what you see from the curb, make that edge look balanced, even if it means shifting the layout slightly.
Tile direction matters too. Often, running the long edge parallel to the longest wall looks best. But on many homes, aligning the layout to the main entrance sightline looks better. I’ve seen porches “feel crooked” just because the grout lines fight the doorway.
Staggered 12×24 tile patterns — how to pick the right offset
When people say they want a staggered look, they usually mean they want movement without the strict grid vibe. For 12×24, a 1/3 offset is the most common sweet spot.
A 1/4 offset can also look good and sometimes works better with certain tiles. Random stagger can look natural, but it needs to be controlled, or you end up with awkward short joints clustering in one area.
If your porch slab isn’t perfectly flat, staggered patterns can be a bit more forgiving than straight stack. That’s one reason I’ll steer homeowners toward running bond when I’m not fully happy with the base conditions.
Best pattern for 12×24 floor tile on porches
Most homeowners end up happiest with one of four: 1/3 running bond, straight stack, diagonal, or a herringbone feature. The best pattern for 12×24 floor tile is the one that matches your porch shape and your real conditions.
If you want the safest choice, go with running bond. If your porch is a clean modern slab and you want sharp lines, straight stack can be perfect. If your porch is small and you want it to feel wider, diagonal is a strong pick.
And if you want a detail that feels custom, consider herringbone in a smaller zone rather than committing your whole porch to it.
If your porch connects to indoor areas (kitchen, mudroom, bath routes)
For kitchen porch tile 12×24 layouts, I often look at the transition line. If you can align grout lines with the interior floor, the whole area feels connected. Even if the tile isn’t the same, alignment keeps it from feeling patchy.
For bathroom porch tile 12×24 layouts, the bigger concern is moisture and traction. If the porch is part of a route from a pool, outdoor shower, or a muddy yard, pick a texture that stays safer when wet and use a layout that’s easy to clean.
Borrow design ideas from bathrooms and showers (but adapt them correctly outdoors)
A lot of 12×24 tile patterns shower designs translate visually to porches, especially vertical stack or simple stacked grid looks. The style can work outdoors, but the performance details change.
Small bathroom tricks like diagonal layouts and lighter grout can make spaces feel bigger. If you’re borrowing 12×24 tile patterns for small bathrooms as inspiration, carry over the visual idea, not the indoor assumptions. Outdoors you still need the right slip resistance, drainage, and movement joints.
Tile layout tools — preview patterns and estimate materials before installing
A tile pattern layout generator or tile pattern tool can help you compare tile layout patterns 12×24 before you buy everything. It’s useful for visualizing running bond vs stacked, and for seeing how herringbone changes the feel.
What these tools can’t do is tell you how your porch slopes, where the low spots are, or how much leveling work you’ll need. So use the tool for design planning, then confirm the real-world layout on the porch with chalk lines and a dry run.
Also, plan waste realistically. Straight stack needs less waste than diagonal or herringbone. If you’re doing a lot of cuts, budgeting extra tile saves headaches later.
Installation and maintenance essentials for long-lasting porch tile
Porches last when the base prep is right and the install system matches outdoor conditions. That usually means using materials rated for exterior use and paying attention to movement joints, not just grout lines.
Maintenance is usually easier with 12×24 because you’ve got fewer grout lines to scrub. Still, grime collects at edges, steps, and thresholds. A simple habit is rinsing dust and pollen off regularly, especially in dry seasons when fine dirt gets ground in.
If you choose natural stone, sealing and ongoing care matter more. With porcelain, you’re mostly just cleaning and keeping grout in good shape.
Common mistakes to avoid with 12×24 porch tile layouts
Here are the issues I see most often, and they’re all avoidable:
- Picking a pattern before checking slab flatness and drainage
- Using a 50 percent offset with tiles that have bowing
- Ignoring slip resistance because the porch is “covered”
- Placing tiny cut pieces at the most visible porch edge
- Skipping a leveling system on a straight stacked 12×24 install
- Forgetting movement joints in exterior areas
When you avoid these, your porch looks better on day one and stays that way.
FAQ
How to stagger 12×24 tiles?
The safest stagger is a 1/3 offset. It reduces lippage caused by tile bowing and works better on outdoor slabs than a 50 percent offset.
Which direction should 12×24 tile be laid?
Most porches look best when tiles run parallel to the longest wall or main walking direction. This improves visual flow and hides slope better.
What is the 3-4-5 rule for tiling?
The 3-4-5 rule helps square your layout lines. Measure 3 feet on one line, 4 feet on another, and adjust until the diagonal between them is 5 feet.
What is the 1/3 rule for tile?
The 1/3 rule means offsetting rectangular tiles by one-third of their length. It minimizes lippage and is commonly recommended for 12×24 tiles.
Are 12×24 tiles good for porches?
Yes, when they’re outdoor-rated porcelain with slip resistance and installed with proper slope, spacing, and layout planning.
Conclusion
A porch doesn’t need a complicated pattern to look finished. It needs a layout that fits the shape of the space, respects drainage, and stays safe when wet.
If you want my most practical advice, start with traction and slope, then choose a pattern that works with your slab. In most homes, a 1/3 running bond is the calm, reliable choice, while straight stack and diagonal can look great when conditions are right.
Once you match design to real porch conditions, your 12×24 installation won’t just look good in photos. It’ll feel solid underfoot and hold up year after year, which is exactly what you want from porch tile 12×24 layouts.
Disclaimer:
This article is based on real-world installation experience and general best practices. Porch conditions vary, so always verify local building requirements and consult a qualified installer for site-specific advice.

I’m Bilal, the founder of Dwellify Home. With 6 years of practical experience in home remodeling, interior design, and décor consulting, I help people transform their spaces with simple, effective, and affordable ideas. I specialize in offering real-world tips, step-by-step guides, and product recommendations that make home improvement easier and more enjoyable. My mission is to empower homeowners and renters to create functional, beautiful spaces—one thoughtful update at a time.