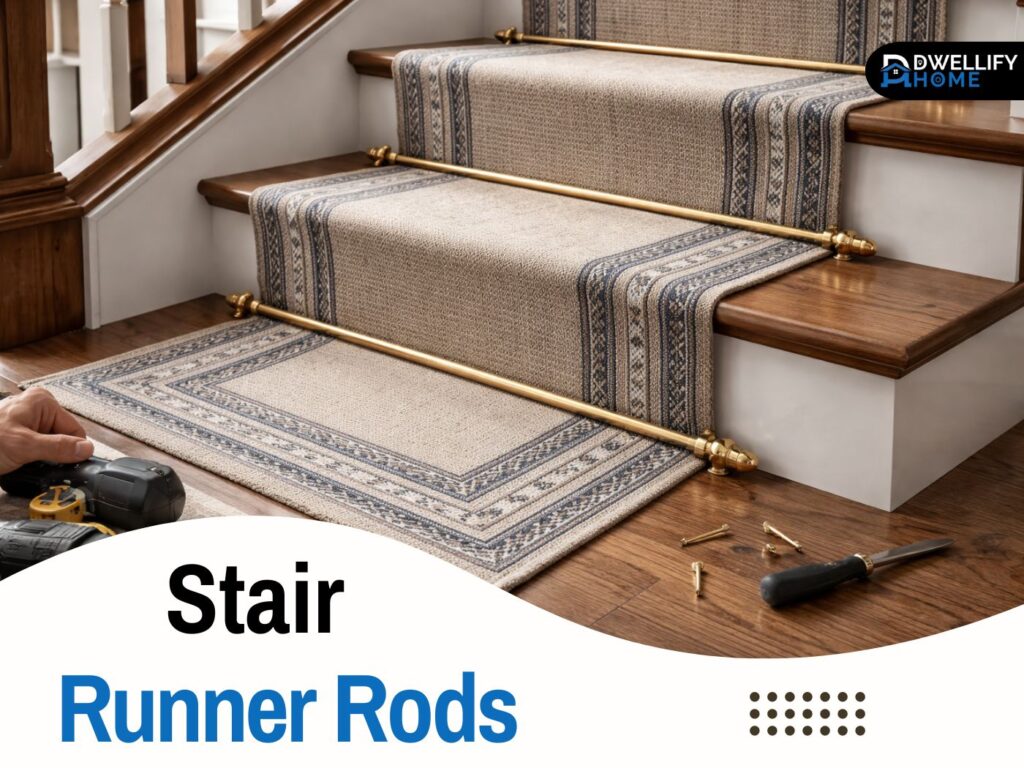
When a stair runner looks slightly unfinished, it’s usually not the runner’s fault. It’s the details around the edges and the way the runner meets each step. That’s where stair runner rods can make a big difference. In many homes, they add a clean, tailored finish that makes the runner feel intentional, not like a quick add-on.
I’ve installed runners and decorative rods for more than a decade, and I can tell you this: rods can look elegant, but only when the runner is secured properly and the hardware is measured and aligned with care. If you get those two things right, the whole staircase feels calmer and more put-together.
Snippet-ready definition:
Stair runner rods are decorative metal rods fitted at each step where the tread meets the riser. They add a tailored, classic finish, while the runner itself should be secured separately for safety.
Mission Statement:
At Dwellify Home, our mission is to make home upgrades feel doable by sharing practical, experience-backed guidance that helps you choose well, install with confidence, and get results that last.
Stair Runner Rods 101 (What They Are and What They Actually Do)
Stair rods are decorative metal rods that sit at the angle where the tread meets the riser. On many staircases, they visually “pin” the runner at each step and create that classic stairway look you see in older homes and boutique hotels.
Here’s the part most homeowners don’t hear clearly enough: in modern installations, stair rods are usually not the main thing holding the runner in place. The runner should be secured with the right method for your stairs, often staples, tackless strips, or a strong carpet adhesive system. The rods come after to finish the look, not to replace proper fastening.
If you’re standing on the stairs with me, I’d say it simply: think of rods like trim on cabinetry. They don’t make the cabinet strong, but they make it look complete. When the runner is already safe and stable, the rods are a beautiful upgrade.
Quick Guide Table: Choosing and Installing Stair Rods
| What you’re deciding | Best option in most homes | Why it works | Watch-outs |
| Bracket type | Hinged brackets | Easier on thicker carpet, simpler to remove for deep cleaning | Needs careful alignment so it closes cleanly |
| Fixing position | Front-fix brackets | Stable, works on many standard risers | Riser face must be solid and not crumbly |
| Finish | Satin nickel or matte black | Hides fingerprints and daily knocks | Polished finishes show marks faster |
| How many rods | One per step | Clean, consistent look | Landings may not need one |
| Budget | Mid-range set with solid brackets | Brackets matter more than rod shine | Very cheap sets may flex or scratch |
Step-by-step mini checklist (clean and practical)
- Secure the runner first (staples, tackless, or a proper runner system)
- Pick bracket style (front-fix or side-fix, hinged or unhinged)
- Measure stair width and runner width so rods look balanced
- Count steps for quantity (a stair runner rods pack of 13 usually suits 13 steps)
- Mark bracket positions using a simple template so every step matches
- Install brackets, then fit rods and finials
- Tighten and test for wobble or rattles
Do You Need Stair Rods? (Best Use Cases and When to Skip)
Rods are worth considering when the staircase is a focal point. A front hall staircase, an open landing, or any set of stairs you see every day can benefit from that crisp line at each riser. They also work well when the runner has a pattern or border and you want the whole thing to read as a finished design choice.
They’re also helpful when you’re trying to balance a runner that feels visually “light.” A slim runner on a wider staircase can look a bit lost. Adding rods draws the eye across each step and makes the runner feel grounded.
That said, I’m the first person to suggest skipping rods in a few situations:
- Very thick, high-pile carpet that swallows the hardware and makes alignment tricky
- Narrow stairs where brackets would sit too close to the edges
- Households where little details get bumped often and you want fewer parts to maintain
- Modern minimal interiors where visible hardware looks out of place
If you love the look but your stairs aren’t ideal, there are alternatives we’ll cover, including low-damage options and cleaner bracket choices.
Types of Stair Rods and Finishes (Style and Durability)
Most rods come in finishes like brass, chrome, satin nickel, antique bronze, and matte black. On real staircases, the finish matters as much as the shape, because it affects how often you’ll clean them and how they’ll look after a few years of daily use.
In busy homes, I often recommend a finish that hides fingerprints. Satin nickel and matte black are forgiving. Polished brass and chrome look sharp, but they show smudges more quickly, especially near the bracket points where hands and vacuums bump.
You’ll also see options like lacquered and unlacquered brass. Lacquered brass is sealed to slow tarnish. Unlacquered brass can develop a softer patina over time, which some people love because it feels lived-in and classic. If you want a consistent shine with less upkeep, lacquered is easier. If you like the character of aging metal, unlacquered can look great, just expect a bit more care.
A simple matching trick I use in homes: pick one nearby metal element as your reference, usually the stair handrail brackets, door hardware, or a ceiling light in the same sightline as the staircase. Matching doesn’t have to be exact, but it should feel related.
Stair Rod Brackets Explained (The Part That Determines Fit)
The brackets matter more than the rods. A good rod can look messy if the bracket style doesn’t suit the staircase or the carpet thickness.
Most systems fall into these categories:
- Front-fix brackets: These mount into the face of the riser. They’re common, generally stable, and they work well on many standard stairs.
- Side-fix brackets: These mount into the stringer on each side. They can look cleaner because the hardware sits more to the sides, but they depend on having enough side surface and the right stair shape.
- Hinged brackets: These open and close around the rod, which makes them friendlier for thicker carpet and for occasional removal.
- Unhinged brackets: These are more rigid and can look slightly slimmer, but they often need more precise alignment during install.
I’ve seen people buy a set that looks perfect online, then struggle because the brackets don’t sit flush against the stair surface. Usually the issue is carpet thickness or an uneven riser face. If your runner has padding or a thicker weave, hinged brackets can make your life easier.
This is also where stair rod brackets influence how “quiet” the system feels. A bracket that fits the rod cleanly tends to rattle less over time.
Measuring Stair Runner Rods (So They Look Custom, Not Awkward)
Measuring is what separates a polished job from one that looks slightly off. When I measure in a home, I’m thinking about symmetry, clearance, and how the rod will read from the hallway.
Start with two measurements:
- Stair width from skirting to skirting, or from wall to open edge
- Runner width once it’s centered on the stairs
The rod length should span the runner nicely and finish near the edges of the runner without looking cramped. Many homeowners expect the rod to reach close to the skirting boards, but that often creates awkward tight spacing and makes cleaning harder. I usually aim for the rod to sit visually balanced with a little breathing room at each side.
Now, how many rods do you need? In most setups, it’s one rod per step. Landings are different, because a landing is flat and doesn’t have the same tread and riser junction. Some people use a rod at the top step before the landing and at the first step after it, and skip the landing itself. Others add a decorative rod at the landing edge if there’s a visible break in the runner.
You’ll often see sets sold as stair runner rods pack of 13. That usually suits a staircase with around 13 steps. It sounds obvious, but I still ask homeowners to count the actual number of riser transitions where the runner changes direction. That’s the number that matters.
A quick real-world tip: old stairs are rarely perfectly consistent. Measure the top few steps, the middle, and the bottom. If one side is tighter due to a wall angle or trim, you want to know before the hardware arrives.
Choosing the Right Set (Budget, Quality, and Where People Buy)
I’ve installed both budget sets and premium sets. The difference usually shows up in three places: finish quality, bracket strength, and included hardware.
With cheap stair runner rods, the rods can look fine at first, but the finish may scratch more easily, and the brackets may flex slightly if they’re thinner metal. That doesn’t always mean “don’t buy them.” It means you should pay attention to the bracket design and the screws or anchors included. Sometimes upgrading the fixings makes a budget set perform much better.
Many homeowners look at stair runner rods Home Depot because it’s convenient for returns and for picking up supplies like anchors, drill bits, or a runner installation kit. That can be a practical approach, especially if you want to see a finish in person.
Another common path is looking at stair rods IKEA, mostly because people buy their runner or rug there. IKEA is great for runners, but rods are often sourced from decorative hardware specialists. If you like an IKEA runner, just plan to match it with a rod set from a hardware line that offers the right lengths and bracket styles.
If you’re comparing sets, look for:
- Solid bracket build and a clean fit around the rod
- A finish that matches the wear level of your home
- Clear sizing and a reliable way to order extra brackets or finials later
Prep Before Installation (The Step Most DIYers Rush)
Before we touch hardware, we need the runner secure. I tell every homeowner this on day one: rods make things look finished, but they don’t make an unsafe runner safe.
If the runner shifts underfoot, or if the edges lift when you vacuum, fix that first. On many stairs, the runner is held with staples tucked just under the edge, or with tackless strip systems at the tread and riser transition. Adhesive methods can also work when used correctly with the right products and surfaces.
Then do your prep:
- Vacuum the runner and stairs so the brackets sit flat
- Mark the runner centerline so everything stays symmetrical
- Decide bracket height and stick to it across the staircase
You don’t need a fancy setup, but you do need consistency. A simple pencil line and a small level are often enough.
How to Install Stair Runner Rods (Simple Step-by-Step)
Once the runner is secure and your measurements are confirmed, installation is mostly about patience.
Here’s the straightforward way I do it:
- Mark bracket positions on one step first
Place the brackets where the tread meets the riser, keeping the same distance from each runner edge. Step back and look. If it looks balanced on one step, it’ll look balanced everywhere. - Pre-drill where needed
If you’re going into hardwood or dense trim, pre-drilling helps prevent splitting and keeps the screws straight. If you’re using anchors, match the drill bit size to the anchor. - Install the brackets lightly at first
Don’t fully tighten them immediately. Get both sides aligned, then snug them down once the rod is in place and you’re happy with the level. - Fit the rod and finials
For hinged brackets, open, seat the rod, and close. For unhinged styles, slide and seat carefully. Add finials or end caps last. - Final tightening and check
Walk the stairs. Vacuum lightly. Listen for rattles. If a rod clicks, it usually needs a small adjustment at the bracket.
If you’re doing stair runner rods DIY, the biggest mistake I see is rushing step one. A single bracket that’s slightly higher than the others can catch your eye every time you walk by.
No Screws Stair Runner Rods (What’s Realistic and What’s Not)
The phrase stair runner rods no screws gets a lot of attention, but in real stair work, true no-screw rod systems are rare. Most rods and brackets need a solid fixing point to stay aligned and safe.
What low-damage usually means is one of these:
- The runner is secured using adhesive or a system that minimizes fasteners
- The rods are installed in a way that avoids drilling into visible woodwork
- The brackets use existing trim or a less noticeable mounting location
If you’re renting or protecting historic wood, the best approach is often to secure the runner using a reversible method that suits the stair material, then use rods only if you can anchor them safely without damaging key features. In some homes, skipping rods and choosing a runner with a finished border gives a similar “tailored” look without adding hardware.
Stair Runner Rods DIY (How to Get a High-End Look on a Real-World Budget)
A high-end look comes from spacing, alignment, and clean edges, not from expensive hardware alone. I’ve seen a modest rod set look perfect because the runner was centered and tensioned correctly.
If you want that clean look without overspending, focus on:
- Centering the runner perfectly on the stairs
- Keeping rod height consistent across every step
- Choosing a finish that works with your lighting and hardware
- Buying an extra bracket or two as a backup for odd steps or repairs
One practical example: I installed a patterned runner in a busy family home with kids and pets. The homeowner wanted polished brass, but they didn’t want constant cleaning. We chose an antique brass finish instead. It looked warm and classic, and it hid daily smudges much better. The staircase stayed looking tidy with less effort.
Common Problems (And Fast Fixes That Actually Work)
Even a careful install can run into a few predictable issues. The good news is most fixes are simple.
- Rods look crooked
This usually comes from inconsistent bracket marks. Make a small cardboard or wood template that sets bracket height and side spacing, then repeat it step to step. - Brackets won’t sit flush
Often the runner pile or underlay is thicker than expected. Hinged brackets can help. Sometimes you just need to adjust the bracket position slightly so it sits on a flatter section. - Rattling rods
A rattle is usually a loose bracket or a rod that doesn’t seat cleanly. Tighten gently, check that the rod is centered, and make sure finials are snug. - Runner edges curling or shifting
This is a runner issue, not a rod issue. Re-secure the runner first, then reinstall the rods so they sit neatly at the tread and riser line.
If you notice one step that looks different, don’t ignore it. Most staircases have one odd step due to old construction or a slight change in wall angle. Fixing that one step is what makes the whole staircase look professional.
Care and Maintenance (Keep Them Looking New)
For daily care, a dry microfiber cloth goes a long way. If you use a cleaner, choose one that matches the finish. Brass finishes often prefer gentle products and a light hand. Chrome and nickel can usually handle a mild, non-abrasive cleaner.
A simple routine I recommend:
- Wipe rods and finials during regular dusting
- Check bracket screws every few months, especially on high-traffic stairs
- Avoid harsh abrasives that scratch the finish and make future cleaning harder
If you chose unlacquered brass, expect gradual color change. That’s normal and part of the look. If you want to slow it down, keep the rods clean and dry, especially after wet weather when shoes track moisture indoors.
FAQs
1) Do stair runners need stair rods?
Not usually. The runner should be held in place by staples, tackless strips, or another secure method. Rods are mainly decorative and help the runner look finished.
2) What is an alternative to stair runner rods?
A clean alternative is a runner with a finished border and very neat edge work, plus proper underlay. If you want a “tailored” look without hardware, tight wrapping at each riser helps a lot.
3) Why are stair runner rods so expensive?
Cost usually comes from metal quality, finish durability, and bracket construction. Better sets have stronger brackets, cleaner machining, and finishes that hold up to knocks and cleaning over time.
4) What are stair runner rods?
They’re decorative rods placed at the tread and riser line to give a classic, structured look. They’re paired with stair rod brackets and finials, while the runner is secured separately for safety.
5) Can I do stair runner rods DIY, or should I hire someone?
Many homeowners can do it if the runner is already secure and you’re careful with measuring and alignment. The most common DIY issue is uneven bracket height, so using a spacing template helps a lot.
Conclusion
Stair runner rods can add a finished, intentional look to a staircase, but they only shine when the basics are done right. Secure the runner first, measure carefully, and choose stair rod brackets that suit your stair shape and runner thickness. Then take your time with alignment, because consistency is what your eye notices most.
If you’re unsure where to start, start with one step. Measure it, mock up bracket placement, and step back to see how it looks from the hallway. Once that first step feels right, the rest becomes a calm, repeatable process. That’s how you get a staircase that looks elegant, feels safe underfoot, and stays looking good for years.
Disclaimer:
This guide is for general information and typical residential staircases. Stair materials and local codes vary. If your runner feels loose, your stairs are damaged, or you’re unsure about drilling and fixings, consult a qualified installer.

I’m Bilal Hassan, the founder of Dwellify Home. With 6 years of practical experience in home remodeling, interior design, and décor consulting, I help people transform their spaces with simple, effective, and affordable ideas. I specialize in offering real-world tips, step-by-step guides, and product recommendations that make home improvement easier and more enjoyable. My mission is to empower homeowners and renters to create functional, beautiful spaces—one thoughtful update at a time.