Elfin thyme is one of those plants that looks almost too neat to be real. It forms a low, tight mat, smells amazing when you brush past it, and can soften hard edges like pavers and stone paths in a way grass never can.
Now here’s the thing: starting it from seed is totally doable, but it’s not a “sprinkle and forget” kind of plant. The seeds are tiny, the seedlings are slow, and the biggest mistakes happen in the first month. If you get the early steps right, you’ll be rewarded with a tough little groundcover that gets better every season.
I’ve started this thyme from seed multiple times in real garden beds and in trays under lights. I’ll walk you through what actually works, what usually fails, and how to get a dense patch without wasting a season.
Snippet-Ready Definition:
Elfin thyme seeds grow a low, compact creeping thyme groundcover known for its fragrance, drought tolerance, and use between pavers, paths, and rock gardens when planted in full sun and well-drained soil.
Mission Statement:
Our mission is to help home gardeners grow elfin thyme seeds successfully using clear, experience-based guidance that builds confidence, avoids common mistakes, and supports healthy, long-lasting garden design.
Quick Comparison Table (Helpful + Clean)
Elfin Thyme vs Other Common Thyme Options
| Feature | Elfin Thyme | Creeping Thyme | Woolly Thyme |
| Growth height | Very low and compact | Low but slightly taller | Low, fuzzy texture |
| Spread speed | Slow to moderate | Moderate to fast | Moderate |
| Best use | Pavers, tight spaces | Ground cover areas | Rock gardens |
| Fragrance | Strong thyme scent | Strong thyme scent | Mild scent |
| Foot traffic | Light only | Light to moderate | Light only |
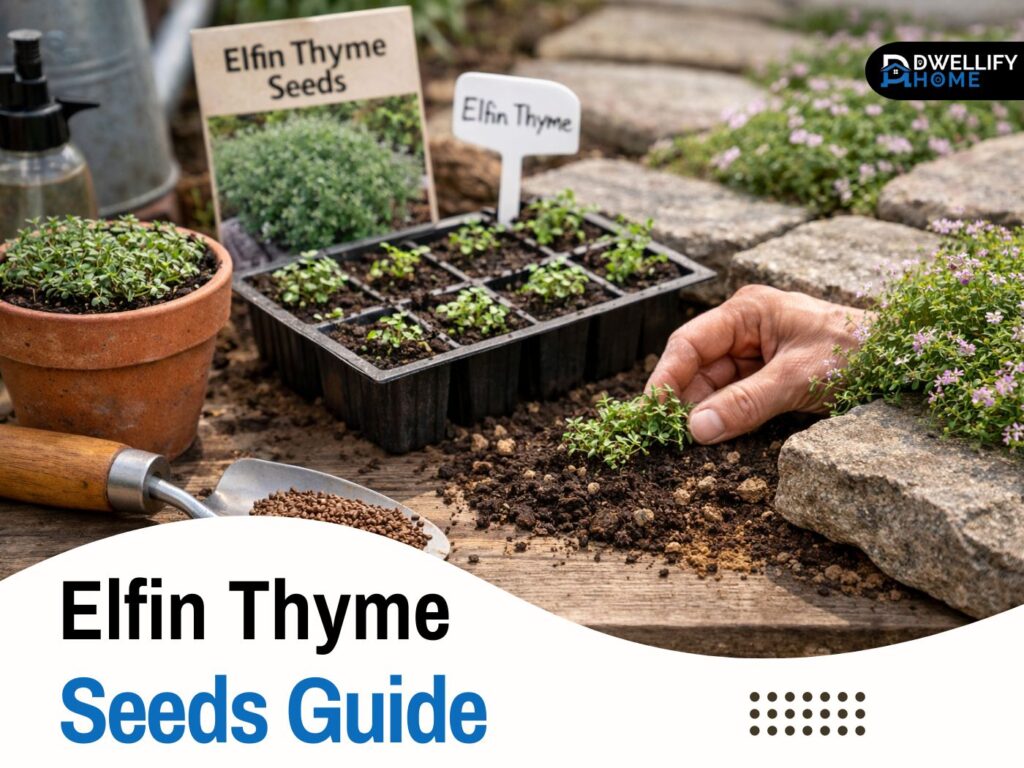
Quick Planting Guide (Step-by-Step)
How to Plant Elfin Thyme Seeds Successfully
- Choose full sun with fast-draining soil
- Surface sow seeds (do not bury them)
- Press gently so seeds touch the soil
- Mist lightly to keep soil evenly moist
- Wait patiently (germination takes 2–4 weeks)
- Reduce watering once seedlings appear
- Transplant carefully when roots are established
What Are Elfin Thyme Seeds (and what you’ll actually get)?
Elfin thyme is a compact type of creeping thyme that stays very low to the ground. When it’s happy, it looks like a soft green carpet with tiny leaves. In bloom, it can throw small pinkish flowers that bees love. The scent is classic thyme, especially on warm days.
But there’s a detail that surprises a lot of gardeners. With named varieties like “Elfin,” seeds don’t always produce identical plants. Some seedlings may be slightly taller, looser, or different in growth habit than the tightest “true Elfin” mats you see in photos. That doesn’t mean the seeds are bad. It just means you should expect a little variation.
Elfin thyme in simple terms (tiny, mat-forming groundcover)
If you’ve grown regular culinary thyme, Elfin is like its tiny ground-hugging cousin. It isn’t tall and woody like kitchen thyme can become. It wants to creep, knit together, and fill gaps.
In my own beds, the first year looks modest. The best part is what happens later. Year two and three are when it starts looking like the thick, finished groundcover most people imagine on day one.
“Elfin” labeling confusion (Elfin thyme vs creeping thyme vs wild thyme)
You’ll see Elfin thyme sold under several names: creeping thyme, wild thyme, and sometimes just thyme groundcover. Many sellers also list botanical names that don’t always match the exact plant you expect.
So when you see elfin thyme vs creeping thyme comparisons, the honest answer is this: Elfin is a type within the creeping thyme group, but creeping thyme can also refer to several thyme species and cultivars. That’s why two people can buy “creeping thyme seeds” and end up with two different-looking patches.
Important reality check: will seeds grow true Elfin, or vary?
If your goal is a super-uniform, ultra-compact look between pavers, seeds can still work, but you may need to be picky later. What I do is let the seedlings grow, then keep the ones that stay the tightest and lowest. Those become my “keepers,” and I use them to fill in other spots.
If you want the most predictable results quickly, elfin thyme plugs are the easier option. They cost more, but you know what you’re getting, and they fill in faster than seedlings.
Elfin Thyme vs Creeping Thyme vs Woolly Thyme
These three get compared a lot, and it’s a fair question because they’re used in similar places. The differences matter most when you’re planting between stones or trying to keep a neat, low profile.
Elfin thyme usually stays the shortest and tightest. Many other creeping thyme types spread faster but look a bit looser. Woolly thyme is a different look entirely, with fuzzy leaves and a softer texture, often less fragrant than traditional thyme.
Key differences in height, spread, look, and scent
If you want a crisp, low “green grout” look between pavers, Elfin tends to behave best once established. Some creeping thyme types flower more heavily, which is beautiful, but can also make the patch look a bit less uniform during bloom.
Woolly thyme is great for texture in rock gardens. It can handle dryness well, but in my experience it’s not always the best choice for narrow paver gaps where you want a tight mat and consistent fill.
Which is best for between pavers and light foot traffic?
Thyme is more “walk-on-occasion” than “walk-on-all-day.” Light foot traffic is fine once the plants are rooted in and mature. The trick is giving them time to anchor before you step on them regularly.
For pavers, I like Elfin or another tight creeping thyme cultivar. For bigger open areas, the best creeping thyme seeds might actually be a faster-spreading type, especially if you’re covering a wider space and don’t need the tiniest growth habit.
Why People Grow Elfin Thyme (Best Uses Around the Home)
Elfin thyme shines in places where you want softness and fragrance without mowing. It’s also great when you want something that looks intentional but doesn’t need rich soil or constant watering.
In real yards, it’s often used as a living accent rather than the main “lawn.” That’s a good mindset to keep. It can cover ground, but it does so in its own time.
Here are the spots where it performs best:
- Between pavers and stepping stones
- Along the edge of a path where it can spill slightly
- In rock gardens and gravel borders
- In containers as a trailing, fragrant filler
- As a low-water groundcover in full sun areas
If you’re going for a lawn alternative, use it in smaller sections first. A thyme “panel” by a patio often looks better and is easier to maintain than trying to replace an entire yard.
Growing Conditions That Make Elfin Thyme Thrive
This plant is easy once it’s established, but picky about two things early on: sun and drainage. If those aren’t right, you’ll fight slow growth, thinning patches, and occasional dieback.
The good news is you don’t need perfect soil. You need the right kind of imperfect soil.
Sunlight (full sun target plus when partial sun works)
Full sun is ideal. In my own garden, the densest patches are the ones that get at least six hours of direct sunlight. Morning sun with afternoon shade can still work, but too much shade makes it stretch and thin.
If you’re planting along a north-facing wall or under overhanging shrubs, it may survive, but it won’t give you that tight, carpet look.
Soil and drainage (the number one success factor)
Drainage is everything. Elfin thyme hates sitting wet, especially in winter. Heavy clay that stays damp is where people lose plants and blame the thyme.
A gritty mix works best. In beds, I often amend with coarse sand, fine gravel, or crushed stone, not compost. Compost holds moisture, and thyme doesn’t need rich soil to look good. It needs oxygen around the roots.
Climate and hardiness (what to expect in winter and summer heat)
Elfin thyme handles cold well when the soil drains. Wet plus cold is the real enemy. In hot climates, it can handle heat, but reflected heat from stone can dry it faster than you expect.
In containers, winter can be tougher. Pots freeze and thaw quickly. If your winters are harsh, tuck pots against a sheltered wall and keep the soil on the dry side.
When to Plant Elfin Thyme Seeds
Timing matters because germination isn’t instant. You want a window where the seedlings can grow slowly without being stressed by frost or extreme heat.
Indoors, I like starting about 8 to 10 weeks before the last frost date. That gives you time for germination and a bit of steady growth before transplanting.
Outdoors, direct sow after frost is safest. Wait until the soil is warming and nights aren’t cold. Cool soil can stretch germination and invite damping off issues in seedlings.
If your main goal is a paver project, plan ahead. Seeds are a slow build. Plugs can be installed closer to your project timeline.
How to Plant Elfin Thyme Seeds (Step-by-Step)
Starting thyme from seed is mostly about restraint. Don’t bury them. Don’t soak them. Don’t overwater them. Tiny seeds want light, airflow, and gentle moisture.
I like using a shallow tray with a very fine, well-draining seed mix. A gritty seed mix works better than a rich one. The seedlings root more cleanly and are less likely to rot.
Surface sowing (light-required seeds, don’t bury)
Sprinkle the seeds on the surface. Then press them lightly with your fingers or a flat board. You’re trying to make contact, not cover them.
If you feel like the seeds will blow away, a very light dusting of fine sand can help. Keep it thin enough that light still reaches the seeds.
Watering during germination (moist, not soggy)
This is where most people lose them. Thyme seeds need consistent moisture, but soggy soil suffocates them. I use a spray bottle or a gentle mist setting and keep the surface evenly damp.
A humidity dome helps early on, but don’t seal it tight for weeks. I vent it daily. Airflow prevents mold and that grey fuzz that can wipe out seedlings fast.
Germination timeline and patience (what normal looks like)
Thyme germination can take a while. Two weeks is common, but three or even four isn’t unusual. The seedlings are tiny, almost like green dust at first.
Here’s my simple rule: don’t dig around looking for sprouts. Keep light and moisture steady, and let them do their thing.
Seedling Care After Sprouting (Where Most People Mess Up)
Once the seeds sprout, the game changes. The soil should dry slightly between waterings, and the light needs to be strong enough to keep seedlings compact.
This is where indoor starts can fail if the light is weak. A sunny window often isn’t enough. Under lights, keep them close, and keep air moving gently.
- Water from the bottom when possible
- Avoid overfeeding early, thyme doesn’t need much
- Give them airflow to strengthen stems
Thinning can feel harsh, but it helps. If seedlings are packed too tightly, they stay weak. I thin so each little cluster has breathing room.
Hardening off is also worth doing properly. A few short outdoor sessions over a week builds toughness and reduces transplant shock.
Transplanting, Spacing, and How Long It Takes to Fill In
Elfin thyme seedlings transplant best when they have a small but visible root system and a few true leaves. Don’t wait until they’re huge. They won’t get huge quickly.
When transplanting, handle them gently. I often move small clumps rather than trying to separate each tiny plant. Clumps establish faster and look fuller sooner.
Spacing for different goals (tight carpet vs slower spread)
Spacing depends on your patience and budget. For a faster fill, plant closer. For a slower, budget-friendly fill, plant wider and let it knit in over time.
In paver gaps, I plant closer than in open beds because the environment is harsher. Heat and dryness slow spreading, so tighter spacing pays off.
What to expect in Year 1 (realistic growth timeline)
Year one can look underwhelming, and that’s normal. Think of it as a root-building year. You’ll see the real mat-forming habit once the roots are established.
If you want a “finished” look this season, plugs are the shortcut. Seeds are the slow-and-steady approach.
Planting Elfin Thyme Between Pavers (Pro-Level Tips)
Between pavers is where Elfin thyme looks incredible, and also where it gets tested the most. The space is tight, the soil dries fast, and heat reflects off stone.
The best part is, a few smart setup choices make a huge difference.
Best base mix and soil depth for pavers
Give the roots room. Shallow dusting of soil in a crack won’t hold moisture long enough for young plants. If you can, clear the joint a bit deeper and fill with a gritty mix.
A blend of sandy soil and fine gravel works well. Avoid pure compost. It stays wet and can cause rot in tight joints.
Watering schedule for paver gaps (dry edges are sneaky)
Paver gaps dry from the sides and bottom faster than you think. Early on, water more often but lightly. Once established, you can water less frequently but more deeply.
In the first few weeks after transplanting, I check the gaps every day during hot weather. If the top inch is bone dry, the young roots are struggling.
Keeping clean lines (mulch and grit choices that don’t look messy)
If you like a clean look, top-dress with a thin layer of fine gravel instead of mulch. Mulch can float, shift, and look messy between pavers.
Fine grit also keeps the crown drier, which thyme appreciates. It’s a small detail, but it helps both appearance and plant health.
Ongoing Care: Watering, Pruning, and Keeping It Dense
Once established, Elfin thyme is low-maintenance. The main job is not doing too much.
Water sparingly. Let the soil dry between waterings. Overwatering is the fastest way to turn a thriving patch into a thinning one.
Pruning is helpful after flowering. A light trim keeps it dense and prevents legginess. The key is trimming the soft growth, not cutting deep into woody stems.
If a patch thins in the center, don’t panic. I refresh it by lightly loosening the surface, adding a bit of grit, and tucking a few small clumps into the bare spot. If you’ve got a strong plant nearby, division works beautifully.
Troubleshooting Guide (Quick Fixes)
If something goes wrong, it’s usually one of a few predictable issues. Thyme is honest. It doesn’t hide problems.
Seeds not germinating often comes down to burying too deep, drying out, or inconsistent moisture. Keep them on the surface with steady dampness and good light.
Patchy growth is often light related. Too much shade leads to thin mats. It can also be spacing. If plants are too far apart, it takes longer to look full.
Yellowing and rot almost always trace back to drainage and overwatering. Improve airflow, reduce water, and add grit. In heavy soil, a raised bed or amended strip can save the planting.
Weeds are a real problem early because seedlings grow slowly. I hand-weed carefully, and I keep the soil surface covered with fine gravel to discourage weed seeds.
Buying Guide: Elfin Thyme Seeds for Sale, Bulk, and Near Me
Buying can be confusing because labeling varies. You’ll see elfin thyme seeds for sale from herb suppliers, wildflower shops, and general seed catalogs. Some sellers also offer creeping thyme seeds by the pound, which is great for coverage, but it may not be the compact Elfin type.
If you want the tiny, tight look, read the botanical name and cultivar listing carefully. If the listing is vague, expect variation.
Seeds vs elfin thyme plugs (cost, speed, and reliability)
Seeds are cheaper, and you can grow a lot. They’re perfect if you enjoy the process and have time.
Plugs cost more, but they give instant structure. They’re also more reliable for a uniform look. If you’re doing a front walkway and want consistent results, plugs are often worth it.
Bulk options (elfin thyme seeds bulk / creeping thyme seeds by the pound)
Bulk makes sense for larger areas. Just remember that bulk listings may be generic creeping thyme, not a compact cultivar. That’s not a bad thing. It can still be a beautiful groundcover, just a bit taller or looser.
If you’re comparing best creeping thyme seeds for a big slope or sunny open bed, faster-spreading types can actually be the smarter buy.
What to check before buying (labeling, species name, expectations)
Here’s what I look for before I buy:
- Clear botanical name and cultivar name
- Real photos of mature growth, not only flowers
- Notes about germination time and light requirement
- Honest mention of slow early growth
If you prefer local shopping, elfin thyme seeds near me usually means checking independent nurseries in spring or asking them to order it. Many nurseries carry plugs more often than seeds, especially for named cultivars.
Safety, Pets, and Pollinators (Quick Notes People Care About)
Elfin thyme is a pollinator-friendly plant when it blooms. Bees love it, so keep that in mind if it’s between pavers where kids walk barefoot. It’s not a danger, just a practical note for placement and timing.
It’s also commonly described as deer resistant because of its strong scent. In my experience, deer usually leave it alone, but nothing is guaranteed if wildlife pressure is high.
Edibility is another question that comes up. Thyme in general is edible, but groundcover thymes are usually grown more for fragrance and landscape use than for kitchen harvest. If you want culinary thyme, plant a dedicated culinary variety in a clean bed or pot.
Expert Tips From Real-World Growing
If you were sitting with me in the garden, here’s what I’d tell you before you start:
First, treat the seeds like dust. Surface sow them, press them in, and don’t fuss. The moment you bury them, germination drops.
Second, aim for gritty soil from day one. I’ve had the best results in mixes that look almost too lean. Rich, dark mixes stay wet and cause problems.
Third, don’t judge the plant in month one. Elfin thyme is slow early. It’s building roots and learning the site. Once it settles, it becomes hardy and low-maintenance.
A simple success checklist that works every time:
- Full sun
- Fast drainage
- Surface sowing
- Light, consistent moisture until sprouting
- Careful watering after sprouting
- Patience in year one
FAQ
Is elfin thyme the same as creeping thyme?
Elfin thyme is a type of creeping thyme, but it stays shorter and more compact. Not all creeping thyme varieties have the same tight growth habit as Elfin.
How do you plant elfin thyme seeds?
Sow seeds on the soil surface, press them lightly, keep them moist, and provide full sun. Do not bury the seeds, as they need light to germinate.
Can I just throw down creeping thyme seeds?
Not recommended. Seeds need surface contact, consistent moisture, and weed-free soil. Tossing them randomly often leads to poor germination.
Is elfin thyme invasive?
No. Elfin thyme spreads slowly and stays low. It fills space gently without taking over surrounding plants.
How long does elfin thyme take to fill in?
Expect modest growth the first year. It usually fills in more densely during the second growing season once roots are established.
Conclusion
Growing Elfin thyme from seed is a little like training a tiny athlete. It starts slow, needs the right conditions, and doesn’t respond well to overhelping. But once it’s established, it’s tough, fragrant, and surprisingly forgiving.
Keep it simple: surface sow, give it strong light, use gritty soil, and water with a light hand. If you do that, you’ll end up with a living green carpet that makes paths look finished and gardens feel inviting.
And if you’re deciding between seeds and plugs, be honest about your timeline. Seeds are the patient route. Plugs are the fast route. Either way, once that thyme settles in, it’ll keep paying you back season after season.
Disclaimer:
This article is for educational purposes only. Growing results may vary depending on climate, soil conditions, and care practices. Always adapt planting methods to your local environment and garden conditions.

I’m Bilal Hassan, the founder of Dwellify Home. With 6 years of practical experience in home remodeling, interior design, and décor consulting, I help people transform their spaces with simple, effective, and affordable ideas. I specialize in offering real-world tips, step-by-step guides, and product recommendations that make home improvement easier and more enjoyable. My mission is to empower homeowners and renters to create functional, beautiful spaces—one thoughtful update at a time.