A good outdoor kitchen starts long before the first board gets cut or the first block gets set. The builds that turn out well usually have one thing in common: somebody took the time to think through how the space would actually be used.
That matters more than people expect. I’ve seen beautiful setups that looked great on day one but felt awkward every weekend after that. The grill was too far from the prep area, the fridge door opened into the walkway, or the counter space was too tight to handle a tray of food and a cutting board at the same time. A smart build doesn’t need to be huge or expensive. It just needs to work well.
Snippet-Ready Definition
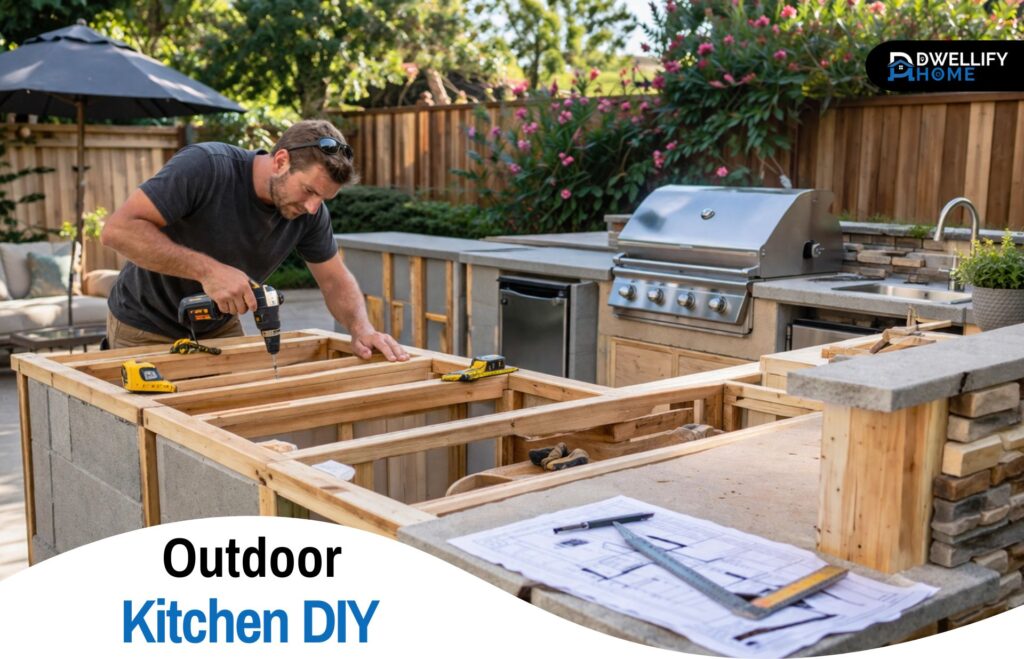
Outdoor kitchen diy means building your own backyard cooking space using custom framing, masonry, or kits. People choose it to save money, improve layout, and create a more useful outdoor area.Mission Statement
Dwellify Home helps homeowners make practical, stylish, and informed home and outdoor living decisions with clear, experience-based guidance.
Key Benefits
- Gives you a cooking space designed around how you actually grill and prep
- Can cost less than a fully custom professional installation
- Lets you build in stages as budget allows
- Improves storage, workflow, and serving space outdoors
- Makes better use of a patio or backyard entertaining area
What to Decide Before Starting an Outdoor Kitchen DIY Project
Start with habits, not materials. Think about how you cook outside now and how you want the space to feel once it’s done. Some people need nothing more than a grill, a small counter, and storage for tools. Others want room for prep, serving, a sink, maybe even a fridge.
Location matters just as much. Keep the kitchen close enough to the house that carrying food and supplies doesn’t get old. At the same time, make sure smoke won’t blow straight into windows or seating areas. I always tell homeowners to stand in the yard and picture a real evening of cooking, serving, and cleaning up. That little exercise usually exposes layout problems early.
Plan the Best Outdoor Kitchen Layout for Your Space
The layout should make cooking feel easy. A straight run works well in smaller yards or along a wall. L-shaped layouts usually give you better prep space and keep the cook from feeling boxed in. U-shaped kitchens can be very functional, but they need enough room to avoid feeling cramped.
Leave more space than you think you need around the grill. Heat, open doors, and people moving around quickly can make a tight setup frustrating. It also helps to separate the hot zone from the serving or seating area. Guests tend to gather where the action is, so the layout needs to account for that.
Set a Realistic Budget From the Start
Budgets go sideways when people price only the visible parts. They account for the grill, cabinets, and stone veneer, then forget framing, fasteners, utility runs, countertop support, and waste. That’s where the money disappears.
The best way to control cost is to decide what needs to be built now and what can wait. A lot of smart projects start with a solid grill station, durable countertop space, and basic storage. Extras like a sink, fridge, lighting, or pergola can come later. That phased approach is often the difference between a build that gets finished and one that stalls halfway through.
Choose the Right DIY Approach for Your Skill Level
Not every outdoor kitchen needs to be built from scratch. Some homeowners do well with a simple framed base and a freestanding grill. Others prefer diy outdoor kitchen kits because they cut down on measuring errors and speed up the process.
Be honest about your experience. Framing a structure, keeping everything level, and planning around heat and moisture takes care. There’s no shame in doing the carpentry yourself and bringing in a licensed pro for gas or electrical work. In fact, that’s often the smartest route.
Check Permits, Utilities, and Safety Before You Build
This is the part beginners usually want to skip. It’s also where avoidable mistakes happen.
Before you build, check local permit rules, setback requirements, and any HOA restrictions. Then look closely at utilities. A grill island with propane is one thing. A full setup with natural gas, water, drainage, refrigeration, and outlets is a different job entirely.
Clearances matter too. Heat near siding, wood posts, or low covers can create real safety issues. Ventilation also needs attention, especially if you’re building around gas appliances. It’s much easier to solve those problems on paper than after the stone and counters are installed.
Pick Outdoor Materials That Can Handle Weather and Heat
Outdoor materials have to do more than look good. They need to handle moisture, grease, sun, and temperature swings without breaking down.
For framing, pressure-treated lumber can work well in the right setup, but it needs to be planned carefully around heat sources. Steel framing is cleaner and more stable, especially near grills. Countertops should be chosen with weather and maintenance in mind. Concrete, stone, and tile are common because they hold up outside. Some look great at first but need more sealing or upkeep than people expect.
The same goes for finish materials. Veneer, stucco, brick, and tile can all work, but only if the base structure and installation are done properly. A lot of cracked finishes trace back to poor support or water getting where it shouldn’t.
Outdoor Kitchen Frame Plans and Base Options
A strong base is what keeps the whole kitchen from shifting, sagging, or looking tired after a season or two.
Framed builds are flexible and often easier for DIY work, especially when you want a custom layout. Masonry bases, including cinder block or outdoor kitchen diy bricks, tend to be heavier and more durable, but they require more planning and labor. Brick gives a classic built-in look. Cinder block can be a solid budget option if it’s finished well. A framed structure with stone veneer often gives the best balance between appearance, flexibility, and manageable effort.
The right choice usually comes down to budget, tools, climate, and how permanent you want the build to feel.
Plan Your Appliances, Cabinets, and Prep Space Around Real Use
One of the most common mistakes is overbuilding for the wrong priorities. People get excited about adding everything, then realize they barely use half of it.
Start with the main cooking appliance. Then make sure there’s enough landing space nearby for trays, raw ingredients, and cooked food. That counter space matters more in daily use than a long list of extras. Outdoor kitchen cabinets should be truly weather-resistant, not just attractive. Storage needs to stay dry and hold up to temperature changes, grease, and regular use.
For smaller builds, a simple prep surface, enclosed storage, and one strong appliance usually outperform a crowded layout full of compromises.
Simple Ideas for Small or Budget-Friendly Spaces
A compact build can still feel complete. Some of the best small setups use a straight counter run with a grill, prep area, and lower storage. Corner layouts can also work well on patios where every foot matters.
Modular designs are especially useful for tighter budgets. You can start with the grill station and add sections later. That’s a practical route for homeowners who want to spread out cost without tearing apart finished work later. It also gives you time to learn what the space actually needs.
How to Prepare for the Build
Before construction starts, measure everything twice and then check it again against appliance specs. Built-in grills, doors, drawers, and sinks all need precise openings. Even small errors can cause delays or expensive rework.
Gather materials in the order you’ll need them. Make sure the site is level and stable. Have the right fasteners, blades, safety gear, and support materials on hand before you begin. Jobs go smoother when you don’t have to stop halfway through because one bracket or sheet material was overlooked.
Step by Step: Building the Kitchen
Most builds follow the same basic path. First, prepare and level the site. Then build the frame or base. After that, add support panels, utility openings, and reinforcement where heavy countertops or appliances will sit.
Once the structure is sound, you can install finish materials, countertops, and cladding. Appliances, cabinet doors, hardware, and trim come near the end. The order matters. Rushing finish work before confirming fit and support is one of the fastest ways to create extra work.
Weatherproof the Kitchen So It Lasts
Outdoor kitchens fail slowly before they fail visibly. Water gets into seams, edges swell, finishes loosen, and fasteners start to show rust. That’s why weatherproofing isn’t an extra step. It’s part of the build.
Pay attention to drainage, edge sealing, protective coatings, and how water moves around the base. Covering the kitchen helps, but it doesn’t replace proper construction. In hot climates, heat and UV exposure can be just as hard on materials as rain. In colder areas, freeze-thaw cycles will punish weak joints and poorly protected surfaces.
Common Mistakes to Avoid
The biggest mistake is building for appearance before function. A close second is underestimating how much space cooking actually takes.
Other common issues include using indoor-rated materials outside, skipping ventilation, crowding the grill, and forgetting storage for the basics. Another one I see often is making the kitchen too far from the house. What feels charming during planning can become inconvenient after the fifth trip carrying plates and ingredients.
Smart Upgrades That Add Real Function
Some upgrades are worth it because they change how often the space gets used. Good lighting is one of them. Cooking under dim patio light gets old fast. Shade structures can also make a major difference, especially in hot areas.
Extras like a pizza oven, smoker, or beverage station can be useful, but only if the core layout is already working well. It’s better to have a simple kitchen that gets used every week than a loaded one with no proper prep space.
Setup Ideas by Budget and DIY vs Hiring a Pro
A basic setup might include a grill surround, prep counter, and storage. A mid-range version often adds better cladding, more counter area, and maybe a fridge. A more advanced build can include utilities, seating, lighting, and multiple cooking zones.
There’s also a line where DIY should stop. Framing, finish work, and basic assembly are manageable for many homeowners with patience and decent tools. Gas, electrical, and sometimes plumbing are different. Bringing in licensed help for those parts protects both safety and the investment you’re making in the build.
How to Maintain the Finished Space
Maintenance is easier when the build was done right. Keep surfaces clean, reseal where needed, and check joints, grout, and caulk before small issues grow. Inspect gas fittings, drainage, and cabinet interiors at the start and end of each season.
Outdoor cooking spaces last longer when they’re treated like working parts of the home rather than occasional patio furniture. A few routine checks do more than most people realize.
FAQs
Is it cheaper to build your own outdoor kitchen?
Yes, it often is, especially if you handle the framing, finishes, and assembly yourself. Costs usually rise when gas, plumbing, electrical work, or premium materials are involved.
What is the cheapest way to do an outdoor kitchen?
The lowest-cost route is usually a simple grill station with a basic counter, open shelving, and durable budget materials like cinder block, concrete, or a framed base with simple cladding.
Can I build an outdoor kitchen myself?
Yes, many homeowners can build one themselves if the design is straightforward and they have basic carpentry or masonry skills. Gas, electrical, and plumbing work are usually better left to licensed professionals.
What happens if you build an outdoor kitchen without a permit?
You could face fines, delays, forced changes, or problems when selling the home. It can also create safety and insurance issues if the build includes gas, electrical, or plumbing work.
What materials hold up best in an outdoor kitchen?
Weather-resistant materials such as steel framing, masonry, stone, concrete, tile, and outdoor-rated cabinets usually last best. The right choice depends on climate, heat exposure, and maintenance needs.
Conclusion
A well-built outdoor kitchen diy project doesn’t need every feature or finish to feel complete. What matters is smart planning, durable materials, a layout that supports real cooking, and a build approach that matches your budget and skill level.
Get the structure right, keep the workflow simple, and make decisions based on how the space will actually be used. That’s what turns an outdoor kitchen diy build from a nice idea into a part of the home you’ll use for years.
Disclaimer
This content is for general informational purposes and does not replace local code requirements, permit rules, or advice from licensed contractors.

I’m Bilal Hassan, the founder of Dwellify Home. With 6 years of practical experience in home remodeling, interior design, and décor consulting, I help people transform their spaces with simple, effective, and affordable ideas. I specialize in offering real-world tips, step-by-step guides, and product recommendations that make home improvement easier and more enjoyable. My mission is to empower homeowners and renters to create functional, beautiful spaces—one thoughtful update at a time.