Balcony privacy is one of those things you don’t think about until you’re living with it. One day you’re trying to drink tea outside, and the next you realize your neighbor’s window lines up perfectly with your chair. The good news is you can add a solid screen without drilling, without upsetting your landlord, and without making your balcony feel like a boxed-in cage.
This guide walks through renter-safe options that hold up outdoors, look intentional, and don’t turn into a noisy sail the first windy night. I’ll also point out the small details that usually get missed—because those are the things that decide whether you love your setup or rip it down in a week.
Snippet-Ready Definition:
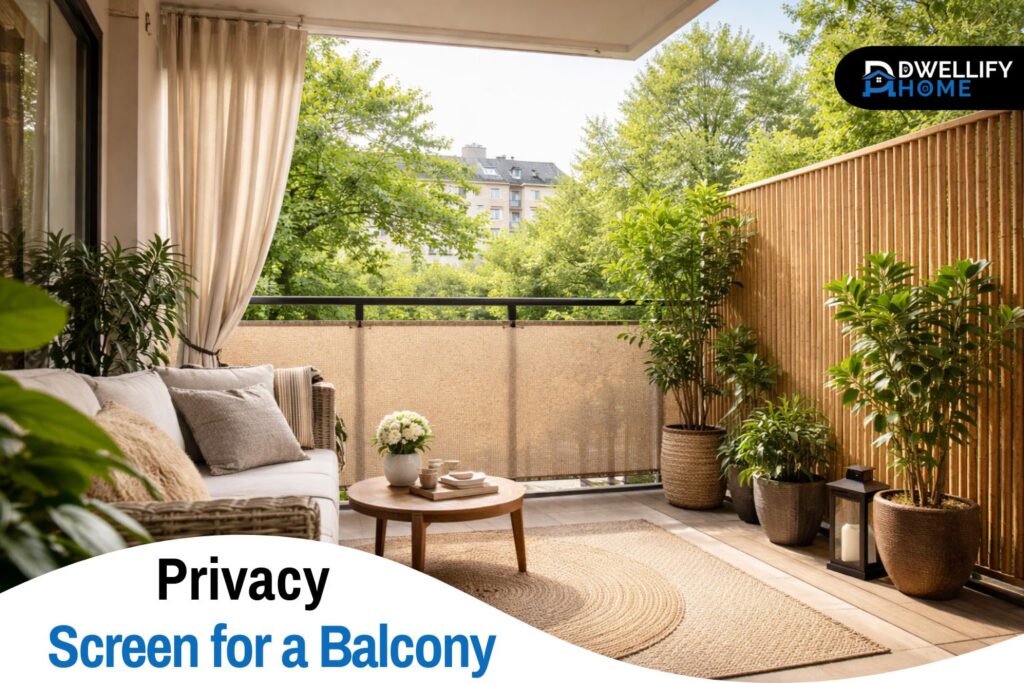
A privacy screen for a balcony is a renter-friendly barrier—mesh, panels, bamboo, or curtains—used to block sightlines from neighbors while keeping airflow and comfort outdoors.
Mission Statement:
Dwellify Home helps you make practical, stylish décor choices with clear guidance you can use in real homes.
Start here: What privacy problem are you solving?
Before you buy anything, figure out where the “exposure” is coming from. A lot of people cover the railing and wonder why they still feel on display.
Side privacy is the classic apartment issue—neighbors on the left or right, or the next balcony over. A side screen (freestanding panel, trellis, curtains, or a side awning) usually fixes this faster than wrapping the railing.
Front privacy is the “street-facing” situation. You might want to block sightlines from pedestrians, nearby buildings, or a parking lot. Railing covers work well here, especially breathable mesh that still lets light through.
Top-down privacy is the sneaky one. If someone above can look straight down, a railing screen won’t do much. In those cases, you’ll get better results with height: tall planters, a vertical trellis, a freestanding screen, or outdoor curtains that create a higher visual barrier.
Also decide whether you need full block privacy or “filtered” privacy. Full block materials can feel secure, but they often catch wind and can get hot. Filtered options—like HDPE mesh or slatted panels—are usually more comfortable and safer on higher floors.
Mini Guide: Pick the Right Option Fast
| Your situation | Best no-drill option | Why it works |
| Street-facing, want airflow | HDPE mesh railing screen | Filters views without catching wind |
| Side view from next balcony | Freestanding screen panel | Targets the angle without covering everything |
| Neighbors above looking down | Tall planters + trellis (or curtains) | Adds height where railing screens can’t |
| Covered balcony, want adjustable privacy | Outdoor curtains on tension rod | Open/close privacy as needed |
| Want a natural look | Bamboo/reed roll | Warm texture and quick coverage |
| Want greenery without upkeep | Faux greenery panels | Adds visual privacy and hides railings |
Key benefits / uses
- Blocks direct sightlines while keeping your balcony usable
- Creates a calmer seating area without permanent changes
- Helps with wind and glare when you choose breathable materials
- Improves the look of basic railings and small outdoor spaces
- Lets renters remove everything cleanly when moving out
Renter checklist before you choose a balcony privacy screen
A few minutes of prep saves you money and a lot of frustration later. Start with rules. Many buildings allow balcony privacy screens but dislike anything that looks messy from the outside. The usual red flags are bright colors, loose fabric flapping, and anything that extends beyond the railing line.
Next, measure properly. Don’t just measure the railing length and call it done. Check:
- The usable straight sections (posts and corners break up space)
- The railing height (from floor to top rail, not just the metal panel)
- Any handrail thickness that affects clips or straps
- Where you can actually attach ties without blocking gates or doors
Then do a quick wind and sun check. A breezy balcony on the 10th floor behaves differently than a sheltered second-floor one. Breathable materials matter more the higher you are. That’s why a lot of “it looked fine online” screens fail in real life—they weren’t picked for wind.
Finally, keep safety in mind. Anything that can be climbed (like horizontal slats plus nearby furniture) is worth thinking through if kids visit or pets roam outside. And if you’re using tall planters as a privacy wall, you’ll want to be realistic about weight and stability.
No-drill attachment methods (how to install without damage)
No-drill doesn’t mean “no effort.” The difference between a clean install and a saggy one is usually the attachment method and how evenly you tension it.
Zip ties (most common, strongest for railings)
Zip ties are still the workhorse for balcony railing screens. They’re strong, inexpensive, and they don’t care about heat or rain. The trick is making them look tidy and keeping the screen from bowing.
Use more ties than you think you need, especially along the top edge. Spacing them evenly keeps the screen flat. Trim the ends cleanly and rotate the locking head to the inside so it’s not visible from the street.
One practical tip: use UV-rated zip ties if you can. Standard ones turn brittle in sun, and you’ll notice the failure right when the wind picks up.
Reusable straps and bungees (easy to remove)
If you take things down seasonally, reusable straps or bungee balls are handy. They’re also good for screens that need occasional adjustment, like a setup you loosen to clean behind.
They don’t always look as crisp as zip ties, so I like them for balconies where the screen is mostly seen from inside, or where you’re pairing them with a more decorative layer like faux greenery panels.
Velcro / hook-and-loop options (quick but not for every railing)
Velcro straps can work well on smooth railings and for lightweight materials. They’re also renter-friendly because they’re easy to remove without leaving marks.
Where Velcro struggles is heat, dust, and heavy tension. On a windy balcony, it can slowly creep loose. If you use it, use it as a support method, not the only thing holding your screen.
Magnet mounting (only for metal railings)
Magnets are great when you have a truly metal railing and you want fast removal. They’re also useful for smaller privacy panels or for reinforcing corners.
The key is preventing slip. Add a thin protective layer (like a small rubber pad) so magnets don’t scratch paint, and don’t rely on magnets alone for large fabric screens unless you’re confident about wind and the grip you’re getting.
Tension rods for balcony curtains (privacy you can open/close)
Outdoor curtains feel cozy, and they’re one of the few options that let you adjust privacy minute by minute. Tension rods work best on covered balconies where wind is milder.
To make curtains behave outdoors, use tie-backs and plan for “storm mode.” Curtains left loose in wind get loud, fast. Pick outdoor-rated fabric if possible, and avoid anything too heavy that will sag once it’s damp.
Freestanding setups (no attachment at all)
Freestanding screens solve two common renter problems: “I can’t attach anything to my railing,” and “I need privacy on one side, not across the front.”
Stability is the whole game here. Think wide bases, added weight, and wind gaps. A screen that’s solid like a wall can become a sail. A slightly slatted or breathable design is usually safer and quieter.
Best privacy screen for a balcony: options ranked by use case
Different materials and styles work better for different balconies. Here’s the practical way to choose—by what you need it to do.
HDPE balcony privacy screen mesh (railing covers)
This is the go-to for a clean, modern look. HDPE mesh is breathable, so it handles wind better than solid fabric. It also gives you that “I can sit outside without feeling watched” effect without turning the balcony dark.
Look for reinforced edges and grommets. A flimsy edge is where sagging starts. If you’re browsing a privacy screen for a balcony on Amazon, listings with clear photos of stitching and grommets usually indicate better build quality.
Bamboo or reed rolls (natural look)
Bamboo and reed fencing rolls add warmth fast. They’re especially nice on small balconies because they hide railings and soften the whole space.
The tradeoff is weathering. These materials fade and can get brittle over time, especially in harsh sun. They also need more tie points to keep them from rattling. When installed well, though, they look intentional—more like design than a quick fix.
Faux greenery panels (ivy/boxwood)
Faux greenery is popular because it covers a lot and instantly makes a balcony feel less exposed. It’s also a nice solution when you want privacy but don’t want to deal with plant care.
The downside is that cheap panels can look plastic. The fix is layering: combine greenery with a simple mesh screen behind it, so you get depth and fewer visible gaps.
Outdoor fabric panels (shade cloth / outdoor textiles)
Shade cloth can be a smart middle ground: it filters views, cuts glare, and can be cut to size. It’s also easier to shape around odd railings.
Just avoid going too solid on a windy balcony. Breathable fabric is your friend. And check how you’ll finish edges—raw fabric edges can fray and look messy.
Outdoor curtains (covered balconies and controlled privacy)
Curtains are best for covered balconies or for side privacy where you can tie them back when needed. They also help with top-down privacy when they’re hung higher than railing height.
Pick hardware that won’t slip, and keep a routine: tie them back when you’re not using them, especially if storms or strong winds are common.
Freestanding folding privacy screens (targeted angles)
These work well for side views—like when the neighbor’s balcony is only on one side. They can also create a cozy corner where you sit.
They do need stability. If your balcony is windy, pair a folding screen with a heavy planter at the base or position it so it’s partially sheltered.
Trellis screens + climbing plants (or faux vines)
A trellis gives privacy without feeling heavy. It also looks great even when it’s doing the practical job of blocking sightlines.
For renters, faux vines are the low-maintenance route. If you go with real climbing plants, choose pots that won’t tip, and be realistic about growth speed. Most people underestimate how long “a living screen” takes to fill in.
Retractable side awnings / side privacy shades
Side shades are excellent for side privacy and feel less permanent than a wall. They’re common in Europe and more available now in other markets too.
The big caution: mounting. Some models need more permanent anchoring than renters can do. If you’re considering one, look for versions designed for temporary or clamp-style setups, and avoid anything that requires drilling into walls.
Tall planters and “living privacy walls”
Tall planters can solve multiple problems at once: front privacy, a nicer view, and extra greenery. They also help with top-down privacy more than a railing cover does.
Be careful with weight and wind. Use wider planters, add gravel at the base for stability, and avoid putting tall, top-heavy plants in narrow pots.
Fast, no-drill setups you can do in a day (mini step-by-step)
Setup A: Privacy screen for balcony railing (HDPE mesh cover)
Start by laying the screen flat and matching it to your railing length. Attach corners first, then work your way along the top edge with evenly spaced ties. After that, secure the bottom edge so it doesn’t flap.
The final step is tension. Go back and snug each tie evenly. Don’t pull so hard that grommets strain, but tight enough that the screen stays flat. This is the difference between a neat install and one that looks temporary.
Setup B: Bamboo/reed roll on a railing
Position the roll and decide where you want seams to land. If you need to join two pieces, overlap slightly and tie through both layers so it reads as one continuous panel.
Add extra tie points in the middle sections. Bamboo rolls sag if they’re only tied at the ends. Once it’s secured, step back and check for rattling spots—those are usually places where a tie is missing or too loose.
Setup C: Outdoor curtains with a tension-rod frame
Use a tension rod between two secure surfaces, ideally under a balcony ceiling or in a sheltered corner. Hang outdoor-rated panels and add tie-backs from day one.
Plan for wind. Curtains should have a “resting place” where they’re tied back most of the time, and only released when you’re sitting out there.
Setup D: Freestanding screen + planters (zero attachment)
Position the screen where sightlines are worst—often slightly angled, not perfectly parallel to the railing. Add weight at the base using planters or a weighted stand.
Leave a small gap for airflow if your balcony is breezy. A solid freestanding wall catches wind more than you expect, especially when gusts hit from below.
Materials that last outdoors (quick buyer guide)
For outdoor privacy, UV resistance and hardware quality matter more than most people expect. “UV-stabilized” materials tend to stay flexible longer and fade less, which is important when your screen is in direct sun.
Breathability is also a comfort and safety issue. Mesh and slatted designs reduce wind load and keep your balcony from feeling stuffy. Solid fabric can work on sheltered balconies, but it’s not my first choice for higher floors.
Pay attention to grommets and edges. Metal grommets that rust can stain fabric. Weak stitching leads to tearing at stress points. A screen that looks great on day one can start failing at the corners if the edge isn’t reinforced.
Sizing and coverage (avoid buying the wrong dimensions)
Height is where people miss. A screen that’s the same height as the railing often blocks “down low” views but doesn’t stop eye-level sightlines from nearby windows. If you’re trying to block neighbors across the way, you may need a higher element—planters, a trellis, or a freestanding screen.
If you’re shopping sizes like an 8 ft outdoor privacy screen, check whether you need a single long run or multiple panels. Multiple panels are fine, but seams should overlap and be tied together so they don’t gap and flutter.
For shorter options like a privacy fence screen 4 ft, these are usually best for lower railings, pet barriers, or when you want a softer filter rather than full privacy. They can also be layered—short screen plus tall planters—for a cleaner look.
Corner balconies and odd railings are easier than they seem. Treat them as sections: do one run at a time and use overlap at corners rather than trying to stretch one piece around bends.
Where to buy (and what to look for)
Outdoor privacy screen IKEA options tend to shine in freestanding panels and modular outdoor items. If you want something that looks like furniture more than a “screen,” this can be a good direction—especially for small balconies where every piece is visible.
For a privacy screen for a balcony on Amazon, focus on the listing details that actually matter outdoors: reinforced edges, grommets, UV rating, breathable material, and included ties or straps. Photos of real installs are more useful than studio images.
If you need a privacy screen for a balcony nearby, local hardware and garden stores often have practical solutions like fence rolls, bamboo screens, shade cloth, and outdoor curtain panels. Buying locally is also helpful when you want to feel thickness and see color in natural light.
Wind-proofing and safety (the expert layer competitors gloss over)
Wind is what makes or breaks balcony privacy. The quiet setups are usually the ones with breathable materials and frequent attachment points. A screen that flaps isn’t just annoying—it’s stressing its edges every time it moves.
A quick wind checklist that works:
- Pick breathable materials for exposed balconies
- Add more ties along the top edge than you think you need
- Secure the bottom edge so it can’t whip
- Reinforce corners (they take the most force)
- Skip install on high-wind days so you can tension calmly
Safety matters too. Don’t overload the balcony with heavy planters without thinking it through. Keep tall screens stable, especially on higher floors. And when you remove a screen (for storms or moving out), cut ties carefully and avoid scraping paint so you don’t lose a deposit over a simple upgrade.
Maintenance: keep your privacy screen looking good
Most balcony screens look worse because of dust and sun, not because they’re “bad.” HDPE mesh usually cleans up with a quick rinse and a soft brush. Bamboo and reed do better with gentle cleaning and occasional tightening of ties as they dry and shift.
Faux greenery collects dust. A quick shake and a light rinse helps. If it’s near a kitchen window or city pollution, you may need to wash it a bit more often than you expect.
Seasonal storage is simple: let everything dry fully, then roll or fold it loosely. Storing damp fabric is the fastest way to end up with mildew smells next season.
Troubleshooting (quick fixes)
A screen that flaps loudly usually needs more attachment points or a more breathable material. Add ties along the top and bottom, and check whether the screen is too loose in the middle.
Sagging happens when the top edge isn’t supported evenly. Add a few ties in the center and tighten gradually. For bamboo rolls, add tie points where the roll naturally bows.
If zip ties are snapping or fading, switch to UV-rated ties. Standard ties don’t love constant sun. Also check that you’re not over-tightening to the point the tie is under constant strain.
Still exposed from above? Combine a railing cover with height: tall planters, a trellis, or outdoor curtains that rise above railing level. Top-down privacy usually takes a layered approach.
FAQs
How can I make my balcony more private?
Start by identifying the exposed direction. Use a breathable mesh railing screen for front views, and add a freestanding panel or curtains for side angles. For top-down views, use tall planters or a trellis.
Are balcony privacy screens allowed?
Often yes, but it depends on building rules. Neutral colors, tidy installs, and keeping the screen inside the railing line usually avoids issues. Check your lease or HOA notes before buying.
How to close a balcony for privacy?
Use a combination: railing screen for lower coverage plus height with planters, a trellis, or outdoor curtains. “Closing” works best when you block the exact sightline, not just the railing.
Can you put a screen on a balcony?
Yes. Most renters use zip ties, reusable straps, or magnets on metal railings. Choose breathable materials for windy balconies and secure both top and bottom edges so it doesn’t flap.
What’s the best privacy screen for a balcony in wind?
A breathable HDPE mesh screen with frequent tie points is usually the most stable. Avoid solid panels or loose fabric on exposed, higher-floor balconies unless the area is well-sheltered.
Conclusion: The simplest way to choose a privacy screen for a balcony
The easiest “start here” setup is a breathable mesh railing cover secured neatly with zip ties, then add height only where you still feel exposed. Side privacy is usually better handled with a freestanding panel, trellis, or curtains you can pull closed.
Once you match the screen to your actual sightlines and your balcony’s wind, the whole space feels calmer. And because it’s no-drill, you can adjust, upgrade, or remove it without turning a simple privacy fix into a landlord problem.
Disclaimer:
This article offers general home guidance. Always follow your building rules and prioritize safety, especially on higher balconies and in strong wind.

I’m Bilal, the founder of Dwellify Home. With 6 years of practical experience in home remodeling, interior design, and décor consulting, I help people transform their spaces with simple, effective, and affordable ideas. I specialize in offering real-world tips, step-by-step guides, and product recommendations that make home improvement easier and more enjoyable. My mission is to empower homeowners and renters to create functional, beautiful spaces—one thoughtful update at a time.