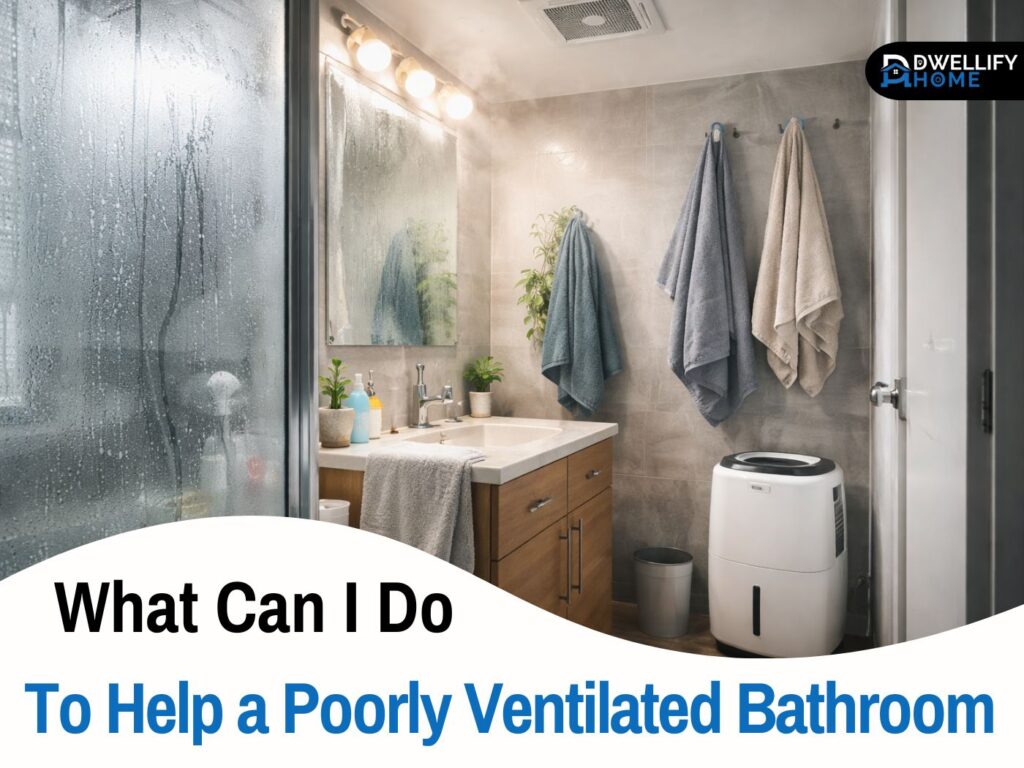
A poorly ventilated bathroom doesn’t always look “bad” at first. It just feels annoying. The mirror stays foggy forever, towels take ages to dry, and there’s that damp, stuffy smell that shows up after a shower.
I’ve worked on plenty of real homes where the bathroom was technically “fine,” but humidity had nowhere to go. The good news is most problems improve a lot with a few smart habits, a little airflow planning, and the right fan setup. Let’s walk through it step by step.
Snippet-ready definition:
A poorly ventilated bathroom traps humidity after showers, causing fog, damp smells, and mold. Improving it means removing moisture faster using an exhaust fan, better airflow into the room, and smart drying habits.
Mission Statement:
Dwellify Home’s mission is to help homeowners solve everyday home problems with clear, practical guidance that’s safe, realistic, and based on real-world experience.
How to tell if your bathroom is poorly ventilated
A bathroom can seem normal until you pay attention to what happens after hot water is running. Ventilation problems show up in patterns, not in one single moment.
If your bathroom still feels wet and heavy long after you’re done, that’s your first clue. Moisture should clear out fairly quickly when ventilation is working properly.
Simple “after-shower” test (30 to 60 minutes)
Try this once. Take a normal shower, then leave the bathroom as you usually do. Come back after 30 minutes.
If the mirror is still fogged, the walls still feel damp, or the air still smells like steam, your airflow is not keeping up. In healthy ventilation, you’ll usually notice the room feels normal again within that time window.
Warning signs you shouldn’t ignore
In homes I’ve visited, the most common signs are:
- A musty smell that comes back even after cleaning
- Peeling paint on the ceiling or bubbling patches near the shower
- Black or pink spots on grout lines, caulk, or corners
- Towels and bathmats that never fully dry
- A bathroom that feels warmer and heavier than the rest of the home
These are classic “poor ventilation in bathroom” signals. They don’t mean your home is falling apart. They just mean moisture is hanging around too long.
Quick Guide Table (fastest way to choose the right fix)
| Your Bathroom Situation | What to Do First | Best Upgrade If Needed |
| Fan works, but bathroom stays steamy | Run fan longer after shower, wipe surfaces, keep door slightly open | Add timer or humidity-sensor fan |
| Fan runs but seems weak | Clean grille, check outside vent flap, confirm it vents outdoors | Replace with correct CFM fan, improve ducting |
| Windowless bathroom | Use fan + ensure makeup air, add small circulation fan | Inline fan or better duct run |
| No fan at all | Reduce steam, wipe down, use bathroom dehumidifier, keep door open | Install an exhaust fan vented outdoors |
| Mold keeps coming back | Control humidity and dry surfaces daily | Pro check for hidden leaks, duct issues, correct ventilation setup |
Step-by-step mini plan (simple and practical)
- After every shower: run the bathroom vent fan 20–30 minutes and leave the door slightly open.
- Remove water fast: squeegee or wipe shower walls and glass.
- Create makeup air: make sure air can enter the bathroom (door gap or vented door option).
- Support with a bathroom dehumidifier if it’s windowless or humidity stays high.
- If it still feels damp: check the fan, ducting, and whether it vents outside, then upgrade CFM if needed.
Why poor ventilation in a bathroom becomes a bigger problem
Humidity is sneaky. It doesn’t just sit in the air. It settles on surfaces. It gets into tiny cracks. It stays trapped behind cabinets and in corners where you don’t look every day.
Over time, that can feed mold and mildew. Even when it’s not visible, you might notice allergies acting up, the air smelling stale, or that “damp towel” scent that never disappears.
On top of that, moisture damages materials. I’ve seen swollen vanity bases, peeling ceiling paint, warped trim, and grout that breaks down faster than it should. People often try repainting first, but the paint fails again because the humidity problem never got fixed.
Immediate low-cost fixes (start today)
Before you replace anything, start with the basics. These small actions work because they reduce moisture fast and help your bathroom recover after each shower.
Run the exhaust fan longer (the simple timing rule)
Most people turn the fan off too soon. A bathroom vent fan needs time to pull moisture out, especially after a steamy shower.
A simple rule that works in real homes is: run the fan during the shower, then keep it running for at least 20 to 30 minutes after. If you don’t want to think about it, a timer switch is one of the best low-effort upgrades.
If your fan is loud and annoying, you’ll avoid using it. That’s a big clue the fan might need an upgrade later. But for now, using it longer often makes an immediate difference.
Keep the door open (when it helps vs when it doesn’t)
Keeping the door open helps the bathroom exchange air with the rest of the home. It’s especially useful in small bathrooms where steam has nowhere to spread out.
After showers, leave the door open for a while. If you can, hang towels outside the bathroom too. That one habit alone reduces trapped humidity and helps prevent that persistent damp smell.
When does it not help much? If the rest of the home is already humid, or the bathroom has no fan and no air path, you’re just moving moisture around. It still helps, but it won’t solve everything by itself.
Wipe down wet surfaces (fast habit, big payoff)
Guess what. The moisture on your walls and glass is a huge part of the problem. Even with a fan, water left sitting on surfaces keeps evaporating for a long time.
A quick wipe makes a noticeable difference:
- Use a squeegee on shower glass and tiles
- Wipe the tub edge and corners where water pools
- Give the curtain a quick shake so it dries faster
It takes one minute, but it can cut down the “humidity hangover” a lot. This is one of my favorite personal-experience tips because it works even in terrible bathrooms.
Use a bathroom dehumidifier (best use-case)
A bathroom dehumidifier can be a real helper, especially in a windowless bathroom or in humid seasons. It’s not a perfect replacement for ventilation, but it lowers overall moisture so mold and mildew have less chance to grow.
If you go this route, keep it simple:
- Use a small unit sized for the room
- Place it safely away from splashes
- Empty it often, and keep the filter clean
In homes with constant condensation, a dehumidifier plus a properly used fan is often the best combination.
The number one reason a bathroom vent fan “does nothing”: missing makeup air
Here’s the part most people miss. Even a good fan can’t move air if there’s no replacement air coming in.
Think of it like sipping a drink with a blocked straw. The fan tries to pull humid air out, but it can’t because the room is sealed too tightly.
What makeup air is (explained simply)
Makeup air is just the fresh air that replaces the air your exhaust fan is pushing out. Without it, airflow slows down and moisture stays trapped.
In many real homes, the bathroom door fits too tightly, or weather-stripping blocks airflow. The fan is running, but it’s struggling.
Quick fixes: door gap, undercut, vented door option
The easiest fix is to allow a small gap under the door. Many bathrooms work better when there’s enough space under the door for air to flow in.
If there’s no gap, you have options:
- Adjust the door sweep if it’s sealing too tightly
- Trim the bottom slightly if it’s safe and practical
- Add a vented door grille in some setups
You don’t need to overdo it. You just need an air path. Once makeup air is available, your bathroom vent fan often feels like it suddenly got stronger.
If your bathroom has a window: use it the smart way
A window is helpful, but only if you use it with intention. Cracking the window slightly during and after a shower can help steam escape and bring in drier air.
The best part is you can create a simple flow. Open the window and keep the bathroom door slightly open. That creates a gentle exchange instead of trapping steam inside.
If you want an extra boost, a small window fan can pull humid air out. Just make sure it’s used safely and positioned so it actually moves air outward.
One caution I share in colder areas: if the window is icy cold, you can get condensation on nearby surfaces. In that case, combine a short window opening with the exhaust fan and close it once the steam drops.
How to improve ventilation in a bathroom without a window
A windowless bathroom can still be fixed. I’ve seen plenty of them go from “always damp” to “actually comfortable” with the right approach.
Best combo for windowless bathrooms (fan plus airflow path)
In most cases, the winning formula is simple:
- Use the exhaust fan the right way
- Make sure makeup air can enter
- Reduce the moisture left on surfaces
A windowless bathroom needs mechanical ventilation. If the fan is weak or the ducting is poor, that’s where upgrades come in later.
Add circulation (small fan to push damp air out)
Sometimes steam gets stuck in corners or behind the door. A small circulation fan can help push humid air toward the exhaust fan and speed up drying.
This is especially useful if your bathroom layout is awkward, like when the shower is tucked behind a partial wall. You don’t need a strong fan, just enough movement to stop that “still, wet air” feeling.
How to ventilate a bathroom without a fan (temporary but realistic)
If you have no fan at all, you can still reduce moisture. Just keep expectations realistic. Without mechanical exhaust, you’re managing humidity rather than truly extracting it.
Start with source control. Reduce the amount of steam you create in the first place. A slightly cooler shower or a shorter shower makes a big difference in small bathrooms.
Then focus on drying and airflow:
- Leave the door open after bathing
- Run a dehumidifier nearby
- Wipe down shower walls and glass
- Move towels out so they don’t hold moisture in the room
If you’re dealing with constant dampness, adding an exhaust fan is usually the long-term fix. It’s one of those upgrades that protects your home and makes daily life easier.
Fix your existing bathroom exhaust fan (quick troubleshooting)
Before replacing anything, check if your current fan is actually doing its job. I’ve seen many fans that were fine, but blocked, dirty, or poorly vented.
Clean the fan grille and housing (dust kills airflow)
A dusty grille can cut airflow more than people realize. Remove the cover, wash it, and vacuum the inside gently.
If the fan blades are dirty, they can’t move air efficiently. This is a simple maintenance step that often improves performance right away.
Check if it’s venting outside (not attic or ceiling void)
This is a big one. A bathroom vent should exhaust moisture outdoors, not into the attic or just above the ceiling. Venting into an attic can create serious moisture problems over time.
If you’re not sure where it vents, it’s worth checking. In older homes, I’ve found ducts that ended nowhere useful.
Look for airflow blockers (stuck exterior flap, lint, loose duct)
Outside vents can get stuck, blocked, or clogged with lint and dust. Duct connections can also loosen, which reduces suction.
If your fan sounds like it’s running but you feel no pull, there’s likely a restriction somewhere. Fixing that can be cheaper than replacing the fan.
Upgrade your exhaust fan the right way (CFM made simple)
If your bathroom stays humid even after good habits and basic checks, the fan may be undersized or outdated.
How to choose the right CFM for your bathroom size
CFM is how much air the fan moves. A simple starting point is about 1 CFM per square foot of bathroom area.
So if the bathroom is 60 square feet, you’d look around 60 CFM or more. Larger bathrooms, high ceilings, or very steamy showers may need extra capacity.
This is often the missing piece behind “what can i do to help my poorly ventilated bathroom vent” problems. The fan is running, but it’s simply not strong enough for the room.
Choose a quieter fan (sones) so you actually use it
Noise matters more than people admit. If the fan is loud, you’ll shut it off quickly. A quieter fan is more likely to be used consistently, and consistency is what keeps moisture under control.
Best practical upgrades: timer switch or humidity sensor
A timer switch removes the guessing. You set it and forget it.
A humidity sensor fan can also be helpful if you often forget to run the fan long enough. It turns on when humidity rises and runs until levels drop.
Vent ducting mistakes that ruin ventilation (even with a good fan)
This is where many bathrooms fail. The fan can be powerful, but if the duct is wrong, airflow gets choked.
Long ducts, too many bends, and crushed flexible duct reduce performance. I’ve seen new fans installed, but the bathroom still stayed damp because the ducting was the real issue.
What tends to work better:
- Short, straight duct runs when possible
- Fewer sharp turns
- Ducting that isn’t sagging or pinched
- A proper outside termination vent with a working flap
Also, avoid venting into an attic. That’s not just ineffective, it can cause moisture buildup where you really don’t want it.
Moderate-to-advanced solutions for stubborn bathrooms
Some bathrooms are difficult because of layout, long duct runs, or older construction. In those cases, a smarter system can help.
Inline fans are one strong option. They’re installed in the duct line, not right in the ceiling, and they can move air better through longer duct runs.
A passive vent or transfer grille can also help air move from the hallway into the bathroom, improving makeup air and letting the exhaust fan work properly.
For high-performance homes that are tightly sealed, a whole-house approach like an HRV or ERV can be useful. It’s not always necessary, but in certain homes it solves persistent humidity in multiple rooms.
What to avoid (common mistakes people don’t realize)
A few habits and setup mistakes can keep your bathroom damp no matter what you do.
- Don’t vent moist air into the attic or ceiling space
- Don’t block airflow with a fully sealed door and no gap
- Don’t leave wet towels and bathmats inside all day
- Don’t paint over moisture issues without fixing ventilation first
- Don’t rely on fragrance sprays to “solve” damp smells
If you fix airflow and drying, smells usually fade naturally because the moisture source is gone.
No ventilation in bathroom: is it illegal?
This depends on where you live and what type of building you’re in, so I’ll keep it practical.
In many building standards, bathrooms generally need either a window that opens or a mechanical exhaust system that vents outdoors. If a bathroom has no fan and no operable window, it may not meet current standards in some places, especially in rentals and renovated properties.
If this is a landlord or apartment situation, it’s worth checking your local housing rules or building authority. And if there’s visible mold or repeated moisture damage, documenting it can help you push for a real fix.
A simple humidity target (so you know it’s improving)
This is one of the easiest ways to stop guessing. Get a small hygrometer and place it somewhere away from direct water spray.
You don’t need to obsess over the number. You just want to see the trend. If your bathroom stays high for hours after a shower, you still have a ventilation gap.
In many homes, keeping indoor humidity in a comfortable range helps reduce condensation and mildew. The goal is for humidity to rise during a shower, then drop back down fairly soon after.
When to call a professional (and what to ask)
Sometimes you do everything right and the bathroom still stays damp. That’s when a pro can save you time and frustration.
Signs it’s beyond DIY
- Mold keeps returning quickly
- Ceiling or walls feel damp to the touch
- You suspect a duct problem or hidden leak
- The fan is noisy, weak, or vents nowhere useful
- Moisture damage is spreading beyond the bathroom
Quick checklist for an HVAC or electrician visit
When I help homeowners talk to a pro, I suggest asking:
- Is the fan sized correctly for the room
- Where does the duct run and where does it terminate
- Are there too many bends or restrictions
- Is makeup air available so the fan can work
- Can airflow be tested or verified
This keeps the visit focused on real causes, not guesswork.
FAQs
1) How to fix a bathroom with poor ventilation?
Start with basics: run the exhaust fan longer after showers, keep the door slightly open for airflow, wipe wet surfaces, and clean the fan grille. If it still stays humid, the fan may be undersized or venting poorly.
2) What should you do if there is no ventilation when you clean a bathroom?
Open the door fully, open a window if you have one, and run a portable fan aimed toward the doorway to move air out. Keep cleaning sessions shorter, and dry surfaces after so moisture doesn’t sit in corners.
3) How to prevent mold in a poorly ventilated bathroom?
Mold prevention is mostly moisture control: dry the shower area, run the vent fan long enough, keep towels and bathmats from staying damp in the room, and keep humidity from lingering for hours after bathing.
4) How to air out a bathroom with no ventilation?
Use a dehumidifier, keep the door open, and add a circulation fan to push humid air out into a larger space. Reducing steam at the source (slightly cooler or shorter showers) also helps until you can install a vent fan.
5) How long should I run the bathroom fan after a shower?
A practical range is 20–30 minutes after showering. If your bathroom is small, windowless, or very steamy, you may need longer or a timer switch so it’s consistent.
Conclusion
If there’s one thing I’ve learned from working on real bathrooms, it’s this: a poorly ventilated bathroom usually improves fast once you tackle moisture in the right order.
Start with the simple wins. Run the fan longer, create an airflow path, and wipe down wet surfaces. Add a bathroom dehumidifier if the room is windowless or stays damp for hours. Then, if humidity still lingers, look at the fan size and ducting, because that’s often where the real bottleneck is.
And don’t worry, you don’t need to remodel your bathroom to fix this. In many homes, a few smart changes turn that steamy, damp space into a bathroom that actually dries out the way it should.
Disclaimer:
This article provides general home-improvement guidance for moisture and ventilation. It isn’t a substitute for professional inspection. If you have recurring mold, strong odors, electrical concerns, or suspected hidden leaks, consult a qualified HVAC or home professional.

I’m Bilal, the founder of Dwellify Home. With 6 years of practical experience in home remodeling, interior design, and décor consulting, I help people transform their spaces with simple, effective, and affordable ideas. I specialize in offering real-world tips, step-by-step guides, and product recommendations that make home improvement easier and more enjoyable. My mission is to empower homeowners and renters to create functional, beautiful spaces—one thoughtful update at a time.