When I walk into a home for a drapery install, the first thing I look at isn’t the fabric. It’s the window shape, the trim, the floor line, and what’s around the window. That’s because the best-looking drapes usually come down to one thing: measurements that match how the drapes will actually hang.
In this guide, I’ll show you the same measuring method I’ve used on hundreds of installs, from small bedroom windows to wide living room spans and sliding doors. We’ll keep it simple, but we won’t skip the details that prevent expensive mistakes.
Snippet-ready definition:
Measuring windows for drapes means figuring out rod placement, curtain width for fullness, and the right drop length. People do it to get drapes that look balanced, open cleanly, and fit without looking too short or too flat.
Mission Statement:
At Dwellify Home, our mission is to make home upgrades feel clear and doable, with practical, experience-based guidance that helps you choose, measure, and style your space with confidence.
Quick Guide Table (Comparison)
| What you’re measuring | Where to measure from | Common pro range | Why it matters |
| Rod height | Wall above window trim | 4–12 inches above frame | Makes windows look taller, improves drape fall |
| Rod side extension | Past trim on each side | 4–8 inches each side | Lets panels stack off glass, reduces light gaps |
| Curtain width (fullness) | Total rod width | 1.5x–3x rod width | Prevents flat, skimpy-looking drapes |
| Curtain length | From rod position down | Sill, apron, floor, puddle | Controls style and function (clean vs dramatic) |
Step-by-step mini guide (clean and simple)
- Pick rod placement: usually 4–12 inches above the frame.
- Set rod width: extend 4–8 inches past each side of the window.
- Calculate fullness: total curtain width = rod width × 1.5 to 3.
- Measure length: from the rod down to sill, apron, or floor (often 0.5 inch above floor).
- Adjust for header type: rings, grommets, pleats, and rod pockets hang differently.
Before You Measure: Quick Setup (1 minute)
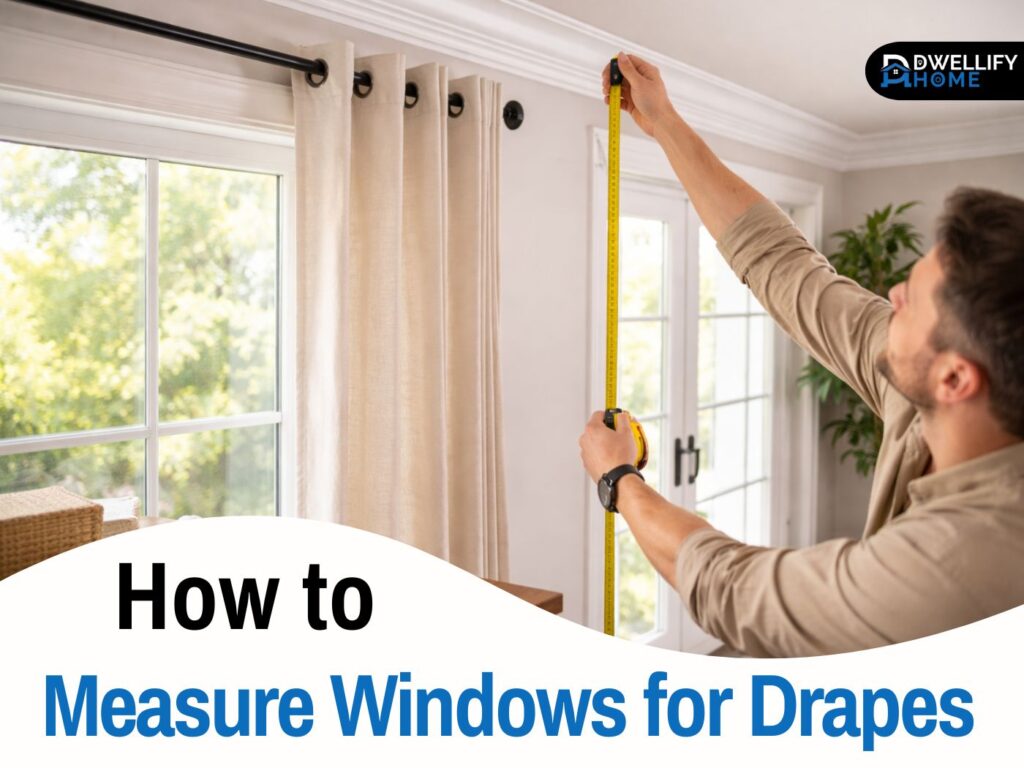
Start with the right tools. I always use a metal tape measure because cloth tapes can stretch and throw off your numbers just enough to cause headaches later.
Here’s what helps:
- Metal tape measure
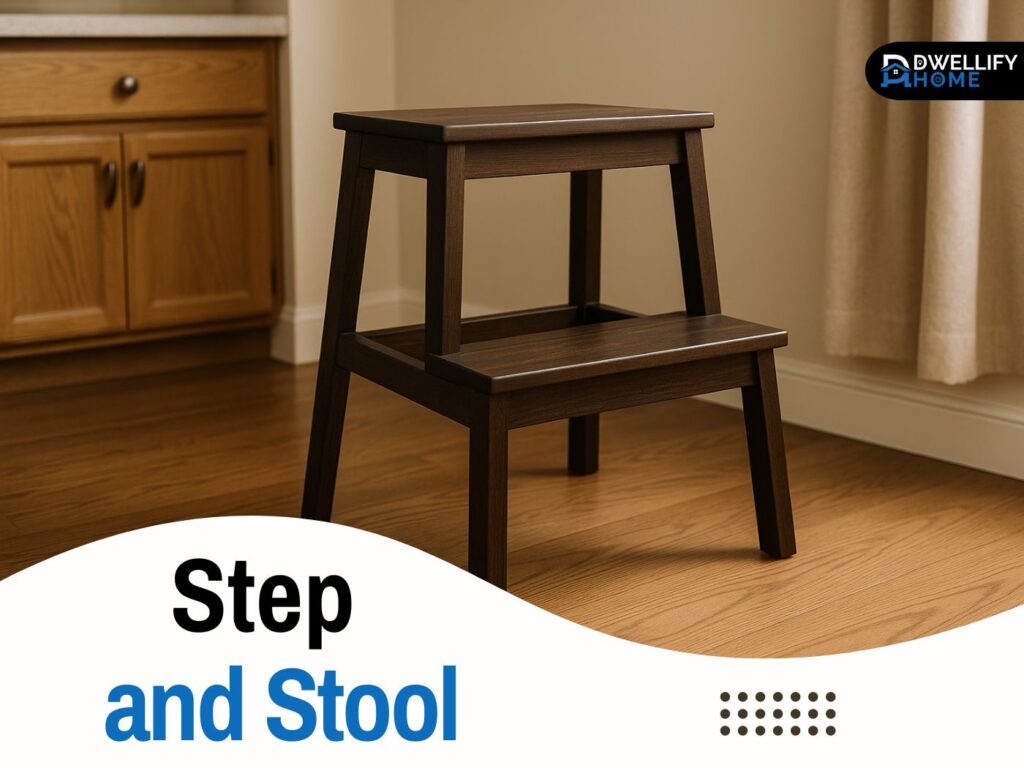
- Step stool
- Pencil and paper (or notes app)
- Level (optional, but useful if your trim looks uneven)
Before you take any measurements, it helps to know the three numbers that matter most:
- Rod or track width: the full span your hardware covers
- Finished curtain width: how much fabric you need for a nice fold and fullness
- Finished curtain length: where the drapes will stop, like sill, apron, or floor
A few quick terms you’ll hear in curtain sizing:
- Fullness: how “rich” the drapes look when closed
- Stackback: the space the curtains take up when open
- Return: the small fabric wrap on the outer edge toward the wall (mostly for custom drapery)
Step 1 — Choose Rod or Track Placement (Height + Side Extension)
This step is where the room starts to look more polished, even before the drapes go up.
Rod height
A reliable starting point is mounting the rod 4 to 12 inches above the window frame. In rooms with low ceilings, I stay closer to 4–6 inches. In rooms with taller ceilings, I’ll go higher to draw the eye up.
One practical rule from real installs: if you mount too low, drapes can look like they’re “shrinking” the window. If you mount higher, the window usually looks larger and more intentional.
Side extension
Most rods should extend 4 to 8 inches past each side of the window. This gives you proper stackback so the drapes can open without blocking glass. It also reduces light gaps on the sides and makes the window feel wider.
If you’ve got blackout lining or want a darker room, I lean toward the longer extension. Extra coverage matters more than people expect.
Step 2 — Measure Window Width (The Correct Way for Drapes)
Here’s the biggest mistake I see: people measure the glass, buy panels based on that number, and then wonder why everything looks skimpy.
First, measure the window width including trim or casing if you have it. That gives you a realistic idea of the window’s visual size.
Then decide your rod width:
- Take the window width
- Add your side extension (usually 8–16 inches total)
That final number is your rod or track span. This is also the number most curtain size calculators want, because it’s the true “coverage” measurement.
Curtain measurements, width or length first?
I always do width first, because your rod width and fullness determine how many panels you need. Length comes after, once you know exactly where the rod will sit.
If you want a simple reminder: hardware sets the width, then fullness sets the fabric, then you measure the drop for length.
Step 3 — Calculate Curtain Width (Fullness That Looks Right)
Fullness is what separates drapes that look finished from drapes that look like flat sheets.
A safe range is 1.5x to 3x fullness, meaning you multiply the rod width by a fullness factor.
Here’s how I explain it to homeowners on installs:
- 1.5x: light gather, more casual, works for sheer panels
- 2x: the most common choice for living rooms and bedrooms
- 2.5x to 3x: fuller, more tailored, often used for pleated styles and thicker fabrics
A simple formula:
- Total curtain width = rod width × 1.5 to 3
How many panels do you need?
This depends on the width of the panels you’re buying. Many ready-made panels are around 50 inches wide, but always check the packaging.
A quick way to avoid mistakes:
- Calculate your total curtain width using fullness
- Divide by panel width
- Round up so you don’t end up short
If you’ve ever asked, “how wide should curtains be for 72 inch window,” the answer usually starts with the rod span, not the glass. A 72-inch window often ends up with a rod closer to 88–96 inches once you add side extension. Then you multiply for fullness.
Center support brackets
If your rod gets wide, it may need a center support bracket. That’s normal, but you should plan for it. Some drapery rings don’t glide smoothly over certain bracket styles, so for heavy curtains I often choose a sturdier rod and ring combination that’s meant for wide spans.
Step 4 — Measure Curtain Length (Sill, Apron, Floor, Puddle)
Length is where the room’s style shows up. Before you measure, decide the finish you want:
- Sill length: ends at the window sill, common in kitchens and bathrooms
- Apron length: ends a few inches below the trim, good for radiators or furniture near the window
- Floor length: the classic look for living rooms and bedrooms
- Puddle: extra fabric resting on the floor, more decorative and higher maintenance
Once the rod height is decided, measure from the rod down to your chosen endpoint.
For floor length, my most-used professional finish is:
- Measure to the floor, then subtract about 0.5 inches
That slight lift keeps hems cleaner and avoids dragging, especially in homes with pets or kids.
Step 5 — Measure Based on Header and Hardware (Don’t Skip This)
This is one of those sections that saves people from returns and reorders.
Different headers change where the curtain “starts,” which changes the finished length.
Here’s what to watch:
- Rings or clips: measure from where the curtain will hang, often from the bottom of the ring or clip point, depending on the system
- Grommets: the curtain sits differently because the rod runs through the top, so the fabric drop starts lower than people expect
- Pleats (pinch pleat, pencil pleat): hooks sit below the top edge, so the drape length depends on the hook position
- Rod pocket: the rod is inside fabric, which can slightly shorten the visual drop
If you’re learning how to measure for curtains and rods, this is where the “why does my curtain look too short” problem usually comes from. The measurement point wasn’t matched to the header style.
Special Situations (Common Real-World Window Setups)
This is where real homes differ from picture-perfect diagrams.
How to measure curtains for double windows
If two windows are close together, you have two options:
- One long rod that spans both windows, giving a unified look
- Two separate rods, giving more flexibility
If the windows are within a couple feet, I usually prefer one rod for a cleaner visual line. Just make sure you have enough wall space for proper side extension and stackback.
Bay windows and corner windows
Bay windows often work best with either:
- A track system that bends, or
- Separate rods for each section with clean returns
Measure each section separately and treat each angle as its own “mini window.” This avoids panels that bunch awkwardly at the corners.
Sliding glass doors and extra-wide windows
Sliding doors need drapes that stack off the glass without blocking the opening. That usually means:
- Wider rod extension
- More panel width for fullness
- Stronger hardware, because the fabric weight is higher
For very wide spans, I’ve installed setups where the rod looks fine but flexes under weight. A sturdier rod and proper bracket placement prevents sagging and helps the curtains glide.
Uneven floors or frames
Older homes often have floors that slope slightly. Always measure length in at least three spots:
- Left, center, right
If one side is lower, decide whether you want the curtains to follow the floor or look visually level. Most people prefer a consistent look, so I base the finished length on the shortest point and then adjust with hemming if needed.
Quick Answer Examples
What size curtains do I need for a 36-inch window?
In many homes, a 36-inch window still needs a wider rod span for good stacking.
A realistic approach:
- Add 4–8 inches per side for the rod
- That often turns a 36-inch window into a rod span around 44–52 inches
- Multiply by about 2x fullness for a standard drape look
Then check the panel widths you’re buying and choose enough panels to meet that total.
How wide should curtains be for a 72-inch window?
A 72-inch window often ends up with a rod span closer to 88–96 inches after side extension. For a full look:
- Use 2x fullness for most rooms
- That can put you near 176–192 inches of total curtain width
This usually means multiple panels, not just two standard ones, depending on the panel width.
Curtain Size Calculator (Fast Way to Double-Check Your Numbers)
A curtain size calculator can be helpful once you know your rod span and your fullness choice. If you’ve looked up a curtain size calculator or even a how to measure windows for drapes calculator, the ones that work best usually ask for:
- Rod width or track width
- Fullness preference
- Desired length style (sill, apron, floor)
- Panel width (sometimes)
Here’s my real-world “sanity check” after you use a calculator:
- If your curtains can’t stack off the glass when open, your rod span is too short
- If your curtains look flat when closed, the fullness factor is too low
Calculators are great for quick checks, but your hardware placement still drives the result.
Shopping Notes (Ready-Made vs Custom)
Ready-made curtains are convenient, but sizing is limited. The most common standard lengths are:
- 63, 84, 96, 108, 120 inches
If you’re close to a standard size, hemming is often the cleanest solution. If you’re far off, custom can save you from awkward “almost right” proportions.
And yes, if you’re browsing something like JCPenney curtains for living room, the measuring method stays the same. The only difference is you’ll need to match your calculations to the panel sizes available.
Mistakes to Avoid (Most Common Measuring Errors)
Most problems I fix on installs come from a few repeat issues:
- Measuring only the glass and ignoring rod extension
- Not adding fullness, so panels look thin
- Measuring length from the wrong point for rings, grommets, or pleats
- Forgetting obstacles like baseboards, radiators, deep sills, vents, or furniture
- Ignoring blackout lining needs, which can require extra width and better side coverage
- Skipping the “three-point check” in older homes with uneven floors
If you have deep window sills or radiators, apron length is often the most practical choice. It looks intentional and keeps fabric from sitting on hot surfaces.
FAQs
1) How do you measure a window for drapes?
Measure the window including trim, then decide rod placement (higher and wider than the frame). Use the rod width to calculate curtain width with fullness, and measure length from the rod to your chosen endpoint.
2) What size is 90 by 90 in curtains?
It usually means 90 inches wide by 90 inches long. The 90-inch length typically works as near-floor length in many homes, but the width depends on your rod span and fullness needs.
3) How much wider should curtains be than your window?
Most drapes look best when the total curtain width is 1.5 to 3 times the rod width. The rod itself is usually 8–16 inches wider than the window (4–8 inches per side) for proper stacking.
4) What size curtain rod do I need for a 36 inch window?
A common setup is adding 4–8 inches per side, so the rod often ends up around 44–52 inches wide. Choose a rod in that range so curtains can open without blocking the glass.
5) Should I measure width or length first for curtains?
Start with width because rod span and fullness determine how many panels you need. Then measure length from the final rod position down to sill, apron, or floor.
Conclusion
If you remember nothing else, remember this order: set your rod placement first, calculate width and fullness from the rod span, then measure your length based on the header style you’re using.
That’s the approach that prevents the two big frustrations, curtains that look too narrow and curtains that come up short. Take a few extra minutes to measure carefully, check your numbers with a curtain size calculator if you want, and measure length in multiple spots if your home is older.
Once your measurements are solid, ordering becomes simple, and installing becomes the satisfying part.
Disclaimer:
This guide shares general measurement advice based on common installation practices. Always check your curtain brand’s sizing rules and hardware specs, and measure twice before ordering, especially for custom drapery or uneven floors.

I’m Bilal Hassan, the founder of Dwellify Home. With 6 years of practical experience in home remodeling, interior design, and décor consulting, I help people transform their spaces with simple, effective, and affordable ideas. I specialize in offering real-world tips, step-by-step guides, and product recommendations that make home improvement easier and more enjoyable. My mission is to empower homeowners and renters to create functional, beautiful spaces—one thoughtful update at a time.