Most mobile homeowners focus on the interior — floors, walls, windows. The space underneath the home barely gets a second thought, until the heating bills spike, pipes freeze, or something starts living under there. That’s usually when the conversation about underpinning begins.
After more than 18 years of working with manufactured home owners on exterior projects, I can tell you one thing consistently: the people who regret skipping underpinning far outnumber those who regret installing it.
Snippet-Ready Definition
Mobile home underpinning is a protective barrier installed around the base of a manufactured home to block pests, cold air, and moisture. It improves energy efficiency, protects exposed pipes, and gives the home a finished, polished appearance.
Dwellify Home Mission
At Dwellify Home, our goal is straightforward — to help homeowners make practical, well-informed decisions about their living spaces. Every article we publish is written to give you real guidance, not recycled tips.
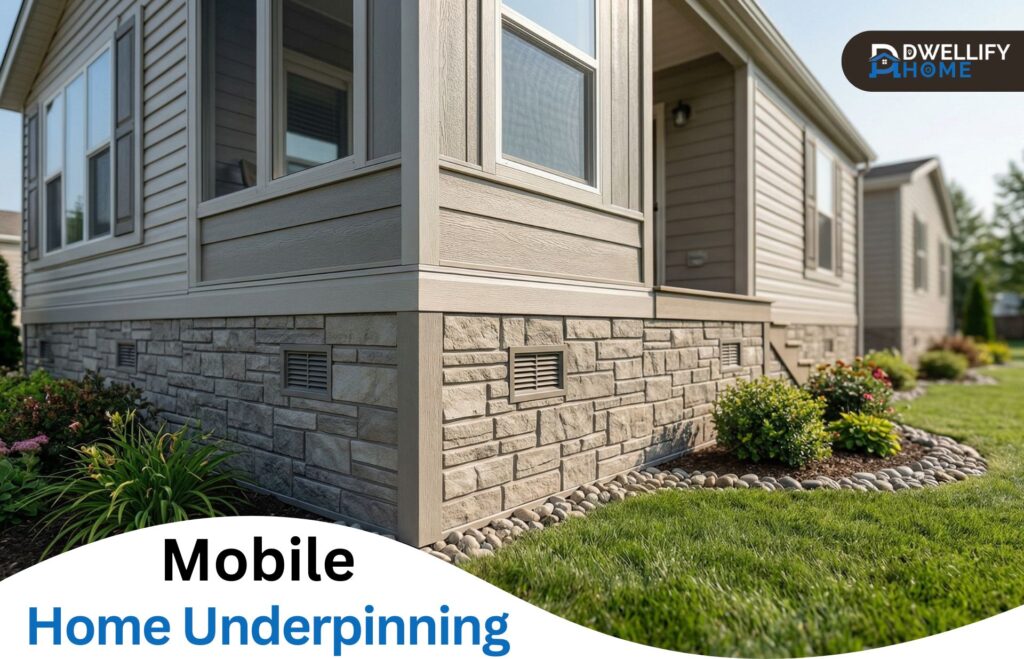
What Is Mobile Home Underpinning — and Is It the Same as Skirting?
The two terms are used interchangeably, and for practical purposes, they mean the same thing. Underpinning is the material that encloses the open space between the bottom of your mobile home and the ground.
Most manufactured homes sit on a pier and beam foundation, which leaves a visible gap all around the base. Skirting closes that gap. It creates a barrier on all four sides, turning an exposed crawl space into a protected one.
What it actually does beneath your home goes beyond appearances. It blocks wind-driven cold air from circulating under the floor, keeps animals from nesting against your ductwork, and slows moisture from building up in the crawl space.
On the regulatory side, HUD code requires that manufactured homes have skirting with ventilation openings on all sides. It’s not just a cosmetic suggestion — it’s built into the federal standard for manufactured housing.
Quick Comparison: Underpinning Materials at a Glance
| Material | Cost Range (Single-Wide) | DIY Friendly | Best For |
| Vinyl | $630 – $1,550 | Yes | Budget-conscious, most climates |
| Metal | $800 – $2,000 | Moderate | Wind-prone or high-impact areas |
| Faux Stone | $660 – $1,800 | Moderate | Curb appeal on a mid-range budget |
| Hardie Board | $1,000 – $2,500 | Moderate | Humid or high-moisture regions |
| Wood | $1,500 – $2,500 | Yes | Rustic aesthetics, mild climates |
| Concrete/Cinder Block | $800 – $2,500 | No | Permanent installs, pest-heavy areas |
| Brick | $2,000 – $4,000 | No | Long-term durability, maximum value |
| Lattice | $500 – $700 | Yes | Temporary use or mild climates only |
Key Benefits of Mobile Home Underpinning
- Prevents cold air from circulating under the floor, reducing heating costs
- Protects water supply lines from freezing in winter
- Blocks pests, rodents, and debris from entering the crawl space
- Reduces moisture buildup that can damage insulation and flooring
- Improves curb appeal and perceived home value
- Required under HUD code for all manufactured homes
Why Underpinning Matters More Than Most Homeowners Expect
The clearest sign of missing or damaged skirting in winter is cold floors. When cold air moves freely underneath the home, it pulls heat right out of the floor, and your furnace works harder to compensate.
Proper underpinning protects your water supply lines from freezing during cold snaps. Pipes running beneath a manufactured home are vulnerable in a way that those inside a site-built foundation are not. One hard freeze with no skirting in place can mean hundreds of dollars in plumbing repairs.
Beyond function, it genuinely improves how the home looks from the street. A clean skirting line ties the home’s exterior together. For anyone thinking about resale, buyers notice when a home looks finished — and they notice when it doesn’t.
Every Underpinning Material Explained — Pros, Cons, and Best Fit
Vinyl is the most widely used material, and there are good reasons for that. It’s lightweight, available in a range of colors and panel styles, and manageable for a confident DIYer. A basic vinyl skirting package for a single-wide runs roughly $630 to $1,550. Insulated vinyl costs more but performs noticeably better in colder climates.
Metal underpinning — typically aluminum or steel — is a step up in durability. It holds up well against wind and impact, though it can dent and some types are prone to rust over time if not properly coated. It usually requires J-channel framing during installation.
Faux stone panels are a popular middle-ground option. They’re made from lightweight polyurethane and realistically mimic the look of stacked stone or brick. They cost more than vinyl but significantly less than actual masonry, and they install faster than people expect. Mobile home skirting faux stone panels are widely available through manufactured home suppliers.
Hardie board skirting — fiber cement — is worth serious consideration for homeowners in humid or high-moisture regions. It resists rot, pests, and fire better than wood, and it holds paint well. It’s heavier than vinyl and needs precise cutting, so it leans more toward professional installation.
Wood skirting has visual appeal, especially on homes with a natural or rustic exterior style. Pressure-treated pine or cedar are your best choices if you go this route. Raw or untreated wood will absorb moisture and deteriorate faster than you’d expect.
Concrete panels and cinder block are the most permanent options. They resist pests, rot, and impact, and they can meaningfully increase perceived home value. The trade-off is cost and complexity — this is not a weekend DIY job. Brick follows the same logic. It’s the highest-cost option, but also the longest-lasting, with pricing for a single-wide ranging from $2,000 to $4,000 installed.
Lattice panels sit at the opposite end of the spectrum. They’re inexpensive and easy to work with, but they won’t stop pests, and they offer minimal weather protection. They can work as a temporary solution or in mild climates where protection is less critical.
How Much Does Mobile Home Underpinning Cost?
Material makes the biggest difference in price. Vinyl is the most affordable starting point, while real brick or concrete sits at the top. For a standard 16×80 single-wide, expect to spend anywhere from $900 on the low end (basic vinyl, DIY) to $5,700 or more for professionally installed masonry.
Double-wide homes naturally cost more — simply because the perimeter is larger. A double-wide brick installation can reach $6,000 before additional costs are factored in.
What pushes prices up beyond material and size? Uneven ground is a big one. When the soil around the base isn’t level, panels need to be custom-cut for height variations, which adds labor time. If the home needs releveling before skirting can go in, budget an additional $800 or so for that step.
Professional Installation vs. DIY — The Real Cost Difference
Professional labor typically runs $60 to $125 per hour. A single-wide installation can usually be completed in a day by an experienced crew. That labor can account for up to 60% of the total project cost, which is a meaningful number.
DIY saves money, but it requires accurate measurement, the right tools, and patience with corners and height variations. For vinyl and lattice, a careful homeowner can genuinely do this well. For concrete, brick, or anything requiring structural framing, professional installation is the smarter call.
Can You Install Mobile Home Underpinning Yourself?
Vinyl is the most DIY-friendly option by a wide margin. Most vinyl skirting kits come with top and bottom tracks, panels, corner pieces, and fasteners. You’ll need tin snips, a measuring tape, a snap lock punch tool, and a level.
Measure your home’s perimeter accurately — length plus width multiplied by two gives you the linear footage. Measure the height at multiple points around the base, not just one. Height can vary by several inches depending on the terrain, and that variation affects how much material you need.
The most common mistake I see on DIY installations is not buying enough material. Order at least 10% more than your calculation suggests. Cutting errors happen, and having spare panels avoids a second trip to the supplier.
Ventilation Is Not Optional — Here’s Why
HUD code specifies one square foot of ventilation per 150 square feet of enclosed crawl space. In practice, this means vents should be distributed on all sides of the home, not clustered on one wall.
Standard foundation vents are inexpensive and widely available. Automatic foundation vents are worth the upgrade — they open and close based on temperature, which improves airflow in summer and reduces heat loss in winter.
Poor ventilation is one of the most consistent problems I encounter on older installations. The signs show up over time: musty smells inside the home, soft spots in the floor, mold growth on the underside of the structure. All of it traces back to trapped moisture and inadequate airflow.
The Moisture Barrier Most Homeowners Skip
Before the skirting even goes on, lay a plastic sheeting vapor barrier on the ground beneath the home. This is a step many homeowners skip entirely because it’s invisible once the skirting is in place. That’s a mistake.
Ground moisture evaporates upward into the crawl space, and without a barrier, it has nowhere productive to go. Over time, it softens floor insulation, encourages mold, and accelerates wood deterioration. A 6-mil polyethylene sheet costs very little relative to the damage it prevents.
Access Doors — Plan for Them Before You Install
Access panels are often treated as an afterthought, which creates real problems during maintenance. Plan for at least two access points — ideally near your water shutoff, HVAC connections, and any plumbing cleanouts.
A good access door fits flush with the skirting panel style, latches securely to keep animals out, and opens wide enough for an adult to move in and out comfortably. Don’t make someone remove six panels just to inspect a water line.
Permits, Park Rules, and Regulations — Check Before You Start
Requirements vary by location, but many jurisdictions treat underpinning as structural work requiring a permit. Mobile home park management may also have their own rules about approved materials, colors, or styles.
Skipping the permit process can have real consequences. Improper or unpermitted skirting can void your home’s warranty and may invalidate an insurance claim if water damage or structural issues arise later. It’s worth a quick call to your local building department before purchasing materials.
Buying an Underpinning Kit — What to Look for Before You Order
A complete kit should include panels, top and bottom tracks, corner pieces, corrosion-resistant fasteners, and at least one access door. Ventilation panels should either be included or clearly specified as add-ons.
Brands like Duraskirt offer specialized concrete-finish panels with a clean, permanent look. You’ll find vinyl kits widely available at Home Depot and through dedicated manufactured home parts suppliers, where clearance mobile home skirting options can reduce material costs further.
To calculate how much material you need: measure the full perimeter, then measure the average height from ground to home base. Multiply those figures to get your square footage, and add 10% for waste and future repairs.
How to Choose the Right Underpinning for Your Specific Home
In colder climates, insulated vinyl or faux stone with proper backing performs better than standard vinyl panels. In coastal or high-humidity regions, fiber cement and concrete resist moisture-related damage more reliably than wood.
If your home’s exterior is neutral-toned with clean lines, standard vinyl or faux stone panels complement it well without looking out of place. If you’re in a mobile home park, check what materials are approved before settling on your choice — some parks restrict wood skirting due to fire safety rules.
Budget is always part of the conversation. Vinyl delivers solid protection at the lowest material cost. Faux stone adds visual depth at a moderate premium. Masonry options are a long-term investment that makes the most sense if you’re planning to stay in the home for many years.
Maintaining Your Underpinning — What Upkeep Actually Looks Like
Vinyl and metal need minimal attention. Wash panels with mild soap and water once a year. Keep grass and shrubs trimmed back from the base to prevent moisture retention against the panels. Check vents seasonally to confirm they’re clear of debris.
Wood skirting requires more hands-on care. Repaint or reseal every few years, and inspect the base of each panel for signs of moisture absorption or rot. Even pressure-treated wood will eventually need attention.
Concrete and cinder block are low-maintenance but check mortar joints every couple of years. Cracks in the mortar let moisture in and give pests a foothold.
For pest control, walk the full perimeter twice a year and look for gaps at corners, around pipe penetrations, and along the bottom track. These are the most common entry points. Use durable mesh or sealant to close any openings without blocking ventilation.
If you notice large sections sagging, warping, or pulling away from the track, that’s not a patch job — that’s a replacement situation. Delaying it usually means water and animals have already found their way in.
Hiring a Skirting Professional — What to Know Before You Call
A good contractor will measure the full perimeter, identify height variations, confirm local vent requirements, and discuss material options that suit your climate and park rules. If they arrive and start quoting without measuring or asking about your setup, that’s a red flag.
Ask for proof of licensing and insurance before agreeing to anything. Ask how they handle access door placement, and whether their quote includes removal of old skirting if you’re replacing existing panels. Get the quote in writing with materials and labor itemized separately.
Mobile home skirting companies that specialize in manufactured housing tend to do better work than general contractors who take on skirting as a side job. Specialization in this area matters more than most people realize.
FAQs
What is the cheapest way to skirt a mobile home?
Vinyl skirting is the most affordable option, with material costs starting around $630 for a standard single-wide. If you install it yourself, you can save an additional 40–60% on labor. Lattice panels cost even less upfront, but they offer minimal weather and pest protection, so they’re better suited as a short-term solution.
What is the difference between underpinning and skirting?
There’s no practical difference. Both terms refer to the same thing — the material installed around the base of a mobile or manufactured home to enclose the crawl space. “Underpinning” is the more technical term used in the manufactured housing industry, while “skirting” is the more common everyday word.
How much does mobile home skirting cost?
Costs vary based on material and home size. A standard single-wide with vinyl skirting typically runs $630 to $1,550 for materials, while professionally installed brick or concrete on a double-wide can reach $6,000 or more. Most homeowners fall somewhere in the $900 to $3,000 range depending on their material choice and whether they DIY or hire a contractor.
What can be used instead of skirting on a mobile home?
A few alternatives exist, though none perform as reliably as purpose-made skirting. Some homeowners use corrugated metal sheets, reclaimed wood planks, or stacked landscape timbers for a rustic look. These can block rain and small animals reasonably well, but they often fall short on insulation, durability, and compliance with local park or permit requirements. If you’re exploring alternatives for cost reasons, lattice or basic vinyl kits are a more practical starting point.
Conclusion
Mobile home underpinning is one of those projects that does more than it looks like from the outside. It protects your pipes, keeps your floors warmer, keeps animals out, reduces energy loss, and gives the home a finished appearance that holds up over time.
The right material depends on your climate, your budget, and your home’s exterior. Ventilation and a moisture barrier beneath the home aren’t optional additions — they’re what make the skirting work properly over the long run.
Whether you’re planning to install it yourself or bring in a crew, taking the time to measure carefully, choose the right materials, and check your local permit requirements will save you from the most common problems. Done right, mobile home underpinning is a one-time investment that pays for itself in protection and comfort for years ahead.
Disclaimer
The cost figures, material recommendations, and installation guidance in this article are based on general industry data and real-world experience. Prices and local regulations vary by region. Always consult a licensed contractor and your local building department before starting any home improvement project.

I’m Bilal Hassan, the founder of Dwellify Home. With 6 years of practical experience in home remodeling, interior design, and décor consulting, I help people transform their spaces with simple, effective, and affordable ideas. I specialize in offering real-world tips, step-by-step guides, and product recommendations that make home improvement easier and more enjoyable. My mission is to empower homeowners and renters to create functional, beautiful spaces—one thoughtful update at a time.