If your kitchen feels tired but the cabinet boxes are still solid, painting can be one of the most satisfying upgrades you can do. I’ve painted cabinets in real, lived-in homes where families still needed to cook dinner every night, so I’ll be honest with you. The secret isn’t fancy paint. It’s the prep and patience between coats.
Cabinets are not like walls. They get grabbed, bumped, cleaned, and exposed to steam and cooking grease. When a cabinet paint job fails, it’s usually because something was skipped, rushed, or painted too thick. Do it right once, and you’ll get a finish that holds up for years.
This guide walks you through the full process from checking if your cabinets are paintable to getting a clean, durable finish that looks professional. I’ll also cover beginner mistakes, ways to paint without removing everything, when you can skip sanding, and how to get it done fast if you’re aiming for a 3-day timeline.
Snippet-ready definition:
Painting kitchen cabinets means deep-cleaning, scuffing or deglossing for grip, priming, then applying two thin coats of durable cabinet paint. Let it dry and cure fully before reinstalling hardware for long-lasting results.
Mission Statement:
At Dwellify Home, our mission is to make home upgrades feel doable. We share practical, experience-based guidance that helps you get clean, long-lasting results without wasting time, money, or effort.
Is It Worth Painting Kitchen Cabinets?
Most of the time, yes, if the cabinet boxes are sturdy and the doors aren’t falling apart. Painting is cheaper than replacing cabinets and it can change the whole room. I’ve had clients who thought they needed a full remodel, and once the cabinets were painted and the hardware was updated, the kitchen looked completely different.
On top of that, painting is flexible. You can brighten a dark kitchen with a lighter color, modernize old wood tones, or make a small kitchen feel cleaner and more open. The best part is you can control the result with prep, color, and finish sheen.
That said, painting isn’t magic. If your cabinets are warped from water damage, if the laminate is peeling badly, or if the doors are cheap and swollen, you might be better off replacing doors or refacing instead. Paint can’t fix structural problems.
Quick Guide Table: Fast, Clean Cabinet Painting Plan
| Stage | What to do | Pro tip | Typical time |
| Prep | Remove hardware, label doors, protect floors | Take photos before removal for easy rehang | 30–60 min |
| Deep clean | Degrease thoroughly, rinse, dry | Focus on areas around handles and near the stove | 45–90 min |
| Repair | Fill dents, old holes, sand flush | If you can feel it now, you’ll see it later | 30–60 min |
| Scuff or degloss | Light scuff sand (or deglosser where needed) | Aim to dull the shine, not strip the finish | 45–90 min |
| Dust removal | Vacuum and wipe with a damp cloth or tack cloth | Dust is the number one cause of gritty paint | 15–30 min |
| Prime | Apply a quality primer, let dry | Use bonding primer for laminate or slick finishes | 1–2 hrs plus dry |
| Paint coat 1 | Thin coat with brush plus mini roller | Lightly “lay off” to reduce roller texture | 1–2 hrs plus dry |
| Paint coat 2 | Second thin coat, same method | Don’t rush. Thin coats cure tougher | 1–2 hrs plus dry |
| Cure | Let paint harden before heavy use | Add soft bumpers to prevent sticking | 3–14 days |
| Reinstall | Put hardware and doors back | Rehang gently, avoid slamming early on | 30–90 min |
Step-by-step mini checklist (simple version)
- Remove doors, drawers, and hardware. Label everything.
- Degrease and rinse well. Let dry.
- Fill dents and holes. Sand smooth.
- Scuff sand or degloss. Remove all dust.
- Prime. Let dry, then lightly sand if it feels rough.
- Paint two thin coats. Let each coat dry fully.
- Wait for curing before heavy use. Then reinstall hardware.
Before You Start: Are Your Cabinets Paintable?
Before you buy anything, do a quick cabinet check. This one step saves people from wasting money on a finish that won’t last.
Wood cabinets are the easiest. Solid wood and most wood veneers paint very well. MDF doors can paint nicely too, as long as they’re not swollen or crumbly around the edges.
Laminate and thermofoil are trickier. These are the “plastic coating” styles. They can be painted, but only if the surface is stable and you use a bonding primer made for adhesion. If the thermofoil is peeling, bubbling, or lifting at seams, paint won’t bond well long term. In that case, repair or replacement is usually the smarter move.
Here are quick red flags:
- Doors feel soft, swollen, or crumbling near the sink or dishwasher
- The surface is peeling, especially thermofoil
- Grease seems baked into the finish and won’t clean off
- Hinges are loose because screw holes are stripped
If you see these issues, you can still improve things, but you may need extra repair steps or new doors.
Safety and Prep Planning (Don’t Skip This)
Cabinet painting is mostly prep, and prep is messy. Plan for dust control and ventilation. Open windows, run fans, and if you’re sanding or spraying, wear a proper mask or respirator. Even water-based coatings create fine particles when sanded.
If your home is older, be cautious about sanding unknown finishes. If you suspect very old paint, take the safer route. Avoid aggressive sanding until you know what you’re dealing with.
Also, pick your timing. Humidity and cold temperatures slow drying and curing. If you can, aim for mild weather and a stretch of days where you won’t need to use every cabinet constantly. I always tell people: the kitchen can function during a cabinet project, but only if you stay organized.
Tools and Materials Checklist (What You Actually Need)
You don’t need a full workshop, but you do need the right basics. Using the wrong roller or skipping primer can ruin the finish, even if your paint is expensive.
Here’s what I keep in my cabinet painting kit:
Cleaning and prep
- Degreaser (a heavy-duty kitchen degreaser or TSP substitute)
- Microfiber cloths, sponges, and a bucket
- Sandpaper or sanding sponges (120, 180, 220 grit)
- Tack cloth or a clean damp cloth for dust
- Wood filler for dents and old hardware holes
- Painter’s tape and plastic or paper for masking
- Drop cloths or rosin paper for floors
Priming and painting
- High-quality primer (bonding primer if laminate or glossy surfaces)
- Cabinet paint or enamel paint made for trim and cabinets
- Angled brush (for corners and details)
- Mini foam roller or mini microfiber roller (for flat areas)
- Paint tray and liners
Optional but helpful
- Deglosser (liquid sandpaper) for hard-to-sand areas
- Door stands or screws in scrap boards to elevate doors
- Caulk for small gaps between trim and cabinet frames
- A sprayer (HVLP or airless) if you want a sprayed finish
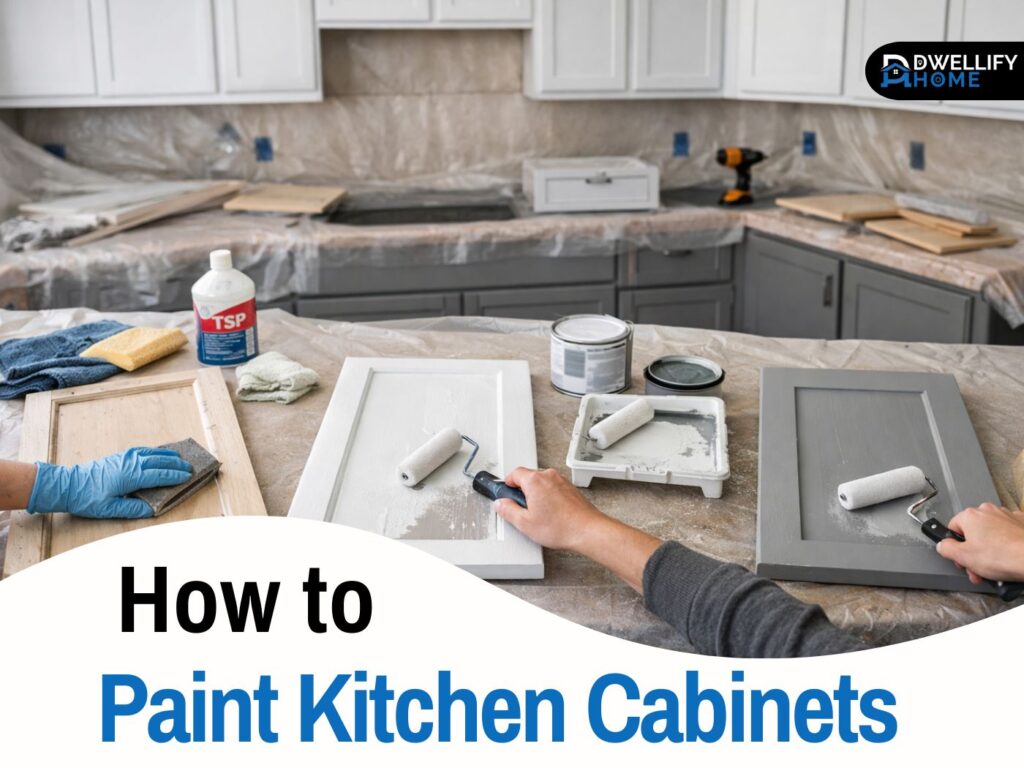
Preparation and Cleaning (This Is Where the Pro Results Come From)
Remove and label doors, drawers, and hardware
Take your time here. Remove doors, drawer fronts, knobs, pulls, and hinges if you can. Put each set of screws in a labeled bag. Label doors with painter’s tape inside the hinge area so it doesn’t show later.
Here’s a simple labeling system that actually works:
- Number each door and its cabinet opening
- Put matching tape on the door and the frame
- Photograph each wall of cabinets before you start
It feels extra, but when you reinstall, you’ll be glad you did.
Deep clean to remove grease and grime
This is not a quick wipe-down. Cabinets collect an invisible film of grease, especially near the stove and around handles. If you paint over that, paint adhesion suffers and chips show up fast.
I like to clean twice:
- First pass to remove surface grime
- Second pass focusing on high-touch areas and edges
After cleaning, rinse with clean water and let everything dry fully. If your cloth keeps coming up yellow or brown, keep cleaning. Paint wants clean, dull, and dry.
Fill, repair, and smooth imperfections
Fill dents, chips, and old hardware holes with wood filler. Let it dry, then sand it smooth. Run your hand across the surface. If you can feel it now, you’ll see it later.
If you have small seams on face frames that always catch light and look shadowy, a thin bead of paintable caulk can help. Don’t caulk moving joints like where doors meet frames. Keep caulk for gaps that should look like one clean piece.
Sanding vs Deglosser: Do You Really Need to Sand?
Most cabinets need at least a scuff sand. Sanding isn’t about removing the finish completely. It’s about dulling it so primer and paint can grip.
A simple approach:
- Use 180 grit to scuff most surfaces
- Use 220 grit for a final light pass, especially on doors
- Avoid going too aggressive unless you have peeling paint
Deglosser can help in corners and profiles that are annoying to sand. But it’s not a free pass. You still need to clean well, and you still need a primer that matches your surface.
If you’ve heard about how to paint kitchen cabinets without sanding, it can work in certain cases. I’ll cover that soon, but in my experience, a light scuff sand makes the job more durable and more forgiving.
How to Paint Kitchen Cabinets Step by Step
Step 1 — Protect your space and set up a paint station
Tape off walls, countertops, and appliances. Cover floors. Create a simple paint station for doors where dust and pet hair won’t settle into wet paint. Even a garage corner with plastic sheeting can work.
Lay doors flat if you can. Painting flat reduces runs and helps the paint level out nicely. If you must paint them upright, do thinner coats and watch edges.
Step 2 — Scuff sand or degloss and remove dust
After sanding, remove dust thoroughly. This step separates a smooth finish from a gritty one. I usually vacuum first, then wipe with a slightly damp cloth, then do a final wipe with a tack cloth.
Pay attention to:
- Door edges
- Inside corners
- Profiles where dust hides
Step 3 — Prime (the right primer makes everything easier)
Primer is not optional for cabinets. It helps with adhesion and it blocks stains and tannins from bleeding through, especially on wood.
Use the right primer for your situation:
- Bonding primer for laminate or slick glossy finishes
- Stain-blocking primer for knotty wood or heavy color changes
- High-quality cabinet primer for most normal repaints
If you’re going from dark to light, primer matters even more. Sometimes tinting primer slightly can help coverage, especially for deep colors.
Let primer dry fully, then lightly sand with 220 grit if it feels rough. Wipe dust again.
Step 4 — Paint in thin coats (brush plus mini roller method)
This is where most beginners go wrong. They load too much paint and chase perfect coverage in one coat. That creates drips, brush marks, and sticky doors.
Do it like this:
- Use an angled brush for corners, profiles, and tight spots
- Use a mini roller for flat panels and face frames
- Work in sections and keep a wet edge
Here’s a pro trick called “laying off.” After rolling, lightly run the roller in one direction with very little pressure. This smooths the texture and reduces lines.
Let the first coat dry fully. Then apply a second thin coat. Two thin coats almost always beat one thick coat.
Step 5 — Second coat, dry time, and curing
Dry time and cure time are not the same. Paint can feel dry in hours but still be soft underneath. Cabinets get handled constantly, so curing matters.
A good rule of thumb:
- Wait at least 24 hours before re-hanging doors if possible
- Be gentle for the first week
- Full cure can take several days to a couple of weeks, depending on paint type, humidity, and airflow
If you reinstall too early, doors can stick, and hardware can dent the finish.
Painting Kitchen Cabinets for Beginners (Mistakes plus Easy Fixes)
If you’re new to this, don’t stress. Most issues are fixable, but it’s easier to avoid them.
Common beginner mistakes I see:
- Skipping degreasing or cleaning too lightly
- Painting too thick to get coverage fast
- Not sanding between primer and paint when needed
- Using a cheap roller that leaves fuzz
- Reinstalling doors before the paint is cured
Easy fixes:
- Drips: Let them dry, sand smooth, then touch up
- Brush marks: Light sand, then recoat with thinner paint and a better brush
- Dust nibs: Sand lightly with 220, wipe clean, then add a final coat
- Sticky doors: Remove doors again, let them cure longer, add bumpers if needed
This is why I tell beginners: treat coats like layers, not like one big finish.
How to Paint Kitchen Cabinets Without Sanding (When It Works)
Yes, it can work, but only in the right conditions. If you have cabinets that are already painted, in good shape, and not glossy, you might get away with skipping sanding by using a strong cleaner and a bonding primer.
In real homes, the problem is grease and shine. If the surface is slick or contaminated, paint has nothing to grip. That’s when you see peeling around handles and edges.
If you want to try the no-sanding route, do a small test:
- Clean a door thoroughly
- Prime with bonding primer
- Paint two thin coats
- Let it cure, then do a hard scratch test with a fingernail
If it scratches easily, sanding would have helped.
How to Paint Kitchen Cabinets Without Removing Them
You can paint cabinet boxes in place, and honestly that’s what most people do. But leaving doors on makes it harder to avoid drips, paint lines, and hinge mess.
My practical advice:
- Remove doors and drawer fronts for best results
- Paint cabinet frames and boxes in place
- Keep the kitchen usable by doing sections
Mask carefully around:
- Countertops and backsplashes
- Appliances
- Inside cabinet openings if you’re not painting interiors
If hinges are staying, cover them well or expect cleanup. Paint on hinges always looks sloppy up close.
How to Paint Kitchen Cabinets With a Sprayer (HVLP or Airless)
A sprayer can give you the smoothest finish, especially on flat doors. Guess what though, spraying is 30 percent painting and 70 percent masking and setup.
If you spray, plan for:
- Full masking of everything nearby
- A controlled area with airflow and low dust
- Multiple light coats instead of one heavy coat
Overspray happens fast. I’ve seen people spray in a garage and end up with a fine mist on bikes, tools, and storage bins. Cover more than you think you need.
Spraying works best when you’re doing a lot of doors and want a factory-like finish. If you’re nervous, you can still get a great look with brush and roller using the thin-coat method.
How to Paint Kitchen Cabinets With Plastic Coating (Laminate or Thermofoil)
This is the area where preparation and product choice make or break the job. Laminate and thermofoil are smooth and non-porous, so regular paint doesn’t want to stick.
Here’s what I do for plastic-coated cabinets:
- Clean extremely well
- Lightly scuff sand, just enough to dull the sheen
- Use a high-quality bonding primer designed for slick surfaces
- Paint with durable cabinet enamel in thin coats
- Let it cure longer before heavy use
If thermofoil is peeling, paint usually fails along that edge again. In those cases, repair the peeling area properly or replace the door. Paint isn’t a good bandage for a surface that’s already lifting.
How to Paint Kitchen Cabinets Professionally (Pro-Level Finish Tricks)
If you want the “how did they get it that smooth” look, these are the tricks that matter.
First, control texture. Use a mini roller that’s meant for smooth surfaces and don’t overload it. Then lay off gently to level the coat.
Second, sand strategically. You don’t need to sand between every coat if the finish is smooth. But if you feel roughness, dust, or bumps, a light 220 grit sand makes the next coat look cleaner.
Third, watch oak grain. Oak cabinets often show grain through paint. If you love the subtle texture, fine. If you want a smoother modern look, you may need grain filler or extra priming and sanding. It’s more work, but the difference is noticeable, especially on large flat panels.
Finally, hardware makes cabinets look finished. Even simple new pulls can make painted cabinets feel like a full remodel. Use a template for consistent placement, and add soft-close bumpers to prevent doors from sticking while the paint continues curing.
How to Paint Kitchen Cabinets in 3 Days (A Realistic Timeline)
You can do this in three days, but you need to be organized and realistic. The big risk is rushing cure time.
Day 1: Prep day
- Remove doors, drawers, and hardware
- Label everything
- Deep clean, fill holes, sand, and dust off
Day 2: Prime and first coat
- Prime doors and boxes
- Light sand primer if needed
- First thin coat of paint
Day 3: Second coat and careful reassembly
- Second thin coat
- Let it dry as long as possible before reinstalling
- Reinstall gently, add bumpers, avoid slamming doors
If you need to cook during this, keep one cabinet with essentials and leave it alone. It keeps your sanity intact.
How to Paint Kitchen Cabinets Before and After (What Changes the Look Most)
When people talk about how to paint kitchen cabinets before and after, they’re usually reacting to three things: color, sheen, and hardware.
Color can change the whole mood of the kitchen. A warm white can make a space feel softer. A deeper color can make the kitchen feel more custom. Think about your lighting too. The same paint looks different in morning sun versus warm evening bulbs.
Sheen matters more than people expect. Satin is forgiving and modern. Semi-gloss wipes clean easily but can highlight imperfections. If your cabinets have lots of dings or texture, satin is often the safer choice.
And don’t underestimate the small upgrades. New pulls, matching hinges, and even under-cabinet lighting can make painted cabinets look intentionally designed, not just refreshed.
FAQs
Can I just paint over my kitchen cabinets?
You can paint over them, but you still need proper prep. Clean off grease, scuff or degloss the surface, and use a good primer so the new finish bonds and doesn’t peel around handles.
What I wish I knew before painting cabinets?
Cure time is everything. Cabinets may feel dry quickly, but the finish can stay soft underneath for days. Reinstalling too early leads to sticking doors, dents, and chips.
What is the easiest way to paint kitchen cabinets?
The easiest method is brush plus mini roller, with doors removed. Brush corners and details, roll the flat areas, and apply two thin coats. It’s simpler than spraying and still looks great.
Is it better to brush or roll paint on cabinets?
Use both for best results. Brush for profiles and tight corners, mini roller for flat panels and frames. This combo cuts brush marks and keeps the finish even.
How long should I wait before using my cabinets normally?
Light use is usually fine after a day or two, but treat them gently for at least a week. Full curing often takes several days to a couple of weeks depending on paint type and humidity.
Conclusion
Painting cabinets is one of those projects where the boring parts create the beautiful result. If you remember one formula, make it this: clean thoroughly, scuff or degloss, prime properly, paint in thin coats, then give it time to cure.
If you’re nervous, start with one section, like the island or lower cabinets, and build confidence. Once you see that smooth finish coming together, you’ll feel the momentum.
When you’re ready, I can also help you pick the best paint system for your cabinet type and your timeline, especially if you’re deciding between brush and roller versus spraying.
Disclaimer:
This guide is for general DIY education. Always follow the instructions on your primer and paint labels, wear proper safety gear, and test products on a small area first, especially on laminate or plastic-coated cabinets.

I’m Bilal, the founder of Dwellify Home. With 6 years of practical experience in home remodeling, interior design, and décor consulting, I help people transform their spaces with simple, effective, and affordable ideas. I specialize in offering real-world tips, step-by-step guides, and product recommendations that make home improvement easier and more enjoyable. My mission is to empower homeowners and renters to create functional, beautiful spaces—one thoughtful update at a time.