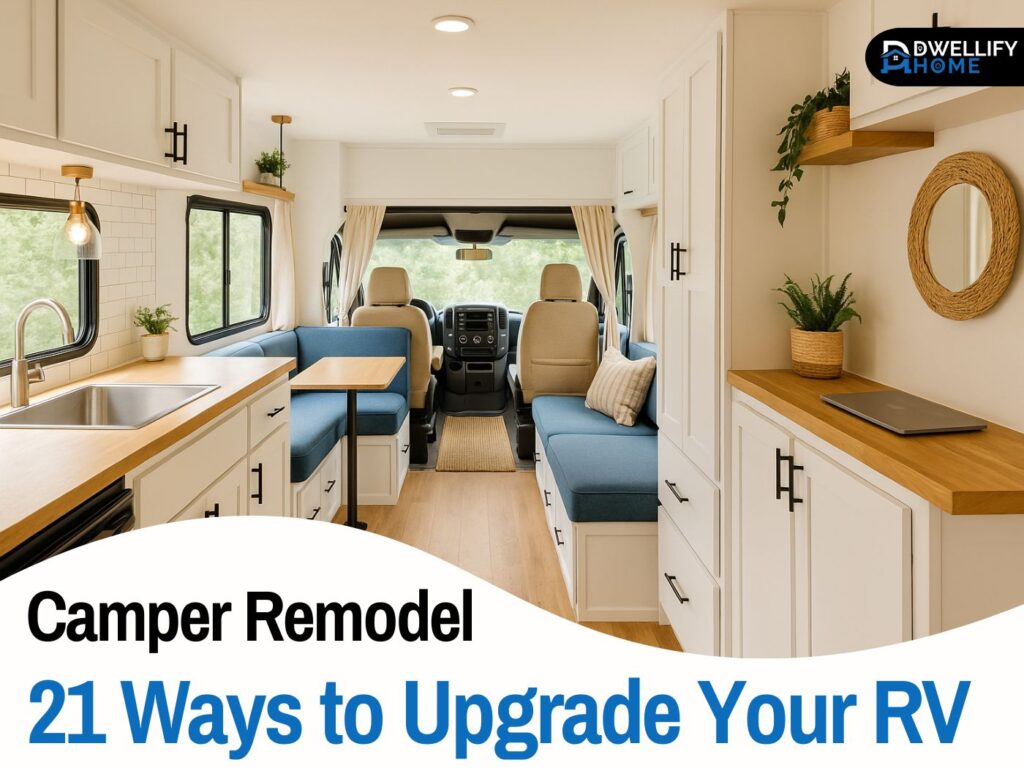
When I first started with a camper remodel, I thought it would be just another weekend project. But the moment I stepped into my own tired RV, with its faded walls and creaky cabinets, I realized how much potential an outdated RV actually has. Turning that worn-out box on wheels into a comfortable, stylish, and functional space—a true home on wheels—was one of the most satisfying things I’ve done.
Today, camper remodels have gained so much popularity. I often meet DIY enthusiasts who love the challenge, and I’ve also seen full-time travelers who take things to the next level. Everyone finds creative ways to refresh interiors, upgrade essential systems, and add those small personal touches that make the space feel alive.
For some, it’s about creating a cozy escape for quick weekend getaways. For others, it becomes a complete renovation that supports life on the road. And trust me, remodeling a camper is one of those rewarding projects that not only tests your patience but also fills you with pride when you see the results.
What makes it even more valuable are the practical steps, the little tricks that only come with trial and error. Over the years, I’ve leaned on trusted expert advice and learned through my own mistakes, which is why I can say every inspiring makeover idea has the power to transform a plain camper into something that matches your lifestyle and fuels your adventure goals.
Our Mission Statement
This guide on camper remodel has been carefully crafted to provide readers with practical, accurate, and trustworthy information. Every detail shared here is based on years of hands-on experience, expert insights, and real-world examples from the RV community. We value accuracy and fact-checking, ensuring that recommendations—whether about design, safety, or functionality—are reliable and up to date. Our goal is to inspire and support you with knowledge that turns your vision into a safe, functional, and personalized home on wheels.
Why Remodel Your Camper? (Setting the Vision)
I’ve seen that remodeling a camper isn’t only about a fresh coat of paint—it’s about creating a space that matches the way you travel and how you choose to live. A thoughtful camper remodel brings so many benefits, and it goes beyond just the way it looks.
- Comfort: Simply updating flooring, swapping out old furniture, and improving lighting can turn long trips into something genuinely enjoyable.
- Personalization: Adding your own style—whether it’s a cozy cabin feel, a modern minimalist vibe, or a bright boho aesthetic—makes your space truly yours.
- Resale value: A well-renovated camper draws in more buyers, often with higher offers when it’s time to sell.
- Adventure-ready upgrades: Practical touches like storage solutions, energy-efficient fixtures, and other smart improvements make life on the road far smoother.
When planning renovations, I always tell people to define purpose first. Are you preparing for short weekend getaways, setting up a family-friendly setup, or dreaming about full-time van life? Every goal changes the kind of upgrades you’ll want. I’ve seen weekend campers happy with quick makeovers or budget-friendly makeovers, while full-timers often go for durable materials, more smart storage, and functional layouts. That’s why an expert planning tip from Carefree of Colorado is so valuable—know what matters most, then build around it.
Another important piece is budget versus scope. As Carefree of Colorado points out, setting clear priorities helps you avoid overspending and keeps your travel goals realistic. I’ve found that balancing vision with your budget leads to smarter choices—and the result is a remodel that supports your lifestyle rather than draining it.
Planning & Pre-Renovation Prep
Before you even think about picking up a paintbrush or ordering new flooring, the most important part of any camper remodel is proper planning. Skipping this step has led me, and many others, to costly mistakes, unexpected hidden problems, and plenty of frustration along the way. Take the time to prepare well—it’s the single best investment you can make before the actual work begins.
1. Inspect & Assess Thoroughly
Every camper deserves a complete health check before you touch a single brush or tool. Look closely for water damage, roof leaks, and even hidden mold. I’ve seen more than a few soft spots in the floor and walls, and trust me, those little signs point to big structural issues. Without fixing them first, any cosmetic work you do will be wasted.
I once heard an RVer on Reddit say, “A soft wall always means a leak—get it resolved before you even think about painting.” That advice has stuck with me because it’s painfully true.
Experts like Barefoot Detour, Carefree of Colorado, and Custom Skirting all agree: a strong foundation is the only way to guarantee a safe remodel that truly lasts. Put simply, fix the core first, and the rest of your camper remodel will reward you for years to come with a lasting remodel.
2. Define Goals & Budget
One lesson I’ve learned in every camper remodel is the value of setting clear goals right from the start. Begin by writing down your must-haves—things like fixing leaks, updating flooring, or upgrading storage. Then make a separate list for the nice-to-haves, which might include decorative accents or even luxury fixtures if your budget allows.
Writers like Proverbs31Girl and experts at Carefree of Colorado remind us that your goals should always align with your lifestyle and your budget.
For example, weekend campers often focus on small comfort upgrades, while full-timers usually invest in durable materials or long-term energy solutions.
I’ve also heard plenty of RVers on Reddit talk about the danger of not setting limits early. Without them, it’s easy to fall into what many call budget creep, where small changes pile up into big expenses. The truth is, even the most exciting camper remodels can turn stressful if money isn’t managed well. A clear plan keeps you grounded, and every dollar you spend ends up making a real difference.
3. Create a Phased Renovation Plan
A remodel feels less intimidating when you break it into manageable stages. The most common approach I’ve seen (and personally followed) looks like this:
Demo → Structural repairs → Mechanical fixes → Aesthetic upgrades.
This kind of phased plan keeps the project organized, helps you spread out costs, and lets you avoid overwhelmed feelings that can easily creep in. I’ve noticed that both Carefree of Colorado and experienced DIYers on Reddit recommend the same method. It’s practical, it’s steady, and it helps you maintain momentum without burning out halfway through the process.
4. Gather Tools & Materials Smartly
The right tools can make any RV renovations far easier. Having them ready keeps the job smoother and safer, and saves you from those frustrating mid-project runs to the store. Over the years, I’ve learned that a drill, caulking tools, sandpaper, rollers, and strong adhesives are true must-haves. Experts from Harvest Hosts, Camping World, and Barefoot Detour often share the same advice—without these basics, progress slows down quickly.
But smart planning isn’t just about the tools. It’s also about how you save money on materials. I’ve seen many RVers stretch their budget by sourcing materials through buy/sell groups. Things like repurposed cabinets, flooring offcuts, or even leftover paint can reduce costs without sacrificing quality. Personally, I love this approach because it makes every remodel feel resourceful and creative. And once again, Harvest Hosts strongly supports this mindset, encouraging RVers to think outside the box when gathering supplies.
Structural & Mechanical Repairs (Build from Solid Foundation)
Every camper remodel I’ve worked on has started with a careful inspection. No matter how exciting your vision or how clear goals look on paper, ignoring structural issues or mechanical issues will only cause bigger problems later. These are the true backbone of any RV, and if they aren’t solid, nothing else will hold up.
I’ve seen people jump straight to design upgrades, only to tear them out again because they skipped the basics. Take the time for fixing the foundation first—it might not be the most glamorous part of the process, but it’s the one that ensures your remodel will actually last.
Address Leaks, Roof Issues, Plumbing, and Wiring
Before you even think about paint colors or new flooring, it’s the hidden systems that matter most. I’ve learned the hard way that if these aren’t in good condition, you’ll end up redoing your work later. Things like leaks and roof damage are the most common problems in older campers, and when they’re left untreated, all that hard work on finishes goes to waste. Many RV owners on Reddit will tell you the same: always start with sealing leaks and repairing roof seams before worrying about cosmetic updates.
The same goes for plumbing and wiring. Experts from Carefree of Colorado and even Architectural Digest stress the importance of checking water lines, the electrical system, and major appliances before the aesthetic phase of a remodel. It’s also the perfect time to replace worn wiring, swap out outdated fixtures, and upgrade plumbing for better efficiency. From my own experience, getting these systems right first makes the rest of the project far smoother and a lot more reliable.
Emphasize Durable, Lightweight Materials
When it comes to repairs, the choice of materials can make or break your project. I’ve seen people go for looks over function, only to regret it later. Using durable materials and especially lightweight materials is the smarter path. Heavy wood or thick tiles may look great, but they can reduce fuel efficiency and put stress on your camper’s frame. Seasoned DIYers on Reddit, along with storage experts at Extra Space Storage, often point to practical alternatives like lightweight plywood, vinyl plank flooring, and composite panels. These options balance strength, durability, and weight so your remodel stays practical for the road.
Remember, your camper’s structure and essential systems are built on the idea of a safe foundation and an efficient foundation. By choosing the right materials, every part of your upgrades, from flooring to décor, will not only shine but also last for many years. This step may not feel glamorous, but it’s the kind of decision that pays off trip after trip.
Demo & Preparation
Once the core structure and systems are taken care of, the next big step in any camper remodel is the demo and preparation phase. This is where you clear out what no longer works and set the stage for a fresh transformation that’s built to last. I’ve always believed this part makes the difference between a quick patch-up and a long-lasting transformation.
Safely Remove Old Fixtures
Start with removing the outdated items. This usually means old furniture, faded wallpaper, bulky cabinets, and sometimes even entire wall panels. I’ve followed the advice of experts like Barefoot Detour and Carefree of Colorado, who both stress that demo is often time-consuming but incredibly rewarding. A good remodel begins with a clean slate, and I can tell you it’s one of the most satisfying moments to watch the old interior come apart. Just move slowly to avoid damaging the frame or surfaces you plan to keep. Many seasoned RV owners recommend labeling wires, bagging hardware, and taking pictures to make reinstallation much easier down the line.
Clean and Prep Surfaces
Once the camper is stripped down, it’s time to sand, prime, and clean surfaces. This part may not look exciting, but it’s what makes the finishes stick. Proper prep work ensures that paint and adhesive products bond well. Both Barefoot Detour and Adventures With TuckNae remind beginners that skipping steps like sanding or priming is one of the biggest mistakes. Even a simple scuff-sand on walls or cabinets will stop paint from peeling later and save you from redoing everything.
Prioritize Moisture Barriers and Subfloor Readiness
Before laying new flooring or adding a stylish backsplash, always check the subfloor and wall areas for moisture. Look for soft spots or dampness, and get them repaired right away. Adding a moisture barrier here is a small investment, but it protects you from long-term damage. Good prepping of these invisible layers is what ensures your remodel holds up through travel, unexpected spills, and changing weather conditions.
Remodel Your RV with These 21 Makeover Ideas
One of the most exciting parts of renovating an RV is gathering fresh inspiration for what you can update. Over the years, I’ve seen people completely transform their RV kitchen, upgrade the bathroom, or even replace worn-out floors—all simple changes that can lead to incredible results. With the right mix of creativity and planning, these RV remodel ideas can give your recreational vehicle the ultimate makeover.
1. Repaint Your RV Interior
For me, nothing refreshes a space faster than painting the inside of an RV. Choosing the right color is not only an affordable RV makeover idea, but it also gives you endless options to work with. I’ve used this trick to brighten my own mobile living space, and the results were night and day—those old dark colors and dingy colors disappeared, replaced with a fresh vibe.
The magic lies in picking the right interior paint colors. Shades like white, gray, beige, sage green, or pale blue bring calmness and openness. These neutral shades also help reflect light, making your motorhome’s interior feel larger and more open. I’ve done this in one of my earliest remodels, and honestly, the difference still amazes me every time I step inside.
2. Customize Your Van Walls
An RV interior renovation doesn’t always mean tearing everything apart—sometimes it’s about customizing the wall space. I’ve often chosen to replace old wall coverings with new materials just to spruce up the atmosphere. One of my favorites was using white shiplap wall panels in a RV remodel, which gave the place that polished farmhouse look I had been craving.
But style is personal. You might love decorative wallpaper for a clean Scandinavian design, a warm mountain rustic vibe, or even a bold Bohemian RV design. If you’re not ready for a big commitment, try peel-and-stick wallpaper. It’s quick, easy, and the result is often stunning—a perfect way to create a unique RV accent wall that sets the mood every time you walk in.
3. Overhaul Your Space with Custom Camper Furniture
Creating a cozy space inside your RV is what makes it feel like home. I’ve designed areas for relaxing and entertaining guests, and nothing changes the camper’s interior faster than a thoughtful renovate with custom RV furniture. These pieces bring both freedom and functionality, and when paired with smart choices like space-saving furniture, the results are impressive.
I’ve used a loveseat with a console, added bench seats around a fold-down table, and even built an entertainment center with storage cubbies for a TV. In one camper interior remodeling project, I decided to reupholster the existing pieces for a fresh modern look instead of buying new ones. That’s the beauty of remodeling an RV—you get to choose how far you want to go.
Just don’t forget the safety side. Every piece of RV furniture should be secure with straps or anchors to handle bumps on the road. And always keep an eye on your RV’s overall weight—comfort and design should never compromise safety.
4. Install Shelves for More Storage
When van space feels limited, smart storage becomes essential. In a small living space, I’ve leaned on simple organization ideas like vertical storage to make the most of every corner. Adding storage shelves in a mobile living room lets you display plants, photos, knick-knacks, or books, and with shelf liners, those items stay safe from getting damaged while the RV is in motion.
For an open look and airy look, I often suggest an RV kitchen makeover with floating shelves instead of bulky cabinets. You can even turn them into a floating wine rack, a spice shelf, or a coffee bar. In the bedroom or bathroom, I’ve seen people use cubes and bins mounted on walls to store linens without cluttering the floor.
One of my favorite tricks is hidden storage—tucking shoes into cubbies under benches. It’s an easy RV space-saving idea that makes life on the road more organized while still keeping the interior stylish and clean.
5. Incorporate Wood Accents
One of my favorite ways to give an RV interior remodel character is by using reclaimed wood. I’ve brought pieces of old wood back to life, turning them into kitchen tables, countertops, and even ceiling beams. In some projects, I’ve used it for flooring or added detail to an RV slide out trim.
What I love most is how these touches transform a camper. The interior instantly gains a natural feel, almost as if you’re carrying a piece of the outdoors with you wherever you go. For me, wood accents don’t just make the space look better—they make it feel warmer and more inviting.
6. Hang New Window Treatments
One of the simplest ways to give your space an instant RV upgrade is by swapping out standard window valances for fresh sheer curtains. Not only do they let in more natural light, but they also soften the whole look of your camper’s interior.
I’ve also used other window treatments like bamboo roller blinds or RV blackout shades, depending on the mood and needs. Blinds create a warm natural vibe, while blackout options add privacy and block sunlight, keeping the space cool and preventing overheating during the day. Small details like these really change how your camper feels, both in comfort and style.
7. Replace RV Flooring
I’ve seen plenty of RV floors show signs of wear and tear, and nothing refreshes a space faster than a good RV reno project focused on the floor. Pulling up old RV carpet and laying down new flooring can completely change the vibe of a camper.
For me, it’s all about choosing the right floor. There are so many easy-to-install options—hardwood, laminate, vinyl, or even tile. Each has its pros, but all can make camper floors more durable, able to hold up for years of travel. And when you take those long road trips across the country, you’ll be glad you invested in a solid foundation under your feet.
8. Elevate Your RV’s Lighting
Updating your RV’s lighting is one of those changes that instantly transforms the atmosphere. The right fixtures create an inviting space that sets the tone for relaxation and enjoyment during your travels. I’ve swapped out old box lights in my own rigs for new RV light fixtures with LED bulbs, and the result was a sleek modern look that felt brand new.
For style, I’ve seen people add a small chandelier above the dining banquette or mount wall sconces in the bathroom, along the walls, or in the living area. These upgrades don’t just brighten your RV—they also eliminate the need for bulky floor lamps, freeing up valuable RV floor space. It’s a small shift with a huge payoff.
9. Add a Skylight
One RV renovation idea I’ll always recommend is adding a skylight. Nothing compares to lying down to sleep under the stars, especially when you can look straight through the roof of your camper van.
Skylights come in different shapes and sizes, so it’s easy to find one that fits your space. The added natural light completely changes the feel of your RV interior, making it brighter and more open. To control that light, I like using pleated shades or an RV skylight cover. They’re perfect for blocking direct sunlight during peak hours, keeping the space comfortable without losing that beautiful sky view.
10. Get Refreshed with an RV Shower Remodel
When you’re living on the road, having a proper camper van shower makes all the difference. One custom van idea I love is building a shower with a high-pressure shower head and a detachable hose—it feels just like home. To keep water from splashing everywhere, I recommend a non-skid shower pan, or if you want to go further, convert your travel trailer bathroom into a full wet bath.
For a stylish camper conversion shower, I’ve used patterned tile inside the interior, which adds a beautiful decorative touch. Adding shower shelves is also a game changer—it keeps your bottles secure and organized, even when the road gets bumpy.
11. Upgrade Your Bathroom Vanity
A simple RV bathroom DIY project that can completely refresh your space is upgrading the RV sink and bathroom vanity. I’ve done this during a trailer bathroom remodel, and it not only improved storage but also gave the sink area a cleaner, more polished look.
Choosing lightweight materials is key. Options like plastic, acrylic, stainless steel, or even copper keep the build practical without adding extra weight. Once the basics are in place, I like to add finishing touches—a round mirror, a towel rack, or a new countertop. Small changes like these can make the whole bathroom feel brand new, without requiring a full gut remodel.
12. Dine & Lounge in a Cozy Banquette
One of my favorite RV space-saving solution ideas is adding a custom banquette in the kitchen. It works beautifully for both eating and working, making the space feel more versatile. A banquette bench paired with an RV dining table helps you maximize kitchen space in an RV, especially when the bench is hollow and can double as hidden storage.
I’ve built these setups with comfortable cushions and a small table in the middle of the banquette, and they work wonders. You can enjoy meals, use it as a makeshift office, or even play games with the family. It’s cozy, practical, and one of the smartest ways to make the most out of limited space.
13. Install New Kitchen Appliances
When it comes to prepping meals and cooking on the road, a well-equipped RV kitchen makes all the difference. One of the smartest ways of saving money on dining while traveling the road is to upgrade your kitchen appliances. Swapping in a modern stovetop, dishwasher, microwave, or refrigerator can instantly make life easier.
I’ve even replaced an RV kitchen sink during a remodel to refresh the area, which made cooking, cleaning, and storing food far more convenient. If you want to push it further, consider energy-efficient appliances—they cut costs in the long run and keep your camper eco-friendly.
14. Opt for New Kitchen Countertops
Swapping out old countertops is one of the most affordable ways to remodel your RV kitchen. I’ve seen people repurpose old wood from other RV makeover projects and turn it into a butcher block countertop, which adds warmth and charm. If you’re after something sleek, you can go with concrete countertops by layering cement over existing counters—a sturdy and stylish option.
For a more polished finish, granite or marble countertops elevate any camper van design and give it a contemporary look. But if you’re sticking to a budget, a budget-friendly DIY option like patterned wooden contact paper or marble contact paper can give your RV kitchen countertops a fresh face without the cost. I’ve tried this trick myself, and it’s surprising how effective it looks once installed.
15. Update Kitchen Cabinets
One budget-friendly RV kitchen remodel idea that always makes a huge difference is updating the RV cabinets. Sometimes all it takes is paint and new hardware to give them a fresh look. If you’re going for an eclectic vibe, try working with wooden kitchen cabinets—a simple re-staining can bring out their natural beauty.
For something more playful, I’ve used mood-boosting paint colors like light blue or mint green, and the change was immediate. If a basic paint job won’t cut it, you can always remove the old cabinets and install custom cabinets. Either way, the result is an RV interior with a much cleaner look and even more hidden storage space.
16. Add an RV Kitchen Island
Adding an island to your RV kitchen is one of the most functional and useful upgrades you can make. I’ve seen this motorhome remodel idea transform kitchen by creating extra RV kitchen countertop space that makes food prep and cooking so much easier.
The best part is the versatility. With built-in storage compartments, you can keep storing all your essentials—pots, pans, dishes, silverware, utensils, and other kitchen items—without cluttering up the rest of the space. It’s one of those upgrades that adds both style and efficiency to your setup.
17. Design a Decorative Backsplash
A backsplash does more than protect your RV—it shields the interior walls from damage while adding a touch of flair to your mobile kitchen. I’ve worked with different looks, from farmhouse-style shiplap to classic mosaics and even bold patterned tiles. Each one can completely shift the vibe of an RV kitchen remodel.
If you’re after something quick and easy, peel-and-stick subway tiles are a fantastic option. They’re simple to install, affordable, and fit well into almost any kitchen interior design. In my experience, this upgrade doesn’t just look good—it makes the space feel finished and intentional.
18. Open Space with an RV Loft Bed
If you need to maximize space in your RV, a loft bed can be the perfect answer. I’ve seen how lofting creates a space-saving and smart organization solution, especially in small campers without a dedicated bedroom.
Adding a sturdy ladder or built-in stairs makes the loft space easy to access and safe to use. The bonus is that the area underneath the RV loft can become extra living space or even clever RV storage. It’s one of those upgrades that truly makes the bedroom feel bigger, opening up your camper in a way you might not expect.
19. Dedicate an Area to Work
For digital nomads and freelancers who make money while traveling in an RV, having a designated area to focus is a must. I’ve seen how carving out a spot for work, studies, or even creative pursuits makes life on the road much easier and more balanced.
You can set up a custom RV desk, or go with flexible solutions like an RV folding wall table or a Murphy desk. These options save space but still give you a place to keep documents, electronics, and daily essentials organized. And when you’re done, the same space can transform into a dining table or even an entertainment center. That kind of versatility is what makes camper living practical and enjoyable.
20. Build a Space for Your Pets
If you’re living the van life with a furry friend, your camper remodel should include an area just for them. I’ve always found that when a pet has a dedicated spot to sleep, play with toys, and enjoy their meals, they feel more at ease on the road.
There are plenty of pet-friendly camper ideas you can try. I’ve seen people tuck a crate or an RV dog kennel under a lofted bed, which saves space while keeping pets comfortable. Creative pet storage ideas like pull-out drawers for water bowls and food bowls make daily routines easier too. Whether you travel with a dog or a cat, giving them their own corner helps them stay relaxed throughout the drive—and trust me, a calm pet makes the whole journey better for everyone.
21. Revamp the Exterior
Don’t overlook the power of updating the exterior of your recreational vehicle. A fresh look not only boosts curb appeal but also makes your camper feel brand new. Simple RV exterior paint ideas like crisp colors—white, gray, or even bold shades of blues and greens—can instantly transform your RV. For something unique, I’ve seen people create a custom RV mural, and it always turns heads at the campground.
If you want to go further, you can re-side your rig with aluminum or fiberglass, which also improves insulation. And one of my favorite projects was swapping out an old camper door for a DIY upgraded RV door—it’s a small detail, but it adds both character and functionality to the space.
Exterior & Tech Enhancements
A camper remodel doesn’t stop at the walls inside—upgrading the exterior and adding modern technology can make your RV more than just a vehicle. These changes improve both comfort and convenience, turning everyday life on the road into something smoother and far more enjoyable.
Improve the Exterior
Refreshing the outside of a camper can make it feel brand new. A simple paint update or new decals are affordable ways to boost curb appeal. If your budget allows, I’d suggest adding an awning for shade, or even installing solar panels on the roof to support off-grid adventures. Experts like Carefree of Colorado often highlight how these small exterior changes can completely transform the look and feel of your rig when you roll into a campground.
Tech Upgrades for Modern Comfort
In today’s world, technology has become part of everyday RV life. The right upgrades can make travel more comfortable and efficient. According to Carefree of Colorado, the essentials start with Wi-Fi boosters for better connectivity and solar systems for energy independence. Inside, I’ve installed smart lighting and a climate control system, and they’ve made managing the environment so much easier—whether parked in hot deserts or cool mountain ranges.
Real Experiences & Inspiring Remodels
One of the most rewarding parts of a camper remodel is hearing from others who’ve transformed their RVs. These real-life examples hold so much wisdom, and the RV community never fails to share stories that give fresh inspiration while reminding us of the value of smart planning.
Creative DIY Examples
The variety of remodel styles out there is incredible. I’ve seen RVers lean into a southern glam look with bold colors and modern finishes, while others transform toy haulers into sleek, multipurpose living spaces. Some prefer restoring vintage Airstreams with their timeless shine, while others embrace cabin-style interiors with cozy wood accents and a touch of rustic charm. Harvest Hosts often showcases these unique camper remodels, proving that the best designs reflect the owner’s style.
For quicker wins, I’ve met DIYers who go for high-impact upgrades—like using peel-and-stick backsplash tiles in the kitchen or updating the lounge with new upholstery and cushions. The Wayward Home highlights how small touches like these can create big changes without the need for a full gut renovation.
DIY Wisdom
What stands out most are the lessons from experienced renovators. Many stress the importance of pacing and working in stages. As Love Daphne Mae, Barefoot Detour, countless RVers, and folks on Reddit say: “Renovate in stages… Demo, Prep, Installation, Finish…”
This phased approach helps avoid overwhelm, keeps budgets under control, and follows practical advice passed down in the community. Another golden tip from Reddit is clear: “Soft wall means a leak. Don’t do anything else til you fix that.”
These reminders from real owners show that while remodeling can be creative and exciting, it’s also about safety, structure, and making smart choices. They bring authenticity to the process, proving that every successful remodel comes from balancing inspiration with practical know-how.
Common Pitfalls & Pro Tips
Even the most exciting camper remodel projects come with challenges. I’ve made my share of mistakes, and they’ve cost me time, money, and more than a little frustration. Over the years, I’ve picked up lessons on avoiding common pitfalls and following practical pro tips that keep the journey smoother.
Don’t Skip Leak Inspection
One of the biggest mistakes is ignoring leaks or signs of water damage. Many RV owners on Reddit will tell you the same—if you see a soft wall or a damp floor, you’re probably dealing with a hidden leak. Covering it up only leads to bigger problems later. Always take time to repair water issues before moving on to cosmetic upgrades.
Prep Is Key
Solid prep work is the foundation of every successful remodel. I’ve seen what happens when people skip sanding, priming, or cleaning surfaces—the workload doubles when paint peels or adhesives fail. Folks on Reddit stress this constantly, and they’re right. Taking the extra time on prep guarantees your finishes last.
Use Lightweight Materials
Going for heavy materials might look stylish, but they add strain to your camper, reduce fuel efficiency, and stress the frame. Seasoned Reddit users recommend alternatives like lightweight vinyl, plywood, and composites. These keep your remodel both functional and durable while still giving you room for good design.
Watch Out for Budget Creep
It’s easy for costs to spiral when new ideas keep popping up. Carefree of Colorado advises breaking your planning into phases and setting clear financial limits. Focus on essentials first, then add the extras if your budget allows. By monitoring expenses closely, you’ll avoid overspending and keep your remodel enjoyable rather than stressful.
Conclusion
A successful camper remodel is more than just an upgrade—it’s a new way to travel and an entirely different experience on the open road. From fixing leaks to refreshing interiors, and adding modern comforts, every step shapes a space that reflects your style and fuels your adventures.
For me, it has always been about dreaming big while planning smart, moving through the stages with care. Even a dated camper can become a safe, functional, and inspiring home on wheels with the right mix of patience and safety.
Whether you’re chasing quick weekend escapes or committing to full-time van life, the goal is to create something uniquely yours. Start with a clear vision and end with an adventure—your very own custom mobile sanctuary waiting to carry you wherever the road leads.
Disclaimer
This article shares general information, ideas, and personal insights about camper remodel projects. It is not professional, legal, financial, or construction advice. Actual costs, results, and safety conditions may vary depending on your camper, location, and skill level. Always consult qualified professionals before starting any major renovations to ensure safe and reliable outcomes.

I’m Bilal, the founder of Dwellify Home. With 6 years of practical experience in home remodeling, interior design, and décor consulting, I help people transform their spaces with simple, effective, and affordable ideas. I specialize in offering real-world tips, step-by-step guides, and product recommendations that make home improvement easier and more enjoyable. My mission is to empower homeowners and renters to create functional, beautiful spaces—one thoughtful update at a time.