Thinking about remodeling can lights might seem like a small part of home improvement—but it can have a surprisingly big impact on how your space feels, functions, and even how much energy it uses. Whether you’re trying to create a cozy atmosphere in your living room, add focused task lighting in the kitchen, or modernize an outdated ceiling setup, updating recessed lighting is a smart, cost-effective way to upgrade your entire room without tearing down walls.
This guide is for anyone looking to take control of their lighting:
- Homeowners who want to refresh their ceilings with energy-efficient fixtures
- Renovators planning full remodels that include lighting upgrades
- DIYers ready to swap out old hardware with modern LED options
- Interior designers aiming to achieve sleek, minimal looks with better light distribution
You don’t have to be an electrician or a pro to understand what goes into remodeling can lights. In fact, with the right tools, safety tips, and a little planning, this project is very beginner-friendly—and the payoff is immediate. Brighter rooms, lower energy bills, and a much cleaner ceiling line are just the start.
In this article, you’ll learn:
- What can lights are and why people remodel them
- How to choose the right size, style, and trim for your space
- A step-by-step breakdown of the remodeling process (with safety first!)
- Common mistakes to avoid (like poor spacing or overheating issues)
- Tips for mixing recessed lighting with other fixtures
- How to budget for the project—including hidden costs most people forget
- When to DIY vs. when to call in a licensed electrician
- And expert-backed ideas to make your lighting both functional and stylish
If you’ve ever walked into a room and thought, “This lighting just doesn’t feel right,” then yes—remodeling your can lights might be exactly what you need. Stick with this guide, and you’ll walk away with clear steps, smart design inspiration, and the confidence to light your home better.
What Are Can Lights? (And Why Remodel Them?)
Understanding Can Lights: Recessed Lighting Basics
Can lights, also known as recessed lights or downlights, are fixtures installed directly into the ceiling. Instead of hanging down like a pendant or flush mount light, these lights sit flush with the ceiling surface, creating a clean and modern look. The term “can” refers to the cylindrical housing that holds the bulb and is hidden above the ceiling.
These lights are popular in kitchens, living rooms, hallways, basements, and even bathrooms—anywhere a clean, streamlined lighting solution is desired. Most modern homes use them for general illumination or to highlight specific areas like countertops or artwork.
Common Reasons People Remodel Can Lighting
There are several reasons why homeowners decide to remodel their recessed lighting:
- Outdated fixtures: Older can lights can look bulky or yellow over time, especially if they use halogen or incandescent bulbs.
- Energy efficiency: Many older systems waste electricity. Remodeling lets you upgrade to LED technology, cutting your energy bill significantly.
- Poor lighting layout: Maybe the lights are spaced poorly, leaving dark spots or uneven brightness. Remodeling gives you a chance to rework the layout.
- New ceiling work: If you’re replacing drywall or updating insulation, it’s often the perfect time to change lighting too.
- Home resale: Modern lighting is a major selling point. Updating your can lights makes a home look newer and better maintained.
Benefits of Upgrading Old Can Lights
Upgrading your can lights offers a lot more than just a fresh look. Here’s what you get:
- Improved brightness and clarity: LED lights provide cleaner, more consistent light compared to older bulbs.
- Lower energy bills: LEDs use less electricity and last far longer, meaning fewer replacements and reduced monthly costs.
- Modern trim options: You can choose from white, black, metallic, and decorative finishes that better match your space.
- Smart lighting options: Remodeling lets you integrate your can lights with smart dimmers, motion sensors, or voice assistants.
- Fire safety: Newer IC-rated fixtures can be safely installed near insulation, reducing fire risk.
Signs It’s Time to Remodel Your Can Lights
Not sure if you need to remodel your recessed lights? Here are a few signs to look for:
- Flickering or dimming lights even after replacing the bulb
- Fixtures that feel hot to the touch or show discoloration
- Yellowed, rusted, or cracked trim that makes the ceiling look dated
- Buzzing noises from old transformers or incompatible dimmers
- Rooms that feel dark or unevenly lit, especially after sunset
- Bulbs that burn out frequently, which could point to old or faulty wiring
If you’re noticing any of these issues, remodeling your can lights isn’t just cosmetic—it’s practical and, in some cases, necessary for safety.
Planning Your Can Light Remodel: Key Considerations
Layout and Spacing for Optimal Light Distribution
Before you install—or even purchase—your new fixtures, take time to plan the layout and spacing. The right arrangement makes all the difference in how your room looks and feels.
A general rule of thumb is to space can lights about 4 to 6 feet apart in an 8-foot ceiling. For taller ceilings, you may need closer spacing or more powerful fixtures. Also consider the “beam spread” of your chosen lights—wider beams for ambient lighting, narrower ones for task lighting.
Tip: Avoid placing can lights too close to walls. This can cause harsh shadows or highlight wall imperfections. A distance of 2 to 3 feet from the wall is usually ideal.
Use a simple sketch or room planner app to map out where each light will go. Think about where people will be sitting, working, or walking—especially in kitchens, bathrooms, and living rooms. A well-thought-out layout prevents dark corners and overly bright spots.
Choosing the Right Size and Style of Can Lights
Can lights come in several sizes, most commonly 4-inch, 5-inch, and 6-inch diameters. The right size depends on your room size and lighting goals:
- 4-inch lights are great for small rooms, accent lighting, or tight ceiling spaces
- 5-inch lights offer a balance of focus and coverage
- 6-inch lights provide broader illumination and work well for general lighting in larger rooms
Beyond size, you’ll need to pick a trim style—which is the visible part of the light. Some popular options include:
- Baffle trim: Reduces glare, ideal for living areas
- Reflector trim: Enhances brightness, good for kitchens
- Gimbal trim: Adjustable for highlighting artwork or specific areas
- Eyeball trim: Rotatable to direct light where needed
Modern designs also offer color temperature options (warm white, neutral, daylight) and finish colors (white, black, brushed nickel). This makes it easier to match your new lights with the overall style of your space.
Matching Can Lights with Ceiling Types (Flat, Vaulted, etc.)
Your ceiling type will influence what kind of can lights you can use. For flat ceilings, installation is fairly straightforward. Most standard recessed lighting kits are designed with this in mind.
For vaulted or sloped ceilings, however, you’ll need angled or adjustable housings. These allow the light beam to shine downward rather than at an awkward angle. If you install regular flat-ceiling fixtures in a vaulted ceiling, the light may feel off-center or create strange shadows.
Also, make sure to check if your ceiling is insulated. If it is, you’ll need IC-rated fixtures that are safe to install near insulation. These prevent overheating and reduce fire risk.
Planning for Dimmers, Switches, and Smart Controls
Modern lighting isn’t just about bulbs and fixtures—it’s about control. Adding dimmers gives you flexibility to change brightness based on time of day, mood, or activity. For example, dimmed lights in the evening can create a relaxing vibe, while full brightness helps with cleaning or cooking.
Make sure your new can lights are dimmable and compatible with the type of dimmer you choose. Not all LED lights work with every dimmer switch, so check the packaging or product specs.
You can also level up with smart lighting systems like Lutron Caséta, Philips Hue, or Amazon Alexa-compatible switches. These let you control lights remotely, set schedules, or adjust scenes using your voice or smartphone.
Pro tip: Plan for wiring access early. If you’re remodeling, now’s the time to install extra switches or smart hubs while the ceiling is open.
Types of Can Lights to Consider for Remodeling
IC-Rated vs. Non-IC-Rated Fixtures
One of the most important safety considerations when remodeling can lights is choosing between IC-rated and non-IC-rated fixtures.
IC-rated (Insulation Contact) can lights are designed to be safely installed in ceilings where the housing is in direct contact with insulation. They’re made to prevent overheating and reduce the risk of fire. These are the best choice for modern homes, especially in attics, basements, or energy-efficient builds with lots of insulation.
On the other hand, non-IC-rated fixtures require at least 3 inches of clearance from any insulation. If placed too close, they can overheat or cause damage to the surrounding area. Today, most homeowners choose IC-rated options to avoid extra hassle and ensure compliance with building codes.
Tip: If you’re unsure what type your home needs, check your attic or ask a licensed electrician before purchasing new fixtures.
LED Can Lights vs. Traditional Bulbs
Gone are the days when recessed lighting meant dealing with hot, energy-draining halogen bulbs. LED can lights have taken over the market—and for good reason.
LED benefits include:
- Lower energy usage (up to 80% less than incandescent or halogen)
- Longer lifespan (20,000 to 50,000+ hours)
- Cooler operation, reducing heat buildup in ceilings
- Instant-on with no warm-up time
- Variety of color temperatures (from soft warm light to bright daylight)
Traditional bulb fixtures are mostly outdated and less efficient. Remodeling your can lights is the perfect chance to switch to LED technology. Many retrofit kits are designed specifically for this upgrade, making installation simple—even for DIYers.
Airtight Can Lights: What Are They and Why Choose Them
If your home is in a region with extreme temperatures or you’re trying to improve energy efficiency, airtight can lights should be on your radar.
These fixtures are designed to seal off airflow between the conditioned interior space and the unconditioned attic or ceiling cavity. That means:
- Reduced heat loss in winter
- Lower air conditioning costs in summer
- Better indoor air quality, as fewer pollutants or drafts enter your living space
Airtight models are usually labeled “AT” and are a smart long-term investment for any home—especially those striving to meet energy-efficient building standards or aiming for eco-friendly upgrades.
Decorative Trim Options (Baffle, Eyeball, Reflector, Gimbal, etc.)
The trim is the visible part of your can light, and it plays a big role in both style and function. Choosing the right trim helps you tailor your lighting to suit specific needs and aesthetics. Here are the most popular types:
- Baffle trim: Features ribbed interiors to reduce glare. Ideal for living rooms and bedrooms.
- Reflector trim: Smooth and shiny inside for maximum light output. Perfect for kitchens and large areas.
- Eyeball trim: Adjustable and directional. Great for spotlighting artwork or highlighting walls.
- Gimbal trim: Similar to eyeball but sleeker. Allows for focused directional lighting with a clean look.
- Shower trim: Moisture-resistant and sealed—specifically designed for bathrooms or damp areas.
Trim also comes in various finishes (white, black, brushed nickel, bronze) to match your decor. If you want your lighting to look intentional—not just functional—choosing the right trim is key.
Step-by-Step Guide to Remodeling Can Lights
Tools and Materials You’ll Need
Before you begin, gather all your supplies. Having the right tools on hand will make the process smoother and safer. Here’s a checklist to get you started:
Tools:
- Voltage tester
- Wire stripper
- Screwdriver (flathead and Phillips)
- Drywall saw or utility knife
- Ladder or step stool
- Power drill (optional)
Materials:
- New can lights or retrofit LED kits
- Electrical wire (if rewiring)
- Wire nuts and electrical tape
- IC-rated housing (if needed)
- Ceiling patch kit (for cleanup)
- Paint and touch-up supplies
Pro tip: If you’re installing smart dimmer switches or planning to relocate the lights, you may also need low-voltage cabling and compatible controllers.
Turning Off Power and Ensuring Electrical Safety
This step is non-negotiable: always turn off the power at the circuit breaker before you touch anything. Don’t rely on just flipping the wall switch.
Once the breaker is off, use a voltage tester to confirm there is no electricity running to the fixture. Touch the tester to the wires before you disconnect anything. If you’re unsure, label the breaker box clearly and double-check.
Safety tip: Wear insulated gloves and avoid working alone, especially if you’re on a ladder or dealing with attic spaces.
Removing Old Fixtures Safely
To remove your old can lights:
- Pull down the trim ring gently. Some are held by tension clips, while others may have springs or screws.
- Remove the bulb and unscrew the housing if it’s detachable.
- Disconnect the wiring by unscrewing the wire nuts and separating the wires.
- If it’s a remodel housing, release the clips holding it to the drywall.
If your light is mounted with a nail-in or hanger bar, you may need to access the attic or cut around it carefully with a drywall saw. Take your time—rushing this part can cause damage to the ceiling.
Upgrading the Wiring and Housing
With the old fixture out of the way, it’s a good time to inspect and upgrade the wiring if needed. Older homes may have outdated or brittle wires that should be replaced.
Install new housing that matches your ceiling type—flat or sloped—and is IC-rated if insulation is present. Modern housings are often remodel-ready, meaning they can be installed without tearing open the ceiling.
Use wire connectors and secure everything with electrical tape. Make sure your ground wire is connected properly for safety.
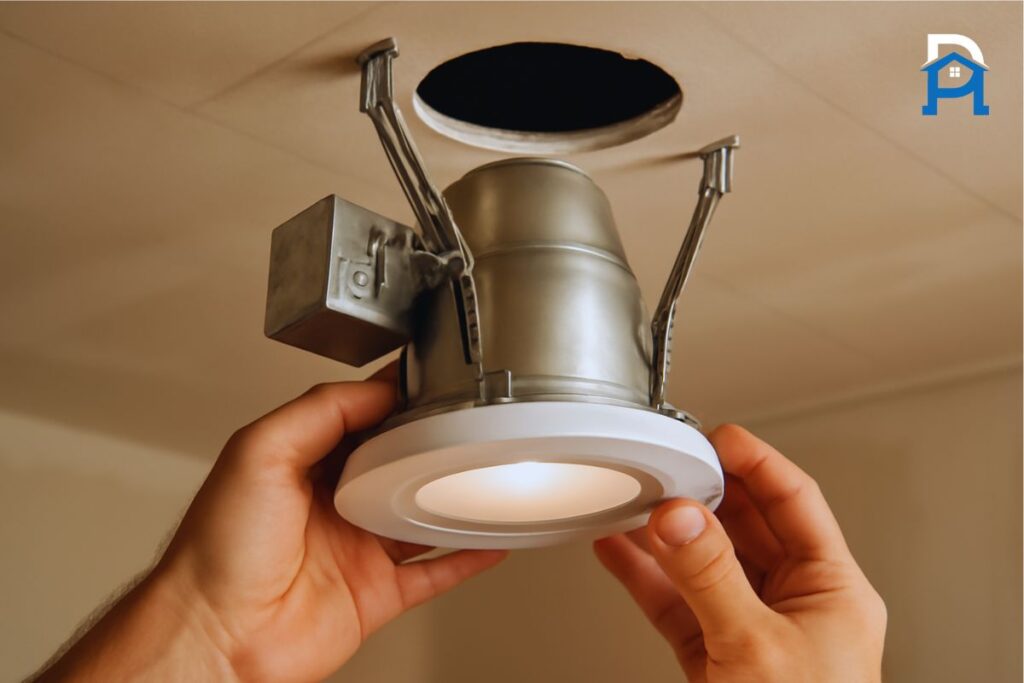
Installing New Can Lights or Retrofit Kits
If you’re using retrofit LED kits, the process is easier than you might expect:
- Connect the LED module to the existing socket adapter.
- Insert the spring clips into the housing.
- Push the module up until it’s flush with the ceiling.
For new can lights, carefully follow the manufacturer’s instructions. Secure the housing, connect the wiring, and test the light before sealing everything back up.
Pro tip: Turn the power back on briefly to test the lights before finishing the trim. Then turn it off again to complete the job.
Patching, Painting, and Finishing Touches
After installation, you may notice some cosmetic imperfections—especially if you had to widen holes or move fixtures. Use a ceiling patch kit to fill in gaps or cracks, then sand it smooth.
Repaint the affected area using ceiling-matching paint. Some lights come with trim that hides minor imperfections, so consider those if you want a clean finish without extra effort.
Finally, reinstall the trim rings, test your lights again, and admire your upgraded ceiling!
DIY vs. Hiring a Professional for Can Light Remodel
Pros and Cons of a DIY Remodel
Tackling a DIY can light remodel is tempting, especially if you’re comfortable with basic tools and enjoy home improvement projects. For many homeowners, it’s a rewarding way to save money and take control of the design.
Pros of a DIY remodel:
- Cost savings: You can save on labor, which can be 50% or more of the total project cost.
- Flexibility: Work at your own pace, choose your own fixtures, and customize your layout.
- Satisfaction: There’s a real sense of accomplishment in upgrading your space yourself.
Cons of DIY remodeling:
- Electrical risks: Improper wiring or poor connections can lead to fire hazards, tripped breakers, or non-functional lights.
- Code compliance: You may not be aware of local building codes or permit requirements.
- Frustration factor: Dealing with old ceilings, insulation, or tight attic spaces can be time-consuming and physically demanding.
Tip: If you have even basic electrical knowledge and are only replacing existing fixtures, a DIY retrofit can be straightforward. But anything beyond simple swaps—like moving wires or cutting into drywall—may require a pro.
When to Call an Electrician or Lighting Specialist
You don’t need to be a master electrician to update your lighting—but you do need to know your limits. There are times when calling a professional is the safest and most efficient choice.
Call a licensed electrician if:
- You’re adding new wiring or changing circuit locations
- Your home’s electrical system is old or ungrounded
- You notice burn marks, buzzing, or flickering from existing fixtures
- You need to install multiple new lights in a short time
- Your ceiling involves complex structures (vaulted, insulated, plastered, etc.)
Electricians also make sure your remodel meets local building codes, which is especially important if you plan to sell your home or get inspections.
What to Expect During a Professional Install
When hiring a pro, the process is typically fast, clean, and code-compliant. Here’s what you can expect:
- Site assessment: The electrician will examine your existing setup, confirm access to wiring, and evaluate ceiling type and insulation.
- Fixture planning: You’ll review the light layout, type of fixtures, and switch/dimmer options.
- Wiring and installation: The old fixtures are removed, new housings are wired in, and any necessary upgrades (like junction boxes or dimmer switches) are added.
- Testing and inspection: Once installed, each light is tested to ensure it’s safe and working properly.
- Cleanup and finish: Professionals often patch and paint around fixtures if needed—or work with your contractor to coordinate it.
Average install time is 1–2 hours per room, depending on complexity. You’ll pay more, but you’ll also gain peace of mind, long-term safety, and often a warranty on labor and parts.
Design Ideas and Inspiration for Modern Can Lighting
Trending Styles in Recessed Lighting for 2025
In 2025, recessed lighting is more than just functional—it’s become a key design element in modern homes. Today’s can lights are slimmer, smarter, and more stylish than ever.
Top trends include:
- Ultra-thin LED trims that sit almost flush with the ceiling for a clean, modern look
- Adjustable color temperature fixtures that shift from warm to cool depending on the mood or time of day
- Black or bronze trim finishes replacing the traditional white, adding contrast and character
- Smart recessed lights that work with voice assistants or mobile apps
Minimalism is big right now. That means fewer bulky fixtures and more seamless integration into ceilings—perfect for open-concept spaces or rooms with multiple design elements competing for attention.
Mixing Can Lights with Pendant or Track Lighting
One of the smartest ways to add depth and balance to your space is by layering can lights with other fixtures. This not only improves overall brightness but also gives your room character and visual hierarchy.
For example:
- In a kitchen, use recessed lights for ambient coverage, and hang pendants over the island for focused task lighting.
- In a living room, install can lights in the ceiling corners while using a central chandelier or floor lamp to anchor the space.
- In hallways or offices, combine track lighting with can lights to add directionality and highlight artwork or shelving.
Tip: The key is to balance function with design. Can lights provide a broad glow, while pendants and tracks create focal points. Used together, they make your lighting feel intentional—not accidental.
Creative Can Light Patterns for Living Rooms and Kitchens
You don’t have to stick with boring grids. Try experimenting with creative layouts that enhance the shape and flow of your space.
Here are a few layout ideas:
- Perimeter lighting: Install can lights 2–3 feet from the walls to brighten up the edges of the room and make the ceiling feel higher.
- Zoned lighting: Divide your space into functional areas (e.g., seating vs. dining) and create distinct lighting zones using recessed lights.
- Asymmetrical placement: For a more contemporary look, place lights off-center or in staggered rows to guide the eye naturally through the room.
- Accent lighting: Use gimbal or eyeball trims to point light toward artwork, architectural features, or open shelving.
Kitchens and open living areas especially benefit from this kind of layout creativity, helping each section feel both unified and purpose-driven.
Using Color Temperature to Set the Mood
Lighting isn’t just about brightness—it’s about feeling. One of the simplest ways to transform your space is by adjusting the color temperature of your recessed lights.
Here’s a quick breakdown:
- 2700K–3000K (warm white): Best for cozy areas like bedrooms and living rooms
- 3500K–4000K (neutral white): Great for kitchens, bathrooms, or workspaces
- 5000K+ (cool daylight): Ideal for garages, laundry rooms, or places where high visibility is important
Many modern LED can lights come with adjustable CCT (correlated color temperature) settings, allowing you to switch tones with the flip of a switch—or even from an app.
Pro tip: Stick to one color temperature per room to keep the mood consistent and avoid clashing tones that make a space feel awkward or mismatched.
Energy Efficiency and Safety Upgrades
Benefits of LED Retrofit Kits for Older Homes
If you live in an older home with outdated recessed lighting, LED retrofit kits are a smart and simple upgrade. These kits are designed to fit into existing can light housings, replacing the old bulb and trim in one go—no full rewiring required.
Why retrofit kits make sense:
- Quick installation: Most kits take less than 10 minutes per light
- Massive energy savings: LEDs use up to 85% less energy than halogen or incandescent bulbs
- Modern look: Clean, low-profile trims give your ceiling a fresh appearance
- Longer lifespan: No more changing bulbs every year—many kits last 20+ years
- Higher safety: LEDs stay cool, reducing the risk of overheating or fire
Retrofit kits are available in a variety of color temperatures and brightness levels, so you can tailor them to your space. They’re especially popular in kitchens, hallways, and living rooms where multiple lights are used daily.
How to Make Your Lighting More Energy Efficient
Beyond switching to LEDs, there are a few smart steps you can take to boost the energy efficiency of your lighting setup:
- Use dimmer switches: Lower light output when full brightness isn’t needed
- Install motion sensors in lesser-used areas like closets or hallways
- Choose ENERGY STAR® rated fixtures that meet strict efficiency guidelines
- Zone your lighting: Instead of turning on every light in the room, set up zones that allow more targeted use
- Seal gaps around housings: Prevent heat or air loss with airtight trims or baffles, especially in attic areas
Bonus tip: Some smart lighting systems let you automate on/off schedules based on time of day or natural light, saving energy without you even thinking about it.
Fire Safety and IC-Rated Can Lights in Attic Ceilings
When remodeling can lights—especially in ceilings near insulation—it’s essential to prioritize fire safety. This is where IC-rated fixtures come in.
IC stands for Insulation Contact, meaning these can lights are built to safely operate in direct contact with ceiling insulation. Without this rating, you’d have to keep insulation several inches away, creating energy leaks and fire hazards.
Why IC-rated lights matter in attics and upper floors:
- They prevent overheating, even when surrounded by insulation
- They reduce the risk of electrical fires caused by trapped heat
- They’re often required by local building codes, especially in colder climates
Always check the label or packaging to confirm the fixture is IC-rated, and avoid installing non-IC fixtures in any insulated ceiling. It’s a small upgrade with major peace of mind.
Cost of Remodeling Can Lights
Average Cost Breakdown (Labor, Materials, Permits)
The cost of remodeling can lights can vary based on your location, the complexity of the job, and whether you’re hiring a pro or doing it yourself. On average, homeowners can expect to pay:
- $20–$60 per fixture for materials (including LED retrofit kits or housings)
- $100–$250 per fixture for professional installation
- $0–$150 for permits, depending on local regulations and electrical work required
If you’re simply swapping out old fixtures with retrofit kits, your costs stay lower. But if you’re cutting new holes, rewiring, or working with vaulted ceilings, expect labor to increase.
Sample cost estimate for a basic 4-light remodel (with pro help):
- Materials: $160
- Labor: $600–$800
- Permit: $100
- Total: $860–$1,060
DIY installs could bring that total down to under $300, depending on your tools and experience.
Factors That Influence the Total Cost
Several variables affect how much you’ll ultimately spend on your lighting remodel:
- Number of lights: More fixtures mean higher labor and material costs
- Ceiling height and type: Vaulted or plaster ceilings require more time and care
- Electrical access: Homes with outdated wiring or no attic access may need upgrades
- Location: Urban areas typically have higher labor rates
- Fixture type: Smart lights or designer trims can cost more than standard options
- Permit requirements: Some cities require electrical permits for even minor lighting work
Tip: Always get a written quote from licensed electricians and ask if the cost includes patching and painting.
Budget-Friendly Upgrades That Still Look Premium
You don’t have to spend a fortune to get a polished, high-end look. Here are a few smart ways to remodel your can lights on a budget:
- Use LED retrofit kits: They eliminate the need for new housings and can be installed in minutes
- Stick with standard trims in modern finishes like matte white or brushed nickel
- Do the demo work yourself, like removing old fixtures and prepping the ceiling
- Buy in bundles: Many online retailers offer discounts when buying 4 or more fixtures
- Look for ENERGY STAR® certified lights, which may qualify for rebates from your local utility provider
A small investment in lighting can go a long way. Even modest upgrades can make your room feel newer, brighter, and more professionally designed—without blowing your budget.
Common Mistakes to Avoid When Remodeling Can Lights
Installing Too Few or Too Many Fixtures
One of the most frequent mistakes homeowners make during a lighting remodel is getting the layout wrong. Either the space ends up too dark because not enough fixtures were installed, or it feels overly bright and sterile because there are too many.
Here’s how to avoid that:
- Use the rule of thumb: 1 can light for every 4–6 square feet of ceiling space
- Consider the purpose of the room—a kitchen may need more task lighting, while a bedroom may benefit from softer, fewer lights
- Think in layers: use recessed lights for general lighting, then add accent or task lighting separately
- Avoid the “runway effect” (long rows of lights too close together), which can make a ceiling look cluttered and disorienting
Tip: Start with a rough sketch or digital layout before buying your fixtures. Simulate the spacing to see how evenly the light will be distributed.
Ignoring Insulation and Heat Clearance Rules
Another critical mistake is installing fixtures without considering insulation or clearance requirements. This is more than just poor planning—it’s a fire hazard.
What to watch for:
- Always use IC-rated can lights if your ceiling is insulated. They’re designed to come into direct contact with insulation safely.
- If you’re using non-IC-rated fixtures, there must be a minimum 3-inch gap around them—otherwise, heat can build up and cause fires.
- Make sure the fixtures are airtight if you live in extreme climates to prevent energy loss and moisture buildup.
Reminder: Always check your attic or ceiling structure before purchasing fixtures. The safest approach is to assume insulation is present and choose IC-rated, airtight options by default.
Skipping Permit or Code Requirements
Many homeowners assume that changing a light fixture is a minor project—but depending on your location and the extent of the remodel, permits may be required.
Skipping permits or not following local electrical codes can result in:
- Fines or inspection failures during home resale
- Voided insurance coverage in the event of fire or damage
- Unsafe wiring that may not meet current safety standards
When permits are usually needed:
- Adding new wiring or circuits
- Modifying structural elements (like joists for fixture clearance)
- Installing fixtures in wet areas (bathrooms, basements)
To stay on the safe side, call your local building department or consult a licensed electrician. Permits may feel like a hassle—but they ensure your remodel is both legal and safe.
Maintenance and Long-Term Care for New Can Lights
Cleaning and Dusting Tips for Recessed Fixtures
Recessed lights are low-profile, but that doesn’t mean they don’t collect dust or grime—especially in kitchens or bathrooms. Keeping them clean helps maintain brightness and prevents buildup that can overheat the fixture over time.
Here’s how to safely clean your can lights:
- Turn off the power at the switch or circuit breaker.
- Allow the bulb and trim to cool down completely.
- Remove the trim ring if it’s detachable (most are held by spring clips).
- Use a microfiber cloth or soft brush to wipe away dust from the trim and bulb.
- For greasy areas (like over a stove), use a damp cloth with mild soap, but never let moisture drip into the fixture housing.
Tip: Avoid using harsh cleaners or spray bottles near electrical components. Dry all parts thoroughly before reinstalling.
How to Replace Bulbs or Trim without Damaging the Ceiling
Replacing LED modules or decorative trim is easy, but it should be done with care to avoid damaging your ceiling or the fixture.
Here’s a step-by-step guide:
- Gently pull down the trim using your fingers—most trims are held by spring-loaded clips
- If changing the bulb, disconnect the power source (even for LED modules) before removing
- When reattaching, guide the clips back into the housing without bending or forcing them
- Be mindful of ceiling paint—if the trim is tight or stuck, use a thin plastic pry tool instead of a screwdriver to avoid scuffing
Pro tip: Use gloves when handling LEDs to avoid leaving fingerprints on lenses, which can cause hot spots or clouding.
Troubleshooting Flickering or Dimming Issues
Even with new lighting, you might experience flickering, dimming, or inconsistent brightness—and it’s not always the bulb’s fault. Here are some common causes and quick fixes:
- Incompatible dimmer switches: Not all dimmers work with LEDs. Make sure your switch is labeled “LED-compatible.”
- Loose connections: Check the wiring behind the switch or inside the fixture if flickering is frequent.
- Voltage fluctuation: Homes with older wiring may experience dips in voltage. A surge protector or upgraded panel may be needed.
- Bulb quality: Not all LED bulbs are created equal—cheaper ones often flicker or fade prematurely.
When to call a pro: If you’ve replaced the bulb and switch but still see problems, there may be a deeper electrical issue that requires an electrician.
FAQs About Remodeling Can Lights
Do I Need a Permit to Remodel Recessed Lights?
It depends on your local building codes and the scope of your project. If you’re simply replacing old fixtures with modern LED retrofit kits—no wiring changes, no structural modifications—you likely won’t need a permit.
However, you may need one if you’re:
- Adding new wiring or circuits
- Installing lights in wet areas like bathrooms or basements
- Modifying the ceiling structure (e.g., cutting new holes or reinforcing joists)
- Upgrading an older home with outdated or unsafe wiring
Pro tip: Always check with your local building department before starting. A quick call can save you time, money, and headaches—especially if you plan to sell your home in the future.
Can I Replace Old Can Lights with LED Without Rewiring?
Yes! One of the best things about modern LED retrofit kits is that they’re designed to fit right into your existing recessed light housings—no rewiring required in most cases.
All you need to do is:
- Remove the old bulb and trim
- Plug the new LED module into the existing socket using the included adapter
- Push the module into place using spring-loaded clips
This makes it easy for DIYers to upgrade outdated lighting with energy-efficient, long-lasting LEDs—all without touching any wires. Just make sure your current housing is in good condition and your circuit can handle the LED load (which is usually very low).
What’s the Lifespan of Modern Can Lighting?
Modern LED can lights are built to last. On average, you can expect:
- 20,000 to 50,000 hours of use per fixture
- That’s about 15 to 20 years of life under normal household conditions
Compare that to traditional incandescent bulbs, which last only 1,000–2,000 hours, and it’s clear why LED lighting has become the new standard.
To maximize lifespan:
- Avoid low-quality or off-brand LED kits
- Keep fixtures clean and well-ventilated
- Use compatible dimmers and avoid power surges
Bonus tip: Many high-end LED kits include warranties ranging from 5 to 10 years, giving you extra peace of mind.
Expert Tips for a Flawless Remodel
Tips from Lighting Designers and Electricians
Professionals who work with lighting every day know how to get the best results—without the frustration. Here are some insider tips to help your remodel go smoothly:
- “Light from the outside in”: Designers often recommend placing can lights around the perimeter of a room first, then filling in toward the center. This gives a more balanced effect.
- Aim for 3-point lighting: Combine recessed lighting with ambient and accent lights for depth and flexibility.
- Check ceiling joists before planning: Electricians stress the importance of knowing your ceiling structure before drilling. Hidden beams or ducts can ruin a perfect plan.
- Test before installing all fixtures: Install one or two lights first, test the beam spread and spacing, and adjust as needed before doing the rest.
Mistakes Homeowners Wish They’d Avoided
Many people dive into lighting remodels without a clear plan—and regret it later. Here are some of the most common “I wish I’d known” moments from real homeowners:
- “I didn’t think about light temperature.” Mixing cool and warm-toned lights in one room can feel chaotic.
- “I used too many lights.” Over-lighting is just as bad as under-lighting. It creates glare and makes a room feel harsh.
- “I skipped the dimmers.” Without dimming options, you lose control over mood and energy efficiency.
- “I bought the cheapest fixtures.” Budget options can look good at first but fail faster and often lack compatibility with smart systems.
Lesson? Take your time. Think about the function of each space—not just the fixtures themselves.
How to Future-Proof Your Lighting Setup
If you’re investing in lighting now, it’s smart to plan for the future. Technology and design trends are changing quickly, and a little foresight can save you from another remodel in a few years.
- Go LED: It’s now the industry standard for performance, longevity, and efficiency.
- Choose smart-compatible fixtures: Even if you don’t use smart systems now, it’s worth having the option down the road.
- Stick with adjustable or replaceable trims: Styles evolve, and being able to swap out the trim keeps your setup looking fresh.
- Install extra switch boxes or conduits: This makes future upgrades easier without tearing up walls or ceilings.
Lighting is one of the easiest upgrades to “future-proof” if you plan ahead during your remodel.
Conclusion
Remodeling can lights might seem like a small project, but it can completely transform how your home looks and feels. From improving brightness and energy efficiency to creating a modern, polished look, the benefits are immediate—and long-lasting.
Whether you choose to DIY or bring in the pros, the key is thoughtful planning. Focus on layout, choose the right fixtures for your ceiling and needs, and never overlook safety or building codes.
By following expert advice and avoiding common mistakes, you’ll not only upgrade your lighting—you’ll elevate your entire space. And with smart tech and LED efficiency built into the plan, you’ll enjoy those upgrades for years to come.

I’m Bilal, the founder of Dwellify Home. With 6 years of practical experience in home remodeling, interior design, and décor consulting, I help people transform their spaces with simple, effective, and affordable ideas. I specialize in offering real-world tips, step-by-step guides, and product recommendations that make home improvement easier and more enjoyable. My mission is to empower homeowners and renters to create functional, beautiful spaces—one thoughtful update at a time.