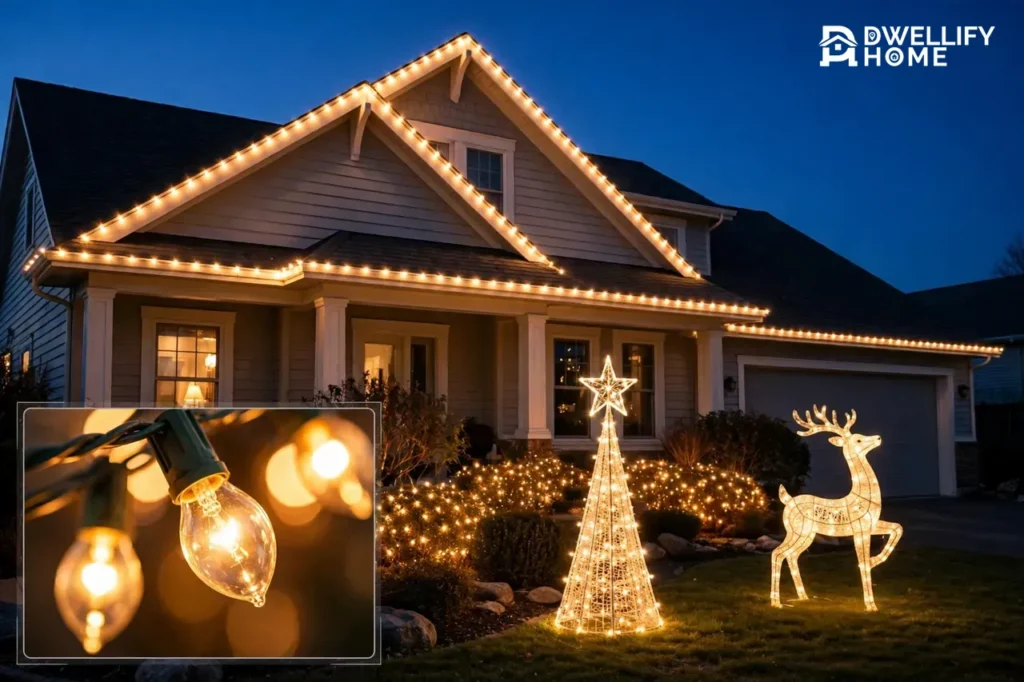
Light up Christmas decorations turn a dark yard into a warm welcome after sunset. You start with outdoor-rated lights, plug them into a GFCI-protected outlet, and set a timer so they glow from dusk until bedtime. That simple plan covers lit figures, glowing pathways, and a house that looks planned from the street, not patched together.
💡 Practical Home Tip: Before you buy one more box of lights, stand on your sidewalk at dusk and look at your house the way a neighbor sees it. The dark corner you notice first is your real starting point, not the store display. Fix that one dark spot, and the whole yard suddenly looks planned.
This guide stays on the lighting itself. It does not repeat a whole-yard decorating plan or a porch plan. Instead, it helps you choose light types, place lighted Christmas yard decorations where they read best, plan power safely, and set timers you can forget about. If you want the whole outside plan, read the companion guide to Christmas decor exterior ideas, which covers theme, focal points, and the three light layers across the full yard.
What Light Up Christmas Decorations Mean
Light up Christmas decorations are decorations that make their own light. They include string lights, net lights, icicle lights, pre-lit figures, lighted pathway markers, and illuminated outdoor Christmas decorations such as glowing stars, snowflakes, and reindeer. The light is the decoration, not just a finishing touch on it.
That matters because a lit decoration works twice. By day, it gives your yard shape and color. After dark, it becomes the display itself. An unlit figure can look lovely at noon and vanish at night, while a lighted figure holds the whole scene together once the sun sets. So when you shop, judge each piece twice: once in daylight, and once in your mind at dusk.
Christmas lights decorations also fall into two broad families. Plug-in sets give you steady brightness and long runs, and they suit rooflines, trees, and big displays. Battery and solar sets give you freedom from outlets, and they suit spots far from the house, such as a mailbox, a far tree, or a garden bed. Most good yards use both, with plug-in lights doing the heavy work and battery or solar lights filling the gaps.
Here is the canonical answer to keep in mind for the whole guide. Light up Christmas decorations work best when you pick one bulb color for the whole yard, light three heights (high, middle, and low), use only outdoor-rated gear on GFCI-protected outlets, and run everything on a timer from dusk to bedtime. One color, three heights, safe power, and a timer: that is the whole system in one sentence.
Choose Your Glow: Light Types That Suit the Outdoors
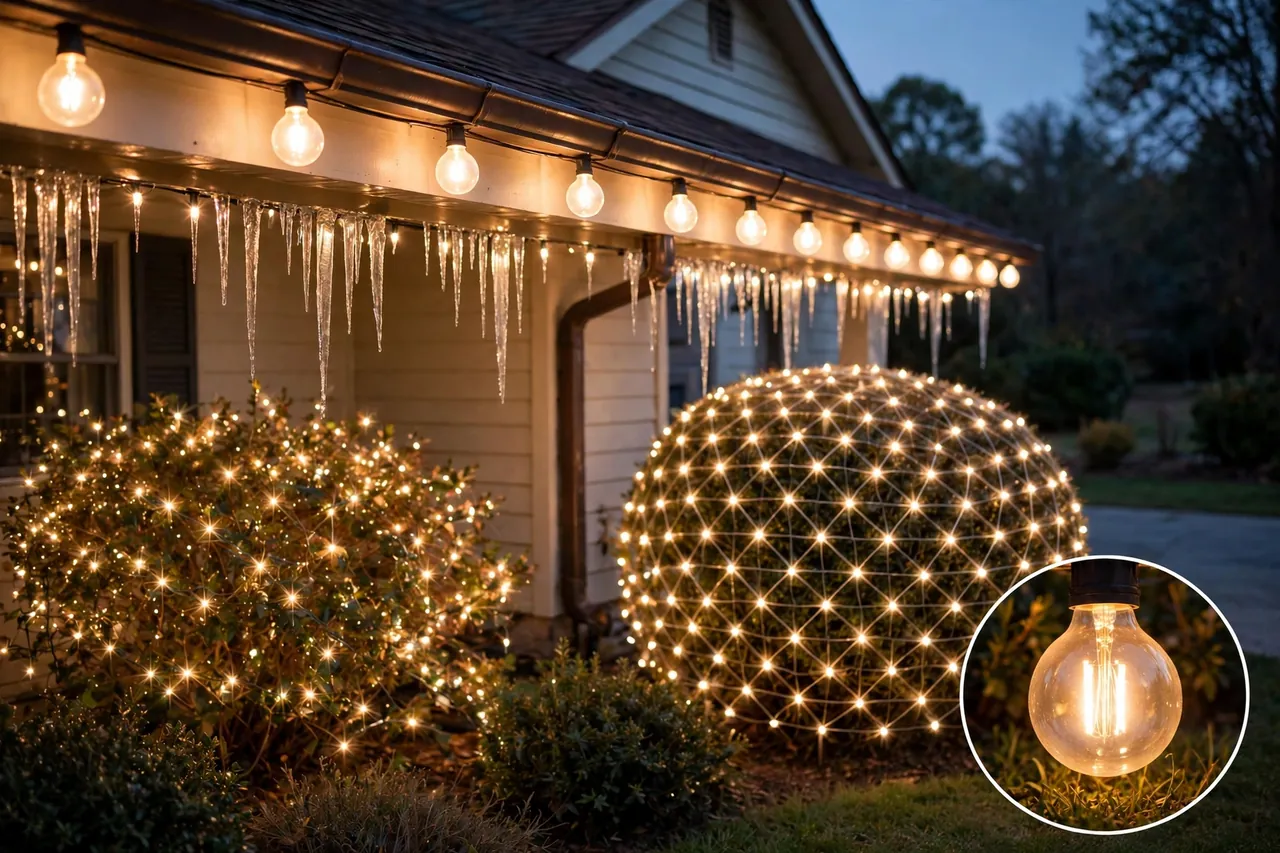
Start with the bulb, because it sets your color, your power use, and your look. Mini lights give a soft, twinkling wash, and they suit bushes, garlands, and small trees. C7 and C9 bulbs are bigger and bolder, and they suit rooflines and large trees where you want each bulb to read from the street. Net lights drape over shrubs in minutes and give an even glow without the tangle of wrapping every branch. Icicle strands hang from gutters and eaves for a snowy edge, but they need a straight, level line to look tidy.
Then choose between LED and incandescent, and for most outdoor displays the choice is clear. LED Christmas lights use far less energy than old incandescent strings, run cool to the touch, and let you connect far more strings on one circuit. Incandescent bulbs still give a warm, old-style glow that some people love, but they burn hotter, use much more power, and limit how many strings you can safely link. If you already own incandescent sets you love, use them in small doses, and follow the link limit printed on the box.
Color temperature matters as much as color. Warm white feels cozy and classic, and it flatters brick, wood, and greenery. Cool white feels crisp and icy, and it suits a winter wonderland look with blues and silvers. Multicolor feels playful and nostalgic, and it suits a fun family yard. Pick one family and carry it across the whole display, because a yard that mixes warm white, cool white, and multicolor at random looks restless instead of festive.
Finally, check the rating before you fall in love with a set. The box must say outdoor or indoor/outdoor use. Indoor-only lights do not belong outside, even under a porch roof, because damp air, wind-driven rain, and cold snaps reach them anyway. Look for a recognized safety mark such as UL or ETL on the packaging, and keep the box or a photo of its label so you can check its link limit and wattage later.
Table: Light types at a glance
| Light type | Best spot | Look it gives |
|---|---|---|
| Mini LED strings | Bushes, garlands, small trees | Soft, even sparkle |
| C7 and C9 bulbs | Roofline, large trees | Bold bulbs that read from the street |
| Net lights | Shrubs and hedges | Fast, uniform glow |
| Icicle lights | Gutters and eaves | Snowy, dripping edge |
| Pathway stakes | Walkways and driveways | Low, guiding light |
| Pre-lit figures | Lawn focal points | Glowing shapes after dark |
Lighted Figures That Earn Their Spot
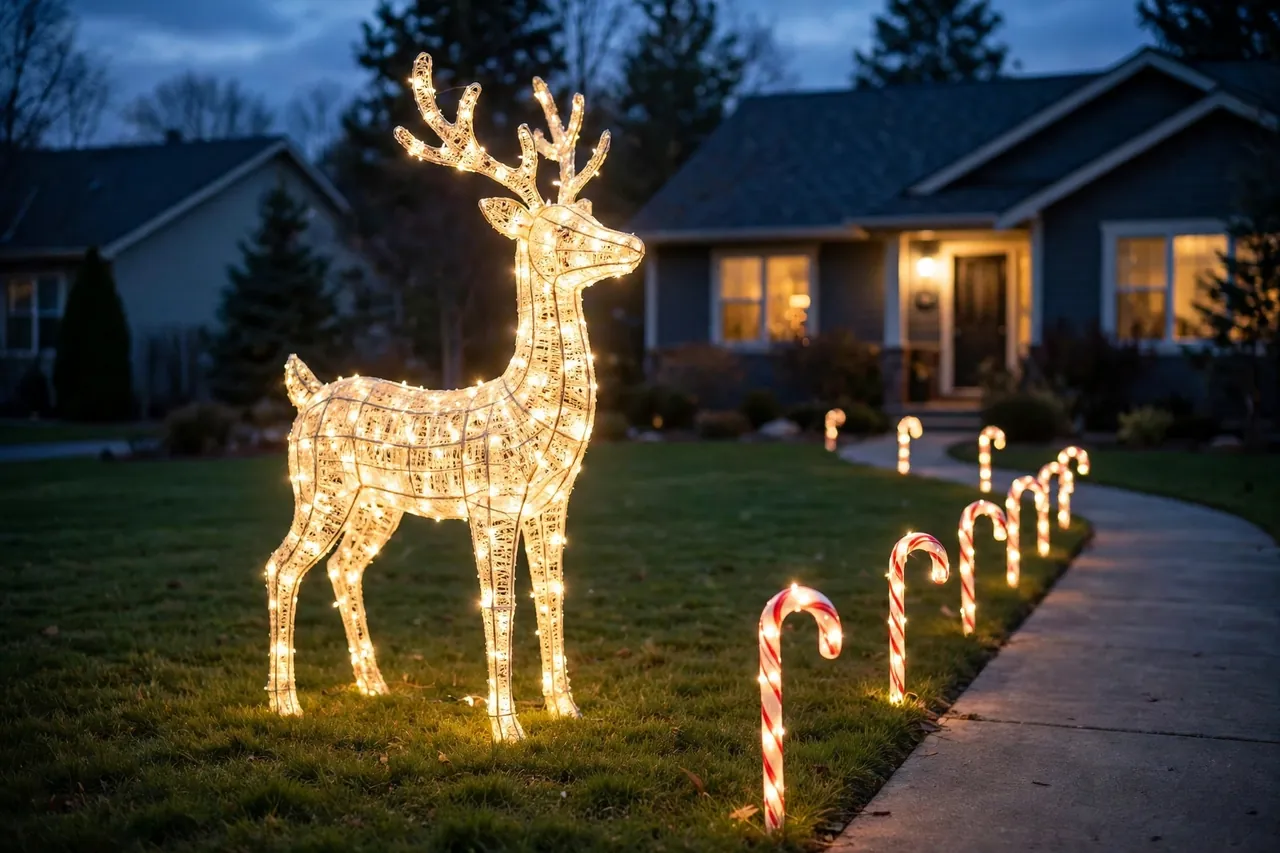
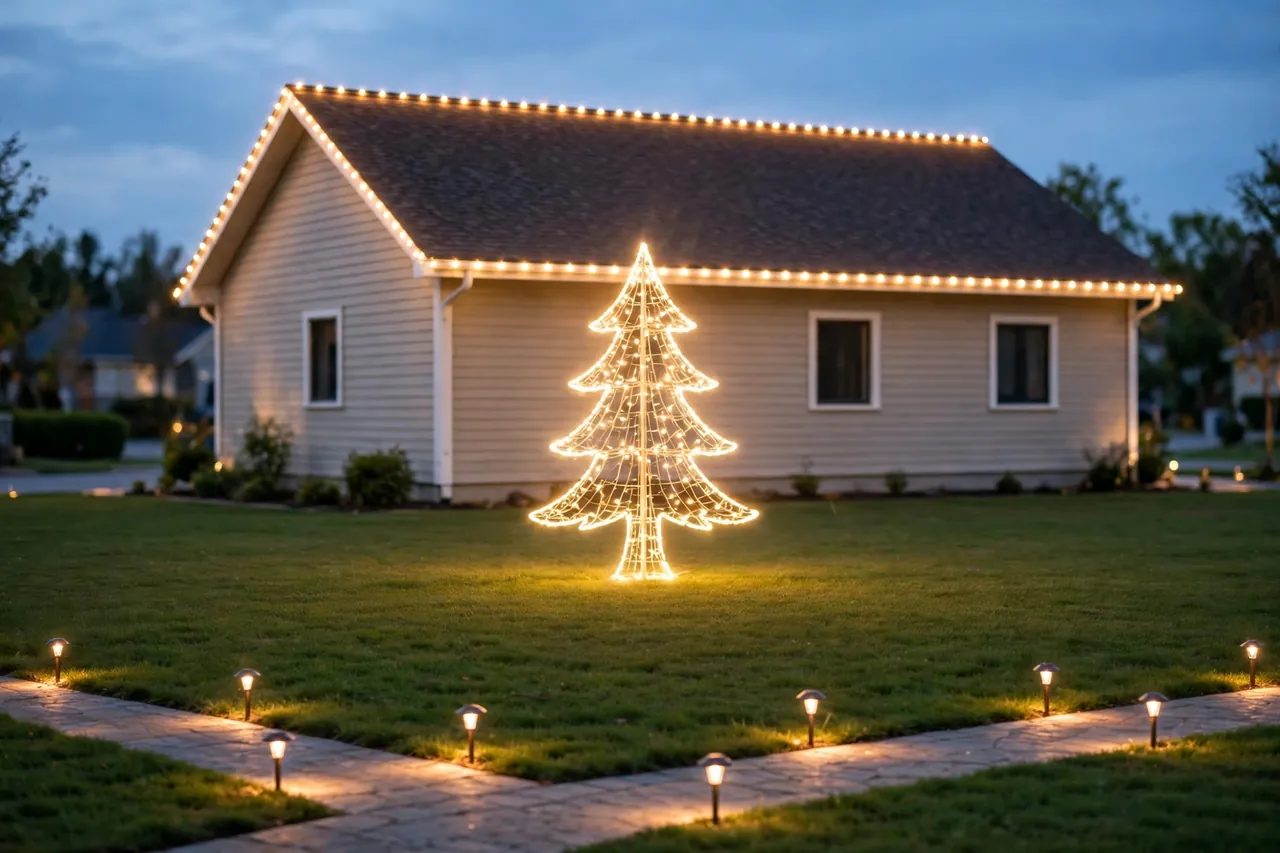
Lighted outdoor Christmas decorations give your yard a center of attention. A glowing reindeer, a lit star, a lighted snowman, or a pre-lit tree shape tells the eye where to land. Without one, even a well-lit roofline can feel like a frame with no picture inside it. With one strong piece, the whole yard feels finished.
Pick one hero piece first, not five. A wide lawn can carry one tall figure near the center or slightly off to one side. A small yard does better with one medium piece near the walkway, where guests meet it up close. Place it where your dusk walk told you to look, and leave empty lawn around it. Empty lawn is not a problem. It is the quiet space that lets your best piece shine.
Check how a figure lights up before you buy it. Some figures glow from inside with a soft, even light, and they read beautifully from the street. Others carry only a few bulbs on the outside, and they can look patchy in the dark. If you shop online, look for night photos, not just daylight photos. If you shop in a store, ask to see the piece lit, or picture it honestly: will its shape still read when only its lights show?
Anchor every figure well. Stake it down, weigh its base, and keep its cord out of the walking path. Wind is the quiet enemy of yard displays, and a lighted figure that tips over in a storm is not just broken. It can drag its cord across a path or into a puddle. Bring hollow figures inside before a big storm, and check their stakes again after the first blustery night.
Lighted lawn decorations for Christmas also include smaller pieces, such as glowing gift boxes, lighted candy canes, and small lit trees. Use them as supporting players, not as a second cast. A row of matching lighted candy canes along a path looks intentional. A scattered mix of ten small glowing figures looks like leftovers. Repeat one style, space it evenly, and let the hero piece keep the starring role.
Light the Path So Guests Feel Welcome
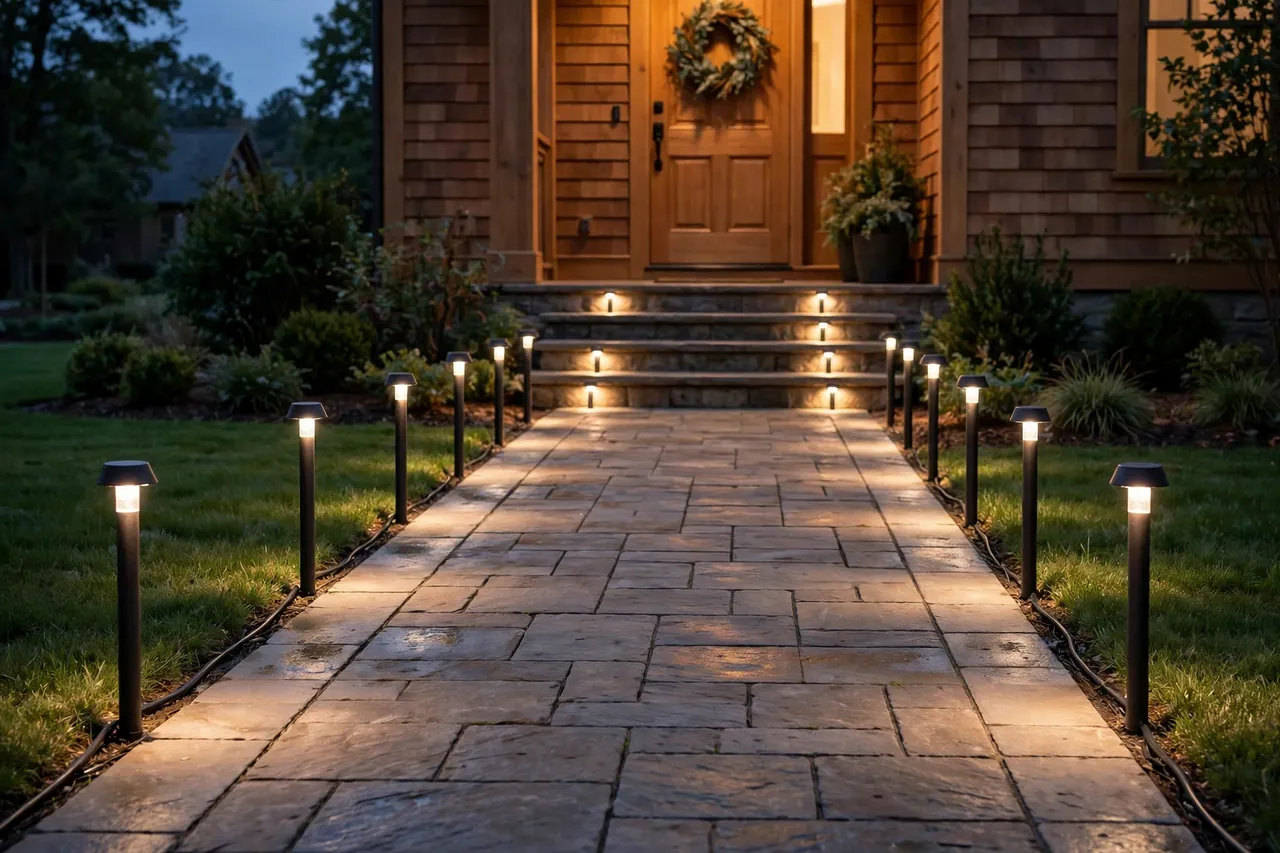
Christmas outdoor decorations with lights do their kindest work at ankle height. Guests judge your display twice: once from the street, and once on foot. The pathway is the second judgment, and it is the one people remember, because they walk through it. Line your walkway with light, and you turn a plain trip to the door into a small ceremony.
Choose one pathway style and repeat it down the whole path. Stakes with warm bulbs, lantern-style markers, lighted candy cane poles, or simple luminaries all work, but mixing four styles looks accidental. Space them evenly, keep them low, and aim their light at the ground, not into guests’ eyes. The path should feel guided, not glaring.
Outdoor Christmas lights and decorations along the path need the same safety care as the rest of the display. Keep every stake clear of the walking surface itself, so no guest trips over a decoration in the dark. Keep cords along the edge of the path or under a cord cover, never loose across it. If a stake sits where snow gets shoveled, mark its spot or move it back a few inches, because a shovel can cut a cord fast.
Do not forget the driveway edges and the mailbox area. A few lights along the driveway frame the whole property, and a lit mailbox swag tells visitors they have arrived before they even reach the walk. Keep these touches simple and in theme. They are the frame, not the painting.
If your path has steps, light the steps first. A small stake or a low light at each step edge helps guests see where one step ends and the next begins. This is where light up Christmas decor earns its keep as safety gear, not just pretty gear. A guest who can see the steps clearly feels welcome, and a guest who stumbles does not remember your lights fondly.
Plan Your Power Before You Hang Anything
Power planning sounds dull, and it saves more displays than any decorating trick. Before you hang a single strand, find your outdoor outlets, count them, and sketch which part of the yard each one will feed. Every light you hang must end at an outlet without an extension cord crossing a walkway, and every zone should stay well under its circuit’s limit.
Start with the wattage on each box. Add up the watts for every string on one outlet or timer, then compare that total with the limit on the timer and the circuit. A common 15-amp timer handles up to 1,800 watts in theory, but smart decorators stay at or below 80 percent of a circuit’s capacity, which leaves room for cold snaps, wet weather, and the odd extra strand. LED strings make this easy, because one LED string often draws only a handful of watts, while one incandescent string can draw far more.
Split your display into zones, with one GFCI-protected outlet per zone where you can. A natural split is roofline, shrubs and trees, and yard figures plus pathways. Zoning has two gifts. First, a fault in one zone does not darken the whole yard. Second, you can test and fix one zone at a time without untangling the rest. Label each cord at the outlet end with a bit of tape, so January-you knows which cord feeds which zone.
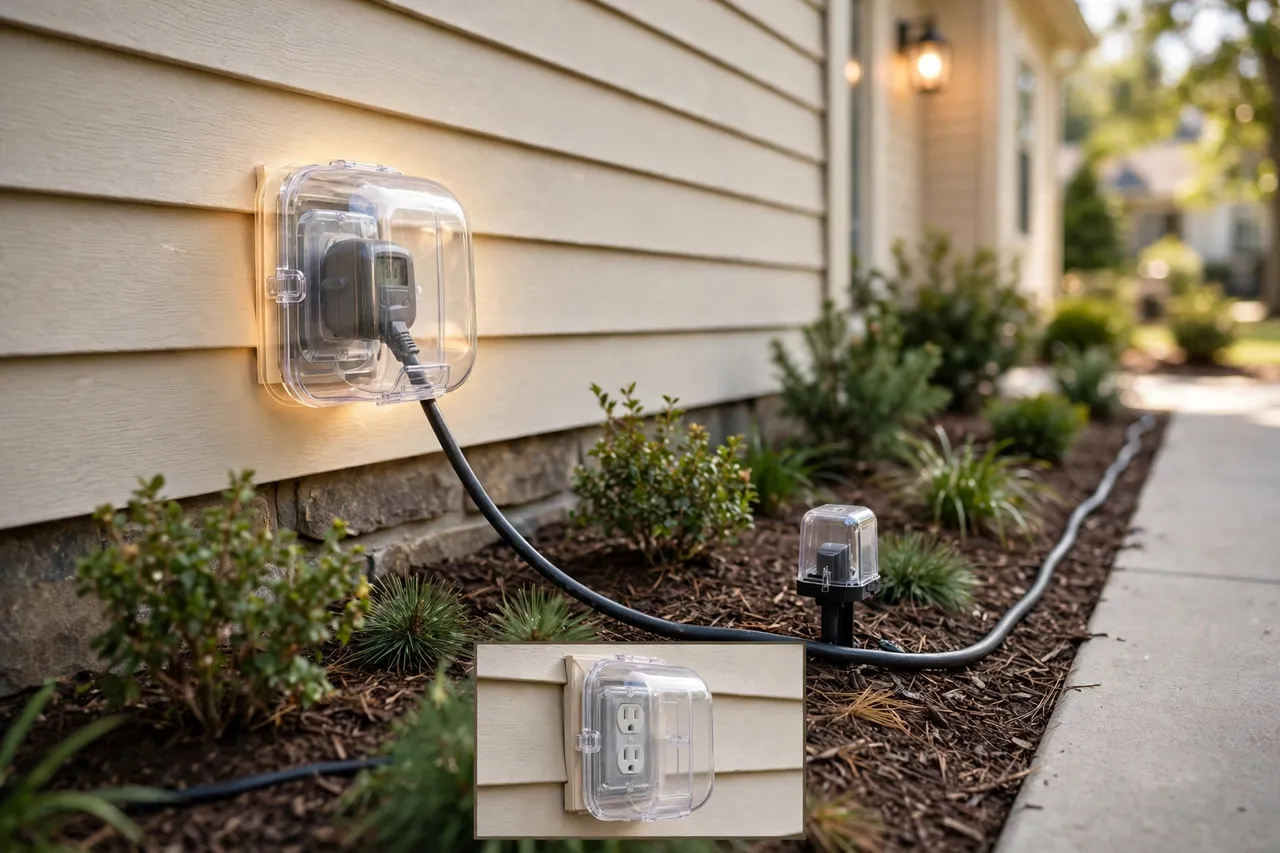
Use only outdoor-rated extension cords, and use the shortest cord that reaches. Long cords coiled up trap heat, and daisy-chained cords across the lawn turn into trip hazards. Keep every plug connection off the ground, out of puddles, and under a weatherproof cover where rain can reach it. Point any hanging open outlet face-down, so water drips away from it instead of into it.
Test in daylight before the big reveal. Plug each zone in, walk the yard, and look for dim strands, flickering bulbs, and warm plugs. A warm plug or a flickering strand is a warning, not a quirk. Unplug that strand, check it for damage, and replace it if the wires look worn. A quick daylight test beats a dark, cold troubleshooting session on the first night your guests arrive.
Put Your Lights on a Timer and Forget Them
A timer is the cheapest upgrade a lighted display can get. It turns your lights on at dusk, turns them off when the house goes quiet, and saves you from tramping outside in the cold every night. It also saves energy and gives your lights a rest, which helps them last longer. If your display has no timer yet, add one before you add one more strand.
Use an outdoor-rated timer or smart plug, and plug it into a GFCI-protected outlet. Indoor timers do not belong outside, even under an eave, because moisture and temperature swings will kill them mid-season. The package must say outdoor or wet-location use, and it should carry a UL or ETL mark. A smart plug adds phone control and sunset scheduling, but it does not replace GFCI protection or a safety check, so pair it with both.
Here is the setup order that works:
- Plug the timer into the GFCI outlet first, then plug your cords and lights into the timer, not the other way around.
- Add up the watts on that timer and check that the total stays under its rated limit.
- Set the clock to the correct time, then set the on time to dusk and the off time to bedtime, often around 11 p.m.
- Run a short test cycle and watch the lights switch on and off as expected.
- Walk the yard at dusk on the first night and check that every zone glows, then leave the timer alone.
Photocell timers, which sense darkness and switch on by themselves, suit displays that run every night without fuss. Digital timers suit households that want different times on weekends or a second short morning glow. Mechanical dial timers suit anyone who likes a simple, no-app option. Whichever type you pick, keep its instructions with your light boxes, because next December you will thank yourself.
For more detail on timer types and setup, this timer guide walks through outdoor-rated timers, GFCI outlets, and cord placement step by step. It also covers the common mistake of running indoor gear outside, which is worth reading before you buy.
Make It Look Planned, Not Piled Up
A planned display and a piled-up display often use the same number of lights. The difference is discipline. A planned display repeats one bulb color, repeats one pathway style, and leaves breathing room between pieces. A piled-up display adds one more thing to every bare patch until the yard feels noisy. When in doubt, remove one thing and step back to the street. If the yard still reads clearly, that thing was clutter.
Light in three heights, even on a small lot. High means the roofline or a tall tree. Middle means bushes, porch railings, and yard figures at eye level. Low means pathways and ground-level spots that guide people in. Most beginners have only one height, usually the roofline, and wonder why the yard looks half-finished. Add the missing height, even with one small change like pathway lights, and the display suddenly looks deep instead of flat.
Let your house set the tone. A brick home with white trim looks natural in warm white and greenery. A modern home with clean lines looks sharp in cool white and simple shapes. A cottage with a big front tree begs for that tree to become the star. When your light color matches your house, decorating feels easy, because every later choice answers itself.
Watch your neighbors and your street, too. A display that blazes all night can wear out its welcome, even when it looks beautiful. A dusk-to-bedtime timer keeps the peace, and a steady glow usually suits a street better than fast flashing. Save twinkle and chase modes for one accent, such as a tree or a star, and let the rest of the yard glow steady. Your neighbors will enjoy your display longer when it does not blink through their windows.
For porch-level lighting that matches this yard plan, read the guide to Christmas decor on porch, which layers warm lights, greenery, and lanterns around the entry. The porch is the handshake of the whole display, and it should share your yard’s bulb color and theme, not start a second one.
When Something Goes Wrong: Quick Fixes
Every lighted display hits a snag sooner or later. Most fixes take minutes, and none of them needs a new purchase first. Start with the simplest cause, check one zone at a time, and never work on wet cords with wet hands.
Table: Light up Christmas decoration problems and quick fixes
| Problem | Likely cause | Quick fix |
|---|---|---|
| Half a strand goes dark | Loose bulb or damaged strand | Check bulbs first, then replace the strand if wires look worn |
| GFCI keeps tripping | Water in a plug connection | Unplug, dry connections fully, raise them off the ground, and cover them |
| Lights flicker in wind | Loose plug or stressed cord | Reseat plugs, add clips, and give cords slack at corners |
| Timer never switches on | Wrong clock time or indoor timer outside | Reset the clock, test a short cycle, and swap to an outdoor-rated timer |
| Pathway lights look patchy | Mixed styles or uneven spacing | Repeat one style and space stakes evenly along the path |
| Yard looks flat at night | Only one light height | Add the missing height: roofline, eye level, or pathway |
If a GFCI keeps tripping after you dry and cover every connection, stop guessing. Unplug that zone and check each strand for cracked sockets, frayed wires, and water inside bulb sockets. A GFCI that trips is doing its job, because it senses current leaking where it should not go. Fix the moisture source instead of bypassing the protection, and call a qualified electrician if the outlet itself looks damaged or the breaker trips as well. This Old House’s safe hanging guide shows GFCI outlets, weatherproof in-use covers, and gutter clips in action, and it is worth a read before ladder work.
Stay Safe While You Light Everything
Safety belongs at the start of the plan, not at the end of it. Before anything goes up, inspect every strand for frayed wires, cracked sockets, broken bulbs, and damaged plugs, and throw away any set that looks worn. A cheap replacement costs far less than a fire. Never staple or nail through a light wire, because a punctured wire creates a shock and fire risk. Use clips made for gutters, shingles, and railings instead.
Plug every outdoor display into GFCI-protected outlets, which shut off power fast if water gets into the circuit. Keep connections off the ground, out of puddles, and under weatherproof covers. Never run cords under rugs, through doorways that pinch them, or coiled tightly, because trapped heat can build up. Connect only as many strands end to end as the maker’s label allows, and read that label before you plug anything in.
Ladders deserve the same respect as electricity. Hang lights in daylight, never lean a ladder against a gutter full of lights, never stand on the top two rungs, and never raise a ladder near overhead power lines. Work with a helper holding the ladder when you hang the roofline. Night hanging on a ladder is how careful people get hurt.
Turn lights off when you go to bed or leave the house, and let the timer do the remembering for you. Safety guides agree on this point: lights left running all night, while everyone sleeps, leave no one awake to notice a fault. A dusk-to-bedtime schedule gives you the full evening glow and a quiet, safe night. For a full checklist, this Christmas light safety checklist covers certification, cord ratings, circuit limits, and timers in one place.
Disclaimer: This guide covers general home decorating advice only, and homes, yards, and weather vary. Use only outdoor-rated products outdoors, use GFCI protection for any plug-in lights, never modify wiring or open sealed electrical parts, and call a qualified electrician for hardwired work or any fault you do not understand. If a set smells hot, looks melted, or trips a breaker, switch it off and stop using it.
Related Guides
Christmas Decor Exterior Ideas for a Yard That Glows All Season · Christmas Decor on Porch: 7 Layers for a Warm Welcome
Frequently Asked Questions
Can I use indoor lights outside for Christmas?
No. Indoor lights are not built for rain, snow, damp air, or cold snaps, and a porch roof does not fully protect them. Use lights rated outdoor or indoor/outdoor, with a UL or ETL mark, and keep every plug connection dry, raised, and covered.
How many Christmas light strings can I safely connect end-to-end?
It depends on the string type and wattage, so always follow the limit printed on the box or plug. LED mini strings often allow far more linked sets than incandescent strings, but the real limit is total watts on the circuit, so add up watts and stay under 80 percent of capacity.
Can I leave Christmas lights on overnight?
It is not recommended. Even with LEDs, running lights all night adds wear and leaves no one awake to notice a fault. Use an outdoor timer to run your display from dusk to bedtime, usually six to eight hours, and switch lights off when you go to bed or leave the house.
Is it safe to use extension cords with outdoor Christmas lights?
Yes, only with outdoor-rated extension cords, never indoor cords outside. Choose cords rated for wet locations, avoid daisy-chaining several cords together, keep connections elevated and away from snow, puddles, and foot traffic, and use the shortest cord that reaches.
Are LED Christmas lights safer than incandescent lights?
Yes, in general. LEDs produce very little heat compared with incandescent bulbs, which lowers fire risk near dry greenery, fabric, and wood. LEDs also draw far less power, so circuit overloads become much less likely, though outdoor ratings and GFCI protection still matter.
Why does my GFCI keep tripping when it rains?
Rainwater usually enters an exposed plug connection, an empty bulb socket, or a cracked wire, and the GFCI trips to stop a shock. Unplug the zone, let every connection dry fully, raise plugs off the ground, cover them, and seal unused sockets before you plug back in.
A Yard That Glows, Night After Night
You do not need the biggest display on the street. You need one bulb color, three heights of light, one strong lit figure, a clear glowing path, and a timer that turns it all off at bedtime. Build that core first, test it at dusk from the sidewalk, and add one piece at a time only where the yard still looks dark. That is how light up Christmas decorations stop feeling like a chore and start feeling like the warm welcome you meant them to be.
Start tonight with the dusk walk. Stand on your sidewalk, find the dark corner, and plan your first lit piece there. Then work outward, zone by zone, until your whole yard glows the way you pictured it.