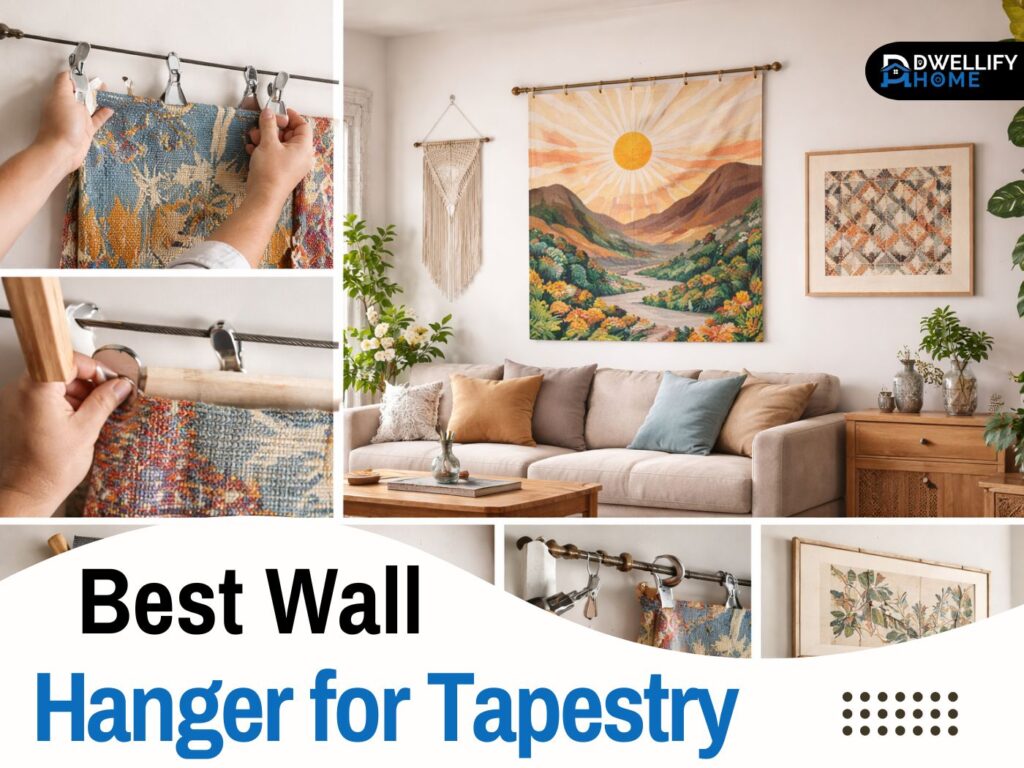
A tapestry can make a room feel warmer and more finished without adding bulky décor. The part that decides whether it looks tidy or sloppy is the hanging method. If the support is weak or uneven, you’ll see sagging in the middle, puckering at the top edge, or small fabric pulls that never quite go away.
I’ve installed tapestries and textile wall pieces in homes, rentals, cafés, and offices for more than 10 years. The best results always come from matching the hanger to three things: tapestry weight, wall type, and the look you want. Once those line up, the installation feels straightforward and the tapestry sits like it belongs there.
This guide walks you through the most reliable hanging options, how to prevent sagging and wrinkles, and the mistakes I see most often when people hang fabric art for the first time.
Snippet-ready definition:
A wall hanger for tapestry is the hardware that supports fabric art on a wall, like clips, rods, battens, or frames. People use it to hang textiles neatly, prevent sagging, and protect both the fabric and the wall.
Mission Statement:
At Dwellify Home, our mission is to make home décor feel simple and doable, with practical, experience-based guides that help you choose the right materials, hang pieces safely, and create a space that feels like you.
What is a wall hanger for tapestry?
A wall hanger for tapestry is the hardware and method that supports textile art on a wall. It can be as simple as a clip system, or as structured as a batten mount or a frame.
Most options fall into a few categories:
- Clips or clamps
- Rods and brackets
- Hanging kits
- Velcro with a wooden batten
- Frames or shadow boxes
The real difference is not just style. It’s how evenly the fabric is supported. Even support keeps the top edge from stretching over time and helps the tapestry hang flat.
Quick Guide Table (comparison)
| Option | Best for | Pros | Watch-outs |
| Tapestry hanger clips | Light to medium tapestries, quick swaps | Fast, flexible, minimal tools | Can pinch fabric, may sag if spaced too wide |
| Tapestry hanger rod | Medium to heavy pieces | Even support, clean top line | Thin rods can bow on wide tapestries |
| Tapestry hanging kit | Beginners who want “all-in-one” | Convenient, usually includes hardware | Quality varies, check weight rating |
| Velcro + batten | Heavy or long-term display | Flattest hang, reduces stress points | Needs careful install, not ideal for fragile textiles |
| Tapestry hanger frame | Smaller or delicate textiles | Finished look, added protection | More cost, sizing matters |
| Adhesive hooks/strips | Rentals, lightweight fabric | Low damage, simple | Fails on texture/humidity, not for heavy pieces |
Quick step-by-step (no-sag setup)
- Measure and find center of both wall and tapestry.
- Pick the right support (clips for light, rod or batten for heavier).
- Mark mounting points evenly and use a level.
- Choose correct anchors (studs for heavy, rated anchors for drywall).
- Hang and adjust tension so the top edge stays straight.
- Step back and re-check level before fully tightening.
How to choose the best wall hanger for tapestry (fast decision guide)
Before you buy anything, do a quick check of the tapestry and the wall. I treat this like choosing the right mounting hardware for a heavy mirror. You don’t guess. You match the method to the load and surface.
Start with weight. A thin printed tapestry is forgiving. A thick woven piece, a rug style textile, or anything wide and heavy needs stronger support. If you can feel the fabric pulling when you lift it from one corner, it’s not a clip and adhesive job. That’s when a heavy duty wall hanger for tapestry setup makes sense.
Then look at the wall type. Drywall is common, but it still needs correct anchors or studs for anything heavy. Plaster can crack if you force the wrong fastener. Brick and concrete are strong, but they need masonry bits and proper plugs. If you’re in a rental, you may want to avoid drilling, but you still have to respect weight limits.
Finally, think about the look. Do you want a relaxed drape, a clean straight top edge, or a framed art feel? A rod gives a tidy line. A batten mount gives the flattest, most supported display. A frame is best when you want a finished border and extra protection.
Best wall hanger options (pros, cons, and best use cases)
This is where most people get stuck, because a lot of setups can work. The trick is choosing the one that matches your tapestry and your wall, not just what’s popular.
Tapestry hanger clips (fast and flexible)
Tapestry hanger clips are great for lightweight pieces, especially when you want to swap tapestries seasonally. I’ve used them in dorms, rentals, and kids’ rooms where the priority is quick changes and minimal tools.
The downside is pressure. Small clips can pinch the fabric and leave marks. On heavier textiles, clips can also create stress points that cause the top edge to stretch. If you choose clips, pick wider ones and spread them out.
A good clip setup usually looks like this:
- Use more clips than you think you need, spaced evenly
- Add a thin strip of felt or fabric inside the clip if the textile is delicate
- Avoid hanging by just two points, it causes the middle to sag
These are often sold under terms like tapestry wall clips or quilt hanger clips. If your piece feels heavy in your hands, move to a rod or a supported system.
Tapestry hanger rod (clean look and better support)
A tapestry hanger rod is one of the most dependable choices for medium to heavy tapestries. It spreads weight more evenly and makes the top line look intentional. In real installations, this is my go to method when a client wants the tapestry to sit straight above a sofa or bed.
If your tapestry has a rod pocket, you’re already set. If it doesn’t, you can add a sleeve on the back or use clips attached to rings on the rod. Curtain rods can work too, as long as the brackets are solid and the rod is stiff enough not to bow.
Practical tip from the field: if the tapestry is wide, a thin rod will sag in the center. Look for a thicker rod, or use a center support bracket if the rod system allows it. This is the easiest way to avoid that droopy middle.
Rod plus baseboard or batten support (for heavy pieces that sag)
For heavier textiles, I like a rod setup combined with additional support that keeps the top edge from carrying all the load. A simple wooden slat or batten behind the tapestry can take pressure off the fabric and keep the display flatter.
This works well when the tapestry is wide and you want a clean, gallery style line without a frame. It’s also a smart choice when the tapestry is thick and tends to pull down over time.
If you’ve ever seen a tapestry look slightly curved, like it’s smiling, that’s usually because the support points are too far apart or the rod is flexing. Adding a center bracket or using a batten style support fixes that quickly.
Velcro plus wooden batten (conservation style, even support)
If you want the most even support, this is it. Museums and textile professionals often use a Velcro support system with a wooden batten because it spreads weight across the top edge. When it’s done correctly, it reduces distortion and helps the textile hang flat.
This method is ideal for:
- Heavy or valuable textiles
- Pieces that you plan to display long term
- Tapestries that must stay very flat
The key is doing it correctly. The Velcro is typically stitched to a backing or support strip, not glued directly to fragile fabric. Then the matching Velcro is attached to a wooden batten that’s mounted level on the wall.
When not to use it: very delicate textiles, brittle fibers, or pieces where stitching would cause damage. In those cases, a conservator would usually recommend alternative support methods.
Tapestry hanging kit (all in one for beginners)
A tapestry hanging kit can be a good choice when you want fewer decisions. Many kits include hooks, anchors, clips, or a rod system. Some are meant for light décor, while others are built for heavier fabric.
If you go this route, don’t choose based on photos alone. Check these details:
- Weight rating that matches your textile
- Hardware included for your wall type
- Clip width and grip style, if it uses clips
- Whether the kit includes a level friendly mounting method
This is also where many people end up shopping on marketplaces. If you’re looking at wall hanger for tapestry amazon listings, focus on the hardware specs and weight rating first. A nice looking kit is useless if the anchors are wrong for your wall.
Tapestry hanger frame (frame or shadow box for a finished look)
A tapestry hanger frame is best when you want the textile to feel like artwork and stay protected. I often recommend framing for smaller tapestries, embroidered pieces, or delicate fabric art that you don’t want rubbing against wall texture.
A standard frame works if the textile is thin. A shadow box is better if it has texture or thickness. The goal is to avoid compressing the textile too tightly, and to keep the fabric from touching the glass if there is glass.
Framing costs more, but it gives a clean border and reduces dust exposure. For heirloom pieces, it’s worth considering.
Rental friendly ways to hang a tapestry (low or no damage)
Rentals usually mean fewer holes. You can still get a tidy look, but you have to stay honest about weight and wall texture.
Adhesive hooks and strips can work well for lightweight tapestries. The biggest failure I see comes from skipping surface prep. Dust, paint sheen, and humidity all reduce grip. Clean the area gently, let it dry fully, then apply the adhesive and give it time to bond.
Here’s when adhesive methods struggle:
- Textured walls
- Humid rooms like bathrooms
- Heavy tapestries or thick weaves
- Large sizes where the fabric pulls down steadily
For a cleaner look in a rental, a lightweight magnetic poster style hanger can work too, especially for thin textiles. Just be mindful that some magnets are strong enough to crease delicate fabric at the top edge, so test it gently.
Step by step installation (works for most hangers)
Even when the hanging method changes, the process stays similar. These steps prevent crooked installs and uneven tension.
- Choose the height
For most rooms, I like the top of the tapestry around 6 to 8 inches above a sofa or headboard. If it’s a feature piece on a blank wall, aim for eye level placement. - Find the center
Measure the wall space and mark the center lightly. Then measure the tapestry and mark its center. Lining up center points avoids that common mistake where the tapestry feels slightly off. - Mark support points
If you’re using clips, mark clip locations evenly across the top. If you’re using a rod, mark bracket locations, and add a center support if the rod is long. - Use the right anchors
Drywall needs anchors unless you’re hitting a stud. Plaster often needs special care to avoid cracking. Brick needs masonry anchors. This is where a lot of installs fail, not because of the hanger, but because the fastener is wrong. - Level before you tighten
Hold your brackets or batten in place, check level, then tighten. If you tighten first and level later, you’ll chase crooked lines. - Hang and adjust
Hang the tapestry, step back, and adjust tension. Small shifts at the top make a big visual difference.
Heavy tapestry setup (no sag, no fail rules)
For heavy textiles, your goal is to distribute weight and avoid pulling the fabric at just two points. This is where a heavy duty wall hanger for tapestry approach matters most, because it’s about safety and long term shape.
A few rules I follow on heavy installs:
- Use studs when possible, especially for wide pieces
- If studs aren’t available, use rated anchors and more support points
- Avoid thin rods that flex in the middle
- Add a center bracket or choose a stiffer rod
If the tapestry is truly heavy, a batten system or a rod with multiple brackets is usually the most reliable. It keeps the textile flat and reduces long term stretching.
Common problems and quick fixes
Even good installs can look off if one detail is missed. Here are the issues I see most often and how to fix them without starting over.
Sagging in the middle
This usually means the support points are too far apart or the rod is bending. Add a center support or switch to a batten style support for wide pieces.
Clip marks or fabric pulls
Use wider clips, reduce pinch pressure, and add a soft padding layer inside the clip. If the textile is delicate, move to a rod pocket sleeve or a support system that doesn’t pinch.
Adhesive hooks falling
Clean the wall, respect weight limits, and avoid textured paint. If the tapestry is large, adhesive methods often fail over time because the fabric pulls steadily.
Uneven hanging
Most of the time it’s a leveling issue, not the tapestry. Recheck the bracket level, then adjust clip spacing or rod alignment until the top line looks straight.
Care tips (protect the tapestry and the wall)
Textiles don’t behave like framed art. They move with humidity, light, and gravity. If you want your tapestry to look good for years, support and placement matter.
Keep the tapestry out of direct sun if you can. Sunlight fades dyes and weakens fibers over time. If it has to be near a window, consider rotating it seasonally.
Support the top edge evenly. When a tapestry hangs from just two points, the fabric stretches at the corners and sags in the middle. Rods, battens, and evenly spaced clips prevent that.
For valuable or vintage pieces, choose a method that avoids stress points and doesn’t rely on adhesives touching fabric. If the textile is brittle or historically significant, it’s worth getting advice from a textile professional before stitching anything to it.
Buying guide (what to look for online)
When you’re comparing tapestry hangers, a few specs matter more than marketing photos.
Look for:
- Weight rating that matches your tapestry
- Hardware included for your wall type
- Clip width and grip style if it uses clips
- Rod thickness and bracket spacing recommendations
If you’re browsing wall hanger for tapestry amazon options, check reviews that mention long term performance, not just first day setup. A hanger that looks fine on day one can sag after a month if the rod is too thin or the clips are too narrow.
Also, keep in mind that the best wall hanger for tapestry depends on your situation. A renter with a lightweight fabric needs a different solution than someone mounting a heavy woven textile above a fireplace.
FAQs
What’s the best option for renters
Lightweight tapestries do well with adhesive hooks or lightweight clip systems. If the piece is larger, a removable poster style hanger or a rod supported by safer mounting points usually looks cleaner.
What works best for heavy tapestries
A rod with sturdy brackets into studs, or a batten and Velcro support system. Avoid relying on just two hooks.
Rod vs clips vs Velcro batten, which lasts longest
For long term display, a rod or batten system usually wins because it spreads weight and reduces stress points.
How do I hang a tapestry without a rod pocket
Use clips spaced evenly, or add a sleeve on the back so you can use a rod. If the textile is valuable, avoid pinching and choose a support method that distributes weight.
Conclusion
A tapestry looks effortless when it’s hung with the right support. The goal is not just getting it on the wall, but getting it to sit straight, stay flat, and keep its shape over time.
If you want quick swaps and a lightweight look, tapestry hanger clips can work well when you space them out properly. For most medium to heavy pieces, a tapestry hanger rod gives a cleaner line and better support. For long term display or valuable textiles, a batten or Velcro support approach keeps stress off the fabric and helps it hang flat. And if you want a finished art style look, a tapestry hanger frame is hard to beat.
Take five minutes to check weight, wall type, and placement height before you mount anything. That small prep step is what separates a tapestry that looks temporary from one that looks like it was meant to be there.
Disclaimer:
This article is for general home décor guidance. Always follow the weight limits and installation instructions for your specific hardware, and use appropriate anchors for your wall type. For valuable or fragile textiles, consider professional advice before stitching or mounting.

I’m Bilal Hassan, the founder of Dwellify Home. With 6 years of practical experience in home remodeling, interior design, and décor consulting, I help people transform their spaces with simple, effective, and affordable ideas. I specialize in offering real-world tips, step-by-step guides, and product recommendations that make home improvement easier and more enjoyable. My mission is to empower homeowners and renters to create functional, beautiful spaces—one thoughtful update at a time.