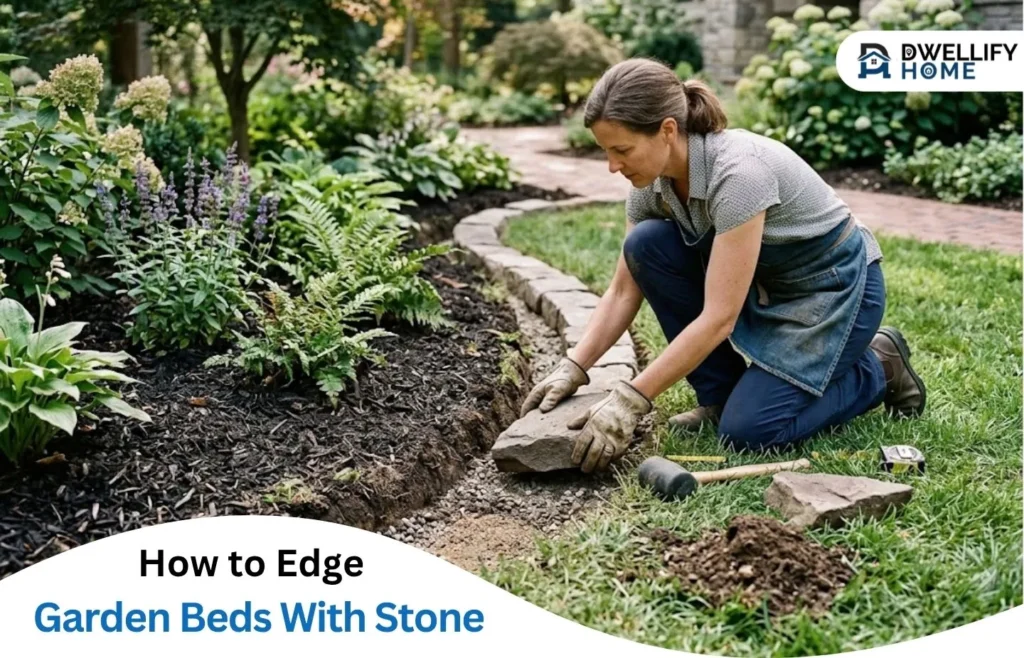
Stone edging gives a garden bed a clean, permanent line that separates planting areas from the lawn, mulch, or a nearby path. Unlike plastic or metal strips, stone holds its shape through heat, frost, and foot traffic, so the border still looks intentional years later. This guide covers why stone works so well, how to plan the layout, the step by step install, and the upkeep that keeps the border tight.
Why Choose Stone Edging for a Garden Bed?
Stone edging does more than frame a bed. It keeps soil and mulch where they belong, stops grass roots from creeping into the planting area, and gives the whole landscape a finished look. Because the material is heavy and durable, it stays put long after lighter edging has cracked or lifted.
The hardest part is picking a stone that stays sharp through years of frost and foot traffic instead of one that fades or crumbles. For a border that holds its line, companies like Techo-Bloc make garden edging stones built for the cuts, curves, and weather a bed has to handle. Starting with a durable material means the edge you set this season still looks clean many winters from now.
How Does Stone Define and Protect the Bed?
A stone border acts as a physical barrier between two zones that behave very differently. On one side, loose soil and mulch need to stay contained. On the other, lawn and pathway materials push inward over time. Set correctly, the stones block that migration, which means less edging work each season and cleaner lines between the bed and everything around it. The border also helps hold moisture in the bed instead of letting it run off into the grass.
Stone Styles That Complement the Landscape
The right stone depends on the look you want and the style of the home. Cut pavers and manufactured edging units give straight, uniform lines that suit modern and formal gardens. Rounded fieldstone or cobbles read more natural and work well around informal, cottage style beds. Flagstone and flat slabs sit low and can double as a mowing strip, while taller blocks create a raised, defined wall. Matching the stone color to existing hardscaping, like a patio or walkway, ties the yard together instead of introducing a competing element.
Planning a Stable Stone Border
A durable border starts with planning, not digging. Mapping the line, picking the stone size, and checking the grade before you break ground prevents the two most common problems: a wavy edge and stones that shift after the first winter.
Mapping Curves, Corners, and Transitions
Lay out the border before removing any sod. A garden hose or a length of rope is the easiest way to test a curve, because you can adjust it until the shape looks right from both the house and the street. For straight runs, stakes and a mason line keep the edge honest. Plan how the border meets fixed points like a driveway, a tree, or a downspout, since those transitions are where a rushed layout usually looks off. Mark the final line with spray paint so it stays visible once you start cutting the sod.
How Should You Choose the Stone Size and Shape?
Match the stone to the scale of the bed and the job it needs to do. Small cobbles suit tight curves and narrow beds, while larger blocks hold a long, straight run with fewer joints. Flat bottomed units sit more stably than rounded ones and are easier to level, which matters if you want a mowing strip the wheels of a mower can ride along. Thicker stones resist frost heave better than thin ones, so they are worth the extra cost in cold climates where the ground freezes and thaws.
How Do You Install Stone Edging Step by Step?
Installing stone edging follows a clear sequence: dig the trench, build a stable base, set and level the stones, then backfill. Working through it in order keeps the border straight and locked in place.
How Deep Should the Trench Be?
Dig the trench deep enough that the stones sit low and solid, not perched on the surface. As a general rule, the trench should hold a few inches of base material plus enough of the stone to anchor it, with the top sitting at or just above the soil line depending on whether you want a mowing strip. Keep the trench slightly wider than the stone so you have room to adjust each piece. Remove roots and large rocks from the bottom so the base can compact evenly.
Preparing a Level, Stable Base
A compacted base is what keeps stone edging from sinking or tilting. Add a few inches of crushed gravel to the trench, then tamp it down firmly with a hand tamper. A thin layer of coarse sand over the gravel lets you fine tune the height of each stone. Check the base with a level as you go, because a flat, firm foundation is far easier to build on than one you try to correct later.
Setting, Leveling, and Securing the Stones
Set the stones one at a time, pressing each into the sand and tapping it down with a rubber mallet. Check level across the top and against the neighboring stone so the border reads as one continuous line. Keep the joints tight to block weeds and soil from pushing through. For a border that needs extra hold on a slope or a high traffic edge, a bead of landscape adhesive between courses locks the stones together without mortar.
How Do You Finish and Backfill the Border?
Once the stones are set and level, backfill both sides to lock them in place. Pack soil or gravel against the outside edge where the border meets the lawn, and fill the bed side with soil or mulch up to the stone. Tamp the backfill gently so it supports the stones without pushing them out of line. Sweep off any sand or debris, then water the area lightly to settle everything before adding plants.
Maintaining a Stone Garden Bed Border
Stone edging needs very little upkeep, which is a big part of its appeal. A quick seasonal check keeps the border looking sharp and catches small issues before they turn into bigger ones.
How Can You Prevent Shifting and Gaps?
Most shifting comes from a base that was never compacted properly or from frost pushing stones upward over winter. Walk the border in spring and press on any stone that feels loose, then lift it, add base material, and reset it. Keep joints tight by brushing in sand or soil when gaps appear, which stops weeds from taking hold and keeps the line clean.
Managing Drainage and Seasonal Soil Movement
Water is the main force working against a stone border. If runoff pools behind the edging, it softens the base and invites heaving. Make sure the bed drains away from the border, and clear any mulch or debris that blocks water from moving through. In cold climates, the freeze thaw cycle is the biggest stress on the border, so a deep, well drained base does more to protect it than anything you do at the surface.
Frequently Asked Questions About Stone Garden Bed Edging
What Is the Best Stone for Garden Bed Edging?
The best stone depends on the look and the climate. Manufactured concrete edging units and cut pavers give the most consistent lines and are easy to level, while natural fieldstone and flagstone suit informal beds. In regions with hard winters, choose a dense, frost resistant stone that handles repeated freeze thaw cycles without cracking.
Do Garden Edging Stones Need to Be Buried?
At least partly, yes. Burying the base of each stone in a trench with a compacted foundation is what keeps the border from shifting. How much sits above ground depends on the style you want: a low profile for a mowing strip, or a taller face for a defined raised edge.
Can Stone Edging Be Installed Without Mortar?
Yes. Most garden bed borders are dry laid on a compacted gravel and sand base, which lets you adjust or replace stones later. Landscape adhesive between courses adds hold on slopes or high traffic edges without the permanence of mortar.
How Do You Keep Stones From Shifting?
Start with a deep, well compacted base, keep the joints tight, and make sure water drains away from the border. A spring check to reset any loose stones and refill gaps keeps the edge stable for years.
We want our readers to understand how we support our website. Some links may be affiliate or sponsored links, which means Dwellifyhome.com could earn a small commission from qualifying purchases made through them.