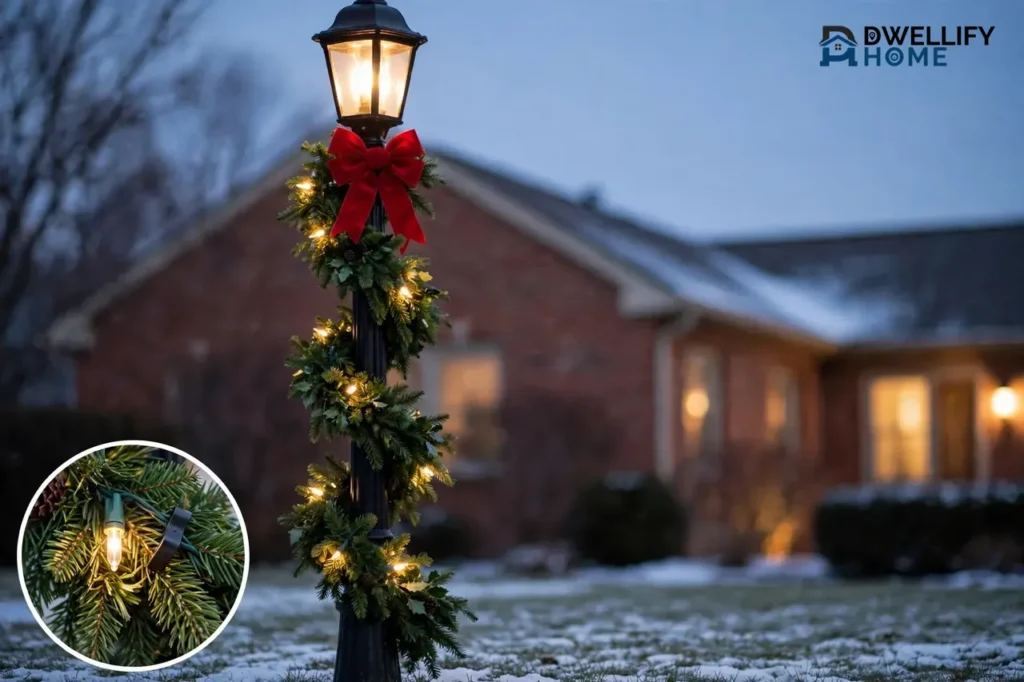
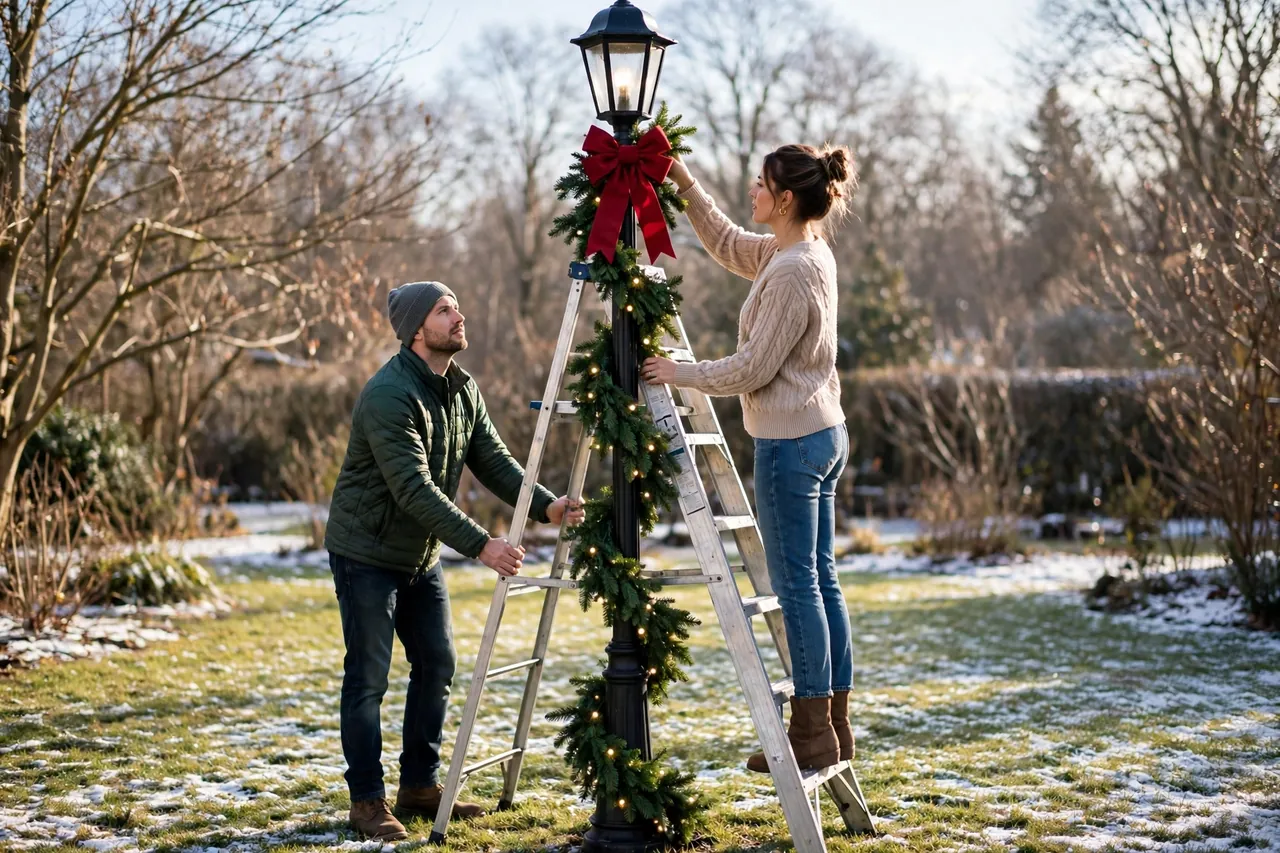
Christmas lamp post decoration means dressing a yard lamp post for the holidays with garland, lights, a bow or wreath, and a lantern topper, while you keep the fixture safe and the power dry. Start at the base, spiral garland and outdoor lights upward, secure them every couple of feet, and finish with one clear focal point near the lantern. Pick outdoor-rated lights, plug them into a GFCI-protected outlet, and never climb past a safe ladder height to reach the top.
One decorated post can change a whole front yard. It greets guests at the walk, frames the driveway, and pulls the rest of your outdoor display together, even when the rest of the yard stays simple. You do not need a big budget or a full weekend to get that effect. You need a plan, the right fasteners, and a little patience on the ladder.
This guide stays on lamp posts only. It covers real posts in a yard or by a walk, not fences, porches, or rooflines. Follow the steps in order, and you will get a neat spiral, a steady glow, and a fixture you can strip clean in January without scratches, sticky residue, or dead bulbs.
What Christmas Lamp Post Decoration Means
A Christmas lamp post is an outdoor light post that you dress for the season, and Christmas lamp post decoration is the whole job of dressing it: the garland wrap, the lights, the bow or wreath, and the topper that crowns the lantern. Most homeowners decorate a post lamp by the front walk or driveway, a garden lamp post among the beds, or a light pole near the street. The idea stays the same in every case. You wrap the pole, you light it, and you top it with one strong detail.
Think of the post in three parts. The base anchors the look and hides the cord. The pole carries the spiral of garland and lights. The lantern head carries the focal point, such as a bow, a small wreath, or a glowing lantern topper. When you plan those three parts before you buy anything, you avoid the most common mistake: a post that looks busy at the top and bare at the bottom, or bright at the bottom and dark at the top.
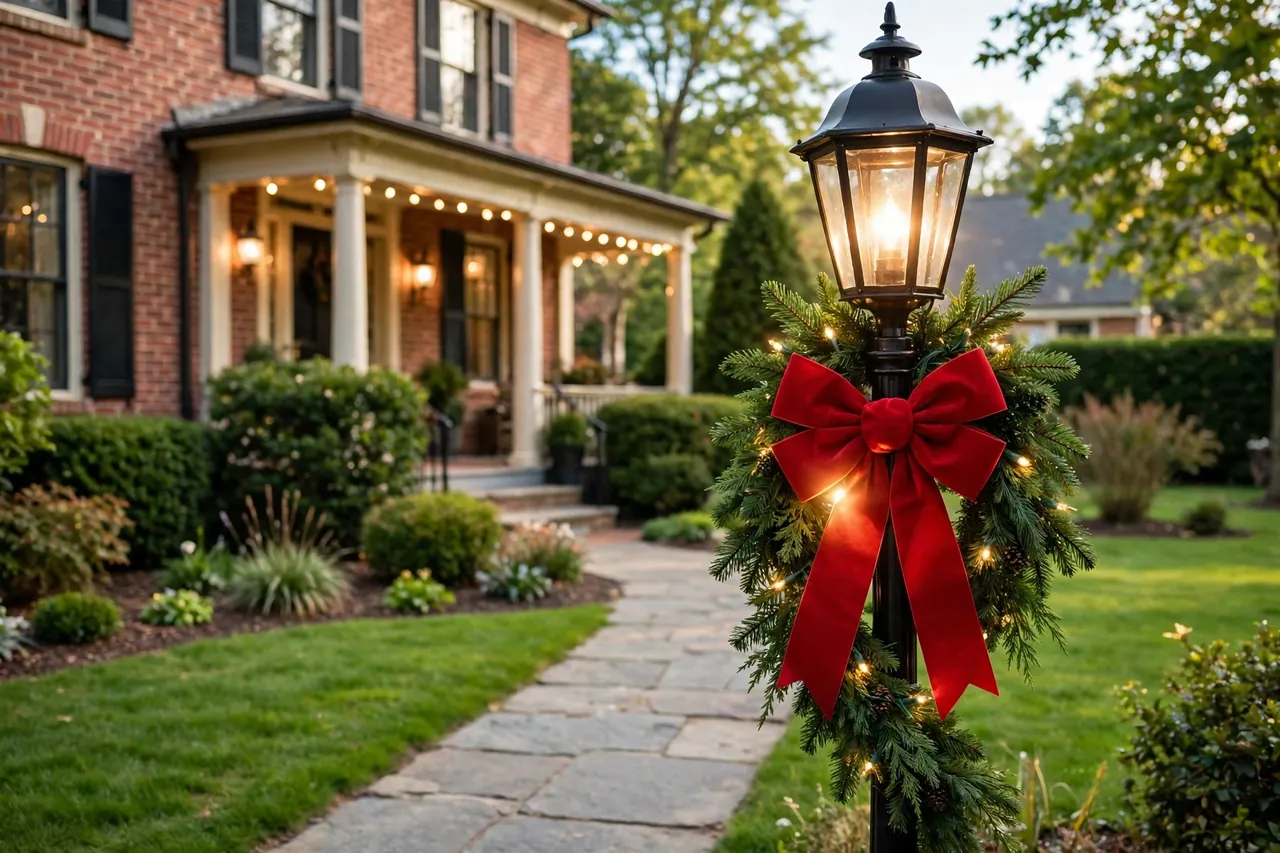
Outdoor Christmas lamp post decoration works best when it matches the house, not when it shouts over it. A brick home suits warm white lights and deep green garland. A white farmhouse suits red bows and classic evergreen. A modern home suits cool white lights and one metallic accent. Pick one color story, repeat it, and stop before you add a third or fourth color.
Pick a Look That Fits Your Yard
Choose your look before you shop, because the look decides what you buy. A classic look uses evergreen garland, warm white lights, and one large red bow below the lantern. A winter wonderland look uses frosted garland, cool white lights, and silver or white ornaments. A rustic look uses cedar garland, pinecones, burlap ribbon, and warm lights. A candy cane look twists red and white ribbon around green garland for a playful front walk.
Keep the scale honest. A slim garden post suits thin garland and small ornaments. A tall, chunky street-side post can carry thick garland, a wide bow, and larger baubles. Oversized pieces on a slim post look top-heavy, and tiny pieces on a tall post disappear by nightfall. Stand back from the street after you hang the first section, and check the size before you finish the whole pole.
Match the rest of the yard in a light way. If your porch already glows warm white, keep the lamp post warm white too. If your front door wears a red bow, echo that bow on the post. You do not need to copy every decoration. One repeated color and one repeated material tie the yard together, and the lamp post then feels like part of a plan instead of a lone project.
What You Need Before You Start
Gather everything before you climb anything. You need outdoor-rated LED string lights, outdoor garland long enough to spiral the full pole, weather-safe zip ties or light clips, a wide weatherproof ribbon for the bow, and a small wreath or lantern topper if you want one. Add a sturdy step ladder, a helper for the high work, an outdoor-rated extension cord, and a timer or smart plug so the display switches off on its own.
Measure the post first. Measure its height from the ground to the lantern, and guess the spiral length as roughly three times the straight height, because each wrap eats length fast. Buy one extra garland length if you can. A short garland forces wide gaps, and wide gaps show bare pole at night. Test every light string on the ground before you hang it. A dead section hides well in a box and shows badly on a pole.
Check the fixture before you decorate it. Wipe the pole clean so ties grip well. Look for loose finials, cracked glass, and rust spots that snag ribbon. Never cover the lamp’s vents, and never tape anything over a hot bulb. If the post wobbles at the base, fix that first. A wobbly post plus a heavy wreath makes a bad pair in the first strong wind.
- Outdoor-rated LED string lights, tested on the ground first
- Outdoor garland, long enough to spiral the full pole plus one spare length
- Weather-safe zip ties or light clips, never nails or staples
- Wide weatherproof ribbon, a bow, or a small wreath for the focal point
- Sturdy ladder, a helper, an outdoor-rated cord, and a timer
How to Wrap a Lamp Post With Garland and Lights
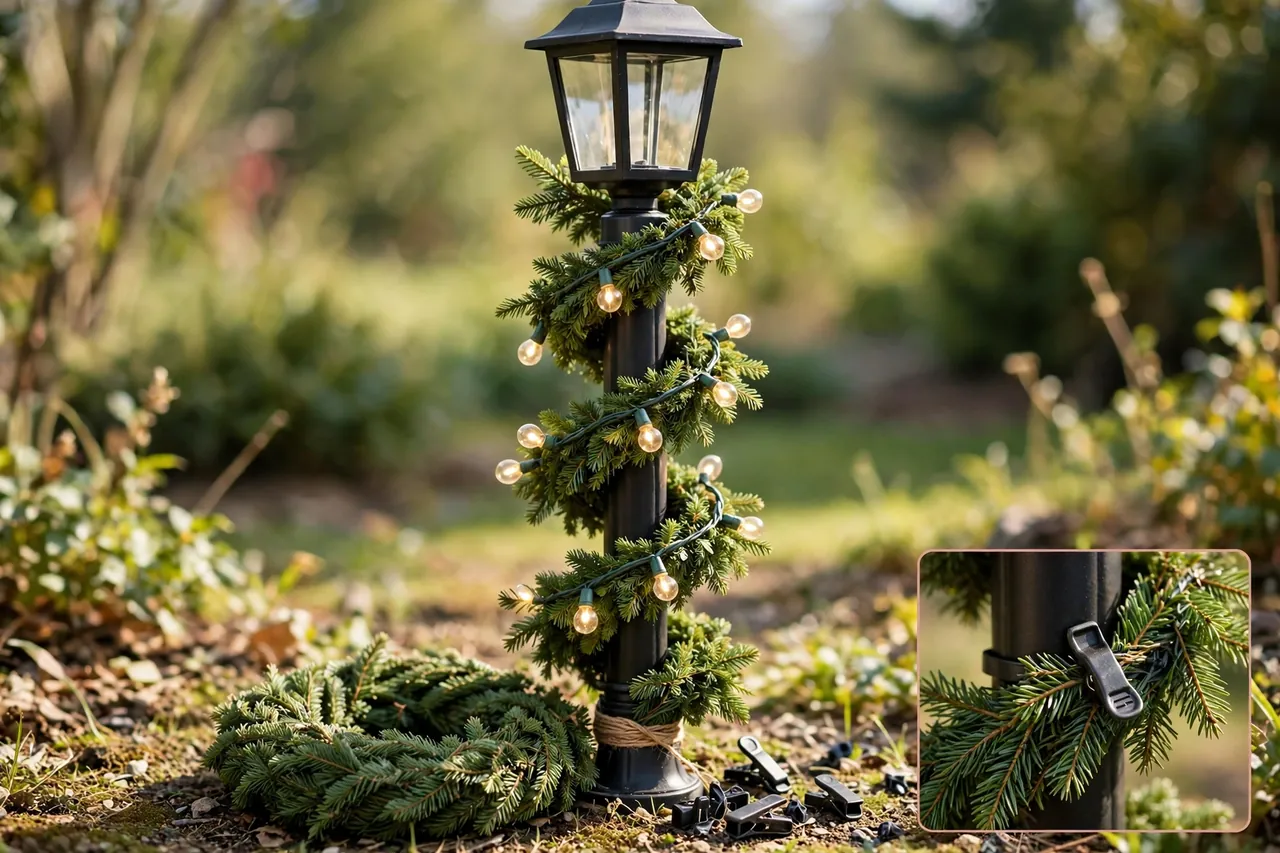
Work from the bottom up, and keep the plug end where you can reach it. Start the garland at the base, tie it snug, and spiral it upward in even turns. Secure the garland every 18 to 24 inches with a zip tie or clip, and pull each tie just tight enough to hold. A tie pulled too hard crushes the garland and dents soft paint. A tie left too loose lets the whole spiral slide down after the first rain.
Wrap the lights next, in the same spiral path, so the bulbs sit on top of the garland and shine outward. Weave the string through the outer tips of the garland rather than burying it deep inside. Buried bulbs glow dim and overheat against dry needles. Space the wraps evenly, step back often, and fix gaps while you still stand on the ground or the lowest safe rung.
Keep the spacing steady with a simple trick. Hold your hand flat against the pole between wraps, and use that hand width as your guide. Your wraps will look even from the street, and you will use the garland evenly instead of running rich at the bottom and thin at the top. When you reach the lantern, tuck the garland end behind the lantern base and tie it off. Do not drape loose ends over the glass, where wind can whip them against the bulb.
- Clean the pole, test the lights on the ground, and lay out the garland and ties.
- Start the garland at the base, tie it snug, and spiral upward in even turns.
- Secure the garland every 18 to 24 inches with a zip tie or clip.
- Wrap the lights along the same spiral, with bulbs on top of the garland.
- Step back, fix gaps, and tie off the top end behind the lantern base.
- Plug in the lights, check the glow from the street, and adjust before dark.
Add a Bow, Wreath, or Lantern Topper
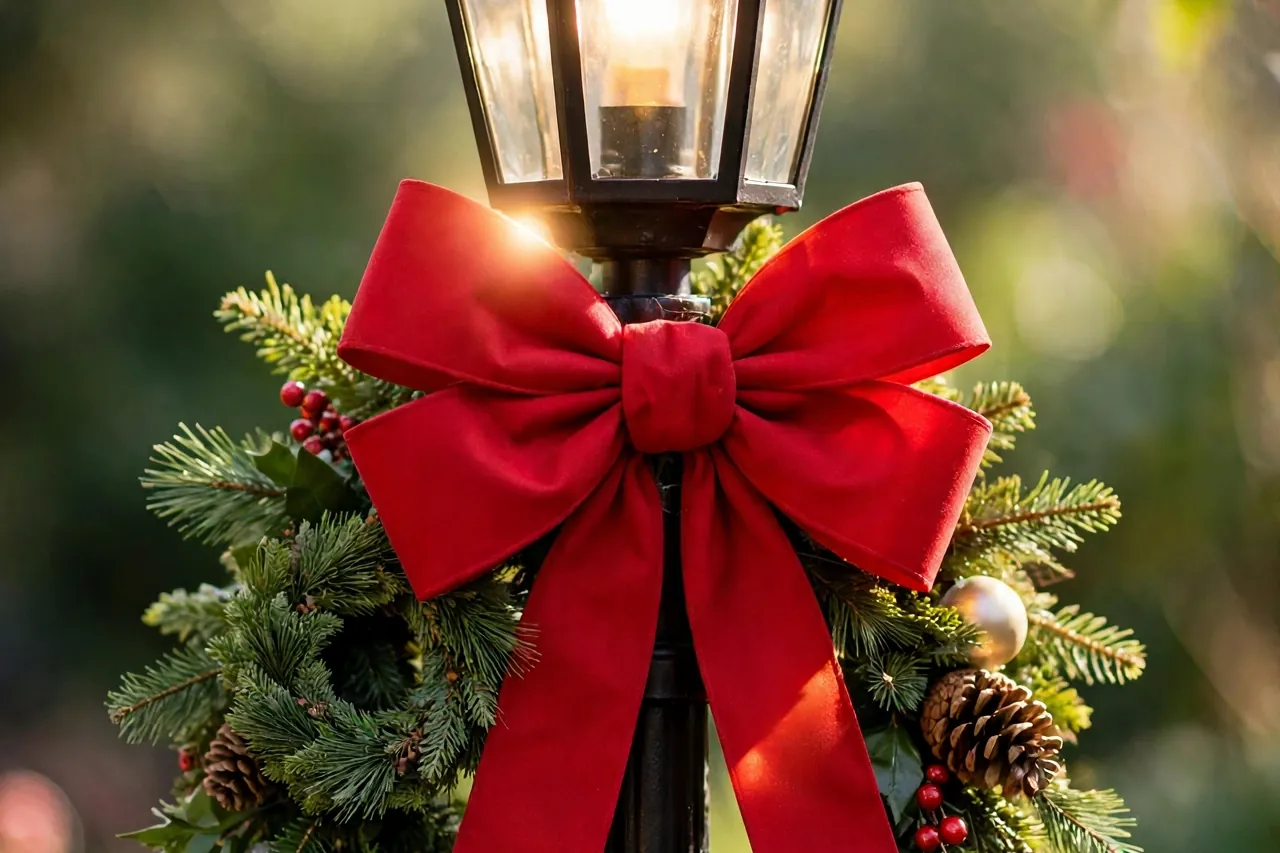
The topper gives the post its personality, so choose one hero and let it lead. A large weatherproof bow tied just below the lantern reads clearly from the street and suits almost every home. Make the loops full, cut the tails long, and angle the tails so they fall along the garland instead of sticking straight out. A bow that faces the street does the most work, so tie it with the front toward the walk or road.
A small wreath hung on the lantern frame offers a quieter, classic finish. Hang it from a sturdy hook or wire, not from a light string, and center it on the side guests see first. For a Christmas outdoor lamp post with a glass lantern, a lantern topper also works well: a small glowing lantern or a cluster of ornaments hung just below the main light adds depth without blocking the real lamp. Keep the topper light. A heavy topper strains the finial and swings hard in wind.
Add ornaments last, and add few. Tuck three to five shatterproof ornaments into the garland at eye level and near the top, where guests can enjoy them. Skip glass ornaments outside. One fall onto a walk or driveway ends a glass ball, and sharp shards in a garden bed cause trouble long after the holidays. Pinecones, berries, and small picks add texture without that risk, and they survive frost far better than glittered glass.
Power Your Outdoor Lamp Post Safely
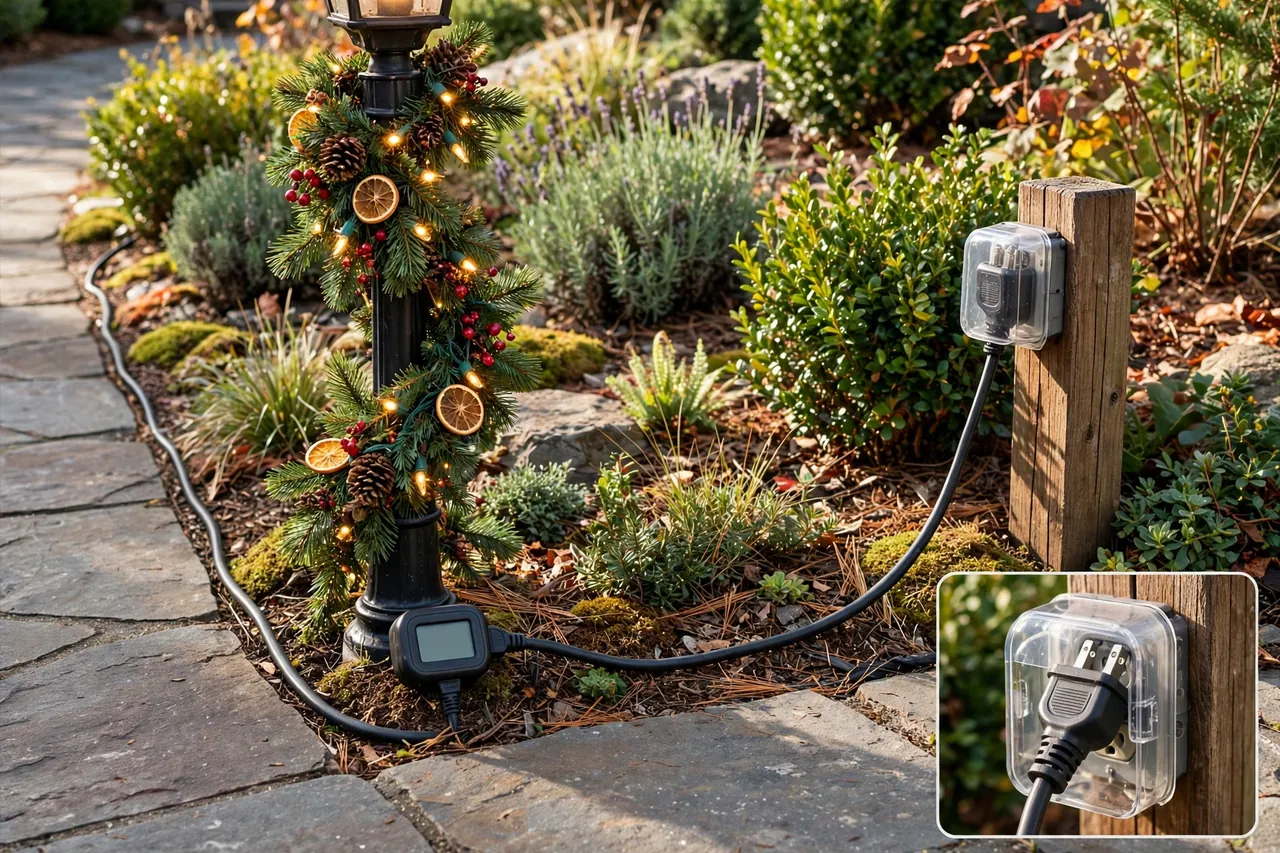
Power decides whether a pretty post stays a safe post. Use only lights and cords labeled for outdoor use, and plug them into a GFCI-protected outlet. The U.S. Consumer Product Safety Commission advises that outdoor electric lights and decorations plug into circuits protected by ground fault circuit interrupters, and it also advises checking labels to confirm lights carry certification for outdoor use. Read the CPSC holiday decorating safety guide before you plug in a new display.
Run the cord with care. Keep plugs off the ground, out of puddles, and clear of walks, snow shovels, and mower paths. Cover outdoor plug connections with a weatherproof cover made for in-use outlets. Never run a cord through a window or door crack, under a rug, or under mulch. A pinched cord heats up, frays fast, and hides damage where you cannot see it.
Respect the limits on the box. Follow the maker’s limit for how many strings you can connect end to end, and never exceed it because LEDs feel cool. For a post with no nearby outlet, solar lights or battery lights solve the problem cleanly. Solar sets need a panel in open sun, and battery sets need fresh batteries and a timer, but both options remove the long cord across the yard. A timer also protects the display at night, because the lights switch off when you sleep instead of burning all night.
Inspect the whole setup before the first switch-on and once a week after that. The Electrical Safety Foundation International urges homeowners to inspect each decoration before plugging it in, since cracked, frayed, or bare wires and loose connections can cause a serious shock or start a fire. See ESFI holiday safety guidance for the full checklist. Throw out any string with cracked sockets, bare wire, or a plug that feels warm. No decoration justifies a damaged cord.
Stay Safe on a Ladder and Protect Your Fixture
Height causes more lamp post injuries than electricity does, so treat the ladder as part of the project. Set the ladder on firm, level ground, never on soft soil, ice, or a slope. Keep three points of contact at all times, face the ladder as you climb, and never stand on the top rung. Ask a helper to hold the ladder and pass up ties and ribbon. If the top of the post sits beyond a comfortable reach from a safe rung, stop there. A post decorated to a safe height looks far better than a fall from an overstretched climb.
Protect the fixture while you decorate it. Use soft ties and clips, never nails, staples, or screws driven into the pole. Nails chip paint, open rust paths, and nick wire insulation. Do not hang heavy items from the lantern glass or the finial. Do not wrap garland so tight that it traps heat against a hot incandescent bulb, and switch to LEDs if your post still runs hot bulbs. When you remove the display in January, cut ties carefully away from the pole, wipe the pole clean, and check for scratches while the marks still feel fresh in your mind.
Watch the weather, too. Skip ladder work in high wind, rain, or ice. Wet garland weighs more, wet rungs slip, and a gust can turn a wreath into a sail. On windy lots, add an extra tie near the top and near the bow, and check the post after the first storm. A five-minute check after a storm saves a midnight rescue of a garland strand halfway down the driveway.
Styles That Suit Different Lamp Posts
Not every post wants the same treatment, so match the style to the fixture you own. A classic black post lamp suits evergreen garland, warm white lights, and a red velvet bow. A white or cream garden post suits frosted garland, cool white lights, and silver accents. A rustic wooden post suits cedar, pinecones, and burlap. A modern slim pole suits a simple light wrap and one bold bow, with no extra clutter.
Light pole Christmas decorations for a tall street-side pole need a different eye than a short garden post. On a tall pole, use thicker garland and a larger bow, because small details vanish from the road. On a short garden post, use finer garland and smaller ornaments, because the viewer stands close. For Christmas lamp posts outdoors in a small yard, one decorated post beats three half-decorated posts every time. Focus the effort, and let the rest of the yard breathe.
For Christmas decorations for an outside lamp post near a walk, keep the walk clear. Tails, cords, and low ornaments must stay off the path. Guests carry bags, kids run ahead, and a low bow tail at ankle height trips someone fast. Hang tails above head height near paths, or trim them short where the post hugs the walk.
Quick Reference: Lamp Post Decoration at a Glance
Use this quick reference when you shop and when you hang the display. It sums up the choices that matter most, so you can check them off without re-reading the whole guide.
| Decision | Best choice for most homes | Avoid |
|---|---|---|
| Lights | Outdoor-rated LEDs, tested before hanging | Indoor strings used outside |
| Garland | Outdoor garland, spiral from the base up | Garland so short it leaves bare pole |
| Fasteners | Weather-safe zip ties or light clips | Nails, staples, or screws in the pole |
| Focal point | One bow, wreath, or lantern topper | Three competing toppers on one post |
| Power | GFCI outlet, outdoor cord, timer | Cords under rugs, mulch, or doors |
| Height | Safe ladder reach with a helper | Top rung, soft ground, or high wind |
Troubleshooting: Fix Common Lamp Post Problems
Most lamp post problems have a simple fix, and most fixes take minutes once you know where to look. Work through this list in order before you buy new lights or strip the whole post.
- Garland slides down. Add ties every 18 inches, tighten the base tie first, and anchor the top behind the lantern base. Wet garland weighs more, so add one extra tie after rain.
- Lights glow dim or patchy. Check for a loose plug, a tripped GFCI button, and a string buried deep in garland. Pull bulbs to the outer tips and test the string on the ground.
- GFCI keeps tripping. Unplug the display, dry every connection, and lift plugs off wet ground. If it still trips with dry plugs, retire that string and test a new one.
- Bow droops or spins. Re-tie it with thicker wire inside the loops, face it toward the street, and add a second tie behind the knot. Wet fabric bows droop, so choose weatherproof ribbon.
- Post looks bare at night. Add one more light wrap near the top, where darkness shows first, and check that no garland buries the bulbs. Step back to the street to judge the glow.
- Paint scratches after removal. Next year, use soft clips instead of wire, cut ties away from the pole, and wipe grit off the pole before you wrap. Touch up chips before winter moisture reaches bare metal.
Care, Storage, and Taking the Display Down
Take the display down in reverse order: ornaments first, then the topper, then lights, then garland. Work on a dry day, and keep the ladder rules from setup day. Coil lights loosely, never yank them off the pole, and bag ties, clips, and ribbon together so next year’s setup starts fast. Label the bag with the post it fits, because a garland cut for a tall pole will swamp a short garden post.
Store garland in a dry bin, out of damp garages and attics where moisture breeds mold. Check lights once more before you pack them, and throw out any string that failed during the season. A broken string stored “for later” only wastes next December’s first evening. Wipe the pole clean, tighten any loose finial, and leave the fixture ready for a plain winter glow until next Christmas.
If you plan a bigger yard display next year, let the lamp post lead it. For broad yard ideas, see Christmas decor exterior ideas, and for an entry display that pairs with a glowing post, see Christmas decor on porch. Build outward from the post one element at a time, and the yard will grow without turning cluttered.
Related Guides
Keep the outdoor display coordinated with these related guides: Christmas decor exterior ideas for the whole yard, and Christmas decor on porch for an entry that pairs with a glowing lamp post.
Frequently Asked Questions
How do you decorate a lamp post for Christmas?
Start with a theme, then wrap outdoor garland in a spiral from the base up, add outdoor lights along the same spiral, and finish with one focal point such as a large bow below the lantern or a small wreath on the lantern frame. Secure everything with weather-safe ties, keep cords dry and off walks, and step back to check the look from the street.
How do you decorate outside posts for Christmas?
Decorate outside posts much like a lamp post, with garland, lights, and a bow or wreath, but suit the method to the post. A lamp post carries a lantern topper well, while a plain post may need a lit mount or a wreath to hold the eye. In both cases, use outdoor-rated materials, secure ties often, and keep the display clear of paths.
What safety tips should you follow when decorating light poles?
Follow ladder safety rules, set the ladder on solid ground, use a helper, and keep three points of contact as you climb. Inspect wiring and bulbs before you hang anything, use only outdoor-rated lights and cords, plug into a GFCI-protected outlet, and switch the lights off before you go to bed or leave the house.
Can you use solar lights on an outdoor lamp post?
Yes, solar lights suit a lamp post with no nearby outlet, and they remove the long cord across the yard. Place the solar panel in open sun, keep it clear of snow and leaves, and expect a shorter glow on cloudy winter days. For a steady all-evening glow, pair solar accents with plug-in lights or use a battery set with a timer.
How do you keep garland from slipping down a lamp post?
Anchor the base tie first, secure the garland every 18 to 24 inches with weather-safe ties or clips, and tie the top end behind the lantern base. Avoid ties pulled so tight they crush the garland, and add an extra tie after rain, when wet garland weighs more. A spiral that starts snug at the base rarely slides.
Before you climb, read this short note. This guide gives general home decorating advice, not electrical advice for your specific home. Use only outdoor-rated lights and cords, plug outdoor displays into GFCI-protected outlets, keep cords dry and clear of walks, and call a qualified electrician for outlet or wiring work. Homes, fixtures, outlets, and weather vary, so follow your product manuals and stop any step that feels unsafe.
Start with one post, one color story, and one strong topper. Hang the garland in daylight, check the glow after dark, and fix the gaps while the ladder still stands nearby. A single well-dressed lamp post will welcome every guest all season, and next year you will hang it in half the time.