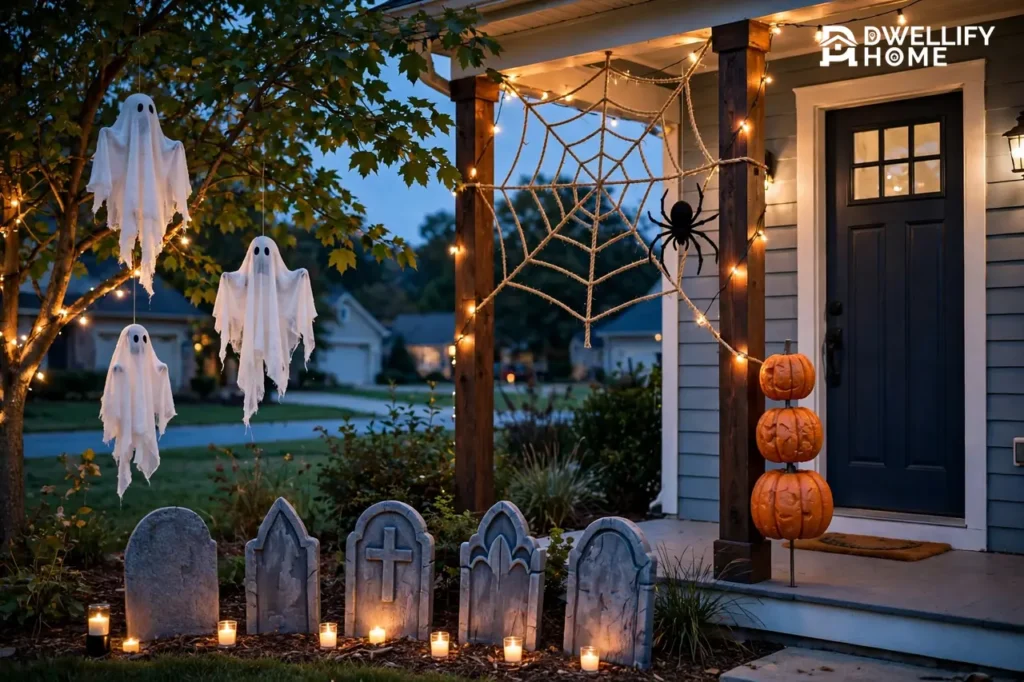
The most reliable do it yourself Halloween yard decorations are builds, not buys: a row of foam tombstones, hanging cheesecloth ghosts, a giant spider web corner, a stacked pumpkin totem, and silhouette cutouts. Each project below gives you the materials, the steps, and exactly how to anchor and weatherproof it, so your yard looks haunted on October 31 — not scattered across the lawn after the first windy night.
Start with the tombstones if this is your first year. They are the cheapest build, the easiest to store, and they turn a plain lawn into a graveyard in one afternoon. Add one project per season and your display grows without ever feeling like a chore.
💡 Practical Home Tip: Build one project completely — painted, sealed, and anchored — before starting the next. A finished tombstone row teaches you your yard’s wind and soil, and those two lessons decide how every later project should be built and staked.
Before You Build: Choose Materials That Survive October Weather
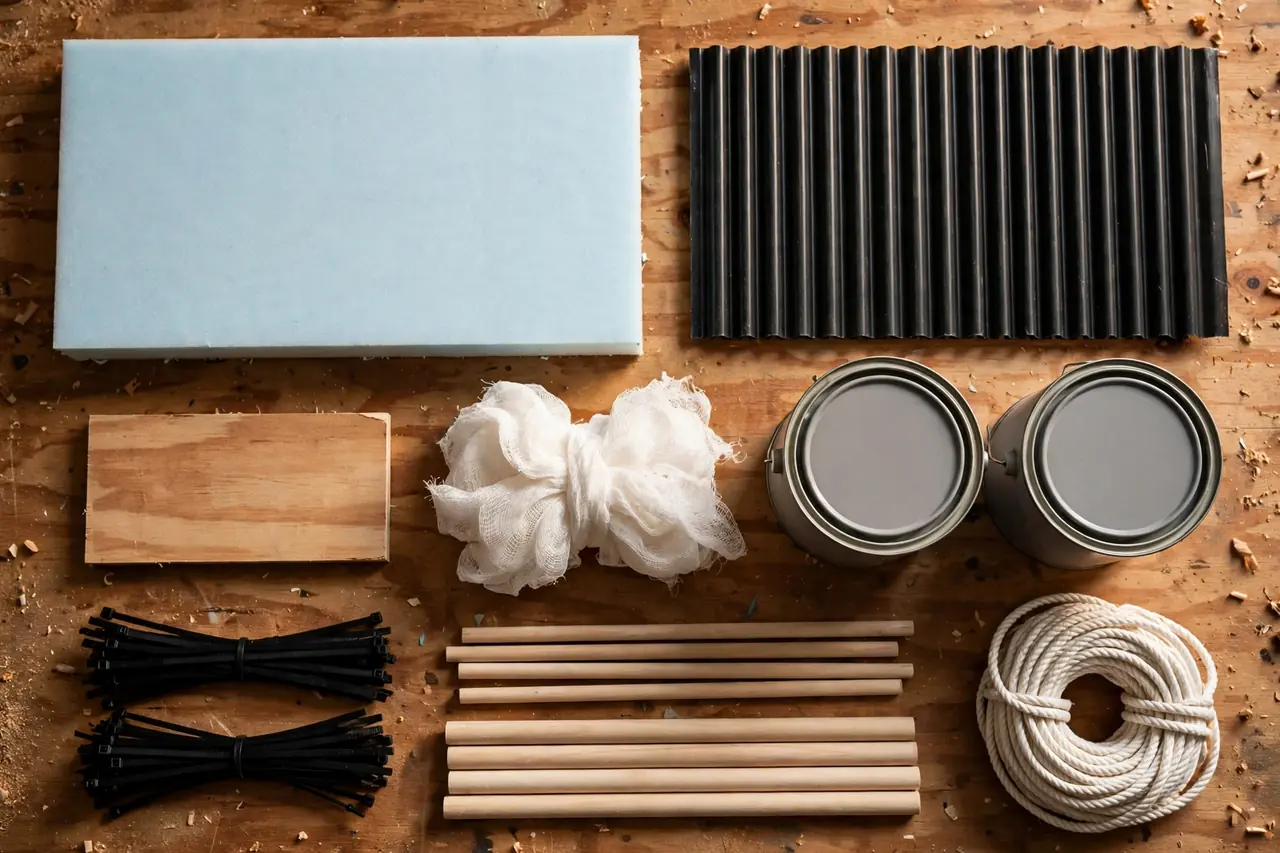
Every failed yard display fails the same way: the material was fine indoors and wrong outdoors. Cardboard looks great on build day and slumps after one rainy night, so treat it as a covered-porch material only. For anything in the open yard, pick from foam board, plywood, plastic, rope, and fabric — and match the paint to the material.
One paint rule matters more than any other: standard spray paint can soften and melt bare foam. Use exterior latex or acrylic paint on foam projects, or seal the foam first and spray over the seal. Plywood takes almost any outdoor paint but is heavier, so plan its anchoring before you cut it, not after. Foam supplier Foam by Mail’s DIY haunted house foam guide sums up why builders keep returning to foam: it is lightweight, simple to cut and carve with common tools, easy to paint, and durable enough to reuse year after year.
Choosing your build material
| Material | Best for | Weather behavior | Anchoring need |
|---|---|---|---|
| Foam insulation board | Tombstones, silhouettes | Waterproof itself, but paint must be foam-safe; seal cut edges | High — very light, catches wind like a sail |
| Plywood | Tombstones, signs, cutouts | Needs exterior paint or sealer on all faces and edges | Medium — weight helps, still stake tall pieces |
| Corrugated plastic sheet | Yard silhouettes, signs | Fully waterproof, no paint needed | Medium — light but less fragile than foam |
| Cheesecloth and old sheets | Ghosts, draped figures | Absorbs rain and gets heavy; best under trees or eaves | Low — hangs from line, swings safely |
| Cardboard | Covered porch only | Weakened by moisture; one wet night can ruin it | Low indoors; not a yard material |
Wood belongs in the yard too — if you enjoy saw-and-screw projects, our guide to pallet Halloween decorations turns reclaimed pallets into yard pieces that shrug off weather foam cannot handle. One rule covers everything below: the lighter the piece, the more serious its anchoring must be. Each project states its own anchor, and the full anchoring rules sit in their own section further down.
Project 1: A Row of Foam Tombstones
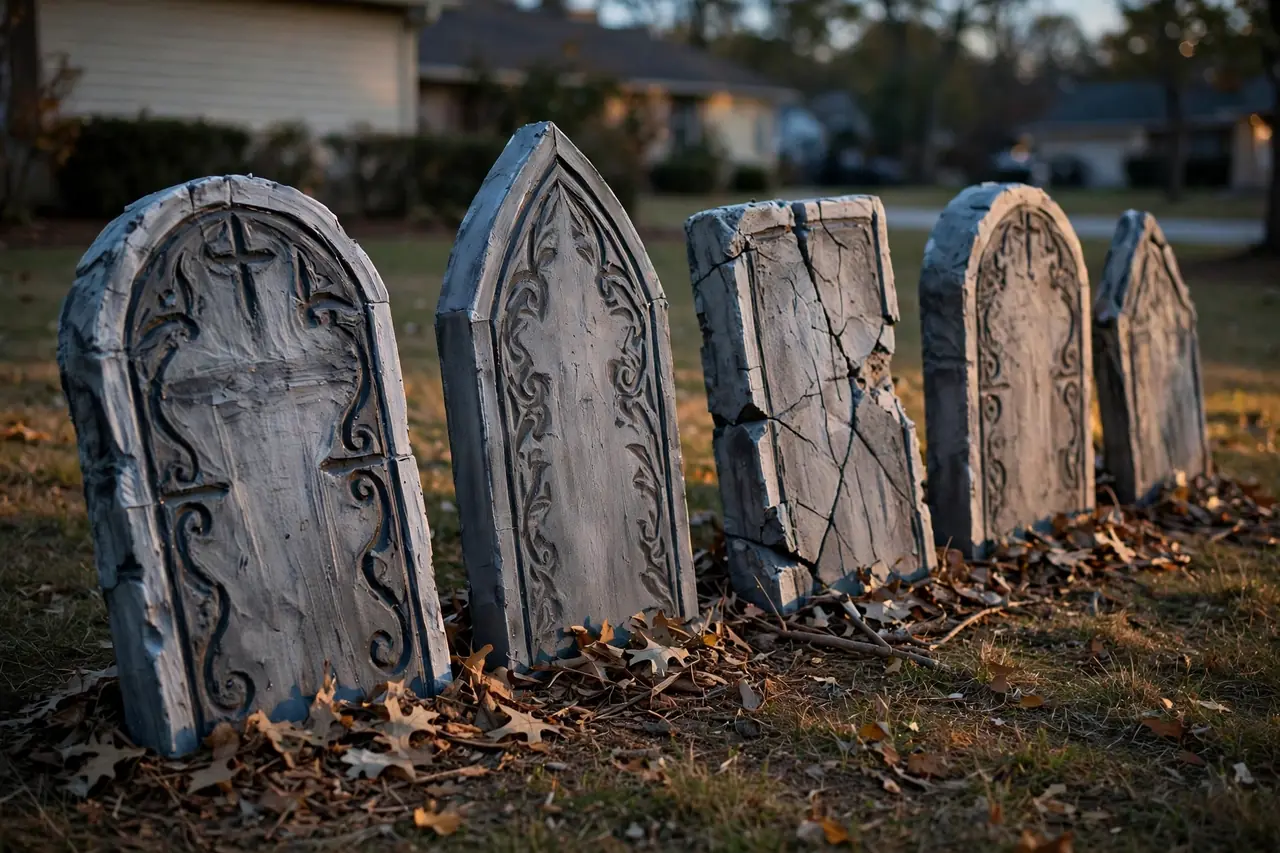
A tombstone row is the backbone of almost every home graveyard, and foam insulation board is the material most builders choose: cheap, light, easy to cut, and thick enough to carve real letters into. Vary the shapes — rounded tops, pointed tops, one cracked rectangle — because identical stones read as store-bought, while mixed shapes read as an old cemetery.
Materials
- Foam insulation board, 1 to 2 inches thick
- Exterior latex or acrylic paint in gray, plus black and white for aging
- Short lengths of PVC pipe or wooden dowels for stakes
- Strong outdoor glue
- Utility knife or hot wire foam cutter, marker, paintbrushes
- Cheap DIY garden path ideas — building the walkway that carries trick-or-treaters through the display.
Steps
- Draw each tombstone outline on the board with a marker. Mix heights and shapes on purpose.
- Cut along the lines with a utility knife using several shallow passes, or a foam cutter if you have one.
- Carve the epitaph into the face with the knife tip or a pencil pressed into the foam. Short and funny beats long and clever.
- Paint the whole stone gray and let it dry fully. Dry-brush black into the letters and edges, then a light white pass on the raised areas, so the carving reads from the street.
- Glue a short PVC pipe or dowel vertically to the back of each stone, leaving the lower half of the stake exposed. That exposed half is what goes into the ground.
- Push the stakes into the soil and angle two or three stones slightly, the way real old stones lean. Scatter a little mulch or dead leaves at the bases.
Weatherproofing and anchoring: paint every face, including the back and bottom edge, because unpainted foam drinks water through its cut cells. The glued back-stake is the anchor — push it deep enough that the stone’s bottom edge nearly touches the ground, so wind pushes against soil, not air. In a windy yard, upgrade to two stakes per stone. If you would rather place props on a porch or indoors as well, our standalone do it yourself Halloween props guide covers portable versions of tombstones, ghosts, and spiders for anywhere in the house.
Project 2: Cheesecloth Ghost Figures
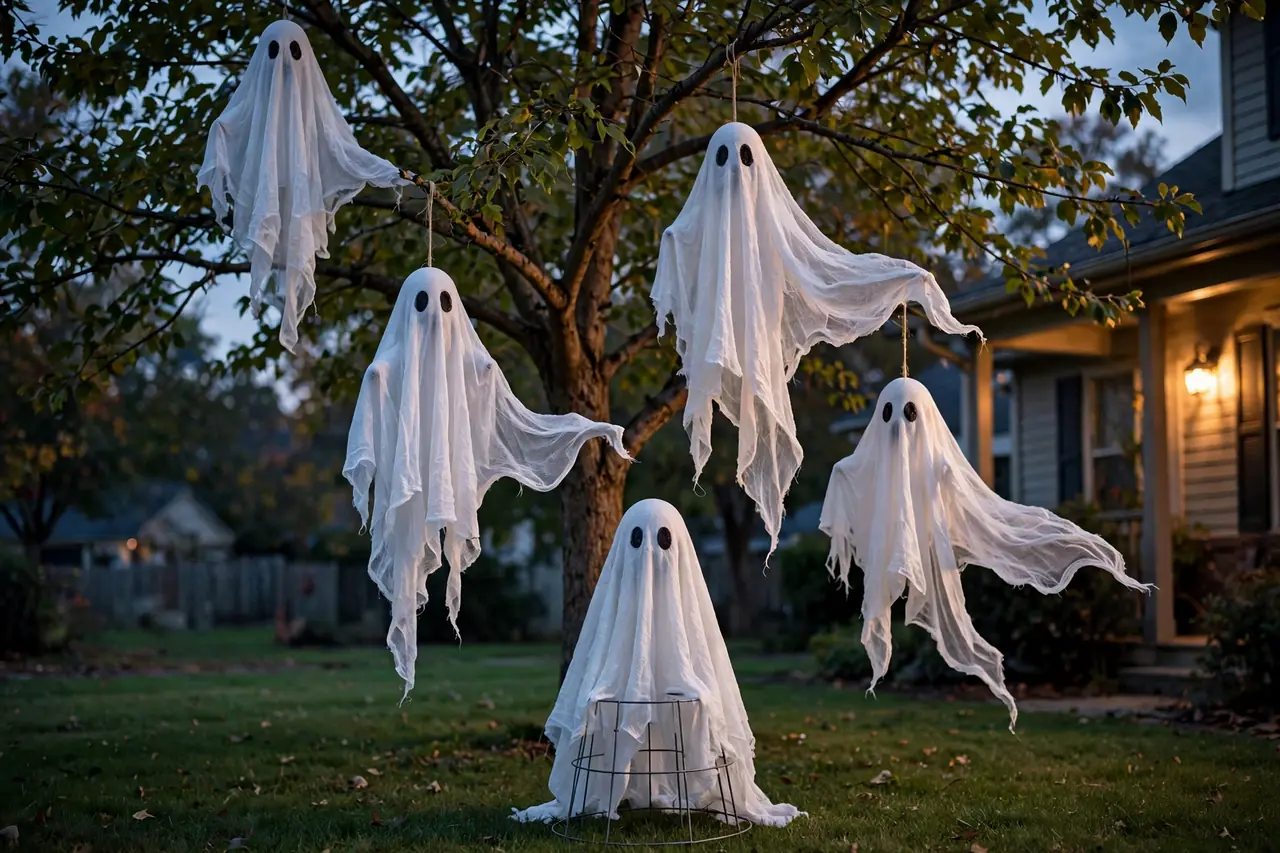
Ghosts give you movement, which no static prop can match. A cheesecloth ghost costs almost nothing, takes minutes, and sways in any breeze. You can hang them from branches or build the standing version on an upside-down tomato cage when you have no tree in the right spot.
Materials
- Cheesecloth, or thin white fabric or old white sheets
- Foam balls or balloons for heads
- Fishing line or twine for hanging
- Fabric stiffener or spray starch (for the standing version)
- Black felt or a fabric marker for eyes
- Tomato cage (standing version only)
Steps for hanging ghosts
- Place a foam ball or balloon in the center of a square of cheesecloth and gather the cloth under it to form a head.
- Tie the neck with twine or fishing line, leaving a long tail of line for hanging.
- Glue on two felt eyes or draw them with a fabric marker. Off-center eyes look friendlier; low, dark eyes look spookier.
- Tie the ghosts to branches at different heights so the group moves like a family, not a uniform row.
Steps for a standing ghost
- Push a tomato cage into the ground upside down, with the wide ring at the bottom.
- Set a foam ball on the top spike as the head.
- Drape cheesecloth or a sheet over the ball and cage. Soak the cloth in fabric stiffener first if you want the draped shape to hold when dry.
- Add eyes, then stake the cage legs firmly so the figure cannot walk in the wind.
Weatherproofing and anchoring: fabric is the one material here that genuinely suffers in rain — it absorbs water, gets heavy, and can mildew if packed away damp. Hang ghosts under branches or eaves where they stay mostly dry, and tie every line with a knot that cannot slip. For the rest of the spooky mood — webs, silhouettes, and lighting tricks that make simple builds look frightening — see our guide to DIY scary Halloween decorations.
Project 3: A Giant Spider Web Corner
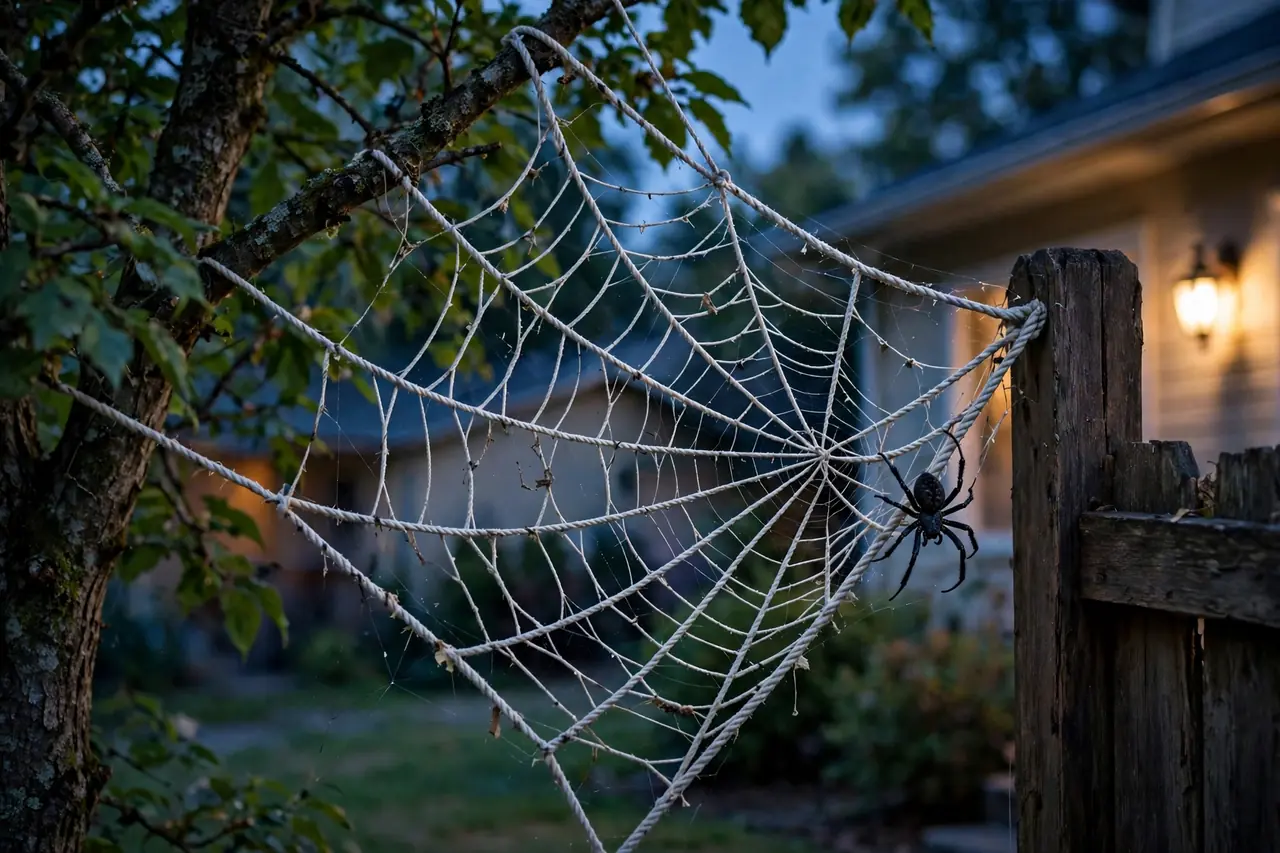
A web needs two anchor points and a corner: a tree and a fence, two porch posts, or a tree and a ground stake. Rope webs beat bagged cotton webbing outdoors because rope holds its shape in wind, reads clearly from the street, and stores in a small coil.
Materials
- White or natural rope, clothesline, or paracord
- Two large black foam balls or a stuffed black trash bag (spider body)
- Black pipe cleaners, foam tubes, or PVC lengths (spider legs)
- Cable ties and scissors
Steps
- Run three or four straight “spoke” lines from one low center point up and out to your anchor points, like a bicycle wheel cut in half. Tie each spoke tight.
- Weave a second rope in a spiral between the spokes, starting near the center and working outward. Loop it around each spoke as you pass, so the spiral cannot slide.
- Build the spider: join a large ball (abdomen) to a smaller one (head), or stuff a black trash bag firmly and tie it off in two sections.
- Bend eight legs from foam tubes or PVC, attach them to the body, and bend each leg once in the middle so it stands like a real spider.
- Cable-tie the spider to the web slightly off-center. Centered looks staged; off-center looks caught.
Weatherproofing and anchoring: the web is only as strong as its anchor points, so tie to structures, not to small branches that flex and slacken the lines. Check the spokes after the first windy night and re-tension once — rope stretches a little, then settles. The spider’s enemy is its own sail area: a stuffed-bag body needs two cable ties minimum, and in exposed yards, run one safety line from the body to the fence so a gust cannot take it to the neighbor’s roof.
Project 4: A Stacked Pumpkin Totem
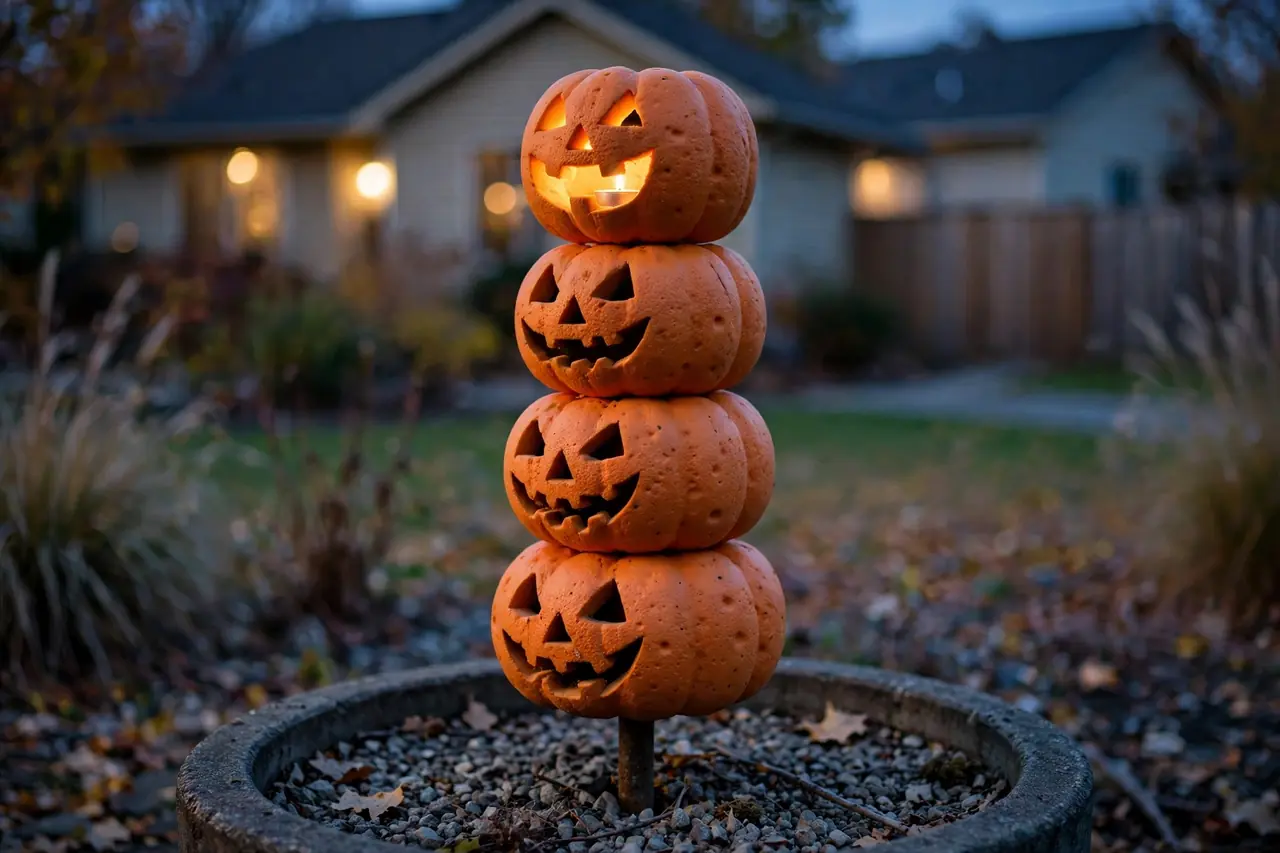
A pumpkin totem — foam pumpkins stacked on a rod — gives a small yard height without taking ground space, and greets visitors at a door or gate better than anything flat. Use craft foam pumpkins, not real ones: a real stack rots from inside and collapses, while foam stores and returns next year.
Materials
- 3 to 5 foam craft pumpkins in descending sizes
- A wooden dowel or metal rod, long enough for the stack plus ground depth
- A heavy planter, plus gravel or sand for weight
- Drill with a bit matching the rod
- Battery LED tea lights (optional, one per pumpkin)
Steps
- Fill the planter with gravel or sand and set the rod upright in the center, packing the fill tight around it. Or skip the planter and drive the rod directly into soil.
- Drill a hole through the top and bottom of each pumpkin, aligned so the rod passes straight through.
- Carve or paint faces before stacking — it is far easier on a table than on the rod.
- Slide the pumpkins down the rod, largest first, turning each one a few degrees so the faces spiral instead of lining up.
- Drop a battery tea light inside the top pumpkin, or any pumpkin you hollowed with an opening at the back.
Weatherproofing and anchoring: the totem is a lever — tall, narrow, and top-heavy by design — so the base does all the work. A planter full of gravel beats bare soil in soft or wet ground, and the rod should extend well into the base or earth, never just into the bottom pumpkin. Foam pumpkins themselves are waterproof; painted faces are the weak point, so seal them with a clear outdoor coat if yours flake. If planning the whole outdoor scene matters more than individual builds, our outside Halloween decorating ideas guide lays out porch, yard, walkway, and window zones as one plan.
Project 5: Silhouette Cutouts for Windows and Yard
Silhouettes are the highest-impact project here per dollar spent. A black shape — witch, cat, bats, reaching hands — needs no detail, because the viewer’s imagination supplies it. Indoors they backlight through a window; outdoors they stake into the lawn as flat black figures.
Materials
- Black corrugated plastic sheet for yard versions; black foam board or poster board for window versions
- Printed or hand-drawn silhouettes as templates
- Craft knife or scissors, tape (window version)
- Thin stakes or dowels and glue (yard version)
- A lamp or LED light inside the room (window version)
Steps
- Draw or print your shape at full size. Simple outlines with no thin parts survive cutting best.
- Trace the shape onto your sheet and cut slowly, turning the sheet instead of forcing the knife around curves.
- For windows: tape the cutout flat against the inside of the glass, then place a lamp behind it in the room. At night the whole window glows and the shape goes solid black.
- For the yard: glue a stake to the back, push it into the soil, and angle the figure so it catches your porch light or a spotlight from the front.
Weatherproofing and anchoring: this is why material choice splits by location. Poster board and foam board are indoor materials — one rainy night destroys them — while corrugated plastic is made for outdoor signs and ignores rain completely. Yard silhouettes are flat sails, so use two stakes on wide shapes and push them deep; a single center stake lets the piece spin and eventually snap at the glue line.
Anchoring and Weatherproofing Rules That Save Every Build
Wind, not rain, kills most yard displays. Rain mostly fades paint; wind folds, snaps, and relocates anything light and tall. Run through these rules once when you set up, and again after the first storm of the season.
- Stake everything light. Foam pieces get back-stakes glued on before painting day, not improvised after. Two stakes beat one on anything wider than your hand.
- Weight what you cannot stake. Sandbags, gravel-filled planters, and concrete blocks hold pieces on patios and driveways where stakes cannot go.
- Use line, not hope, for hanging pieces. Fishing line or wire ties hanging figures to solid branches and posts. Joy Us Garden’s long-running graveyard display relies on exactly this trio — stakes, ties, and fishing line — because coastal wind taught the lesson in its first year.
- Bury an edge where you can. A tombstone or silhouette with its bottom edge an inch into the soil has far less sail area than one floating above the grass.
- Seal the whole piece. Paint or seal backs, bottoms, and cut edges. Water enters through the unfinished side, not the painted face.
- Test before the big night. Builder Craving Some Creativity advises testing the stability of large decorations before a stormy night — a five-minute wiggle test in October beats chasing a tombstone down the street on Halloween.
A quick decision guide for the anchor that fits your piece:
Which anchor should you use?
| Your piece | Best anchor | Backup for stormy yards |
|---|---|---|
| Foam tombstone or silhouette | Glued back-stake pushed deep | Second stake plus buried bottom edge |
| Standing figure (ghost cage, character) | Staked legs or frame | Sandbag or gravel weight inside the base |
| Hanging ghost or figure | Knotted fishing line on a solid branch | Second line to a different point to limit swing |
| Tall stack (pumpkin totem) | Rod into packed planter or deep soil | Guy lines from the rod to two ground stakes |
| Web corner | Spokes tied to structures | Re-tension after the first windy night |
Lighting Your Builds Without Creating a Hazard
Your builds earn their keep after dark, and the safest light is the one with no cord at all: battery LED tea lights inside pumpkins, solar stakes along the path, and one spotlight aimed at the graveyard. When you do plug lights in, treat it as electrical work, not decorating. The U.S. Consumer Product Safety Commission’s holiday decorating safety tips say to use only lights tested by a recognized laboratory such as UL or ETL, to check every set for cracked sockets, frayed wires, or loose connections and throw out damaged sets, and — outdoors — to plug lights only into a ground-fault circuit interrupter (GFCI) protected receptacle or a portable GFCI.
Three habits cover most of the risk. First, keep cords along edges and out of the walking path entirely; a cord across a dark walkway is the most common way a fun yard turns into a sprained ankle. Second, keep plugs and connections off wet ground and out of puddles. Third, turn lights off when you go to bed or leave the house — the CPSC gives the same advice, because a shorted strand cannot start a fire it has no power to feed. For year-round yard lighting ideas that also serve a display, our guide to outdoor string lights covers placement and weather ratings in depth.
Keep real flames out of the yard altogether. Battery candles give the same flicker inside a pumpkin or lantern with none of the risk from wind, costumes, or dry leaves.
Storage: Pack It Right and Next October Takes an Hour
The season’s last job decides whether next year’s setup takes an afternoon or a weekend. Dry everything completely before it goes into a bin — a graveyard-display builder at Joy Us Garden warns that props packed damp come back mildewed and funky the next year. Fabric ghosts need a full sunny day of airing; foam needs a wipe and a check that no water sits in carved letters.
- Store flat foam pieces upright against a wall or stacked with cardboard between painted faces, so they do not warp or stick together.
- Coil the web rope loosely and keep its spider attached or bagged with it, so the set stays a set.
- Label multi-part builds. Craving Some Creativity recommends labeling PVC and frame pieces for easy reassembly — a strip of tape with a number saves real time next season.
- Keep battery lights with the prop they light, batteries removed, so nothing corrodes in the dark.
- Photograph your finished yard before teardown. One phone photo is the best setup diagram you will ever have.
Related Guides
- Outside Halloween Decorating Ideas — the whole-outdoor plan: porch, yard, walkway, and window zones, mixing bought and DIY pieces.
- Spooky Halloween Yard Ideas — theme-first scenes for the yard, from graveyard to haunted forest, when you want the story before the builds.
- Do It Yourself Halloween Props — standalone buildable props for the porch, indoors, or anywhere a full yard display does not fit.
- DIY Scary Halloween Decorations — the scary look itself: lighting, webs, and silhouettes that make simple builds feel frightening.
- Pallet Halloween Decorations — sturdy reclaimed-wood yard projects for builders who prefer saws to craft knives.
- DIY Haunted House Props — props built for a walk-through home haunt, room by room.
Frequently Asked Questions
What are the best materials for large DIY outdoor Halloween decorations?
For durability, Craving Some Creativity points to PVC pipe, treated lumber, and metal rods for frames, with foam board, chicken wire, and pool noodles as lightweight shaping materials. In this guide’s builds, foam insulation board, corrugated plastic, and rope do most of the work. Whatever you choose, finish it with outdoor-rated paint so rain cannot undo the build.
How do you keep large Halloween decorations from blowing over in the wind?
Anchor them: stakes or rebar driven into the ground, sandbags or gravel weight on hard surfaces, and glued back-stakes for foam. Builder guidance also stresses testing stability before a stormy night. The anchoring table above matches each build in this guide to its best anchor — start there, and use the backup column if your yard is exposed.
How do you store oversized Halloween props after the holiday?
Dry everything fully first, then store flat panels upright against a wall so they cannot warp. Disassemble what comes apart, label frame pieces for reassembly, and use breathable covers instead of sealed plastic so trapped moisture cannot grow mold. Keep each prop’s lights and stakes in its box, and next year’s setup shrinks to an hour or two.
What are some easy large outdoor Halloween decorations for beginners?
The ranking guides point to oversized foam tombstones, tomato cage ghosts, and giant yard spiders — and all three appear in this article as Projects 1, 2, and 3. Start with the tombstone row: it needs the fewest tools, forgives rough cutting, and still changes the whole feel of a yard. Add the ghosts next year when you know your yard’s wind.
What are some funny tombstone sayings I can use?
Builders’ favorites include “I told you I was sick,” “I’m just resting my eyes,” and “I finally found a WiFi signal.” Keep epitaphs short — three to six words carved large read from the street, while a long joke only works up close. One funny stone among serious ones lands better than a whole row of punchlines.
How do I decorate my yard for Halloween on a budget?
Build one scene instead of scattering single items: a tombstone row from one foam board, cheesecloth ghosts from fabric scraps, and a rope web cost very little and reuse for years. Focus spending on the anchors and one light, not on more props. Fewer, well-placed, well-anchored pieces beat a yard full of loose decorations every time.
Pick your first project, buy one board or one bundle of cheesecloth, and finish it this weekend — a single completed build in the yard is worth five planned ones. Next season, add one more project and photograph the result; in three years you will own the display your street slows down for.
Disclaimer: This guide is general information for home decorating projects, not professional advice. Follow tool and product manufacturers’ instructions, plug outdoor lighting only into GFCI-protected receptacles as the CPSC advises, and keep cords and stakes out of walkways. If any part of a project involves electrical installation or work you are not comfortable doing, hire a qualified electrician instead.