Most homeowners spend weeks second-guessing their driveway choice — and then go ahead without fully understanding what they’re committing to. A gravel driveway looks simple on the surface: you dig, you lay stone, you drive on it. But there’s a lot that happens between those steps that determines whether your driveway stays solid for fifteen years or turns into a rutted, muddy mess after the first wet season.
This guide walks you through everything — what gravel driveways actually are, which materials to choose, what installation really involves, and how to keep one in good shape long-term. No padding, no theory — just the practical information you need to make a confident decision.
The Short Answer
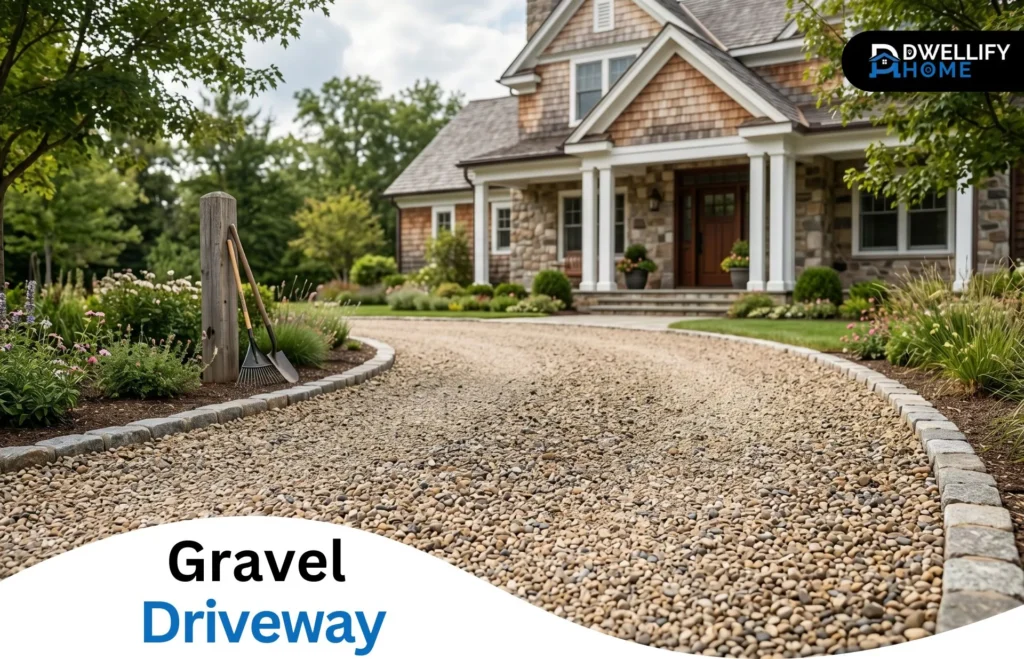
A gravel driveway is a layered crushed-stone surface that provides a permeable, low-cost alternative to asphalt or concrete. Homeowners choose it for its natural drainage, affordability, and ease of repair — making it especially practical for rural properties and long driveways.
Mission Statement
Dwellify Home At Dwellify Home, our goal is straightforward: help homeowners make practical, well-informed decisions about their living spaces — from the driveway to the garden and everything in between. We focus on real guidance over trends, and honest advice over hype.
What Is a Gravel Driveway?
A gravel driveway is a layered stone surface built from compacted aggregates — crushed rock, gravel, or stone — that together form a stable, permeable driving area. Unlike asphalt or concrete, it lets rainwater drain directly through the surface rather than running off to one side. That permeability is one of its biggest practical advantages.
How It’s Built and Why It Works the Way It Does
The strength of a gravel driveway comes from its layers, not just its surface. A properly built driveway has a large-stone base for structural support, a medium aggregate middle layer for stability, and a finer top course for driving comfort. Each layer is compacted before the next one goes down.
When those layers are done right, the stones interlock under pressure and create a surface that handles vehicle weight without shifting. When they’re done wrong — or skipped entirely — you get a driveway that ruts, sinks, and scatters within a season or two.
Clean Gravel vs. Minus Gravel — What the Difference Means for You
This is something a lot of homeowners don’t hear until after they’ve ordered the wrong material. Clean gravel has no fine particles — it drains well and sits loosely, which makes it good for base layers and drainage beds. Minus gravel (like ¾” minus) contains fine dust from the crushing process that fills the gaps between larger stones and packs down tight.
For a driving surface, you generally want a minus gravel. It compacts, stays in place, and doesn’t scatter under tires. Clean gravel looks tidy in photos, but on a driveway with daily traffic, it shifts and spreads quickly.
Quick Comparison: Gravel vs. Asphalt vs. Concrete
| Feature | Gravel | Asphalt | Concrete |
| Cost per sq. ft. (installed) | $1–$3 | $5–$12 | $6–$15 |
| Drainage | Excellent | Poor | Poor |
| Lifespan (maintained) | Indefinite | 15–20 yrs | 30–40 yrs |
| DIY-friendly | Yes | No | No |
| Repair difficulty | Easy | Moderate | Difficult |
| Winter performance | Moderate | Good | Good |
| Best suited for | Rural, large properties | Suburban driveways | High-traffic, urban |
Key Benefits at a Glance
- Costs significantly less than asphalt or concrete — both to install and repair
- Naturally permeable surface reduces runoff and handles heavy rain well
- Repairs require no professional help — just material and a rake
- Works across a wide range of property styles and sizes
- Can last decades with basic annual maintenance
Is a Gravel Driveway the Right Choice for Your Property?
A gravel driveway works well in many situations — but not all. The right answer depends on your site, your climate, and how you use the driveway.
Soil Type and Site Conditions to Assess Before You Start
Clay-heavy soil is problematic. It holds moisture, expands when wet, and shifts under load — which means your gravel base can sink or heave over time without proper preparation. Sandy soil drains better but offers less structural support. Both can work with the right base design and a geotextile fabric layer, but you need to know what you’re working with before you order materials.
Walk the area after rain. If water sits or the ground feels spongy, you’ll need deeper excavation and possibly a larger base stone before anything else goes down.
How Climate and Weather Affect Long-Term Performance
In colder climates, freeze-thaw cycles are your biggest enemy. Water gets into the gravel bed, freezes, expands, and pushes stones out of position. Angular crushed stone handles this better than rounded gravel because its edges lock together more securely.
In very dry climates, dust can be an issue with lighter surface materials. Self-binding gravel or decomposed granite tend to perform better in those conditions because they compact more firmly.
Traffic Load and Property Size — Setting Realistic Expectations
For a standard two-car residential driveway with light to moderate traffic, almost any properly installed gravel setup will perform well. If you’re regularly bringing in heavy vehicles — delivery trucks, equipment, or trailers — you’ll want a deeper base and a crusher run surface rather than pea gravel or decorative stone.
Long driveways (over 100 feet) are actually where gravel shines most. The cost advantage over concrete or asphalt becomes significant at scale, and the drainage benefits matter more across larger surface areas.
Gravel Driveway Pros and Cons
What Makes Gravel Worth Considering
Cost is the most obvious advantage. A gravel driveway typically costs $1 to $3 per square foot installed, compared to $6 to $15 for concrete or asphalt. For a 500 to 1,000 square foot driveway, that gap adds up to thousands of dollars.
Beyond cost, the drainage performance is genuinely hard to beat. Water passes through naturally, which reduces runoff, eliminates pooling, and takes pressure off your property’s drainage system.
Repairs are also straightforward. A pothole in concrete or asphalt needs professional equipment. A pothole in a gravel driveway needs a shovel and a bag of new material.
The Honest Drawbacks You Should Know About
Gravel moves. No matter how well it’s installed, vehicles will push surface stones to the edges over time, and you’ll need to rake and replenish periodically. On steep driveways, this happens faster.
Snow removal is more complicated. A metal plow blade will scoop up gravel along with snow, so you’ll either need rubber-edged plowing equipment or resign yourself to hand-clearing near the surface.
It also tracks into your home more than hard surfaces do. Shoes, paws, and bike tires carry small stones inside. It’s a minor issue, but a real one.
Types of Gravel for Driveways — Which One Is Right for You?
Crushed Stone (#57, #411, #3) — The Most Reliable All-Round Option
These are the workhorses of driveway gravel. #57 stone (roughly ¾ inch) is one of the most commonly used top-layer materials — it compacts reasonably well, drains effectively, and holds up under regular vehicle use. #411 is a mix of crushed stone and fines that packs down even tighter. #3 stone (about 2 inches) is typically used as a base layer, not a surface.
For most residential driveways, #57 or #411 on top of a #3 or #4 base is a proven combination.
Crusher Run — Best for Compaction and Heavy Use
Crusher run is a blend of crushed stone and stone dust that packs almost like a solid surface when properly compacted. It’s the go-to for driveways that see heavy loads or high traffic. It’s also among the most affordable options at $20 to $30 per ton. The downside is that it doesn’t drain as freely as clean stone — if drainage is a priority, it’s better used as a sub-base rather than a top course.
Pea Gravel — Good Looking but Needs Containment
Small, smooth, and rounded, pea gravel is visually appealing but functionally frustrating on a driveway. It doesn’t compact, it rolls underfoot, and it scatters constantly without solid edging on both sides. It has its place in decorative pathways and garden borders, but for a working driveway with daily vehicle traffic, it’s rarely the right call.
Decomposed Granite — A Smart Choice for Dry Climates
Decomposed granite (DG) compacts firmly, has a natural sandy-gold appearance, and works well in low-rainfall areas. In wet climates, it softens and erodes. In dry regions, it can outperform most other surface options for appearance and stability. Cost runs $40 to $80 per ton depending on your area.
River Rock — Decorative Use Only
River rock is rounded, smooth, and shifts easily under vehicle weight. It’s genuinely beautiful as a border or landscape feature, but it performs poorly as a driveway surface material. If you want the aesthetic, use it as an accent alongside a more functional gravel type — not as the primary surface.
Self-Binding Gravel — Low Scatter, Neat Finish
Self-binding gravel contains a natural clay content that causes it to bind together when wet and compacted, creating a firm, semi-solid surface. It scatters far less than loose stone and gives a cleaner, more polished look. It’s popular in UK markets and increasingly available elsewhere. It’s not as permeable as open aggregate, but it works well for homeowners who want gravel aesthetics without constant raking.
Understanding the Three-Layer System
The three-layer approach is the foundation of any driveway that holds up over time. Skipping layers or cutting depth is the most common reason gravel driveways fail within a few years.
Layer 1 — The Foundation (Large Base Stone)
The base layer uses large angular stone — typically #3 or #4 crushed stone at 1.5 to 2 inches — laid 4 to 6 inches deep. This layer handles the structural load and provides the primary drainage channel. Angular stone is critical here; rounded stone won’t lock together and will shift under pressure.
Layer 2 — The Sub-Base (Medium Aggregate)
The middle layer is typically 3 to 4 inches of medium-sized aggregate like #57 stone or crusher run. This bridges the gap between the large base and the finer surface, prevents the top layer from sinking into the base, and adds stability across the full depth.
Layer 3 — The Top Course (Surface Gravel)
The top course is 2 to 3 inches of your chosen surface material — usually #57, #411, or self-binding gravel. This is what vehicles drive on, so compaction here matters. A plate compactor pressed over the top course will lock the stones in and dramatically reduce early scatter.
Where Geotextile Fabric Fits In and Why It Matters
Geotextile fabric (sometimes called landscape fabric or road fabric) goes down on the bare soil before any gravel. Its job is to separate the soil from the stone layers, preventing the base from slowly sinking into soft ground over time. In clay-heavy or moisture-prone soils, skipping this step is a mistake you’ll notice within two or three years. It’s inexpensive and takes less than an hour to lay — never skip it.
How to Build a Gravel Driveway — Step by Step
Step 1 — Plan Your Layout and Drainage Direction
Before anything else, decide where water needs to go. A properly graded driveway has a slight crown (higher in the center, sloping to the sides) or a consistent slope to one edge. Without a plan for water direction, you’ll be fighting erosion and pooling for the life of the driveway.
Step 2 — Mark and Excavate to the Right Depth
Mark the edges clearly with stakes and string. Excavate to a depth of 8 to 12 inches for a full three-layer installation — 12 inches for heavy-use driveways, 8 inches for light residential use. Remove all vegetation, roots, and soft material.
Step 3 — Lay the Geotextile Fabric
Roll the fabric across the excavated base, overlapping seams by at least 12 inches. It doesn’t need to be pinned in most cases — the weight of the stone keeps it in place. Trim cleanly at the edges.
Step 4 — Add and Compact the Base Layer
Spread your large base stone evenly to a depth of 4 to 6 inches. Run a plate compactor over the entire area, passing in overlapping rows. Don’t rush this step — a properly compacted base is what makes everything above it stable.
Step 5 — Add the Middle Layer
Spread the medium aggregate and compact again. The middle layer should sit firm and not shift when you walk across it before you add the top course.
Step 6 — Finish With the Top Course and Final Compaction
Spread your surface gravel evenly. Use a lighter pass with the compactor here — enough to lock the stones without over-crushing them. Rake for an even finish and check that your drainage slope is correct before calling it done.
Step 7 — Install Edging to Keep Gravel Where It Belongs
Edging is not optional if you want the driveway to hold its shape. Timber, steel, concrete banding, or brick — the material matters less than the depth. Edging needs to be set firmly into the ground so it contains the stone and doesn’t lean or shift over time.
How Much Does a Gravel Driveway Cost?
A standard gravel driveway costs between $1,500 and $5,000 for professional installation, or $800 to $2,500 for a DIY build. The range is wide because driveway size, gravel type, and site conditions all affect the final number significantly.
Average Gravel Driveway Prices Per Square Foot
Professionally installed, most gravel driveways run $1 to $3 per square foot for materials alone, and $4 to $8 per square foot all-in with labor, excavation, and compaction. A 1,000 square foot driveway will typically land between $3,000 and $5,000 with professional installation.
What Drives the Cost Up (and What Keeps It Down)
The biggest cost variables are the type of gravel you choose, the depth required, site prep complexity, and how far the supplier needs to deliver. Decorative options like river rock or blue stone can cost $50 to $120 per ton, while functional materials like crusher run sit at $20 to $30 per ton.
Keeping costs down without cutting corners: buy gravel in bulk, source from a local quarry within 30 miles to reduce delivery charges, and purchase 10 to 15 percent extra so you have material for the first year or two of maintenance without a separate delivery.
DIY vs. Professional Installation — Where the Real Savings Are
DIY can save 40 to 60 percent on labor costs. The work itself isn’t technically complex, but it does require a plate compactor (rentable for $75 to $150 per day) and physical effort across a full day or two. The risk with DIY isn’t the installation itself — it’s skipping proper grading, under-excavating, or using the wrong materials.
If you’re unsure about your site’s drainage or soil conditions, bringing in a professional for at least the excavation and base layer is worth the cost. You can always handle the top course yourself.
How to Calculate How Much Gravel You Need
Use this straightforward formula: Length (ft) × Width (ft) × Depth (ft) ÷ 27 = cubic yards needed. For a 4-inch layer, depth in feet is 0.33. Most driveways need 4 to 6 inches of combined material across all layers. When in doubt, order slightly more than your calculation — short deliveries always cost more than ordering extra upfront.
Permit Requirements and What to Expect
Permit requirements vary by location, but most municipalities require a permit when a new driveway connects to a public road. Expect to pay $50 to $300 for a standard residential permit. Some areas also require drainage plans or engineering drawings for larger installations. Check with your local building or public works department before you start — it takes a phone call and can save a costly compliance issue later.
Gravel vs. Asphalt vs. Concrete — A Practical Side-by-Side
Gravel wins on upfront cost — clearly. Asphalt and concrete both run two to five times more per square foot. But cost isn’t the only consideration.
Asphalt lasts 15 to 20 years with regular sealing and crack repair. Concrete can last 30 to 40 years with minimal upkeep but cracks in freeze-thaw climates and costs significantly more to install. Gravel needs periodic top-ups and regrading, but individual repairs cost almost nothing and don’t require professionals.
For drainage, gravel is the clear leader — it’s fully permeable, which is increasingly relevant where stormwater regulations are tightening. Asphalt and concrete both require engineered drainage solutions to handle runoff.
Aesthetically, concrete and asphalt look cleaner and more urban. Gravel suits rural properties, large estates, country homes, and any property where a natural or rustic look fits the landscape. On longer driveways — over 200 feet — the cost advantage of gravel becomes so significant that most homeowners don’t seriously consider alternatives.
How to Maintain a Gravel Driveway
Consistent, simple maintenance is what separates a driveway that looks good for decades from one that deteriorates within a few years.
Raking and Regrading — How Often and What to Watch For
Rake the surface two to four times per year — once in spring after winter, once in autumn, and as needed after heavy rain. The goal is to redistribute displaced stone and maintain your drainage slope. A hard rake moves material quickly; a landscape rake gives a smoother finish.
Watch for low spots developing near the edges or center — these are where water will start pooling if left unaddressed.
Filling Potholes and Ruts the Right Way
Don’t just fill a pothole with surface gravel. Dig out the soft material beneath it first, add base stone, compact it, then refill with your surface material. Filling over soft ground just delays the problem by a season.
Ruts caused by repeated tire tracking in the same path are normal. Regular raking redistributes gravel back into them. For deep ruts, compact the base again before topping up.
When to Top Up Your Gravel and How Much to Add
Most residential driveways need a top-up every one to three years. Signs it’s time: you can see the base layer through the surface, water is pooling in flat areas, or the surface feels thin underfoot. A 2-inch top-up layer is usually sufficient for routine maintenance. For a complete refresh after heavy wear, 3 to 4 inches is more appropriate.
Weed Control That Won’t Damage Your Driveway
The geotextile fabric below your base layer does most of the work, but weeds will still germinate in the surface gravel from airborne seeds. Hand-pulling works fine for light growth. For broader coverage, a salt-based or horticultural vinegar solution is effective without leaving chemical residue that can affect adjacent soil or plants.
Avoid thick landscape fabric on top of the gravel — it traps debris, degrades, and eventually creates more maintenance problems than it solves.
Seasonal Maintenance Through the Year
Spring is the most important maintenance season. After winter, check your drainage slope, fill any frost-heaved low spots, and rake the full surface. Summer is low-maintenance — just a quick rake if stones scatter. Autumn is a good time for a top-up before winter, so the surface is in good condition going into the wet season.
Winter Care — Clearing Snow Without Destroying the Surface
A standard metal plow blade set flat will tear up your top layer. Raise the blade slightly above the surface so it rides on the gravel rather than scraping through it. A rubber-edged blade is even better. Snow blowers work well on gravel driveways and cause minimal stone displacement. Avoid rock salt in high quantities — it won’t harm the gravel itself but can damage edging materials and any adjacent vegetation over time.
Common Gravel Driveway Problems and How to Fix Them
Gravel Scattering and Displacement
The most common complaint — and the most preventable. It happens fastest on driveways without edging, on surfaces with rounded stone, and in areas with fast-moving vehicle turns. Solid edging, angular stone, and occasional raking solve most scattering issues. If it’s severe, consider switching to a self-binding gravel or adding a stabilization grid under the top layer.
Muddy or Soft Spots After Rain
Soft spots usually mean one of two things: the geotextile fabric wasn’t installed, or the base layer is too thin. Water is getting into the soil below, softening it, and letting the stone sink. The fix involves digging out the affected area, addressing the drainage issue, relaying fabric, and rebuilding the layers. It’s work, but it’s a one-time correction if done properly.
Rutting and Uneven Sections
Light rutting is normal wear and managed by raking. Deep, recurring ruts in the same spots usually mean the base layer under that section has failed. Dig down, check the base, compact again if it’s loose, and rebuild from there. Permanent rutting that keeps returning despite maintenance is typically a sign of inadequate excavation depth at the start.
Poor Drainage and Standing Water
Standing water after rain means your drainage slope has failed or was never set correctly. Water should sheet off the surface or flow to a planned edge. If pooling is happening in the middle of the driveway, the crown has collapsed. Regrading with a box blade or landscape rake — or in serious cases, bringing in a contractor with a grader — will restore the slope.
Gravel Stabilization Options Worth Knowing About
Gravel Grids and Honeycomb Stabilizers
Gravel grids are interlocking plastic or HDPE panels that sit beneath or within the surface layer and confine the gravel in individual cells. Stones can’t migrate laterally, scatter under tires, or wash away in heavy rain. For high-traffic driveways, steep slopes, or properties where regular raking isn’t practical, grids are genuinely worth the additional cost. A well-installed grid system can extend a driveway’s functional life to 20 to 40 years — significantly longer than unconfined gravel.
Resin-Bound Gravel — When You Want a Firmer, Neater Finish
Resin-bound gravel mixes decorative aggregate with a clear UV-stable resin to create a smooth, solid surface that still allows water to drain through. It looks far more finished than loose gravel, requires almost no maintenance, and doesn’t scatter. The cost is considerably higher — closer to $40 to $70 per square meter — but for a front driveway where appearance matters, it bridges the gap between the look of a hard surface and the drainage of gravel.
Gravel Driveway Ideas — Making It Work for Your Home
Edging Styles That Define and Contain the Driveway
The right edging changes how a gravel driveway looks entirely. Timber sleepers give a warm, natural feel. Steel edging is modern and clean, almost invisible from a distance. Brick or stone borders add a formal, traditional quality. Concrete banding is the most durable long-term but the least flexible aesthetically.
Whatever material you choose, edging needs to be set deep enough — at least 6 to 8 inches below grade — to resist lateral pressure from the gravel and vehicle movement.
Curb Appeal and Property Value — Does Gravel Actually Help?
A neatly maintained gravel driveway with clean edging and consistent stone color genuinely improves a property’s first impression. It suits certain home styles — country houses, barn conversions, period properties, and rural homes — far better than asphalt would.
Whether it adds measurable resale value depends on the property type and local market expectations. In areas where gravel driveways are common and expected, a well-maintained one is a positive. In urban areas where paved driveways are the norm, some buyers may see it as a future upgrade cost. Know your market before you decide.
DIY or Hire a Contractor — How to Decide
Most homeowners can handle a gravel driveway DIY if the site is reasonably flat, the existing soil is stable, and the driveway is under 50 feet. The tools are rentable, the materials are straightforward, and the process is well within a capable adult’s ability over a weekend.
Where DIY gets risky: poor drainage conditions, significant slope, clay soil, or a very long driveway where getting the grade wrong costs a lot to fix later.
What Gravel Driveway Contractors Typically Handle
A gravel driveway contractor handles excavation, grading, fabric installation, material delivery, layering, compaction, and edging. Some also handle drainage swales or culverts if your site needs them. For a full-service installation, expect to pay $4 to $8 per square foot in labor on top of material costs.
Questions to Ask Before You Hire Anyone
Ask how deep they plan to excavate — anything less than 8 inches for a standard driveway is a concern. Ask whether they use geotextile fabric (some skip it to save time). Ask about their compaction process and what equipment they use. Get a clear breakdown of materials: type, size, and quantity. And ask whether their quote includes final grading and edging — or just gravel delivery.
A contractor who gives you clear, specific answers to these questions is worth trusting. Vague answers about “standard installation” are worth following up on.
Frequently Asked Questions
How long does a gravel driveway last?
A properly installed gravel driveway with regular maintenance can last indefinitely. The stone itself doesn’t degrade — it just displaces over time. With annual raking and a top-up every one to three years, most homeowners get decades of solid performance from a well-built gravel driveway.
How deep should gravel be for a driveway?
The total gravel depth should be 8 to 12 inches across all three layers for most residential driveways. This includes a 4 to 6 inch base layer, a 3 to 4 inch sub-base, and a 2 to 3 inch top course. Driveways used by heavy vehicles should be closer to 12 inches total.
Can I install gravel over existing asphalt or concrete?
Technically yes, but it’s generally not recommended. Rigid surfaces don’t provide the flexible base that gravel needs to compact and drain properly. Gravel laid over solid pavement tends to shift, create a “ball-bearing” effect underfoot, and offer poor drainage. Resin-bound gravel is a better option if you want gravel aesthetics over a solid base.
Do I need a permit for a gravel driveway?
In most areas, yes — if the driveway connects to a public road. Permit costs typically range from $50 to $300. Requirements vary by municipality, so check with your local planning or public works office before breaking ground.
What is the best gravel for a driveway surface?
For most residential driveways, #57 crushed stone or #411 (a crushed stone and fines blend) are the most reliable surface options. They compact well, stay in place reasonably, and drain effectively. Crusher run is the best choice for heavy-use driveways.
How often does a gravel driveway need to be topped up?
Most driveways need a top-up every one to three years, depending on traffic volume, slope, and weather conditions. A flat, lightly used driveway in a dry climate can go longer. A sloped driveway with heavy traffic in a wet climate may need attention every year.
Conclusion
A gravel driveway is one of the most practical, cost-effective surfacing options available to homeowners — but only when it’s done right. The difference between a driveway that holds up for twenty years and one that needs work after two seasons usually comes down to the quality of the base, the depth of excavation, and the choice of materials.
Take the time to understand your site conditions before you order anything. Choose your gravel type based on how you’ll actually use the driveway, not just how it looks in a photo. And if you’re unsure about drainage or soil stability, it’s worth getting a professional assessment before you start digging.
A well-built gravel driveway looks good, drains well, costs a fraction of the alternatives, and is genuinely easy to maintain. Get the fundamentals right, and it’ll serve you for years.
Disclaimer
The content on Dwellify Home is provided for general informational purposes only. While we aim for accuracy and practical relevance, individual results, site conditions, costs, and preferences will vary. Always consult a qualified contractor or local authority before starting any home improvement project.