The best outdoor landscape lighting ideas layer three kinds of light: path lights that guide your steps, accent lights that show off trees and garden beds, and soft wash light on the house itself. A professionally installed system costs $3,500 on average in the United States, with most homeowners spending $2,000 to $6,000, according to Angi’s 2026 cost data checked November 9, 2026.
Good landscape lighting does three jobs at once. It keeps walkways and steps safe after dark, it makes your yard look beautiful at night, and it helps deter intruders. The trick is restraint. A few well-placed fixtures beat a yard full of bright lights every time.
Start With a Plan, Not a Shopping Cart
Walk your yard at night before you buy a single fixture. Notice where it feels dark, where you trip, and which features you love in daylight. A big oak, a stone wall, a garden bed, and the front door are all candidates for light. A plain fence or an empty lawn usually is not.
Sketch your yard on paper and mark three things: the paths people walk, the features worth showing off, and the dark spots that feel unsafe. These marks become your lighting zones. Most yards need only three or four: the front walk and entry, the main garden beds, one or two trees, and the patio or deck area.
Pick one focal point per zone. The Spruce’s lighting experts make the same point: choose a primary focal point, such as a prominent tree or garden structure, plus a couple of secondary areas. When everything glows, nothing stands out.
Layer your light the way designers do indoors. Use low path lights for safety, spotlights for drama, and soft wash light for background glow. The Spruce calls layered outdoor lighting the secret to a better outdoor space, and its designers recommend mixing path lights, step lights, house lighting, and garden accents instead of relying on one bright porch light.
Path and Walkway Lighting
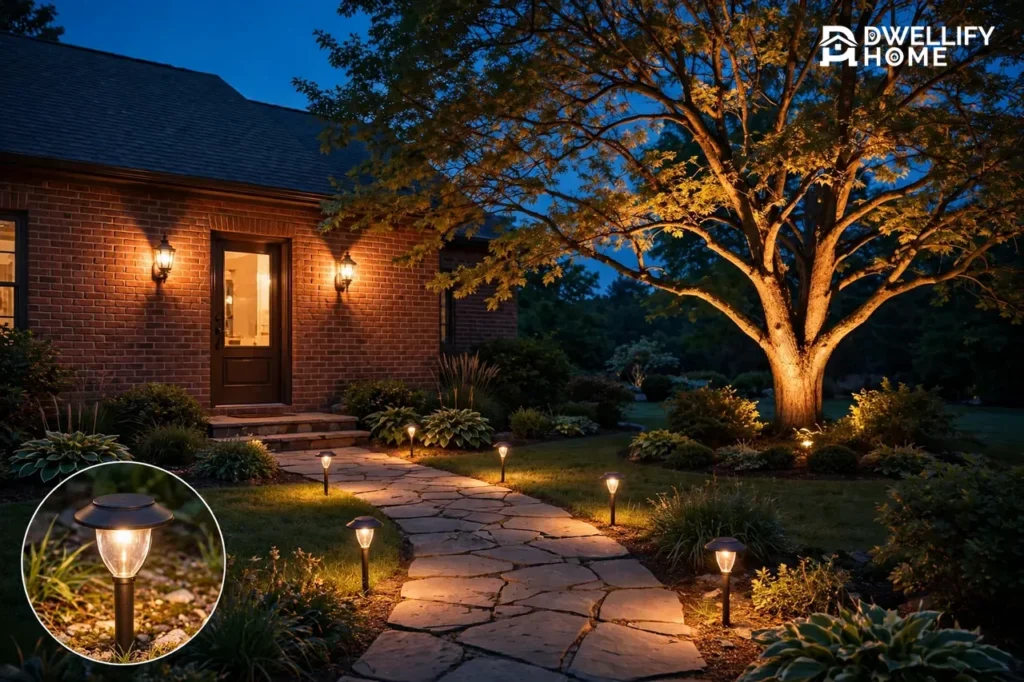
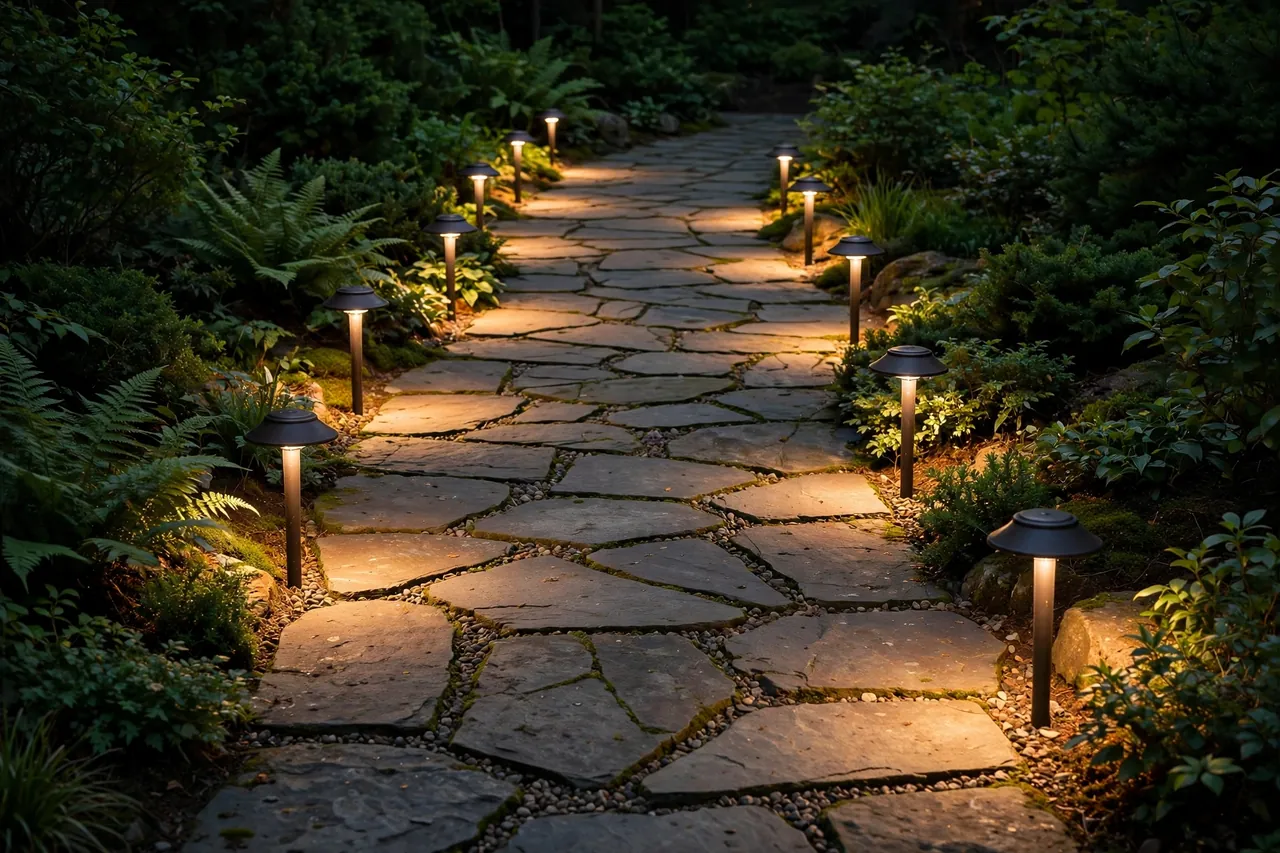
Path lights are the workhorses of landscape lighting. They sit low to the ground, usually 18 to 24 inches tall, and cast a soft pool of light downward onto the walking surface. They guide guests from the driveway or street to the front door, and they make garden paths safe after sunset.
Space them about 6 to 8 feet apart for an even look. Landscape designer Caroline Ervin, quoted by The Spruce, recommends placing path lights about eight feet apart because each one throws light roughly four feet in each direction. Stagger them on alternate sides of the path instead of lining them up in two straight rows. The zigzag pattern looks natural and lights the path more evenly.
Keep the light low and warm. Bright path lights aimed at eye level cause glare and ruin the mood. Choose fixtures with a shielded top that pushes light down onto the ground. For most walkways, 100 to 200 lumens per fixture gives plenty of light without glare.
Light every change in level. If your path has steps, add a small light at the top and bottom of each flight. A dark step is the most common trip hazard in a yard.
Uplighting Trees and Plants
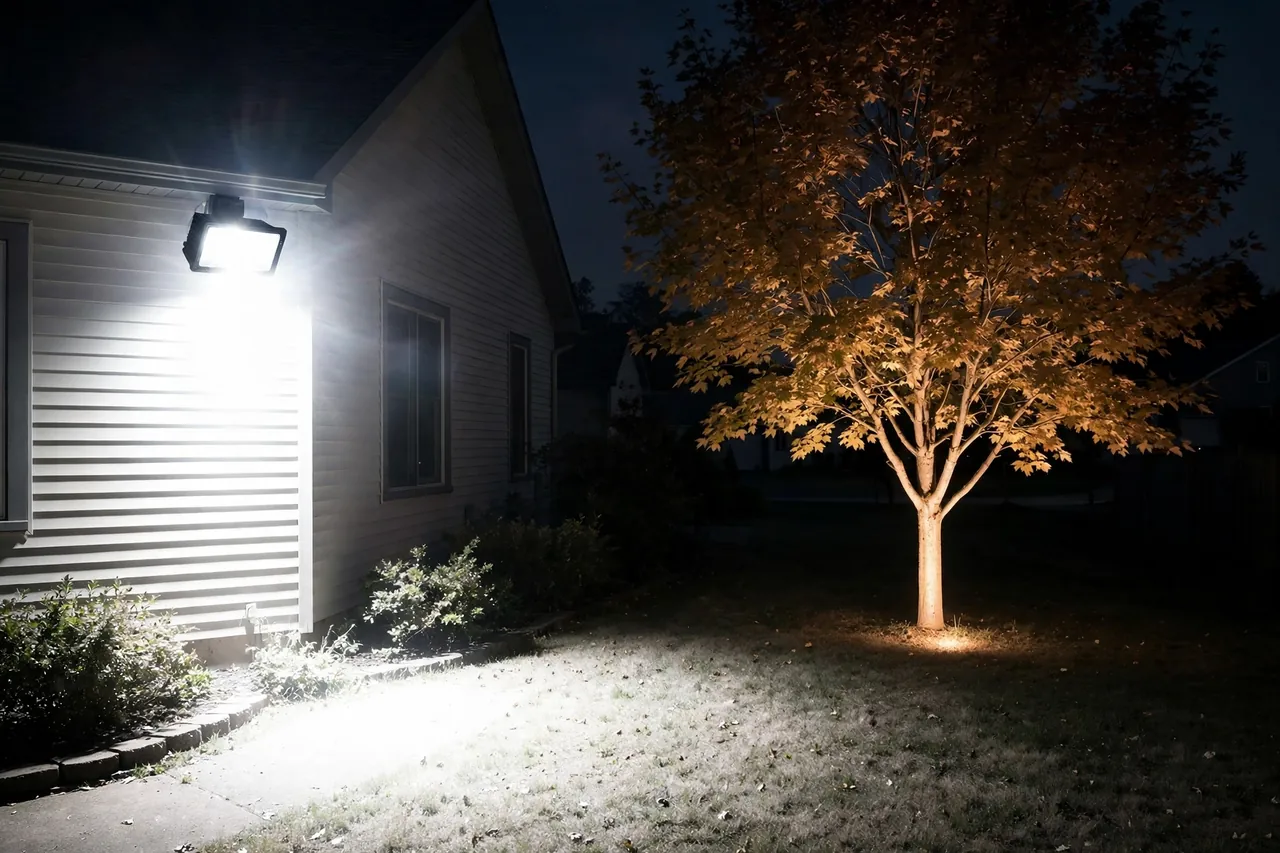
Uplighting turns an ordinary tree into the star of the yard at night. Place a spotlight or well light at the base of the tree and aim the beam up through the trunk and into the canopy. The branches catch the light, the leaves glow, and the tree looks twice as tall as it does by day.
Choose trees with interesting shapes. Japanese maples, river birches, dogwoods, and oaks with wide-spreading branches all look stunning with a little light shooting up into them. Skip small or scraggly trees. One well-lit tree beats five poorly lit ones.
Try moonlighting for a softer effect. Mount a shielded bullet fixture high in a tall tree and aim it down at the ground below. The light filters through the leaves and lands in dappled pools, just like moonlight. This Old House recommends this technique for a natural look, and it works best over a patio, a seating area, or a garden bed you use in the evening.
Backlight shrubs and ornamental grasses for a different mood. Place the light behind the plant, between the plant and a wall or fence. The plant becomes a dark silhouette rimmed with light. This trick works beautifully with tall grasses, agaves, and sculptural shrubs.
Light Your House Itself
Your house is the biggest feature in your yard, so give it some light too. Wall washing spreads a soft, even glow across a wall, a stone facade, or a brick chimney. Place wide-beam fixtures a few feet from the wall and aim them up. The texture of the stone or brick comes alive, and the house looks warm and welcoming from the street.
Flank the front door with sconces. Two matching fixtures, one on each side of the door, give guests a clear place to arrive and make the entry feel safe. Add an overhead light on the porch landing as well. Keep the color warm here, around 2700K to 3000K, so the entry feels inviting instead of stark.
Highlight the roofline with under-eaves lighting. Small fixtures tucked beneath the eaves cast a soft glow along the edge of the roof and draw the eye up to the architecture.
Never aim a light straight at a window. The glare blinds anyone inside and wastes light. Aim fixtures at walls, columns, and the spaces between windows instead.
Garden Beds, Walls, and Water Features
Garden beds need soft, low light. Small well lights set flush with the soil can wash a bed of flowers or groundcover with a gentle glow. Tier-shaped and mushroom-shaped fixtures work well here too, since they spread light sideways across low plants without blinding anyone. Light the bed, not the mulch.
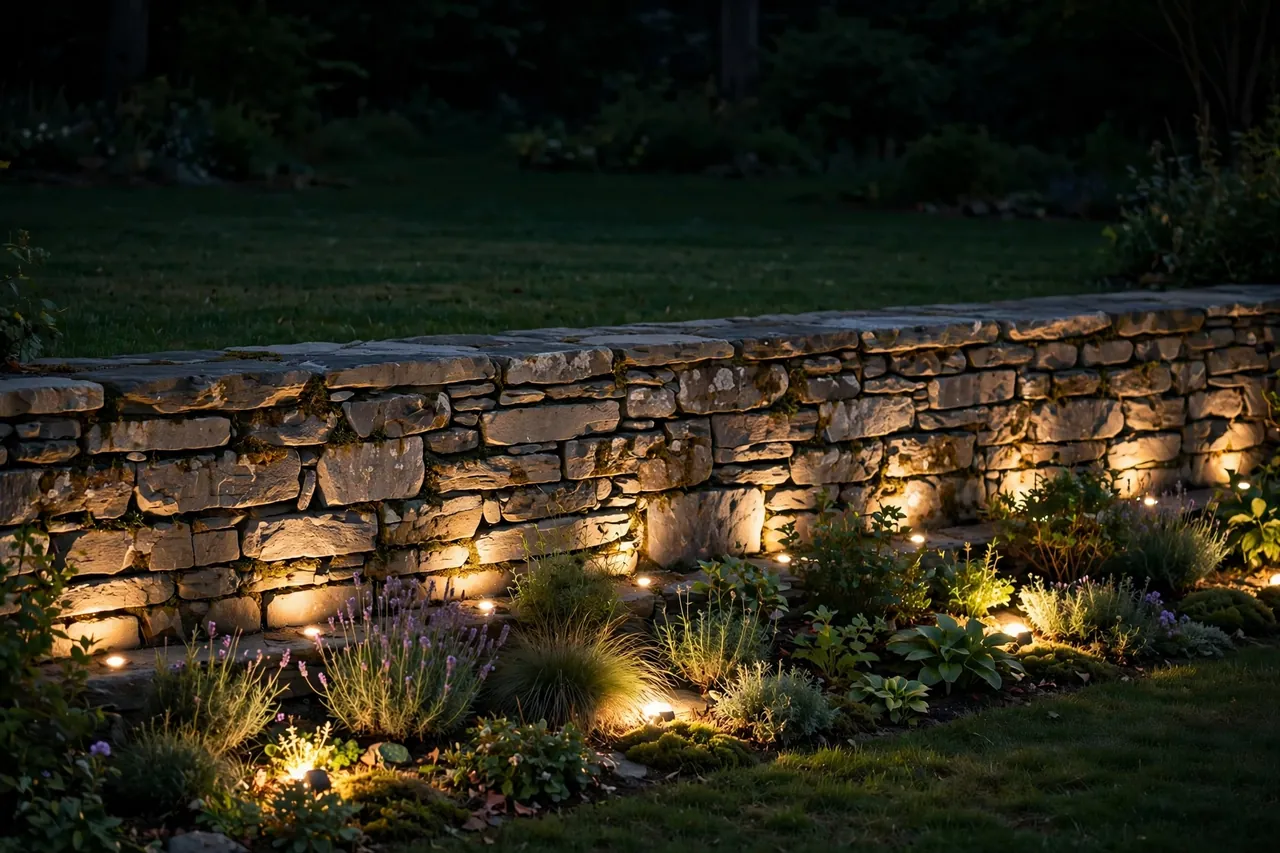
Retaining walls and garden walls love light. A row of small fixtures along the base of a wall shows off the stone or blockwork and doubles as a safety guide along a slope. If you are building a wall, plan the lighting before the wall goes up so you can hide the wiring inside it. Our guide to building a retaining wall on a slope covers the structure side of the job.
Water features glow best from below or behind. A small submersible light inside a fountain makes the water sparkle, while a spotlight aimed at a waterfall shows off the moving water. Keep fixtures out of the water unless they are rated for it.
Pool areas need light for safety as well as beauty. Low lanterns around the pool deck give a soft glow and pretty reflections on the water, while path lights guide the walk from the house to the pool. Keep fixtures low and warm around a pool so the area feels like a lounge, not a stadium. For the planting side of a pool yard, see our rectangle pool landscaping ideas.
Steps, Decks, and Driveways
Steps deserve their own lights. Recessed fixtures built into the riser of each step, or small lights set into the wall beside a staircase, make every tread visible. Light every other step on a long flight, and always light the top and bottom steps. This is the single most useful safety upgrade in landscape lighting.
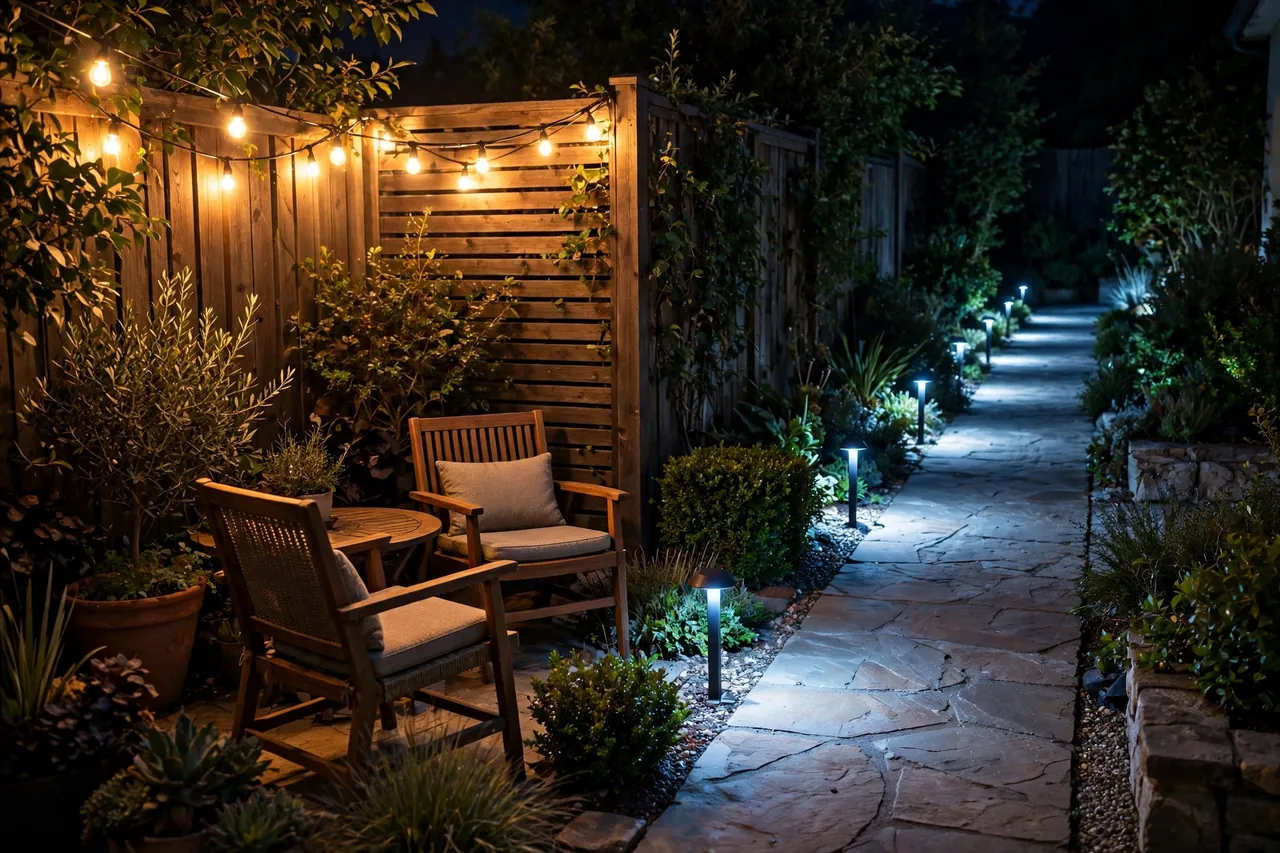
Decks look best with low, built-in light. Small fixtures in the stair risers, under the rail cap, or along the edge of the deck outline the space without glare. String lights above a deck add a festive feel for evening meals.
Driveways need a light touch. A few low bollard lights or path lights along the edge show drivers where the pavement ends and the lawn begins. Avoid bright floodlights here. They glare into drivers’ eyes and annoy the neighbors.
Light your house number. It sounds small, but delivery drivers, guests, and emergency responders all need to find your home at night. A small fixture above or beside the numbers does the job.
Solar vs Low-Voltage vs Line-Voltage
Most landscape lighting runs on one of three power sources. Each one suits a different yard and a different budget. Here is how they compare.
| Power option | Best for | Typical cost per fixture | DIY friendly? |
|---|---|---|---|
| Solar | Small accents, sunny spots, renters | $50–$200 | Yes, easiest |
| Low-voltage (12V) | Most yards, full systems | $100–$150 installed | Yes, most popular |
| Line-voltage (120V) | Bright security lighting, big areas | $100–$200 installed | No, hire an electrician |
Costs in the table come from Angi’s 2026 cost data and LawnStarter’s 2026 cost guide, checked November 9, 2026.
Solar lights are the easiest way to start. They stake into the ground, charge during the day, and switch on at dusk with no wiring at all. Their weakness is the sun. Shady yards, dense trees, and short winter days leave them dim. Use solar for accents and paths that get full sun, not for the lights you depend on for safety.
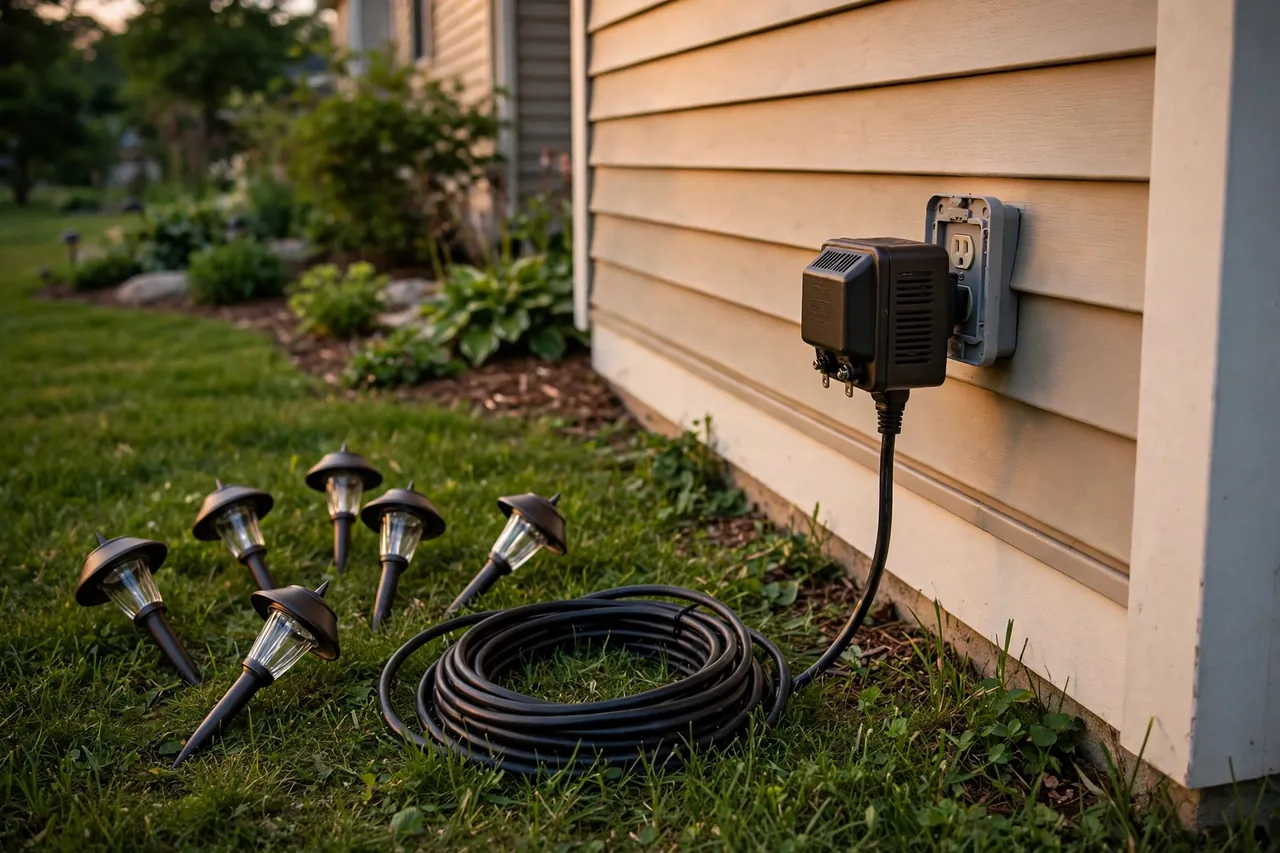
Low-voltage lighting is the best choice for most homes. A transformer plugs into a standard outdoor outlet and steps the power down to a safe 12 volts. The system is safe to touch, easy to install, and bright enough for paths, trees, and the house. Our companion guide on low-voltage landscape lights covers transformers, wiring, and fixture choices in detail.
Line-voltage lighting runs on your home’s regular 120-volt power. It is the brightest option and the right pick for large floodlights and security lighting. It is also the only option you should never install yourself. Trenching cable and wiring 120-volt circuits outdoors is licensed-electrician work, and most local codes require a permit for it.
Pick the Right Color Temperature and Brightness
Color temperature, measured in Kelvins (K), decides whether your light feels warm or cold. Warm white light, around 2700K to 3000K, feels cozy and suits porches, patios, and garden beds. Cool white light, around 4000K and up, feels crisp and suits driveways, security areas, and work zones. The Spruce gives the same rule of thumb: warm light for gathering spaces, cool light for safety areas.
Mix warm and cool on purpose, not by accident. Use warm light where people sit and gather, and cooler light where people walk or where you want a security effect. Keep the mix to two temperatures at most.
Brightness is measured in lumens, not watts. Old halogen bulbs needed high wattage to shine; modern LEDs give the same light with a fraction of the power. Use this guide when you shop:
- Path lights: 100 to 200 lumens per fixture
- Spotlights and uplights: 200 to 700 lumens per fixture
- Floodlights: 700 to 1,300 lumens per fixture
Start dimmer than you think. You can always add a brighter bulb or a second fixture, but a yard that is too bright is hard to fix without moving fixtures. Walk the yard at night after the install and look for glare, hot spots, and dark gaps before you call the job done.
Smart Controls, Timers, and Sensors
A good lighting system turns itself on and off. A simple photocell timer switches the lights on at dusk and off at dawn, so you never think about them. A programmable timer adds control: lights on at dusk, off at midnight, so the yard rests while you sleep.
Motion sensors suit security zones. A sensor on the driveway or side gate switches the lights on only when someone approaches, which saves energy and startles intruders. Keep motion sensors off the garden beds and patio, where you want steady light.
Smart lighting adds scenes and schedules. Many low-voltage systems now pair with an app or a voice assistant, so you can dim the patio lights for dinner or brighten the paths when guests arrive. Zone your system from the start: put the front yard, the back patio, and the garden beds on separate circuits or smart zones, so you can light one area while the others rest.
How Much Does Landscape Lighting Cost?
Budget first, then design to the budget. A professionally installed landscape lighting system costs $3,500 on average in the United States, with most homeowners spending $2,000 to $6,000, according to Angi’s 2026 cost data, updated October 29, 2026 and checked November 9, 2026. LawnStarter’s 2026 guide reports a slightly lower range, $2,000 to $4,500 with an average of $3,250.
Per-fixture prices explain where the money goes. Angi lists pathway lights at $100 to $250 per fixture installed, spotlights at $150 to $350, and floodlights at $200 to $500. Solar fixtures run $50 to $200 each, with no installation cost. A typical front-yard package of 10 to 15 fixtures lands near the low end of the project range, while a full-property design with 25 to 40 fixtures lands near the high end.
Running costs stay small. LED landscape bulbs last 25,000 to 40,000 hours, according to LawnStarter, so a system that runs six hours a night can go for years without a bulb change. LEDs also use far less power than the halogen bulbs they replaced, which keeps the monthly electric bill low.
Start small if the full system is out of reach. Light the front walk and the entry first, since that is the part everyone sees and the part that keeps guests safe. Add the garden beds and trees in a second phase next season. A phased plan beats a rushed full install that cuts corners on fixtures.
DIY Installation in 7 Steps
A low-voltage system is one of the friendliest DIY outdoor projects. The 12-volt power is safe to handle, and most kits need only basic tools. Follow these steps in order.
- Draw your plan. Mark every fixture on a sketch of your yard, then count the fixtures and add up their wattage.
- Size the transformer. Pick a transformer rated at least 20 to 30 percent above your total wattage, so it never runs at full load. A 300-watt transformer suits a 225-watt system.
- Place the fixtures. Set each fixture in its spot without burying the cable yet. Check the look from the street and from inside the house.
- Lay the cable. Run low-voltage cable along the planned route, keeping it a few inches under mulch or soil. Do not bury it deep; shallow burial makes future changes easy.
- Connect the fixtures. Use waterproof connectors at every joint. A dry connection is the number one cause of a system that quits working.
- Test at night. Switch the system on after dark and walk the whole yard. Move any fixture that glares, leaves a dark gap, or lights the wrong thing.
- Bury and tidy up. Once the layout looks right, bury the cable, hide the transformer behind a shrub, and set the timer.
Split a big system into runs of about 100 to 150 watts each. Long runs lose voltage along the cable, so the last fixture on a long run glows dimmer than the first. Short runs keep every fixture bright. This is the same guidance VOLT Lighting gives for its low-voltage systems.
Common Mistakes to Avoid
The most common mistake is too much light. Homeowners add fixtures until the yard looks like a parking lot, then wonder why it feels harsh. Start with fewer fixtures than you think you need. You can add more later, but glare and over-lighting are hard to undo.
The second mistake is lighting everything equally. When every tree, wall, and bed glows at the same brightness, the yard looks flat. Pick one or two stars per zone and let the rest stay soft and dim. Contrast is what makes lighting look designed.
The third mistake is ignoring the neighbors. A spotlight aimed across the property line shines straight into a neighbor’s window. Aim every fixture down or at your own house, never outward. Shielded fixtures help, but aiming matters more.
The fourth mistake is forgetting maintenance. Fixtures shift in the soil, lenses get dirty, and plants grow over lights. Walk the system twice a year, clean the lenses, trim plants that block the beam, and re-aim any fixture that has tilted.
Safety and When to Call a Pro
Low-voltage landscape lighting is safe for most homeowners to install. The 12-volt system poses no shock hazard, and it usually needs no permit. Line-voltage work is different. Any 120-volt outdoor wiring, trenching for hardwired cable, or work inside your home’s electrical panel belongs to a licensed electrician. Check your local building department’s rules before you dig or wire anything.
Call a pro when the job outgrows a simple kit. Large properties, steep slopes, water features, and systems over 300 watts all benefit from a designer’s eye and an electrician’s hands. A pro also helps when your yard has poor drainage, since fixtures sitting in standing water fail fast. If parts of your yard stay soggy after rain, fix the water first. Our guide to fixing a soggy yard shows how to find the cause before you spend money on lights.
Keep lights clear of anything flammable. Do not place a hot fixture against dry mulch, leaves, or wooden structures, and use LED fixtures near plants and mulch since they run cooler than halogen.
Disclaimer: this guide covers general landscape lighting ideas for homeowners. Electrical work beyond a plug-in low-voltage kit, and any work near water, gas lines, or your home’s main electrical panel, should be done by a licensed electrician. Local codes vary, so check your local rules before you install or dig.
Related Guides
Patio Lighting Ideas · Low Voltage Landscape Lights · Front of House Landscaping
- Rectangle Pool Landscaping Ideas for a Stylish Outdoor Oasis
- How to Build a Retaining Wall on a Slope: Easy Steps for Beginners
- Soggy Yard? How to Find the Cause and Fix Poor Drainage
- Top Remodeling Projects That Truly Increase Home Value in 2025
Frequently Asked Questions
What are the types of outdoor lighting?
Outdoor lighting includes path lights, spotlights, floodlights, wall sconces, string lights, bollard lights, step lights, well lights, and solar lights. Path lights guide walkways, spotlights highlight trees and features, sconces light entries, and string lights add warmth to patios. Mix two or three types for a layered look.
How do you choose a color for an outdoor light fixture?
Match the fixture finish to your home’s style and trim. Black works with almost any style, from traditional to modern. Oil-rubbed bronze, copper, or brass suits a farmhouse feel, while brushed nickel, stainless steel, or powder-coated colors suit modern homes. Pick one finish and use it across the whole system.
Is warm white or cool white better for outdoor lights?
Use both, in different places. Warm white light, around 2700K to 3000K, feels welcoming on porches, patios, and garden beds. Cool white light suits walkways, driveways, and security areas where you need bright, clear visibility. Mixing warm gathering light with cool safety light gives the best balance.
How many path lights do I need?
It depends on your path length and the beam spread of your fixtures. Wide-spread path lights cover about 16 feet each, so a 50-foot path needs about five of them. Narrow fixtures cover about 3 feet each, so the same path needs about eight. Space them evenly and stagger them on alternate sides for the best look.
Where should path lights be installed?
Install path lights along walkways, garden paths, driveways, and around patios. Place them near the start and end of each path, stagger them on alternate sides, and keep them low so the light falls on the walking surface. They also work well along garden beds and flower borders.
Start tonight with a simple walk around your yard after dark. Note the dark paths, the tree you love, and the entry that feels unwelcoming. Then light one zone at a time, starting with the front walk and the front door. A few well-placed lights will change how your whole home feels after sunset.