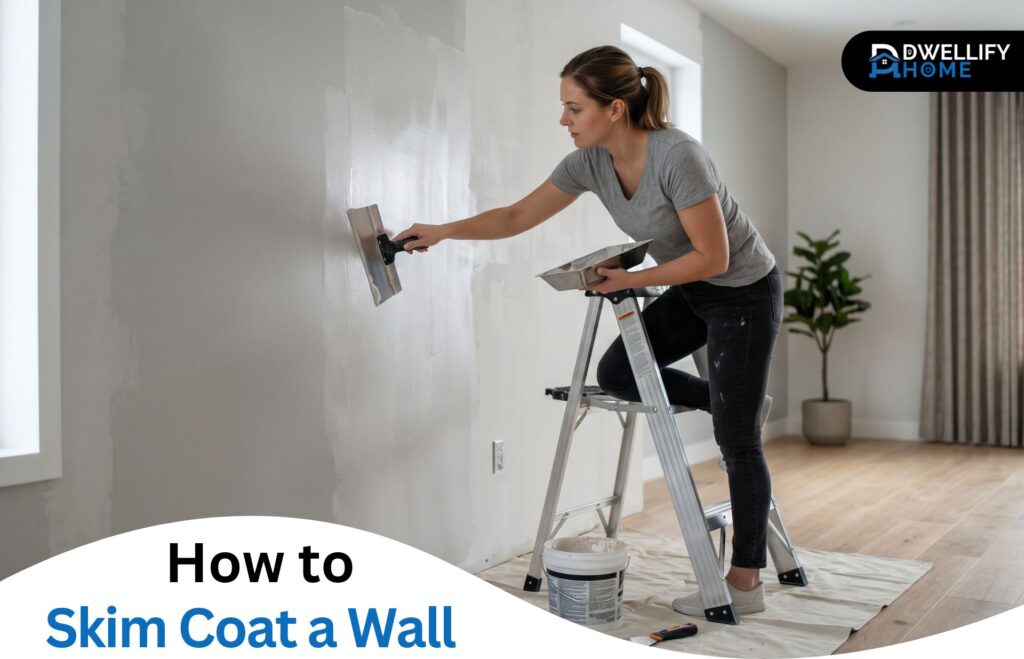
Walking into any room with a smooth finish changes how light actually behaves across every single surface. Skim coating essentially resets your drywall, transforming a textured wall into something quietly refined and beautifully architectural again.
Most folks assume this is a labor intensive job only contractors should handle, yet a patient DIY project approach works beautifully well. Grab joint compound, a thick nap paint roller, plus one Magic Trowel confidently.
Think of this as pursuing a level five finish rather than the standard builder default. Every thin layer matters, every thorough sanding session counts, and the clean slate you create rewards patience across future decades.
Short Definition
Skim coating a wall is the process of applying a thin layer of joint compound over drywall to create a smooth, uniform surface. It hides texture, patches, and imperfections, delivering a flawless base for paint or wallpaper.
Mission:
At Dwellify Home, we help homeowners tackle renovation projects with practical, stylish, and clearly explained guidance, so every improvement feels achievable and informed.
Tools & Materials Needed
Picture your 5 gallon bucket filled with ready mix joint compound or budget-friendly powder joint compound offering 4 times the coverage for roughly $15. Both work, though pre-mixed USG saves mixing time altogether.
Your drill paired with a mixing paddle or mixing bit transforms stiff drywall compound into workable consistency. Grab a sturdy paint tray, mud pan, roller pan, plus bucket with screen for cleaner application overall.
A thick nap paint roller with 3/4″ nap loads mud generously onto surfaces. Pair it alongside a paint roller featuring 1/2 nap cover for priming, then rotate between roller heads consistently.
Your skimming blade (sizes 32″, 14″, and 12″ for outlets and windows) plus wide taping knife handle corners beautifully. A Magic Trowel works differently, gliding across thin passes easily.
Finish strong using 150 grit sandpaper, sanding pads (220 and 180), plus a drywall sander. Protect surroundings with drop cloth, dropcloths, old sheets, floor coverings, spray bottle, water, and wet rag.
Quick Skim Coating Guide: Method Comparison
| Method | Best For | Difficulty | Finish Quality |
| Roller + Skim Blade | Beginners, DIY | Easy | Very smooth |
| Magic Trowel (Squeegee) | Large walls | Easy | Smooth |
| Hawk & Trowel (Pro) | Experienced users | Hard | Level 5 finish |
| Wide Taping Knife | Small patches | Medium | Smooth |
Key Benefits of Skim Coating
- Hides texture, dents, and wallpaper damage completely
- Creates a flawless surface for paint or wallpaper
- Cheaper than replacing drywall entirely
- Achieves a premium Level 5 finish at home
- Extends the life of existing walls
- Reflects light more evenly for a clean, modern look
Setting The Stage Before Mud Hits Wall
Skip the prep your space stage and you will regret it forever. Drywall work gets seriously messy, and drywall dust finds every nook and cranny throughout your home.
Cover the floors, drape furniture, and shield appliances before opening any drywall compound. Then seal off the room completely using plastic sheeting to contain the dust from traveling elsewhere inside your house.
Remove the baseboards entirely rather than trying to work around them. Reinstall them later. Pop off outlet covers and switch covers too, then tape off receptacles protecting against stray drywall cement.
Prime the entire wall first, since bonding depends entirely on it. Old wallpaper residue or walls in bad shape need a basic drywall primer; stains that bleed through require stain-blocking primer instead.
Use a 1/2″ nap roller for coverage, let the primer dry fully, then one roller handles two jobs beautifully. Skip Zinsser Bullseye and raw mud will loosen the weak facepaper.
Nailing The Mud Mixture Correctly
Consistency decides everything here. Too runny and it drips, dribbles down your wall; too stiff and the blade drags unpleasantly. Aim for a thick pancake batter feel, roughly matching toothpaste density always.
Skip measuring cups entirely. Most seasoned hands just eyeball portions directly into the container, adding water gradually while watching how the compound transforms from chunky lumps into something workable.
Your power drill armed with a mixing attachment or drill mixing bit beats hand mixing every single time. Run the drill slowly, forcing the mixer attachment deep to blend bottom layers upward thoroughly.
Ready mix mud saves effort, though unmixed drywall compound from bags of powder offers flexibility. Keep some dry in reserve always, since dry mix rescues batches gone wet beyond repair during humid afternoons.
Test in one spot before committing across surfaces. A thin enough batch should smooth it on the wall without leaving gaps, settling into a lump-free, smooth layer ready for any thin coat application.
Loading Mud Onto Vertical Surfaces
Grab your roller with that plush 3/4 inch nap and dunk it straight into the 5 gallon bucket. This bucket method runs faster than pouring into a roller tray, though excess mud drips make things noticeably messier around your feet.
Work in manageable 4’x4′ sections or go 32 inch wide strips matching your wall height. Lay down a generous amount roughly 1/8 inch thick; skip anything thinner since the blade needs material to flatten properly during passes.
Watered down compound lets you roll it onto the wall quickly before it dries. Dip the roller often, keeping the mud at right consistency. High temperature or low humidity means sections dry fairly quickly, punishing slow workers.
Chase drying out aggressively using a spray bottle to skim it smooth while keeping edges moist; running a humidifier helps too. Work squares, not stripes, and each small sections gets treated before nap texture sets into stubborn smooth ridges eventually.
Flattening The Mud Like A Pro
Grab your skim coating blade and approach the rolled section at a sharp angle. Firm, even pressure matters more than speed here, pulling compound outward rather than trying to build up material across the flat surface unnecessarily.
The goal here contradicts painting instincts entirely. You want to remove the excess, not flatten the surface with additional layers. Think icing a cake backwards; drag hard enough to leave only thin consistent layers clinging to paper beneath.
Some pros bend their trowel to create an invisible crown down the middle. Running crown up places mud in the middle of blade first, while crown down eliminates stubborn blade lines across larger areas wonderfully.
Choose your blade wisely. A 32 inch blade covers ground quickly though a 24 inch blade navigates uneven, bumpy zones better. For tight corners, switch to a wide knife or stubby 12″ knife confidently.
Work fast because thick mud dries quickly under warm conditions. Take long smooth sweeps, keeping the blade moving without lifting mid-pass. Your consistent motion should feel fluid, never choppy, to even everything out across the rolled section.
Between thin coats, switch orientations. Alternate directions religiously; go vertically first, then horizontal application on the next coat. When you hit heavily textured patterns or raised surfaces, extra layers of joint compound fill voids from existing texture or deeper heavy texture left over.
Your first coat rarely achieves perfectly smooth results, so expect ugly gouges, new lines, and streaks initially. Pick out paper bits immediately, let it dry overnight, then scrape off hardened ridges before attempting the smoothing out phase again.
Topping compound behaves differently than regular mud, since it levels itself somewhat. Pro Form topping compound runs creamy and soft, while a splash of dish soap mixed into the top coat creates that signature finish glide pros swear by.
Many pros favor a squeegee approach with a big squeegee featuring a rubber blade and solid handle. Remove the blade cover first, wet the blade, then pull across with steady pressure, moving along 4′ of wall sections methodically.
Try applying mud using a heavy nap roller from your bucket of mud, then finishing with a 12 inch wide ultra fine paint brush across damp mud. Some pros work above the head down to belt-line, using big arcs from feet upward consistently.
Refining Every Pass Across The Surface
Watch how a smooth pull can transform rough drywall in seconds. Use a damp rag to wipe your knife between each sweep; otherwise dried mud leaves streaks and gouges. Keep a mud pan and tray within arm’s reach always.
Switch your approach depending on coverage. For small repairs around bare spots spaced roughly 10″ apart, use a cement trowel or drywall trowel to press down hard; fill voids to proper depth without creating fresh stripes anywhere.
Moisture management prevents drying trouble. Mist edges wet using a spray bottle, keeping the wider the knife philosophy in mind. A true pro layers more than one coat, moving up and down, then side to side, across entire wall sections.
Maintaining Rhythm Across The Entire Wall
Rhythm matters more than speed. After finishing one section, immediately clean my blade before attacking the next section using the same steps. Mud dries fast, and a clean blade prevents drying out mid-project from ruining your smooth, even first section entirely.
Before you roll another section, grab your spray bottle filled with water and lightly mist the existing edge. The second section should slightly overlap that moistened wet edge, blending seamlessly rather than creating ugly transition lines across your entire wall later.
Smart prep saves time dramatically. Try mixing a big batch into a bucket with a lid, maintaining perfect consistency through multiple hours. Refill paint tray only when needed, starting each new section confidently without juggling cleanup tasks or fighting stiff mud constantly.
Stacking Layers For A Flawless Result
One pass rarely delivers perfection. Most projects demand 2 coats minimum, though ambitious homeowners aiming for that crisp level 5 finish typically apply three total coats, doing one each day to guarantee proper curing between each round.
Let walls dry completely before committing to another layer. Rushing this stage creates adhesion problems later. Once the previous pass feels fairly smooth, knock off ridges gently across the surface rather than defaulting to aggressive sanding wastefully.
Finish main walls first, then pivot attention toward inside corners using a dedicated corner trowel. Done right, everything blends evenly together. Your final coat should rest full day undisturbed, rewarding patience with that coveted super smooth finish eventually, requiring no sanding between coats.
Polishing Every Coat Toward Perfection
Between passes, lightly sand only when truly necessary. For most projects, light abrasion is not necessary after each consecutive coat since a clean trowel can handle ridges in one easy stroke, saving you significant dusty aftermath across your home.
Before dragging any sandpaper across cured mud, handle trouble spots manually. Use a drywall knife to scrape off a big blob of dried mud or any stubborn excess mud forming along the trowel edge. You can scrape lumps and bumps this way too.
Your final coat demands proper respect. Let it dry completely for a full day, then perform a thorough drywall sanding using 180 sanding pads initially, stepping up to 220 for the smooth final finish everyone desires afterward.
Sanding screen mesh (featuring silicon carbon grit) outperforms regular overseas sandpaper since both sides stay usable longer. Pair quality 150 grit sandpaper or good sandpaper with a pole sander covering broad areas, attacking remaining lines and imperfections methodically.
Dust control separates amateurs from pros. Wear a dust mask or respirator always. A dust free drywall sander around $30 with vacuum attachment eliminates mess entirely; alternatively, wet sand gently using a damp tiling sponge for quick sanding, gentle sanding touch-ups needing light grit sandpaper.
Locking In That Flawless Surface Forever
After sanding wraps up, let everything sit settled for a full day before continuing. Freshly skim coated new drywall needs priming with a good quality primer; think PVA primer specifically, since it seals the pores and prepares walls beautifully across every square foot.
Skip shortcuts like paint plus primer in one bucket if you genuinely want smooth walls that perform long-term. A dedicated true base coat dries quickly, locking porosity while ensuring your topcoat paint sits dry and bonds evenly throughout decades of normal household wear.
Why I Default To Glass-Like Finishes
Walk into any room and pause. Smooth walls perform invisible work, letting your architecture, furnishings, and art genuinely command attention. Think of them as small upgrades delivering a big difference, quietly producing that refined elevated look everyone notices but cannot quite name.
During recent office renovation projects, I’ve seen how dramatically surface treatment shifts a space. Scraping back wallpaper removal debris exposes patched drywall beneath, a landscape of old and new patches, leftover texture, and sheetrock seams awkwardly competing against each other visibly.
Skim coating lets you reset the surface entirely, making walls match regardless of history. Every stubborn stripe from chair rail removal or newly installed drywall panel disappears, leaving one seamless finish where detail finally lives undisturbed across the perfectly smooth plane.
Decoding The Six Grades Of Drywall Finish
Most homeowners never learn that drywall finishing levels actually exist, yet these six grades determine everything visible afterward. Level 0 marks your starting point: raw board hung with exposed screws and open joints, zero mud or tape applied anywhere yet.
Move up the ladder. Level 1 means joint tape sits installed and loosely mudded over seams. Bump to Level 2 where a single skim layer covers drywall screws; builders stop here for tile backing, garage areas, or minimum-grade tract homes.
Level 3 demands a solid coat across the whole surface, perfect beneath heavy texture like knockdown spray. Level 4 introduces the classic drywall finish most homes receive. An additional coat over tape, screws, and seams gets sanded before being painted or wallpapered beautifully.
Level 5 sits at the pinnacle. The highest quality grade delivers smooth, clean perfection top to bottom, revealing no bumps, no texture, just one even surface stretching across ceiling and wall. Building multiple thin layers takes time but rewards every paint color you later choose. This is true finishing.
Hard-Won Lessons From The Trenches
Always reach for a longer blade when chasing a smoother finish; shorter tools leave ridges behind. Mix extra joint compound upfront so you never remix mid-project, interrupting your rhythm across critical passes across the entire surface.
Clean tools matter more than fancy equipment, since dragging dry compound across wet mud ruins everything instantly. Ignore the weird drywall color or inconsistent tone during application; primer always evens out surface discoloration completely before final coats.
Knowing Where Premium Finish Actually Belongs
Not every room needs top-tier treatment. Spaces flooded with natural light expose every flaw, making level five non-negotiable there. Reserve it for rooms chasing a minimal, clean look; otherwise builders default to level four unless you specifically direct your contractor upfront.
Catching Flaws Before They Become Permanent
Position a light at a sharp angle against your wall rather than relying on overhead down lighting, which hides everything. Move the light to a different angle afterward, exposing missed areas and stubborn imperfections before priming or painting is done.
Wrapping The Project Without The Headache
Here’s the best part about working with drywall compound: everything cleans up with plain water. Rinse your roller, blade, trowel, and buckets immediately after finishing because once joint compound cures on metal or rubber, scrubbing becomes genuinely brutal work.
Frequently Asked Questions About Skim Coating
Q1. How long should I wait between skim coat layers?
Allow each thin layer to cure naturally for roughly 24 hours, depending on humidity levels inside your home office or workspace. Rushing shortcuts actually ruins your result, so exercise patience and resist touching still-tacky surfaces prematurely between passes attempted hastily.
Q2. Can beginners really achieve professional-looking results without experience?
Absolutely yes, provided you embrace simple techniques and borrow proven tips from seasoned pros. Many first-time mudderers deliver perfectly smooth finish quality matching seasoned plasterers after just one weekend of consistent practice on scrap sheetrock panels beforehand.
Q3. What happens if I skim coat over fresh paint without preparing it?
Skipping proper priming creates a nightmare scenario where joint compound refuses to bond properly. Even ultraweight mud will peel away eventually, demanding costly rework. Always roughen glossy surfaces first, then apply a quality low-cost drywall primer underneath.
Q4. Is skim coating cheaper than replacing drywall entirely?
For most small area repairs, yes, remarkably so. Materials cost is inexpensive, typically running $4-5 for powder mix covering a decent 75 sq. ft. span. Full sheetrock replacement involves demolition fees, haul-away charges, and significantly more labor time overall.
Q5. Why does my finished wall look uneven even after careful work?
Lighting reveals flaws that eyesight misses entirely. Position a lamp at a sharp angle instead of flat down lighting, then scan the wall slowly. Hidden imperfections and missed areas suddenly surface, letting you correct stubborn problems before painting begins.
Q6. Should I hire professionals for large whole-room projects?
Consider hiring a pro when chasing a level 5 finish level across a whole surface. DIY works beautifully for single walls, but tackling entire rooms demands serious time, specialized tools, and control over complex process details most homeowners lack initially.
Disclaimer:
This article is for general informational purposes only. Always follow manufacturer instructions for joint compound and consult a professional for structural drywall damage or large-scale renovations.