Few household problems escalate as quickly as a burst pipe. Within minutes, water spreads across floors, soaks into walls, and creeps under furniture you never thought it could reach. The shock alone can freeze you in place, but quick decisions made in the first hour usually decide whether you’re facing a manageable cleanup or a costly restoration job.
Drying the space properly isn’t optional. Lingering moisture invites mold, weakens structural materials, and ruins belongings that might otherwise be saved. This guide walks through each stage of recovery so you can move with confidence and protect your home from lasting harm.
What to Do Immediately After a Pipe Burst
Those opening moments shape everything that follows. Don’t reach for the mop yet. Your priority is cutting off the water source and making sure no one gets hurt. Cleanup comes later once the situation is stable.
After the immediate dangers are handled, you can shift your focus toward drying and recovery. Quick action during this window prevents water from seeping deeper into floors, drywall, and insulation where it becomes much harder to reach.
Shut Off the Water Supply
Locate the main shut-off valve and close it without delay. Most homes have it near the water meter, in the basement, or close to where the supply line enters. If you’ve never had to find it before, this is a good moment to memorize the location for next time.
Turn Off Electricity (If Needed)
Water near outlets, baseboards, or appliances creates a serious shock hazard. Flip the breaker for the affected area, or shut down the main panel if you’re not certain which circuits run through the wet zone. When in doubt, kill the power.
Remove Standing Water Quickly
Grab towels, a mop, or ideally a wet/dry shop vac and start pulling water off the floor. The longer it sits, the more it soaks into subflooring and baseboards. Even buckets and a dustpan work in a pinch — anything to reduce the volume.
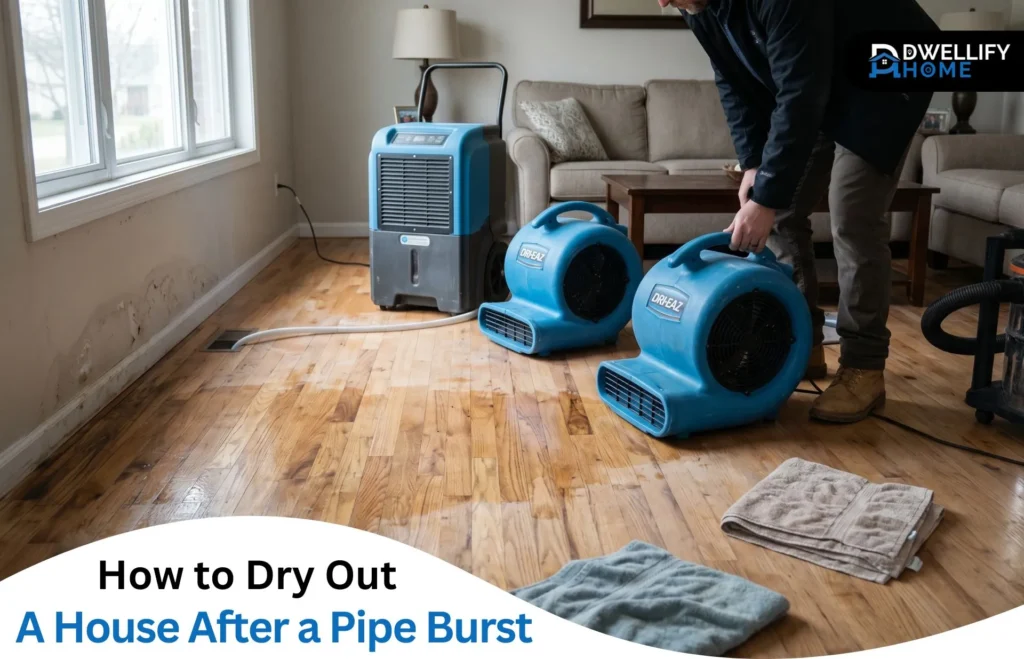
Step by Step Guide to Drying Out Your House
With the water stopped and pulled up, the real drying work begins. This stage takes patience, and it’s where most homeowners either save their property or accidentally let mold take hold. The aim is removing moisture from surfaces and from the air at the same time.
You don’t need a contractor’s truck full of gear to make progress. A few box fans, a decent dehumidifier, and steady airflow handle most situations. Consistency matters more than equipment.
1. Increase Airflow
Open windows when the outside humidity is lower than indoors — usually a cool, breezy day works best. Position fans to push damp air toward open windows rather than just stirring it around. Cross-ventilation moves moisture out faster than a single fan ever will.
2. Use Dehumidifiers
A dehumidifier quietly pulls gallons of water out of the air over the course of a day. Place one in each affected room and shut interior doors so it focuses on a smaller space. Empty the tank regularly, or run a hose to a drain so it doesn’t shut off when full.
3. Remove Wet Items and Materials
Pull up rugs, carpet padding, and soaked furniture as soon as you can. Padding rarely survives a serious soaking and almost always needs replacing. Hardwood furniture might dry out, but anything with particleboard or upholstery that smells sour is usually beyond saving.
4. Dry Walls and Floors
Drywall acts like a sponge, holding water long after the surface feels dry to the touch. Pull off baseboards to let air reach the bottom edge, and consider drilling small ventilation holes if moisture readings stay high. Wood floors warp and cup quickly, so weighted drying mats or specialized panels help if you have access to them.
5. Clean and Disinfect Affected Areas
Once surfaces are nearly dry, wipe everything down with a disinfecting cleaner. This kills the bacteria that arrived with the water and discourages mold spores from settling in. It also clears that lingering damp smell that tends to hang around for weeks otherwise.
How Long Does It Take to Dry Out a House?
Drying time varies more than people expect. A minor leak caught early might dry in two or three days with good airflow. A flooded basement or extended soak can stretch into a week, sometimes longer if walls and subfloors are involved.
The volume of water matters, but so do the materials in your home. Concrete and tile release moisture quickly, while drywall, carpet, and engineered wood hold onto it stubbornly. Room temperature, ventilation, and how many fans you’re running all push the timeline up or down.
How to Prevent Mold After a Pipe Burst
Mold spores are already in your home. They’re harmless until they find moisture, and a flooded room is exactly the environment they need to multiply. Within 24 to 48 hours, colonies can establish themselves in places you can’t see.
Prevention comes down to one rule: don’t stop drying too early. Surfaces can feel dry while wall cavities, subfloors, and insulation stay damp for days longer. A moisture meter is a small investment that takes the guesswork out of this stage.
Why Mold Grows Quickly
Warmth, darkness, and moisture are all mold needs to thrive. After a pipe burst, the inside of your walls offers exactly that combination. Without aggressive drying, what starts as a small patch can spread across an entire wall in a week or two.
Key Prevention Tips
Keep fans and dehumidifiers running for several days past the point where things look dry. Check behind furniture, inside closets, and under sinks where airflow is weakest. Run your hand along baseboards and lower walls to feel for cool, damp spots that visual inspection might miss.
Signs You May Need Professional Help
There’s a point where DIY efforts hit their limit. Large flood zones, water that reached multiple rooms, or moisture trapped behind finished walls usually need commercial-grade equipment to handle properly. Restoration crews from Spartan Restoration Inc use thermal cameras and moisture meters to find water you’d never spot on your own.
A musty smell that won’t fade is another red flag — it often means mold has already started growing somewhere out of sight. When the damage feels bigger than what you can manage, calling a 24/7 local emergency restoration company early usually costs less than waiting and dealing with secondary damage later.
Common Mistakes to Avoid When Drying Out Your Home
Most water damage problems aren’t caused by the initial flood. They come from shortcuts taken during cleanup. Surface water gets handled, things look fine, and a month later there’s a soft spot in the floor or a stain creeping through the paint.
Slow down and work through every step. Doing it right once costs far less than redoing it after mold sets in or floors start buckling.
Waiting Too Long to Act
Every hour you wait, water travels further into porous materials. Drywall wicks it upward, subfloors absorb it through seams, and insulation traps it for the long haul. Speed during the first day determines how much you’ll save.
Not Removing Soaked Materials
Trying to rescue carpet pad, soaked drywall, or particleboard furniture often backfires. These materials hold moisture deep inside and become breeding grounds for mold and odor. Tossing them feels wasteful, but replacement is cheaper than mold remediation.
Relying Only on Air Drying
Open windows alone don’t move enough moisture out, especially in humid weather. Without mechanical airflow and dehumidification, water just shifts from puddles into the air and back into your walls. Fans and dehumidifiers working together do the real work.
Ignoring Hidden Moisture
Water flows downward and outward, finding its way into wall cavities, under cabinets, and beneath flooring. Skipping these checks creates problems that surface weeks later. Pull off a kick plate, lift a floor vent, or peek behind appliances to confirm nothing’s been missed.
Final Tips for Faster Recovery
Recovery is a marathon, not a sprint, but the early hours set the pace. Stay methodical, document the damage with photos for insurance, and resist the urge to put things back too soon. Damp items returned to a dry room reintroduce moisture you just worked hard to remove.
Check the affected zones daily for the first week. Watch for soft drywall, dark spots, warped boards, or any smell that wasn’t there before. Catching small issues now keeps them from becoming expensive ones later.
Conclusion
Dealing with a flooded home is rough, and there’s no point pretending otherwise. Still, learning how to dry out a house after a pipe burst gives you real control over the outcome. Move quickly, stay thorough, and don’t trust appearances when it comes to hidden moisture.
When the situation looks bigger than what you can handle alone, bringing in professionals isn’t giving up — it’s protecting your home from problems you can’t see yet. That kind of judgment is often what separates a quick recovery from a long, expensive one.
We hope you found this article helpful — be sure to check out more of our content before you go! Please be aware that this post may contain affiliate or sponsored links. If you make a purchase through one of these links, we may earn a small commission that helps maintain and improve Dwellifyhome.com. The views and opinions shared here are those of the author alone and do not necessarily reflect the views or policies of Dwellifyhome.com.