

A deck railing cable system uses thin stainless steel cables pulled tight between posts instead of wood balusters or glass panels, and a professionally installed system costs $75 to $260 per linear foot in 2026, according to Angi’s cost guide updated October 23, 2026. The cables stay nearly invisible from a few feet away, so you keep your view of the yard, the trees, or the water. This guide explains how cable railings work, which stainless steel to pick, the spacing your inspector will check, what tensioning really involves, and when cable is the wrong choice for your deck.
People love cable railing for one reason above all: the view. A wood railing chops the scene into slices, and glass needs constant cleaning to stay clear. Cable gives you an open, modern look with very little upkeep. But cable is also a safety system, not just a style choice. Get the spacing, the posts, or the tension wrong and it can fail an inspection — or worse, fail to stop a fall.
What Is a Deck Railing Cable System?
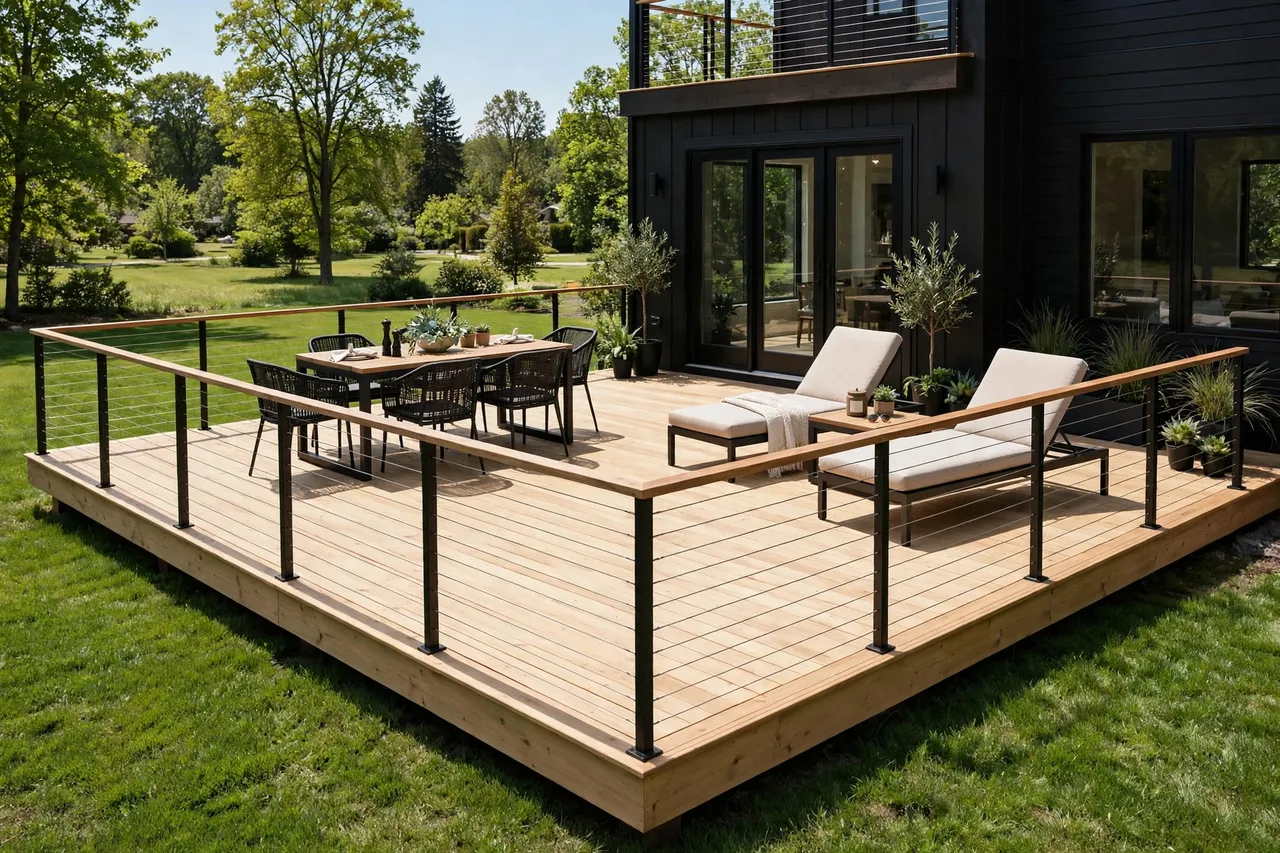
A deck railing cable system is a guardrail made of horizontal stainless steel cables strung between posts and capped with a top rail. The cables act as the infill — the part that fills the space between the top rail and the deck — the same job wood balusters do on a classic railing. Each cable runs from one end post to the other, passes through holes in the middle posts, and is pulled tight with a tensioner at one or both ends.
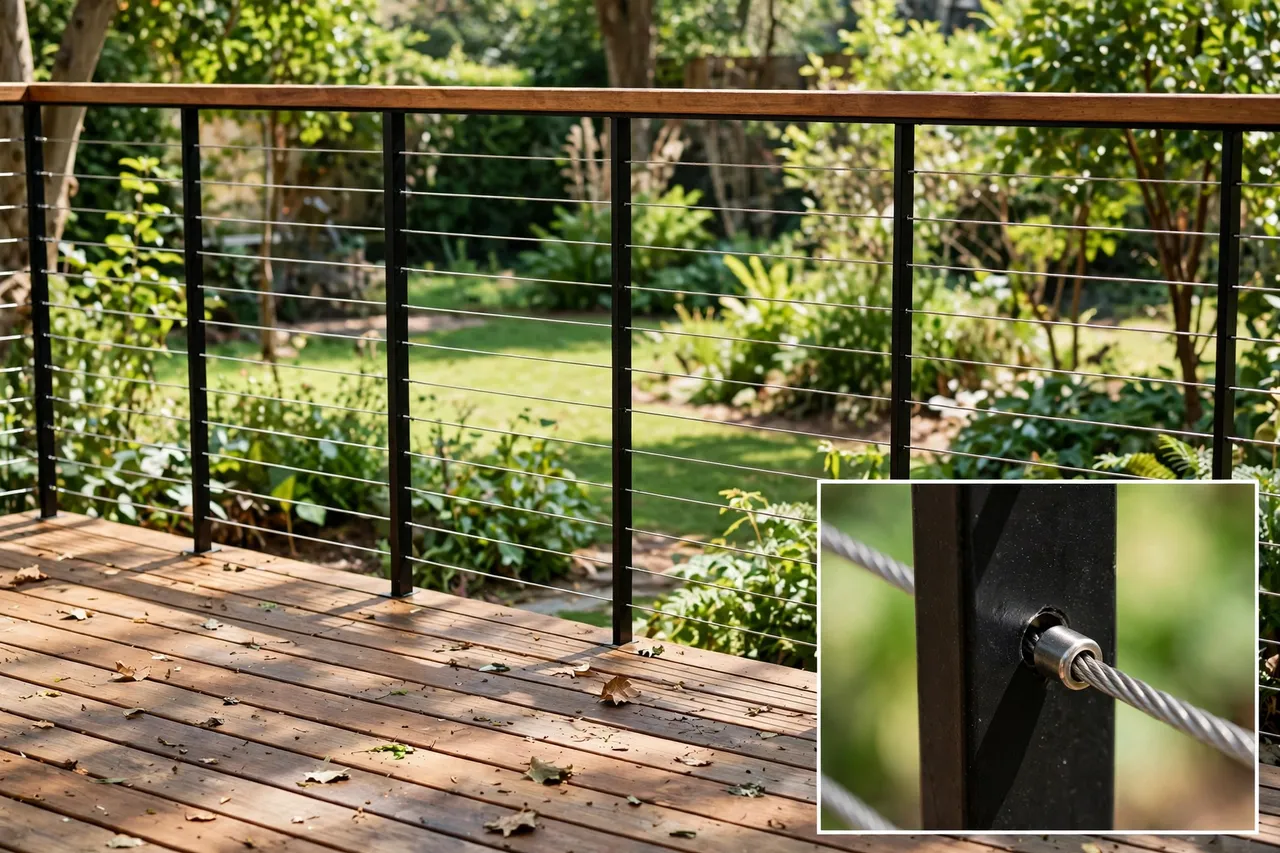
The system has five parts. The posts hold everything up and take the pull of the cables. The top rail gives you something to grip and ties the posts together. The cables themselves form the barrier. The fittings — swage studs, turnbuckles, or threaded terminals — connect each cable to the posts. And the tensioners let you pull each cable tight and re-tighten it later when it stretches.
Cable railing goes by a few names. You may see it called wire railing for decks, wire porch railing, or exterior cable railing, and they all mean the same thing: tensioned metal cable as the infill. A deck with cable railing looks light and modern, which is why it suits contemporary homes, lake houses, and any deck built for the view.
The look is the easy part. The hard part is the physics. Ten or eleven cables, each pulled to roughly 200 to 300 pounds of tension, push thousands of pounds of force onto the end posts. That is why the posts and the frame matter far more than the cable itself, as the next sections show.
Tension is the whole system. Loose cables sag, spread apart, and stop being a guardrail — so every part of a cable railing exists to hold tension.
Stainless Steel Cable Types: 304 vs. 316 and 1/8 vs. 3/16 Inch
Nearly every deck cable railing uses stainless steel cable, and the two choices that matter are the grade and the thickness. Get these right and the cable lasts decades. Get them wrong and it rusts, stains, or stretches out of shape.
Grade 304 vs. grade 316 stainless steel
Grade 304 stainless steel is the standard for most homes. It handles rain, snow, and normal humidity without rusting, and it costs less than the marine grade. Grade 316 stainless steel adds molybdenum, which fights salt corrosion far better. It costs about 20% to 40% more, but it is the right pick near the coast, on a lake with salty air, or anywhere road salt sprays onto the deck.
Pick 316 if you live within a few miles of salt water, or if your winters bring heavy road salt. Pick 304 for a normal inland deck and spend the savings on better posts. Never use galvanized carbon steel cable outside: it costs only $0.35 to $0.45 per foot, but it rusts, stains the deck, and needs replacing far sooner than stainless steel.
Cable thickness: 1/8 inch or 3/16 inch
Most residential decks use 1/8-inch or 3/16-inch cable. The 1/8-inch cable looks slimmer and nearly disappears from a distance, which is the look most people want. The 3/16-inch cable is stronger and stiffer, so it sags less on long runs and suits wide decks and windy spots. Both sizes meet code when spaced and tensioned right — thickness is a looks and stiffness choice, not a safety one.
Construction: 1×19 vs. 7×7 cable
Cable construction describes how the wires are wound. A 1×19 cable has 19 wires in a single stiff bundle, so it stays straight, looks clean, and stretches very little. A 7×7 cable has seven bundles of seven wires, so it bends easily around corners and through fittings. Most deck systems use 1×19 for straight runs because it holds tension best, and 7×7 where the cable must turn a corner or thread through tight hardware.
Buy cable and fittings as a matched set from one maker when you can. Mixed brands can look alike and still fail to fit, and a fitting that does not grip the cable will slip under tension.
Choose 316 stainless steel near salt water, 304 everywhere else. The grade decides whether your cables still look new in ten years or show rust stains in two.
Posts, Top Rails, and Frames: What Holds the Tension
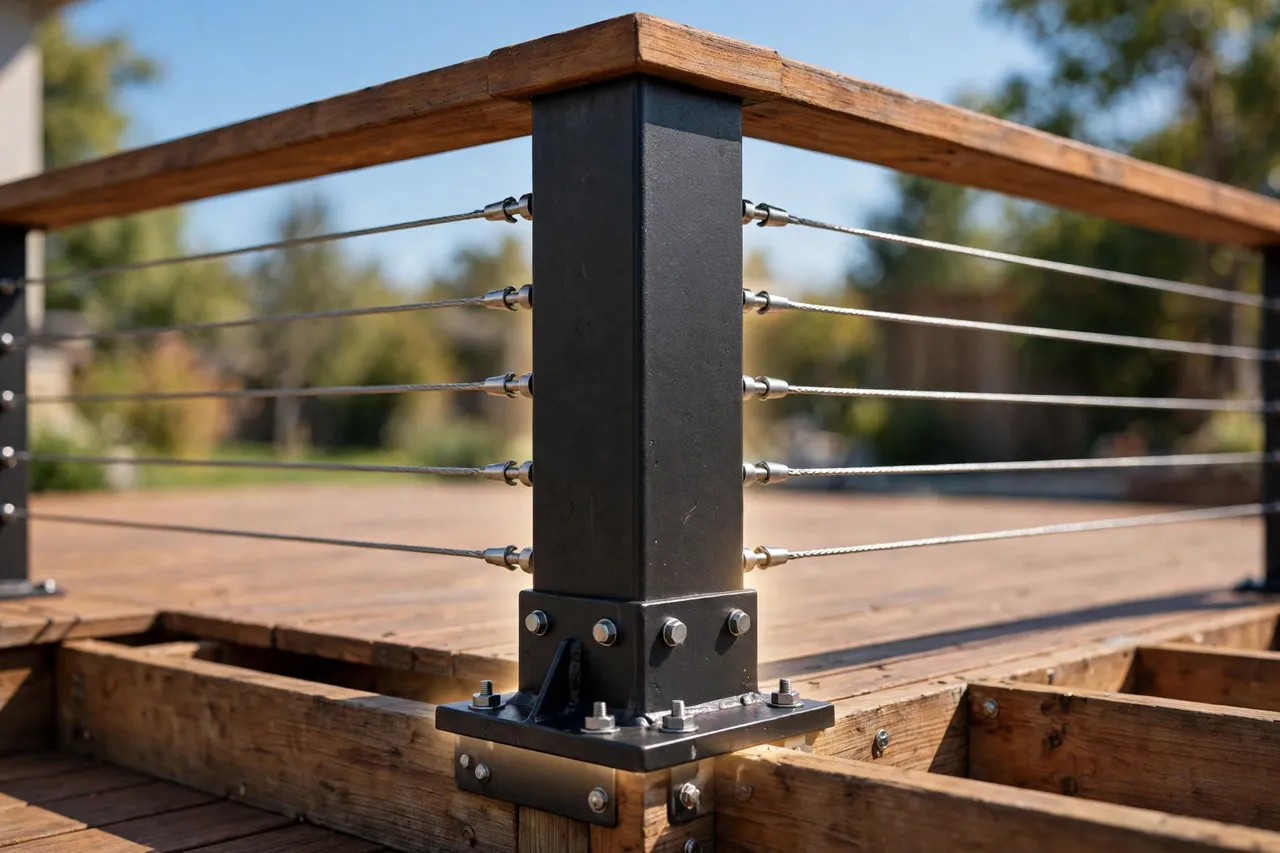
Cable is light, but the frame behind it is not optional. A full run of tensioned cables can pull with 2,000 to 3,000 pounds of force on the end posts, so the posts must be far stronger than the posts on a wood railing. This is the part most DIY plans underestimate.
End posts take the load
End posts and corner posts carry all the tension, so they must be beefier than the middle posts. Use thicker posts, heavier brackets, or a through-bolted connection to the deck frame — a post held by two small screws will bow inward the first time you tension the cables. On a wood frame, many builders add a sub-rail under the top rail between posts, which stops the top rail from flexing and keeps the cables evenly spaced.
Middle posts stop the sag
Middle posts, also called intermediate posts, do not take much pull, but they stop the cables from sagging and spreading. Keep them 3 to 4 feet apart on a horizontal cable run. Wider spacing lets the cables deflect when someone leans on them, and a cable that deflects can open a gap big enough to fail the safety test in the next section. Short runs of 4 feet or less between posts stay tight and pass inspection far more easily.
Top rail and frame materials
The top rail can be wood, aluminum, or stainless steel. Wood feels warm under the hand and suits a wood deck, but it needs sealing and it shrinks as it dries, which loosens cables. Aluminum posts run $65 to $125 each and never rot, while stainless steel posts run $110 to $230 each and look the sharpest with cable. A stainless steel top rail costs about $20 per linear foot, and aluminum or wood rails cost $30 to $60 per foot, according to Angi’s 2026 cost data.
Whatever frame you pick, anchor it to the deck structure, not just to the decking boards. Posts bolted through the rim joist or set on welded base plates hold tension. Posts screwed into a single deck board do not.
Build the frame for thousands of pounds of pull. If the posts cannot hold the tension, no cable choice will save the railing.
Cable Spacing and Code: The 4-Inch Sphere Rule
Building code is the part of cable railing you cannot skip, and the rule that matters most is the 4-inch sphere rule. Under the International Residential Code, no opening in a guard may let a 4-inch diameter sphere pass through. The rule exists so a small child cannot slip through or get stuck in the railing.
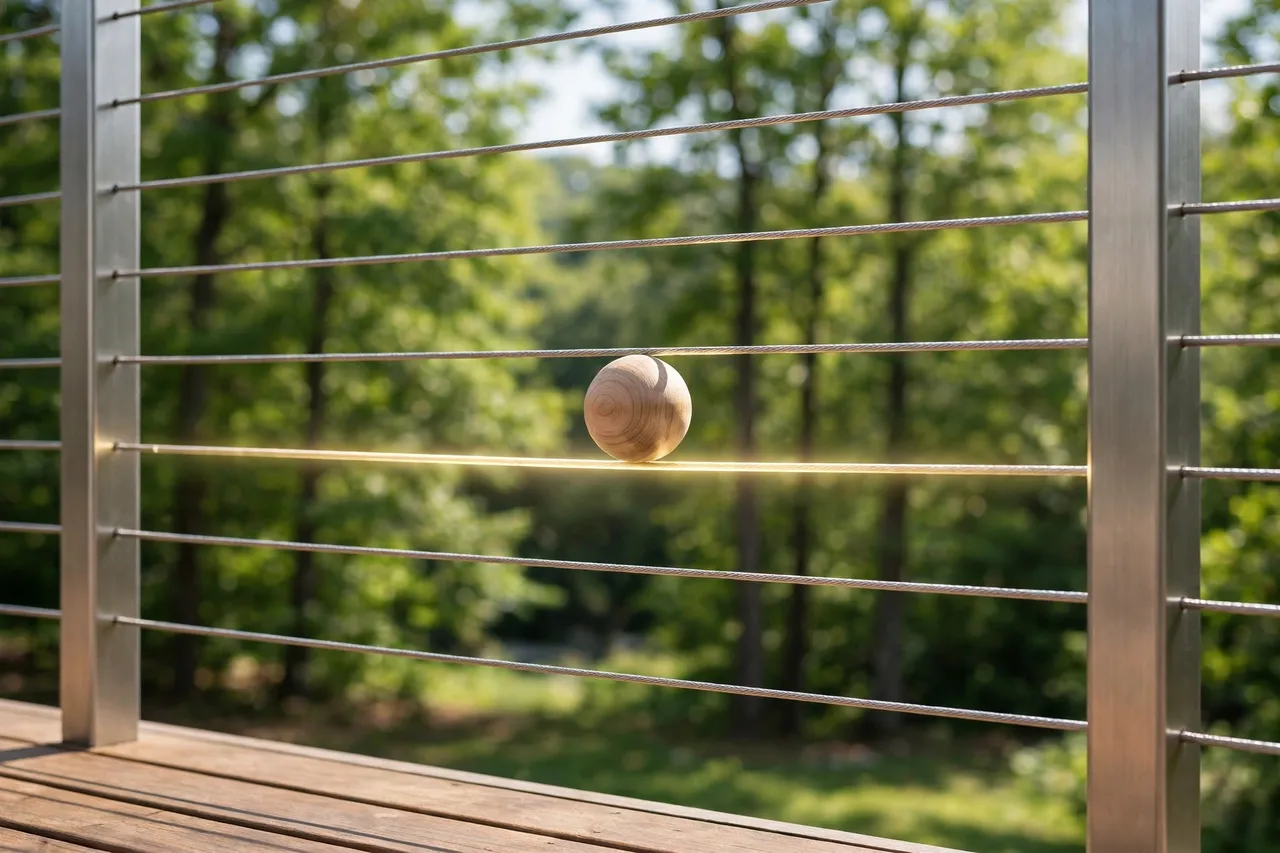
Cables stretch and bend, so you cannot space them 4 inches apart and pass. When someone leans on a cable spaced at 4 inches, it deflects and the gap opens to 5 or 6 inches. That is why every major maker and code guide works from a tighter number: space the cables 3 inches apart, center to center. At 3 inches, even a pushed cable cannot open past the 4-inch limit. The Senmit code guide for 2026 states the same rule — a 3-inch spacing to satisfy the 4-inch sphere test — and you can read the full spacing, height, and load requirements in Senmit’s cable railing code guide.
Height matters too. For a home deck, the guard must be at least 36 inches tall, measured from the deck surface to the top of the rail. Some states and cities require 42 inches, and commercial decks almost always do. The top rail must also resist a 200-pound push in any direction, and the infill must resist a 50-pound load over a small area. Check your local code before you buy anything — local rules can be stricter than the national model code, and some towns do not allow horizontal railings at all.
Cable railing spacing at a glance
| Rule | What it means | Common number |
|---|---|---|
| Guard height | Deck surface to top of rail | 36 inches minimum (42 in some places) |
| Cable spacing | Center to center, to allow for deflection | 3 inches |
| 4-inch sphere test | No gap may pass a 4-inch ball, even pushed | Test at mid-span |
| Post spacing | Middle posts or spacers | Every 3 to 4 feet |
| Top rail load | Push the rail must resist | 200 pounds |
| Guard needed | When the deck is above grade | More than 30 inches high |
Ask your local building office two questions before you order: does your town allow horizontal cable railings, and does it require 36 or 42 inches? Those two answers shape the whole project, and they cost nothing to get.
Space cables 3 inches apart, not 4. The extra inch is what keeps the railing legal when someone leans on it.
How to Tension Cable Railing (and Keep It Tight)
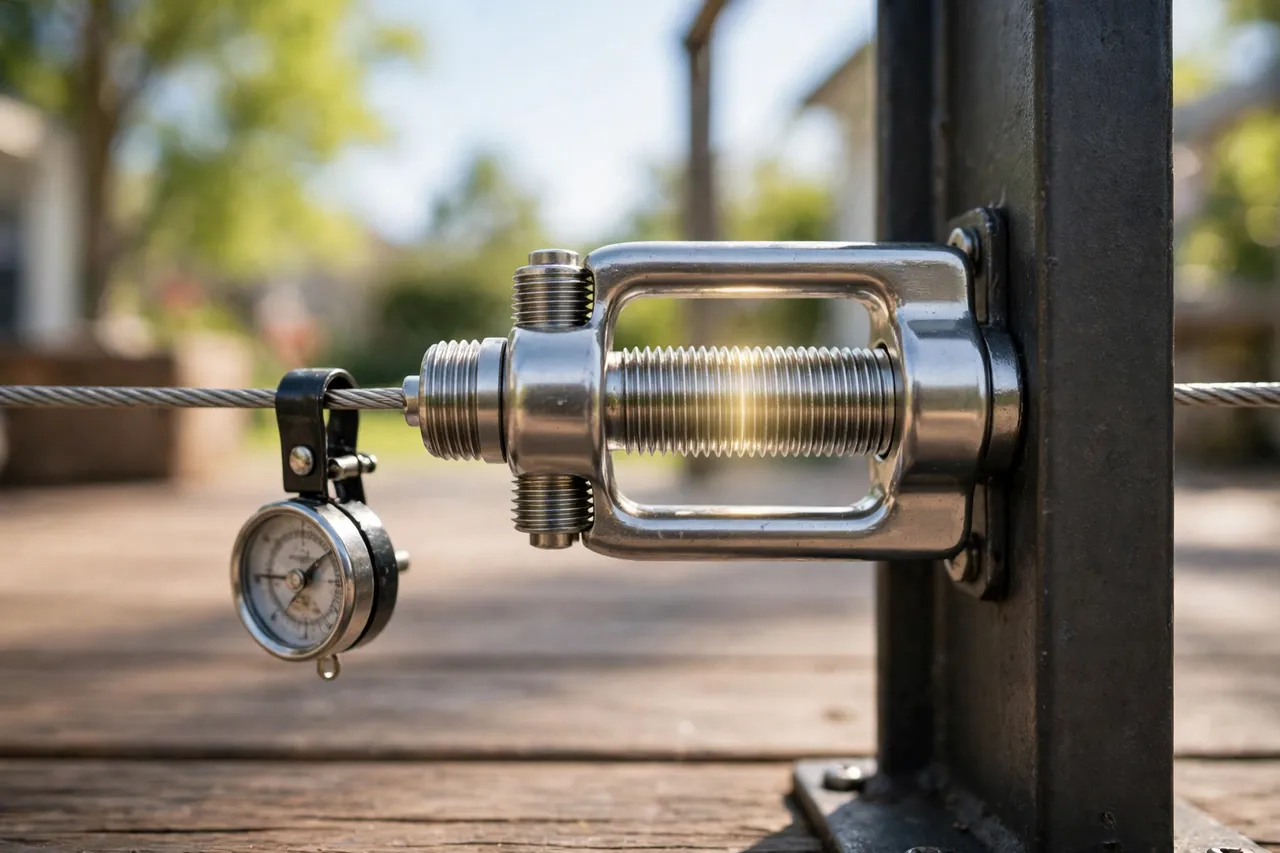
Tensioning is the step that turns a bundle of wires into a guardrail. Each cable needs roughly 200 to 300 pounds of tension, checked with a tension gauge, and the whole run needs re-tensioning after it settles. This is the fiddliest part of the job, and it is where a pro earns the fee.
Step 1: String every cable loosely first
Run all the cables through the posts and attach the fittings before you tighten anything. Work from one end post to the other, and leave slack in every cable. Tightening one cable fully before the others are in place pulls the posts out of line.
Step 2: Pull out the slack by hand
Grab the loose end with locking pliers, brace the pliers against a scrap block of wood so you do not dent the post, and lever the cable as tight as you can by hand. Cut the cable close to the fitting, then cap the end. On a long run, have a second person pull from the middle while you work the end.
Step 3: Tighten from the middle out
Go back to the start and tighten the turnbuckles or tensioner nuts to take out the remaining slack. Start with the cable at the middle of the railing height, then alternate above and below it. This keeps the posts straight instead of bowing them toward one side. A tension gauge tells you when each cable hits its target — guessing by feel is how cables end up uneven.
Step 4: Test with the 4-inch sphere
Press the cables apart at the middle of the longest span and try to pass a 4-inch ball or sphere through the gap. If it cannot pass, the run is good. If it can, add a middle post, tighten further, or both. The Journal of Light Construction’s pro guide to installing cable railings walks through the same lever-and-tighten method and the sphere test, and it warns that some towns ban horizontal rails over climbability concerns — read it at JLC’s installing cable railings guide before you commit to the style.
Step 5: Re-tension after the first season
Cables stretch and wood posts shrink, so a new railing loosens in its first months. Plan to re-tension after the first season, then check tension once a year. If a cable has lost about 10% to 15% of its tension, tighten it with the tensioner and check it again with the gauge. A small turn of the nut is usually all it takes.
Tension from the middle cable outward, and test every span. Even tension keeps the posts straight and every gap under 4 inches.
How Much Does Deck Railing Cable Cost?
A deck railing cable system costs more than wood and less than glass, and the cable itself is the cheapest part of the job. Most of the money goes to posts, fittings, the top rail, and labor. Angi’s cost guide, updated October 23, 2026, puts the national average at $9,000 for a 50-linear-foot run, with most homeowners paying $3,750 to $13,000 — and you can see the full breakdown in Angi’s cable railing cost guide.
Deck railing cable costs by part, 2026
| Part | Typical price | Notes |
|---|---|---|
| Installed system, per linear foot | $75 to $260 | Pro install, materials and labor |
| Stainless steel cable, per foot | $0.50 to $1.70 | 316 grade at the top end |
| Stainless steel post, each | $110 to $230 | Aluminum posts $65 to $125 |
| Top rail, per linear foot | $10 to $60 | Stainless $20; wood or aluminum $30 to $60 |
| Labor, per linear foot | $20 to $50 | Or $50 to $100 per hour |
| DIY materials, per linear foot | $45 to $95 | Plus tools and a tension gauge |
Three things push the price up fast. Corners add 20% to 30% each, because every corner needs extra posts and hardware. Height adds $170 to $270, because a taller rail needs more cables. And a 316 stainless steel system costs 20% to 40% more than 304, which is money well spent near the coast and wasted inland.
A DIY kit for a straight 20-foot run with 10 rows of cable typically costs $900 to $1,400 in materials. That saves 40% to 60% against a pro install, but only if you already own the tools and you get the tension and spacing right. A failed inspection costs more than the labor you saved.
If you are budgeting the whole deck at the same time, the railing is a small slice of the bill. Our paver patio renovation cost guide breaks down what the surface underneath costs, line by line, so you can see where the railing fits in the full project.
The cable is cheap; the posts and the labor are the project. Budget $75 to $260 per linear foot installed and you will not be surprised.
Cable Railing vs. Wood and Glass: A Quick Comparison
Cable is one of three popular railing styles, and each one wins on a different priority. Wood is cheapest and warmest but needs staining every few years and blocks the view. Glass keeps the view perfectly and blocks wind, but it costs $100 to $600 per linear foot installed and shows every fingerprint, water spot, and smudge. Cable sits between them: it keeps most of the view, costs less than glass, and asks for far less care than wood.
Pick cable when the view matters most and you want a modern look with low upkeep. Pick wood when the budget is tight and the deck sits in a traditional home. Pick glass when you want a total wind block on a high balcony and you do not mind cleaning it weekly. Our sibling guides go deep on the other two: the wood deck railing guide covers species, stains, and baluster styles, and the glass railing guide covers panels, wind load, and cleaning. This article stays on cable, so you get the full depth here instead of a shallow tour of all three.
One honest trade-off: cable railing can raise a home’s appeal in scenic areas, where buyers pay for the view, but it can also date a traditional home if the style clashes with the house. Match the railing to the house, not just to the deck.
Cable wins on view and upkeep, glass wins on wind, wood wins on price. Pick the winner for your deck, not the winner in a photo.
Maintenance: Keep It Clean, Tight, and Rust-Free
Cable railing is low maintenance, not no maintenance. The routine is short — wash, inspect, tighten — and doing it once or twice a year keeps the system safe and good-looking for decades. A well-kept 316 stainless steel system can last 30 to 50 years.
Wash the cables and posts with mild soap and water twice a year, more often near the coast or a busy road. Use a soft cloth, never steel wool or an abrasive pad, which scratches the surface and invites rust. Rinse well and let it dry. If you see tea-colored stains on the steel, that is surface rust from airborne iron, not the cable failing — a stainless steel cleaner and a soft cloth usually remove it.
Inspect the whole run once a year. Look for frayed wires, loose fittings, rust at the terminals, and posts that have shifted or bowed. Press each cable at mid-span: if it gives more than it used to, it needs tensioning. Check the top rail and post bases too, because a loose post makes every cable on that run loose.
Wood posts and rails need their own care. Restain or reseal wood parts every two to three years, and keep an eye out for rot where the post meets the deck. Aluminum and stainless steel posts need nothing but a wash.
Wash twice a year, check tension once a year. Ten minutes of care keeps a cable railing safe for decades.
When Cable Railing Is the Wrong Choice
Cable railing is not right for every deck, and knowing when to skip it saves you a costly redo. The first reason is children. Horizontal cables can act like a ladder, and some towns ban horizontal railings for exactly that reason. If small children use the deck every day, ask your building office first — and consider vertical cable runs, which climb far less easily, or a different infill altogether.
The second reason is wind. Cable railing does nothing to block wind, so a high, exposed deck stays windy with cable. Glass blocks the wind and keeps the deck usable on blustery days. If your deck faces the open coast or a windy hilltop, glass or a solid panel may serve you better than cable, even at the higher price. For a covered spot out of the wind, our covered patio ideas show roofed layouts where cable railing works beautifully.
The third reason is privacy. Cable is see-through by design. If the neighbors’ windows face your deck, cable gives you no cover at all. A small deck has the same problem in reverse: on a tiny balcony, a cable railing can make the space feel even more exposed. Our small patio designs show layouts where screening and planting give a small space privacy without giving up the light.
Finally, skip cable on a deck with weak framing. If the deck structure cannot take thousands of pounds of pull, the railing will bow the posts and sag no matter how good the cable is. Fix the frame first, or choose a railing that asks less of it.
If kids climb, wind howls, or the frame is weak, cable is the wrong pick. The view is not worth a railing that cannot do its job.
5 Mistakes to Avoid With Cable Deck Railing
Most cable railing regret comes from five avoidable mistakes. Check your plan against this list before you order a single part.
- Spacing cables 4 inches apart. Cables deflect when pushed, so a 4-inch gap opens past the limit. Use 3 inches center to center.
- Using skinny end posts. End posts take thousands of pounds of pull, so use beefy posts with through-bolted connections, not screws into deck boards.
- Skipping the tension gauge. Tightening by feel leaves cables uneven, and uneven cables sag and fail the sphere test. Rent or buy a gauge.
- Mixing cable and fitting brands. Fittings that do not match the cable slip under tension, so buy a matched set from one maker.
- Forgetting the re-tension. New cables stretch and wood posts shrink, so a railing that passed in spring can sag by fall. Re-tension after the first season.
The five mistakes share one root cause: treating cable like decoration. It is a safety system first, and the style is the bonus.
Related Guides
If you are planning the whole deck or balcony, these guides pick up where this one leaves off:
- Patio Ideas — layouts, styles, and features for every size of patio.
- Covered Patio Ideas — roofed patios where shade and furniture stay dry.
- Small Patio Designs — seven layouts that make a tiny patio feel bigger.
- Patio Lighting Ideas — string lights and fixtures that work along a railing after dark.
- Paver Patio Renovation Cost — what a paver project really costs, line by line.
- Indoor Outdoor Rugs — sizes, materials, and care for rugs that live outside.
- Deck Shade Ideas — shade over the same deck the cable railing edges.
- Handrail Planters — planters that hang on the railing — check fit with cable spacing first.
- Balcony Cover Ideas — a cover over a cabled balcony.
- Outdoor Patio Tiles — the tile floor the railing frames.
Frequently Asked Questions
How much does cable railing cost per linear foot?
A professionally installed cable railing costs $75 to $260 per linear foot in 2026, according to Angi’s cost guide updated October 23, 2026. A typical 50-linear-foot run averages about $9,000, with most homeowners paying $3,750 to $13,000. DIY materials run $45 to $95 per linear foot, plus tools and a tension gauge.
How far apart should cable railing cables be?
Space the cables 3 inches apart, center to center. Code allows no opening that passes a 4-inch sphere, and cables deflect when pushed, so a 4-inch spacing opens past the limit. At 3 inches, even a pushed cable stays under 4 inches. Keep middle posts 3 to 4 feet apart so the cables cannot sag or spread.
Is cable railing safe for kids?
Yes, when it is built right — tight 3-inch spacing, stiff posts every 3 to 4 feet, and correct tension so the cables cannot spread past 4 inches. The real concern is climbing: horizontal cables can act like a ladder, and some towns ban them for that reason. With children, check local rules first and consider vertical cable runs instead.
How often do you need to tension cable railing?
Re-tension after the first season, because new cables stretch and wood posts shrink. After that, check tension once a year and tighten any cable that has lost about 10% to 15% of its pull. A small turn of the tensioner nut is usually enough. Systems with steel or aluminum posts hold tension longer than wood-framed ones.
What is the best stainless steel for cable railing?
Grade 316 stainless steel is best near salt water, because its molybdenum content resists salt corrosion far better than 304. It costs about 20% to 40% more. Grade 304 is the right pick for a normal inland deck and lasts decades with basic care. Never use galvanized steel cable outside — it rusts and stains the deck.
Can I install cable railing myself?
Yes, if the run is straight, the deck frame is strong, and you own or rent a tension gauge. Straight 20-foot DIY kits cost $900 to $1,400 in materials. Hire a pro for second-story decks, stairs, corners, or homes with children, because correct tension, post strength, and permits are hard to get right on a first try.
Disclaimer: Decks, railings, and building codes vary, and this guide gives general advice, not building or safety instructions. Cable railing is a structural safety system: check your local building code, get a permit where required, and hire a qualified pro for structural work, tensioning, and any deck more than a few feet off the ground. Always follow the product maker’s instructions and your local building rules.
The best deck railing cable system is the one you barely notice — thin lines, a clear view, and a frame strong enough to hold them tight for decades. Pick 316 steel near the coast and 304 inland, space the cables 3 inches apart, build posts that can take the pull, and re-tension after the first season. Do that, and the railing disappears while the view stays.