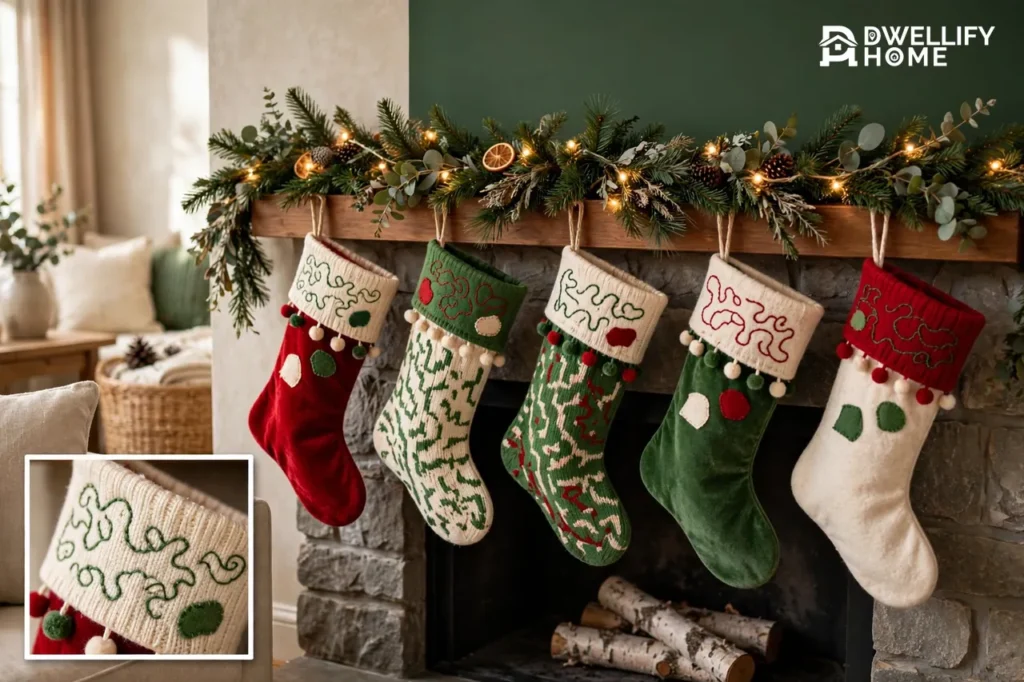
Christmas stocking decorating ideas work best when you start with the person, not the craft store. Pick a plain stocking you like, add one clear name or initial, then add just two or three decorations that match your home. That simple order — name first, theme second, trim last — keeps every stocking readable from across the room and stops the whole set from turning into a cluttered mess.
In this guide, you will find Christmas stockings ideas for every skill level, from no-sew felt shapes to hand embroidery, plus styles for kids, couples, pets, and grandparents. You will also learn how to hang your stockings safely, what to fill them with so the look holds together, and which mistakes to avoid. One safety rule comes first, though: never leave stockings hanging over a lit fire. Move them to a banister, a wall hook, or a bookshelf while the fire burns, and put them back when the fire is out and cold.
Start With a Simple Plan: Pick Your Stocking Style First
Before you buy a single button, decide on one style for the whole set. A shared style makes mismatched stockings look planned instead of random. It also saves money, because you buy one set of supplies in a few colors instead of a little bit of everything.
Start by looking at the room where the stockings will hang. A living room with warm wood and plaid throws suits knit, burlap, and felt stockings, and our decorating ideas for a living room at Christmas show how stockings sit within the wider room scheme. A bright, modern room suits velvet or linen stockings in one or two calm colors with simple trim. If your tree already sets the theme, let the stockings echo it: red and green for a classic tree, silver and white for a snowy tree, or gold and cream for a warm, elegant tree. Our Christmas tree themes guide can help you pick that shared look first, and our room-by-room indoor Christmas decorations guide shows where stockings fit in the whole house.
Choose One Look for the Whole Set, or One Look Per Person
Families usually pick one of two paths, and both work. A matching set gives the mantel a clean, grown-up look, and it photographs beautifully. A different stocking per person gives each family member a stocking that feels truly theirs, which kids especially love.
If you go the personal route, keep one thing the same across every stocking. Use the same name style, the same cuff color, or the same trim. That single shared detail ties the set together, even when one stocking has dinosaurs and another has snowflakes. For example, every cuff could carry the name in the same cream thread, while the bodies show each person’s favorite theme.
Pick Materials That Forgive Mistakes
Felt forgives almost everything. It does not fray, it cuts cleanly, and it glues well, so beginners can shape it with confidence. The Spruce Crafts collection of DIY Christmas stockings shows the same range in action, from photo cuffs and felt creatures to pom-pom trim and simple evergreen sprigs.
Wool and knit stockings feel cozy and look great with embroidery, but they stretch, so keep heavy decorations off them. Velvet looks rich and elegant, yet it shows every pin hole, so plan your design on paper before you stitch or glue anything to it.
For a first project, choose felt or sturdy cotton canvas. You can sew them, glue them, or mix both methods. If you buy ready-made stockings instead of making them, pick a plain base in a solid color. A plain base gives your decorations room to shine, while a busy pattern fights with every trim you add.
Personalize It First: Names, Patches, and Embroidery
Personalizing comes first for a practical reason: the name sets the size and place of everything else. Once you know where the name sits, usually across the cuff, you know how much space remains for shapes, trim, and bows. Put the name on first, step back, and then decorate around it.
For a classic look, embroider the name in cursive on the cuff. Practice the letters on a scrap of felt first so you can check the size and spacing before you touch the real stocking. Match the thread to one accent color on the stocking, such as a pom-pom or a ribbon, and the whole design will feel pulled together. Backstitch works well for small, neat letters, while chain stitch gives a soft, loopy cursive line.
If sewing feels like too much, iron-on patches offer a fast, tidy result. Press the patch exactly where you want it, follow the heat and time on the patch packaging, and let it cool before you test the edges. Fabric paint and puffy paint also work well for names: write slowly, let each layer dry fully, and add a second coat only after the first one sets. For a changeable option, pin on a monogram or clip on a name tag. A tag lets you update a stocking when a baby arrives, a couple marries, or a nickname changes, without remaking the whole stocking.
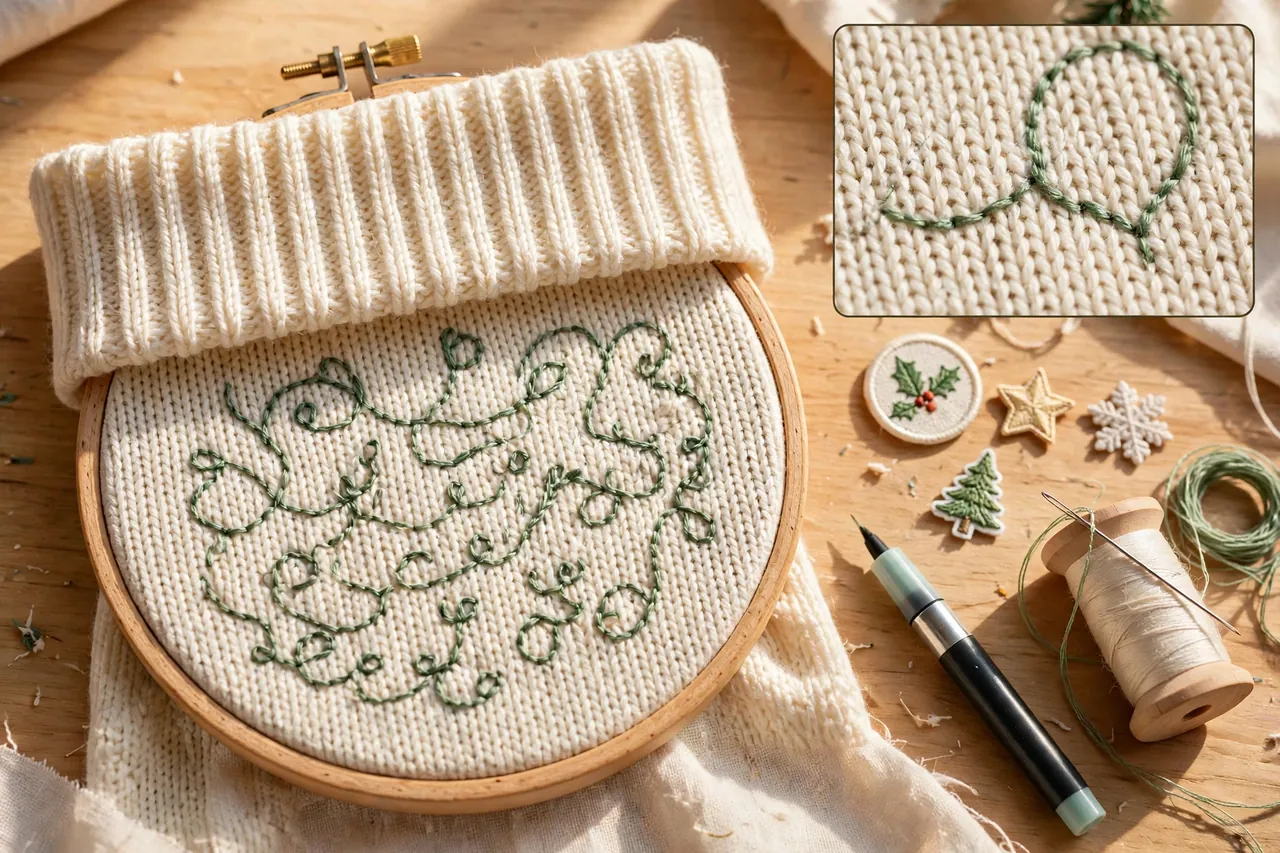
Ideas for Names That Last for Years
Use full first names for young children, since nicknames change fast. For adults, an initial or a monogram often ages better than a trendy font. Keep the letters large enough to read from a few feet away, and keep them in one color. A name you can read at a glance also ends the yearly question of whose stocking is whose.
Photos make a sweet alternative to names. Print small black-and-white photos, treat every photo the same way, and attach each one to the cuff with a neat border. The matching treatment keeps the set unified, even when the faces differ. Small wood-slice tags, leather luggage tags, and stamped metal tags also hold up well year after year, and they suit rustic or farmhouse rooms especially well.
Felt Applique and No-Sew Ideas Anyone Can Try
Felt applique means cutting shapes from felt and fixing them onto the stocking. Snowflakes, trees, stars, gingerbread people, reindeer, and holly leaves all cut easily, and you can sew them, glue them with fabric glue, or press them on with double-sided fusible interfacing. Lay every shape out on the stocking before you fix anything down. Move pieces around, take a photo, and only then commit.
No-sew decorating suits kids, beginners, and anyone short on time. Cut two stocking shapes from felt, glue the edges together, and decorate with felt cutouts, pom-poms, or glitter glue. A city guide to making a Christmas stocking confirms the same no-sew route, using fabric glue in place of stitching and felt letters for the name.
Draw on fake stitching with a fabric pen if you want a sewn look without a needle. Let glue dry completely before you hang the stocking, or shapes will slide and peel.
Trim does a lot of work for very little effort. Rickrack ribbon, pom-pom trim, and faux-fur cuffs each change the whole feel of a plain stocking. Sew trim on for a stocking you will use for years, or glue it on for a quick seasonal refresh. Keep trim to the cuff and the toe or heel, and leave the middle of the stocking calm. When trim runs everywhere, the eye has nowhere to rest.
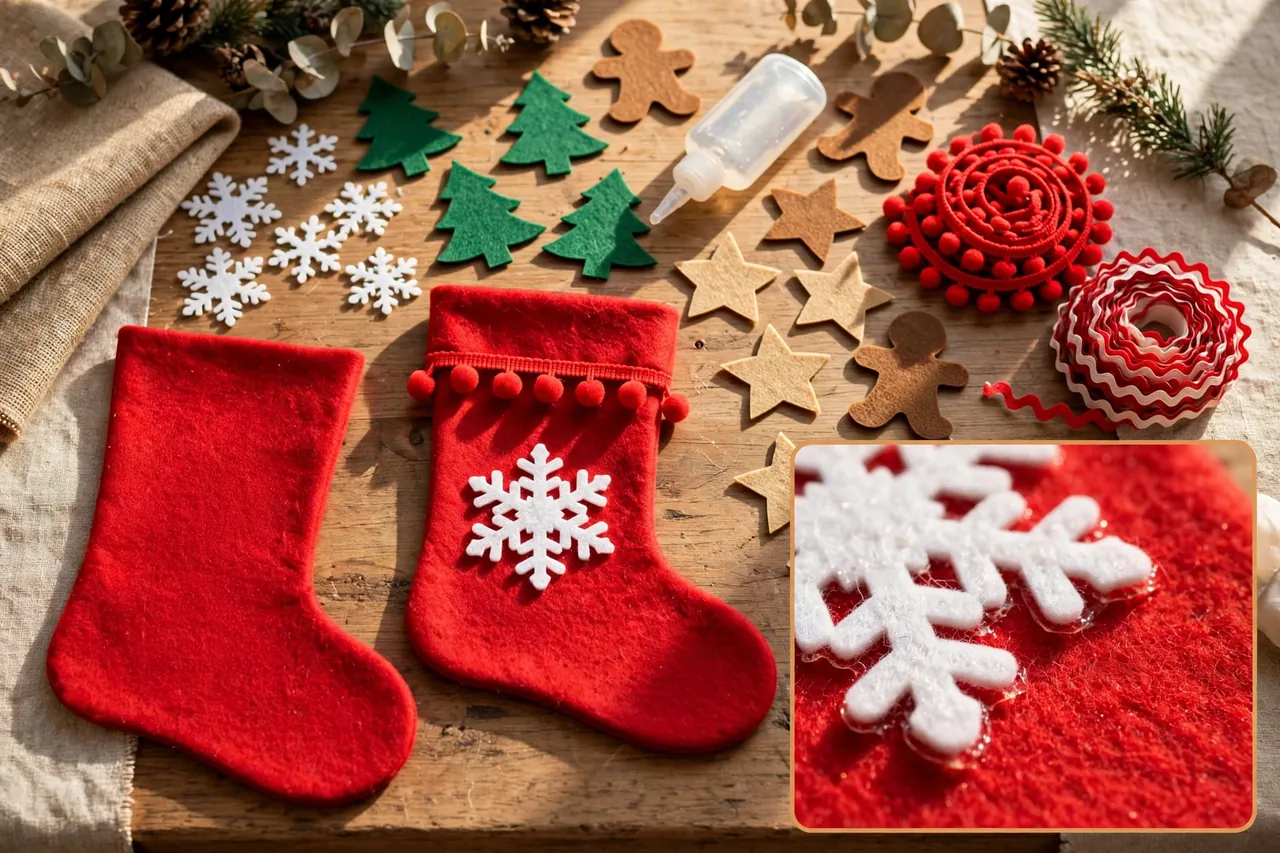
Try These Easy Christmas Stocking Design Ideas
Here are simple combinations that look good without advanced skills:
- Red felt stocking, cream cuff, white snowflake applique, and a small red pom-pom trim.
- Natural burlap stocking, green felt tree, brown trunk, and a tiny jingle bell at the top.
- White knit stocking, silver sequin star, and a soft faux-fur cuff.
- Navy velvet stocking, gold initial patch, and a thin gold ribbon bow.
- Green felt stocking, felt gingerbread person, and red-and-white rickrack along the cuff.
Each combination uses three colors at most. That limit matters. Three colors look rich and planned. Six colors look noisy, even when every single decoration is pretty on its own.
Decorate With Kids Without the Mess Taking Over
Give kids a real job, not just a seat at the table. Let each child pick their own theme and colors, and hand them pre-cut shapes to glue. Washable fabric markers beat paint for younger kids, since cleanup stays easy and mistakes stay small. Cover the table, keep sharp tools out of reach, and use plastic needles or fabric-safe glue instead of hot glue for little hands.
Let the stocking dry flat overnight before anyone hangs it. Paint, glitter glue, and fabric glue all look dry long before they truly set. A stocking hung too soon will smudge, stick to its neighbor, or drop a shape on the floor.
Stocking Styles for Every Room and Family
Different rooms ask for different stockings. A formal living room suits velvet, satin, or linen with quiet trim. A family room or playroom suits felt, knit, and bright pom-poms that can survive excited hands. A bedroom mantel or a wall display suits soft, simple stockings that do not compete with bedding or art.
Match the stocking style to the people, too. Kids love bold shapes, their names in big letters, and a theme they chose themselves, such as dinosaurs, unicorns, or trucks dressed for winter. Couples often prefer a matching pair in one fabric with each name in the same style. Grandparents may treasure a stocking that repeats a family tradition, such as the same red felt and white cuff they grew up with.
Do not forget pets. A smaller stocking with a paw print, a bone shape, or the pet’s name keeps pets part of the tradition without confusing their stocking with a child’s. Hang pet stockings lower or on a separate hook, and fill them with pet-safe treats only.
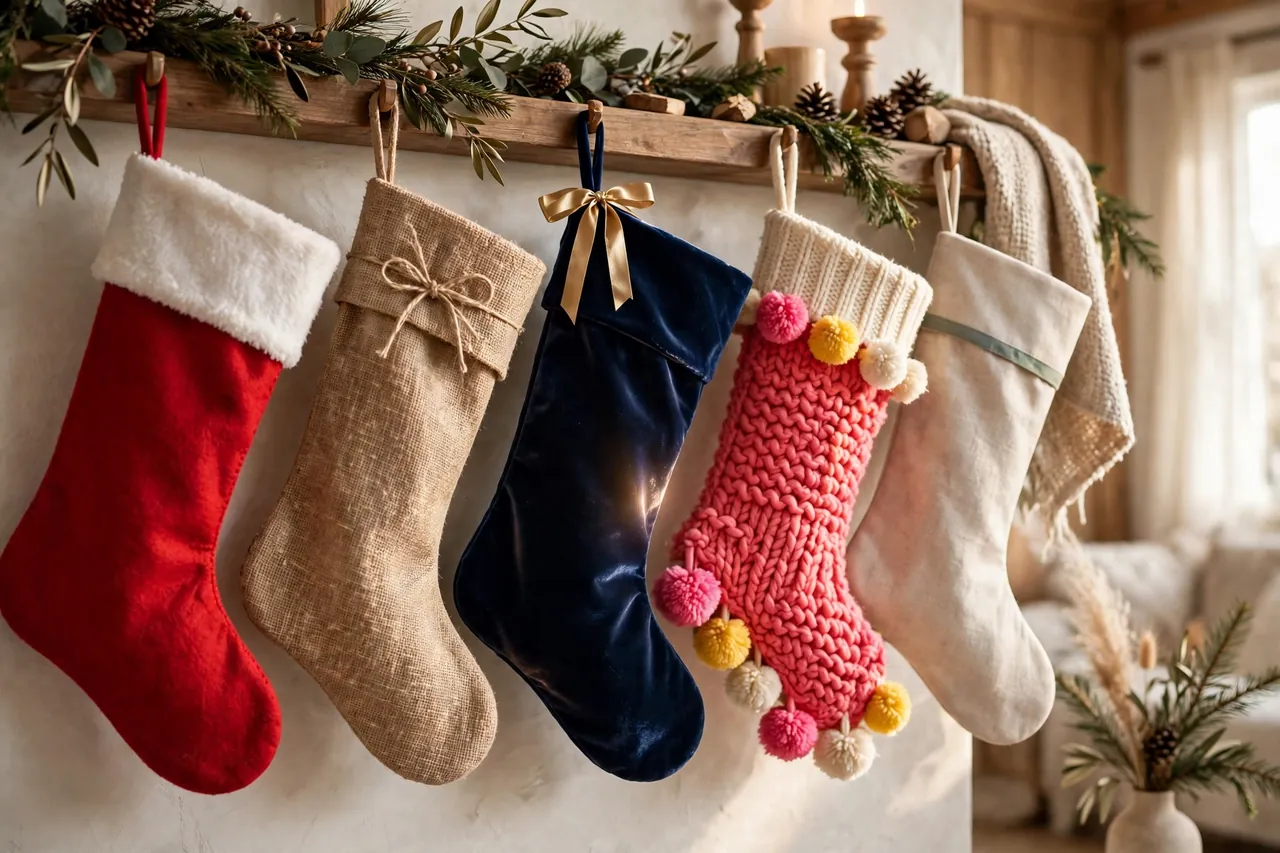
A Quick Style Guide You Can Steal
| Style | Best Base Fabric | Signature Details |
|---|---|---|
| Classic | Red or green felt | White cuff, embroidered name, snowflake or holly |
| Rustic farmhouse | Burlap or natural canvas | Wood-slice tag, twine bow, small pine sprig |
| Elegant | Velvet or satin | Monogram patch, gold ribbon, faux-fur cuff |
| Playful kids | Bright felt or knit | Felt creatures, pom-poms, jingle bells |
| Modern minimal | Linen or plain cotton | One initial, one trim color, no extra shapes |
| Boho | Drop cloth or neutral canvas | Leather trees, tassels, muted earth tones |
Pick one row as your starting point, then change a single detail to make it yours. A classic stocking with a navy cuff instead of a white one still reads as classic, but it no longer looks like everyone else’s.
When Less Decorating Looks Better
Sometimes the strongest choice is restraint. A plain stocking with a neat name and one small evergreen sprig clipped to the cuff can look more elegant than a stocking covered in glitter, bells, and bows. This minimal approach works best on high-quality fabric, where the texture itself carries the look. If you love a quiet room, let the stocking stay quiet, too.
Hang and Display Your Stockings So They Look Their Best
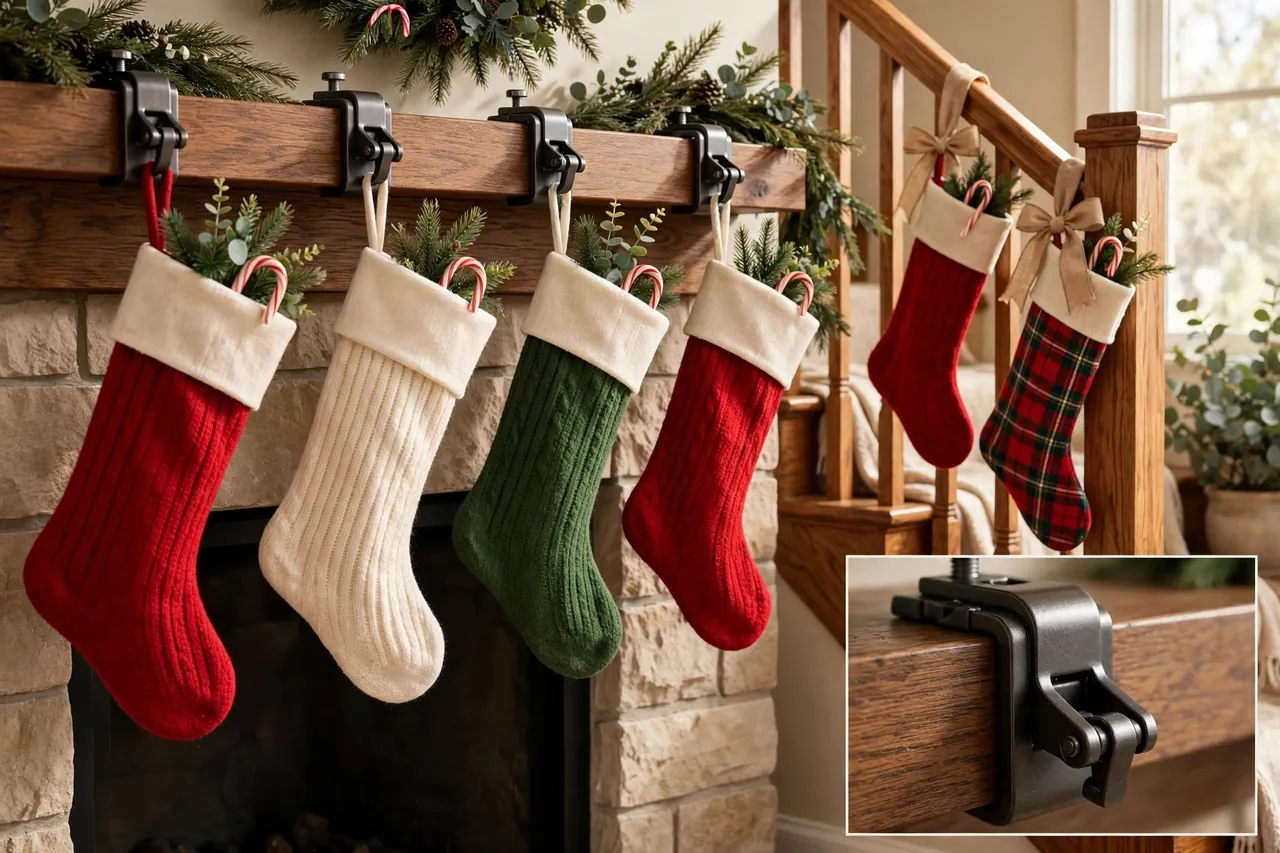
Hanging matters as much as decorating. Space stockings evenly, at least a few inches apart, so each one shows fully and none hides behind its neighbor. Hang them at the same height when you can, with the cuffs lined up. Even spacing and level cuffs make a handmade set look polished.
Use sturdy holders that suit the weight of a filled stocking. Weighted metal holders and clamp-style holders grip the mantel far better than light plastic hooks, and they protect the mantel surface. Test each holder with a filled stocking before Christmas Eve. A holder that tips under weight will drop a stocking full of gifts, and a fallen stocking can break ornaments or spill treats.
No fireplace? You still have plenty of good options. Hang stockings from a staircase banister with ribbon, from a row of wall hooks, from a bookshelf edge, or from a curtain rail. For a fireplace home, our Christmas mantel ideas and guide to decorating your fireplace at Christmas cover the wider display, while this article stays focused on the stockings themselves.
A freestanding stocking stand also works in rentals where you cannot drill or hammer. Wherever you hang them, keep stockings away from candles and open flames.
Make the Cuff Do the Talking
The top of the stocking, the part peeking out, shapes the whole display. Fold the cuff down neatly, and tuck a little filler into it so the cuff holds its shape instead of flopping flat. A sprig of faux greenery, a small ornament, or a candy cane tucked into the cuff adds height and color without changing the stocking itself. Change this top dressing each year if you want a fresh look without redecorating the stocking.
Keep the display balanced. If one stocking carries a big bow, give its neighbors a smaller bow or a matching ribbon so no single stocking shouts over the rest. Step back and look at the whole row, not just one stocking at a time. The row is what guests actually see.
Fillers That Fit the Look
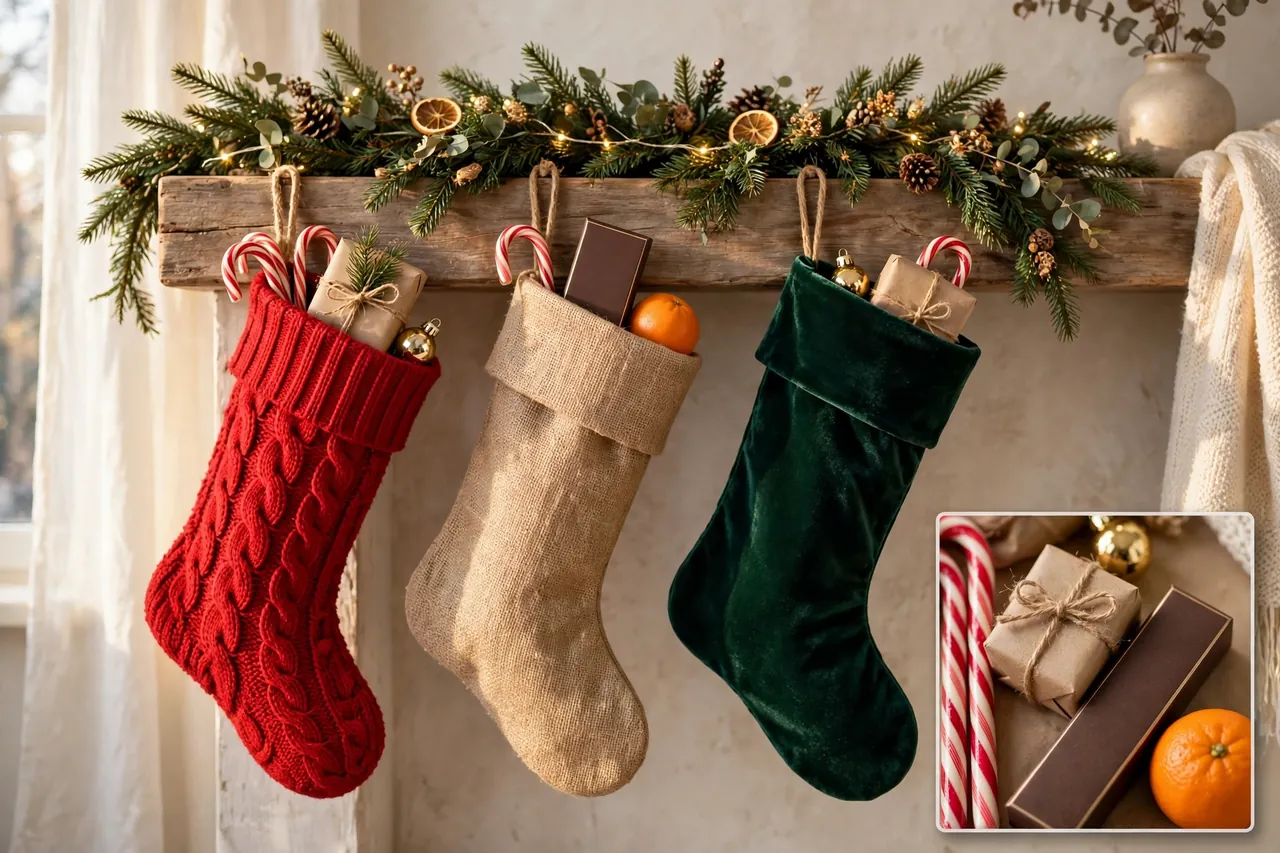
Fillers finish the decoration, because the top of a filled stocking is part of the display all through Christmas morning. Match fillers to the stocking’s style so nothing looks out of place. A rustic stocking suits a candy cane, a small orange in the toe, and a wooden toy. An elegant stocking suits a slim box of chocolates, a lip balm, and a small ornament wrapped in tissue.
Small gifts work best in stockings, since the shape is long and narrow. Think socks, a small book, a puzzle, lip balm, a keychain, or a gift card in a slim envelope. For kids, add one small toy, a few treats, and something useful, such as fun socks or a toothbrush in a festive color. For adults, add one treat, one useful item, and one small luxury, such as good chocolate or a nice pen.
Put the heaviest item at the toe so the stocking hangs straight, and place light, pretty items at the top where they show. Wrap tiny items in tissue so they do not slip to the bottom and vanish. If you want the stocking to look full before Christmas morning, stuff the toe with tissue paper and arrange the visible fillers on top.
Filler Ideas by Stocking Style
- Classic: candy cane, chocolate coins, orange, small ornament.
- Rustic: pine-scented sachet, wooden toy, dried orange slice, twine-wrapped soap.
- Elegant: slim chocolate box, lip balm, silk eye mask, small candle (unlit, kept away from flames).
- Kids: small toy, sticker sheet, fun socks, crayons, fruit snack.
- Pet: pet-safe treats, small chew toy, new collar charm.
Skip anything sharp, anything that leaks, and anything too heavy for the holder. A stocking that rips or tips over ruins the display and can damage the gifts inside.
Mistakes to Avoid, and How to Care for Your Stockings
Most stocking mistakes come from rushing the order of work. Do not glue trim before the name, or the name may end up squeezed into a corner. Do not hang a stocking before paint or glue dries, or the design will smudge. Do not mix six colors and five textures on one stocking and expect it to look calm.
Check glued decorations once a year before you hang the stockings. Press each shape and bell gently, and re-glue anything loose with fabric glue. Sew on any button or bell that keeps coming loose, since a sewn fix lasts far longer than another round of glue. Store stockings flat or rolled in tissue, not crammed into a bag, so applique shapes and trim keep their form until next Christmas.
Wash stockings only as their fabric and decorations allow. Felt and glued decorations usually prefer a gentle spot clean with a damp cloth over a full wash. Embroidered cotton stockings often handle a gentle hand wash, but always check the care label on ready-made stockings first. Let stockings air dry flat, never in a hot dryer, which can melt glue and shrink fabric.
Hang Stockings Safely Around Fire and Heat
Stockings are fabric, and fabric catches fire. Chimney safety experts give one clear rule: you may hang stockings on the mantel, but never leave them there while a fire burns, as Aelite Chimney’s winter holiday fireplace safety tips explain.
Move them to a banister, a bookcase, or a wall hook before you light the fire, and keep them at least three feet from the open flame. This rule covers stockings, ribbons, garlands, and any other hanging decoration, not just the stocking itself.
Use metal holders rather than plastic ones near a fireplace, and keep candles and other open flames away from the display. Battery-operated lights give you the same warm glow without an open flame near fabric. If your fireplace is electric, read the maker’s guidance first, since some models still give off enough heat to damage fabric over time.
Related Guides
Ideas for DIY Christmas Wreaths · Christmas Paper DIY Decorations: Snowflakes, Garlands, Stars, and More · Colorful Christmas Decor: Palettes That Feel Joyful, Not Messy
Frequently Asked Questions
How do you decorate a Christmas stocking?
Start with the name on the cuff, then add two or three decorations that match your theme. Felt shapes, embroidery, iron-on patches, ribbons, and pom-pom trim all work well. Lay every piece out before you glue or sew anything, and keep the colors to three at most for a clean look.
Can I personalize a Christmas stocking without sewing?
Yes. Iron-on patches, fabric paint, puffy paint, felt letters with fabric glue, and clip-on name tags all personalize a stocking with no sewing at all. Fabric glue holds felt shapes well, but let it dry fully overnight before you hang the stocking.
Can you make a no-sew Christmas stocking?
Yes. Cut two stocking shapes from felt, glue the edges together with fabric glue, and decorate with felt cutouts, pom-poms, or glitter glue. Felt works best for no-sew stockings because it does not fray and it holds glue well.
How do you hang stockings without a fireplace?
Hang them from a staircase banister with ribbon, a row of wall hooks, a bookshelf edge, a curtain rail, or a freestanding stocking stand. Space them evenly and test each hook with a filled stocking so nothing tips or falls.
What do you put in a Christmas stocking?
Fill stockings with small gifts and treats: sweets, a candy cane, socks, a small book, a puzzle, a lip balm, or a small ornament. Put heavy items at the toe, light and pretty items at the top, and match the fillers to the stocking’s style.
Can you hang stockings on the mantel while a fire is burning?
No. Never leave stockings, ribbons, or garlands hanging over a lit fire, since fabric can ignite from heat or sparks. Move stockings at least three feet from the flame before you light the fire, and return them only when the fire is out and cold.
Disclaimer: This guide covers decoration only. Keep all fabric stockings, ribbons, and hanging decorations away from open flames, lit candles, and heaters, and follow your fireplace maker’s safety guidance. If a stocking is damaged by heat, retire it rather than hanging it near a fire again.
Start tonight with just one stocking. Add the name, pick one trim, and hang it up to see how it looks in your room. Once that first stocking feels right, the rest of the set almost decorates itself — and next Christmas, you will pull out a set that already tells your family’s story.