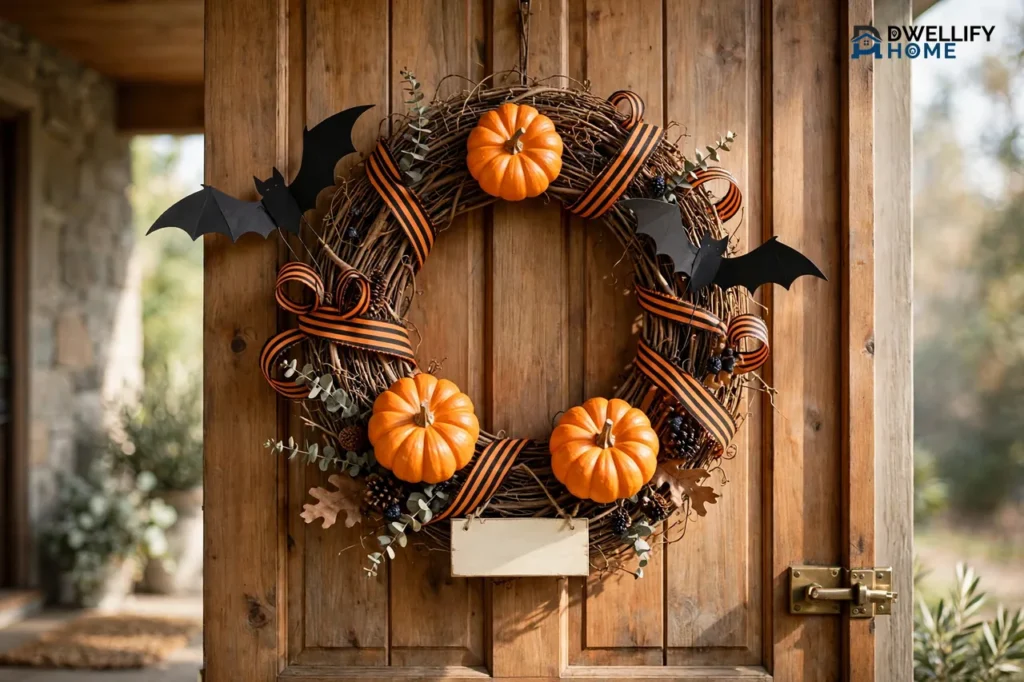
To make a Halloween wreath, pick one theme and two or three colors first, then build on an 18-inch grapevine, foam, or mesh base: dry-fit your biggest decorations, wire or glue them on from largest to smallest, add one clear focal point like a bow or a small sign, and finish with a strong hanging loop. Most beginners finish in about an hour once the supplies are laid out, and the same basic method works for a spooky, witchy, gothic, or cute wreath — only the colors and accents change.
The secret is deciding the look before you attach anything. A wreath built around one theme looks planned; a wreath built from random leftovers looks like random leftovers. This guide covers the theme choice, the base choice, the full assembly, hanging without door damage, and the weather fixes that keep your work up all season.
Start With a Theme: 5 Halloween Wreath Styles
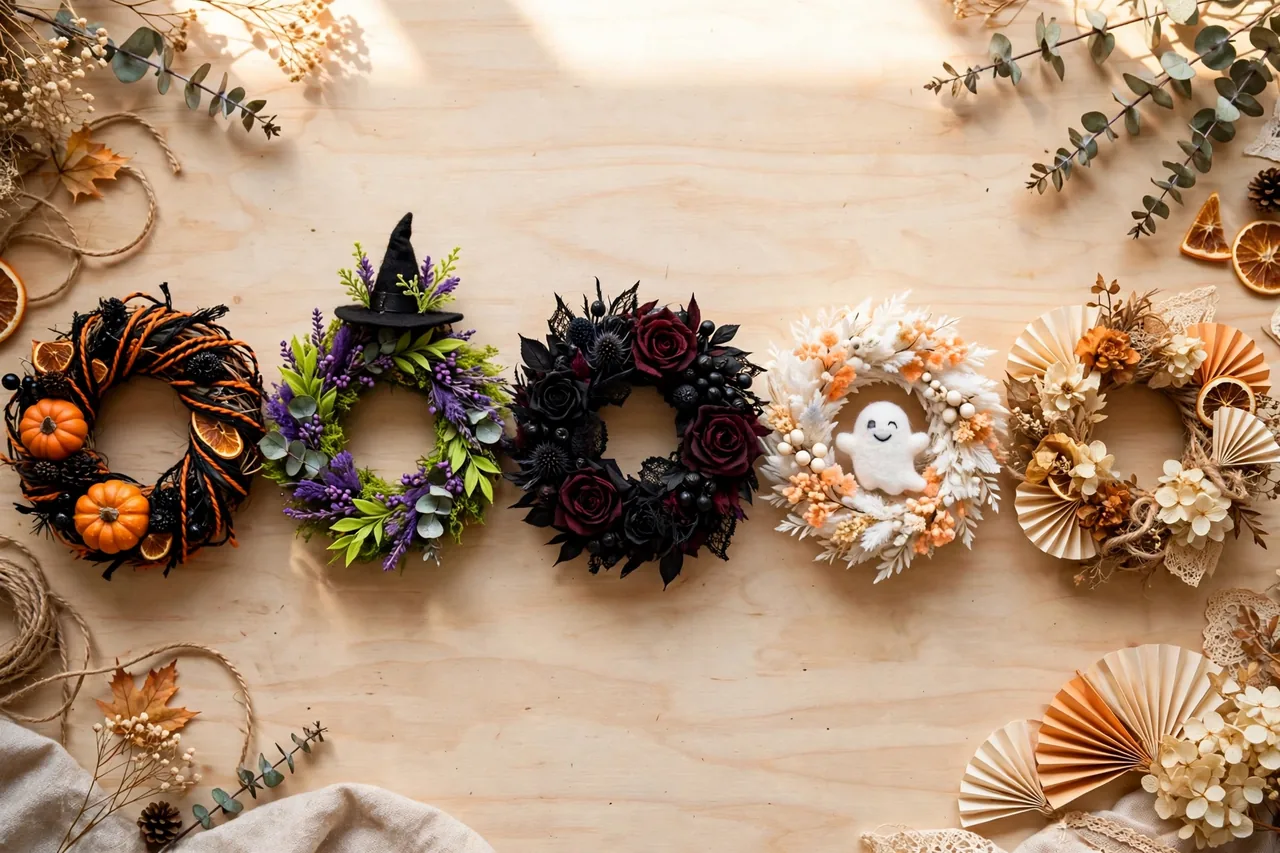
A theme is simply a color palette plus a small set of matching symbols. Choose two main colors and one accent color, then repeat them around the whole wreath. That repetition is what makes a simple wreath look finished instead of cluttered.
Here are the five themes that work best on a front door, with the exact colors and accents each one needs:
| Theme | Colors | Signature accents | Best for |
|---|---|---|---|
| Classic Halloween | Orange, black, cream | Mini pumpkins, bats, striped ribbon, a small “Boo” sign | Most doors; the safest first wreath |
| Witchy | Purple, black, lime green | A small witch hat, broom pick, potion bottles, sparkly spiders | Playful-spooky porches and party doors |
| Gothic | Black, deep burgundy, antique gold | Black roses, feathers, a raven or skull, velvet ribbon | Dark doors and elegant, moody homes |
| Cute and friendly | White, pastel orange, soft purple | Friendly ghosts, candy pieces, smiling pumpkins, polka-dot ribbon | Homes with young trick-or-treaters |
| Vintage Halloween | Orange, black, aged cream | Paper fans, retro cat or pumpkin faces, tinsel, crepe streamers | Old-house charm and collectors |
One rule protects every theme: if a decoration does not match your colors or your symbols, it does not go on this wreath. Save it for another project. Three pumpkins, two bats, and one bow in matching colors will always beat fifteen mixed pieces fighting for attention.
Also check your door color before you shop. Orange disappears on a red-brown door, and a black gothic wreath vanishes on a black door. Hold one decoration against the door in daylight; if it blends in, back it with a light layer — pale ribbon or greenery — so the wreath stands out from the street.
What You Need: Bases, Tools, and Decorations
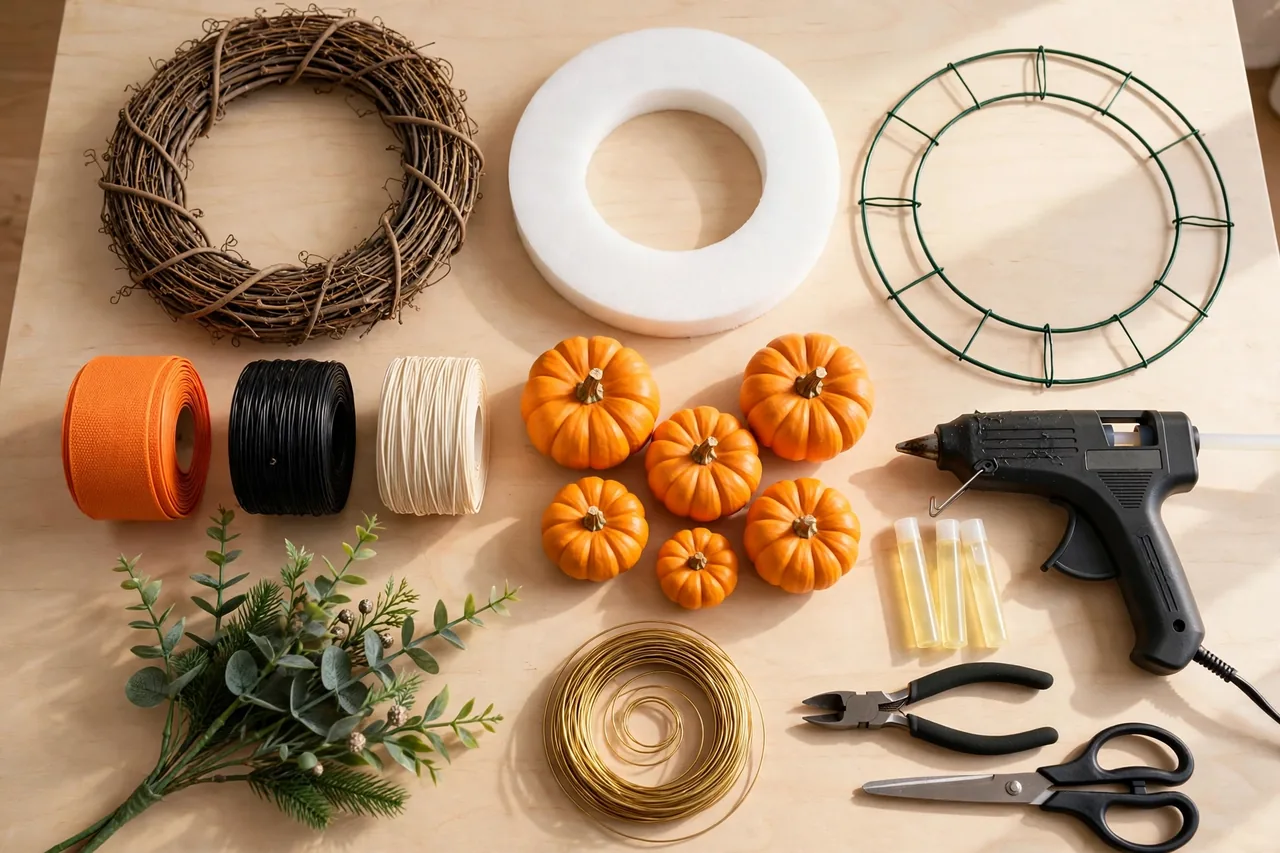
The base is the round frame everything attaches to. All four common bases work for a Halloween wreath, but each one suits a different building style:
| Base | How decorations attach | Strengths | Watch out for |
|---|---|---|---|
| Grapevine | Tuck stems between vines; wire or glue accents | Forgiving for beginners, rustic texture hides small gaps, grips pieces without glue | Uneven surface; bulky pieces can wobble until wired |
| Foam (extruded or Styrofoam) | Push picks and pins straight in; glue light pieces | Smooth, even shape; great for ribbon-wrapped and full-coverage designs | Dents easily; use low-temperature glue so the foam does not melt |
| Wire frame | Tie or wire everything on | Lightweight, strong, reusable year after year | Bare frame shows through unless fully covered |
| Mesh-covered base | Decorations sit on a full deco-mesh layer | Biggest, fullest look; strong color background | The mesh itself is a technique — see the note below |
Materials to gather:
- One wreath base, 18 inches for a standard door (sizing help is in the next section)
- Wired ribbon in your theme colors — wired edges hold bow shapes outdoors
- One focal piece: a small wooden sign, a witch hat, a large bow, or a friendly ghost
- 3 to 5 large accents: mini pumpkins, big spiders, faux flowers, or ornaments
- Filler: faux greenery, berry picks, small bats, or extra ribbon loops
- Floral wire (often sold as paddle wire) and chenille stems (pipe cleaners)
- Hot glue sticks matched to your glue gun’s temperature
Tools:
- Hot glue gun — low-temperature for foam bases and delicate plastic pieces
- Wire cutters for floral wire and thick stems
- Scissors for ribbon and fabric
- A tape measure, and a wreath hanger or hook for the door
About mesh: if you want the big, ruffled deco-mesh look, the mesh layer is a skill of its own — ruffle, cruffle, and poof methods each give a different fullness. This guide builds themed wreaths on grapevine, foam, and wire bases. For the mesh technique itself, follow our guide on how to make a mesh wreath, then come back here for the theme, assembly, and hanging steps, which are the same once the mesh layer is on. FloraCraft’s Halloween mesh wreath project shows a finished manufacturer example.
What Size Wreath Fits Your Door?
Size the finished wreath — decorations included — to the door, not to the base alone. On a standard 36-inch-wide front door, a finished wreath of about 20 to 24 inches across looks balanced: big enough to read from the street, small enough to leave calm space around it. An 18-inch base usually lands in that range once ribbon and accents add a few inches.
For a narrower 30-inch door or an apartment door, drop to a 14- or 16-inch base. For a wide or double door, go up to a 24-inch base, or hang two smaller wreaths, one on each door. If you are unsure, cut a cardboard circle at the size you are considering and tape it to the door for an hour. Cardboard is cheaper than returns.
One measurement most people skip: depth. If your door sits behind a storm door, measure the gap between the two doors before you build. A puffy mesh or bow-heavy wreath may not fit in that space, and forcing the storm door shut can bend the wreath. In a tight gap, build flat — ribbon, leaves, and flat wooden pieces tight to the base — and skip the bulky focal pieces.
How to Make a Halloween Wreath Step by Step
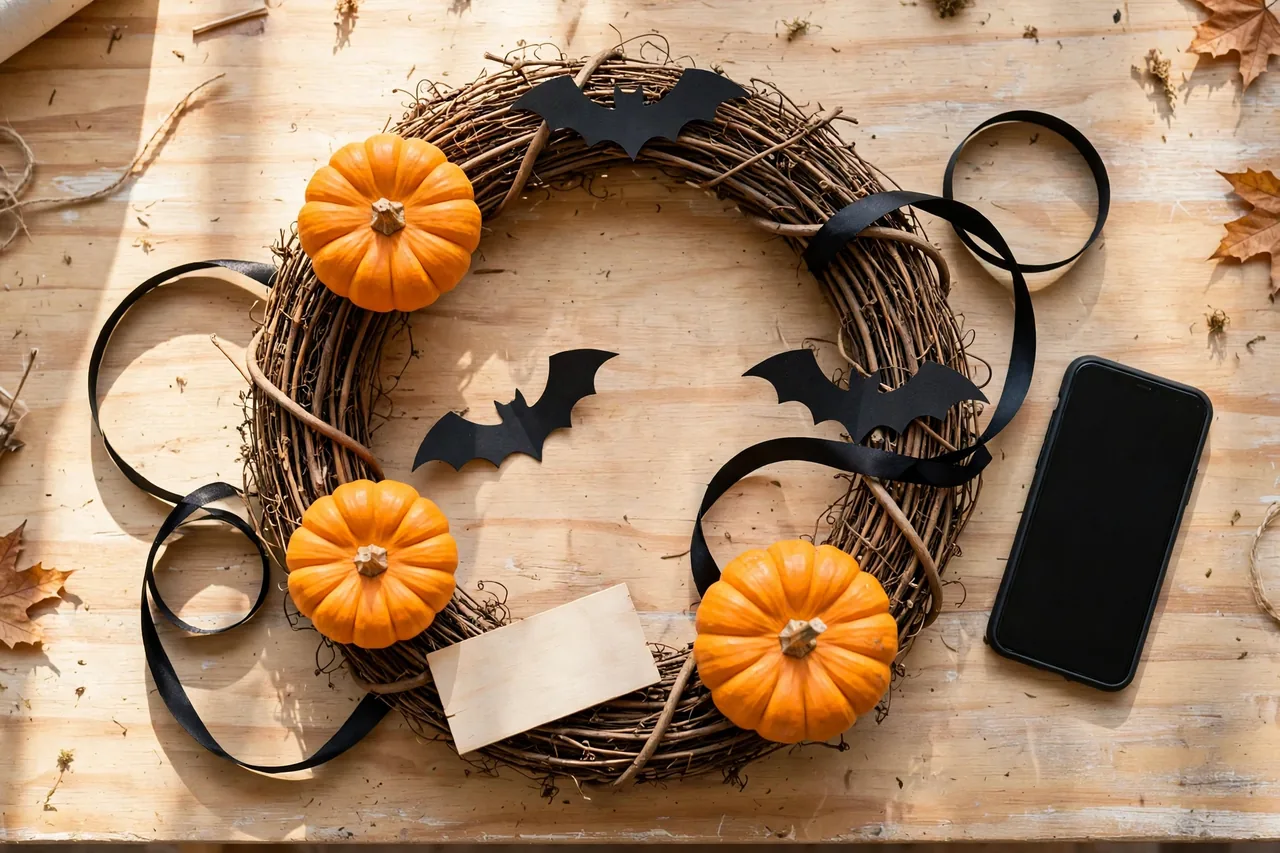
This is the full build, in the order that prevents the usual problems. The example uses a grapevine base and the classic orange-and-black theme, but every step works the same for foam and wire bases and for every theme in the table above.
- Prep the base. Shake a grapevine base outdoors to drop loose bits, and pull off any twigs sticking straight out. If you want a colored base — black under a gothic wreath, white under a ghost wreath — paint it now and let it dry fully before decorating. Rust-Oleum’s own Halloween wreath project shows this order: paint every loose piece first, let it dry, then attach. Spray paint only outdoors or in a well-ventilated space, following the can’s directions.
- Dry-fit the whole design. Lay the base flat and arrange everything on it without glue or wire: focal piece first, then large accents, then filler. Take a photo with your phone. This photo is your map if pieces shift while you work, and it is much easier to fix a crowded design now than after gluing.
- Attach the background layer. Wrap ribbon around the base or tuck greenery stems evenly around the ring so no bare base shows where you want coverage. On grapevine, push stems between the vines and add a twist of floral wire at the back when a stem feels loose. Keep this layer even — it is the frame your theme sits on.
- Add the large accents. Place pumpkins, big flowers, or ornaments in a triangle pattern around the ring rather than in a straight line; odd groupings look natural. Wire each heavy piece to the base — push the wire through or around the piece, twist it tight at the back, and trim the ends. Glue alone is not enough for heavy pieces on a door that opens and closes all day.
- Place the focal point. Add your sign, hat, or big bow last among the decorations, usually at the bottom center or at the 5 o’clock position. One focal point gives the eye a home. Two focal points split the design in half.
- Fill the gaps with small pieces. Tuck berries, small bats, and ribbon loops into empty spots, stepping back every few pieces to check the whole ring. Stop while one or two small gaps remain — a little base texture showing is fine on grapevine and keeps the wreath from looking stuffed.
- Make the bow (if your theme uses one). Loop wired ribbon back and forth in your hand, pinch the center, and wrap it tight with floral wire, leaving two long wire tails. Fluff the loops open, then use the tails to wire the bow to the base so it can be removed later without damage.
- Add the hanger and do the shake test. Twist a loop of floral wire or ribbon firmly around the top back of the base. Lift the wreath by the loop and shake it gently, then tap each decoration. Anything that moves gets more wire now — not after it falls on the porch.
That is the whole build. Everything after this point is styling, hanging, and keeping the wreath alive outdoors.
Theme Recipes: Build the Look You Picked
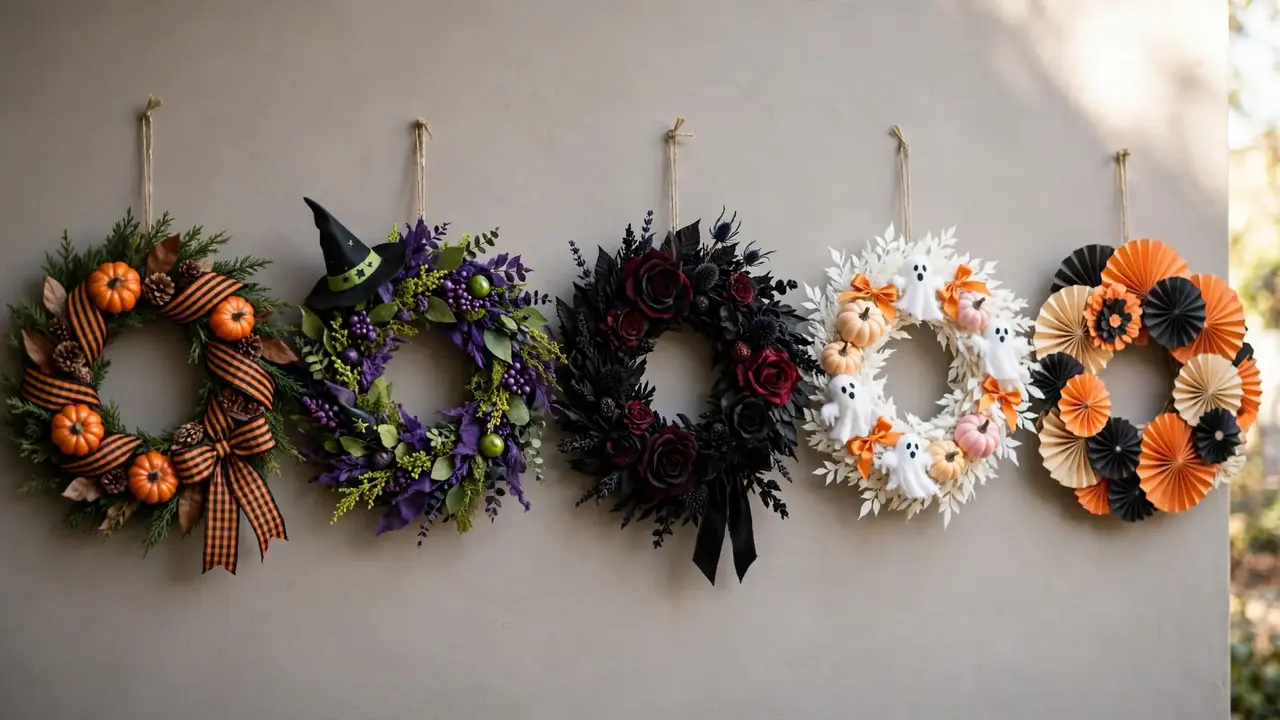
The steps above build any wreath. These short recipes show what changes for each theme — the base treatment, the focal point, and the one detail that sells the look.
Classic orange and black
Keep the grapevine natural or paint it black for contrast. Focal point: a small “Boo” or “Trick or Treat” wooden sign at the bottom. Add three mini pumpkins in a triangle, black-and-orange striped ribbon loops as filler, and two or three flat bats wired so they look mid-flight. This is the most forgiving theme for a first wreath because the colors carry it even if placement is simple.
Witchy purple and green
Start with a black-painted base. Focal point: a small witch hat tilted at the top, or a tiny broom wired diagonally across the lower half. Use purple ribbon, lime-green accents, and one sparkly spider on a thread of webbing near the hat. Keep the glitter to one or two pieces — a little sparkle reads as magic, a lot reads as mess.
Gothic black and burgundy
Paint the base black and cover most of it. Focal point: a cluster of black roses with one burgundy rose at the center, or a small raven perched at the side. Tuck black feathers behind the flowers for height and finish with a velvet ribbon hanger instead of a bow. This theme works best indoors or on a covered porch, because feathers and velvet dislike rain. For more of this mood across the whole house, pair the wreath with the ambience ideas in our guide to DIY scary Halloween decorations.
Cute ghosts and candy colors
Paint a foam base white, or wrap it in white ribbon. Make simple ghosts from white fabric or felt circles with two black oval eyes — no faces scarier than a smile. Focal point: one larger ghost at the bottom with a tiny orange bow. Scatter candy-shaped pieces and pastel pumpkins as filler. This is the theme to choose when your street is full of small children.
Vintage paper Halloween
Use flat pieces only: paper fans in orange and black, retro-style cat or jack-o’-lantern faces printed or cut from card stock, and a crepe-paper rosette as the focal point. Wire or pin everything flat against a foam or wire base. Flat and light means this wreath also fits behind a storm door, and it stores flat without crushing.
How to Hang Your Wreath Without Damaging the Door
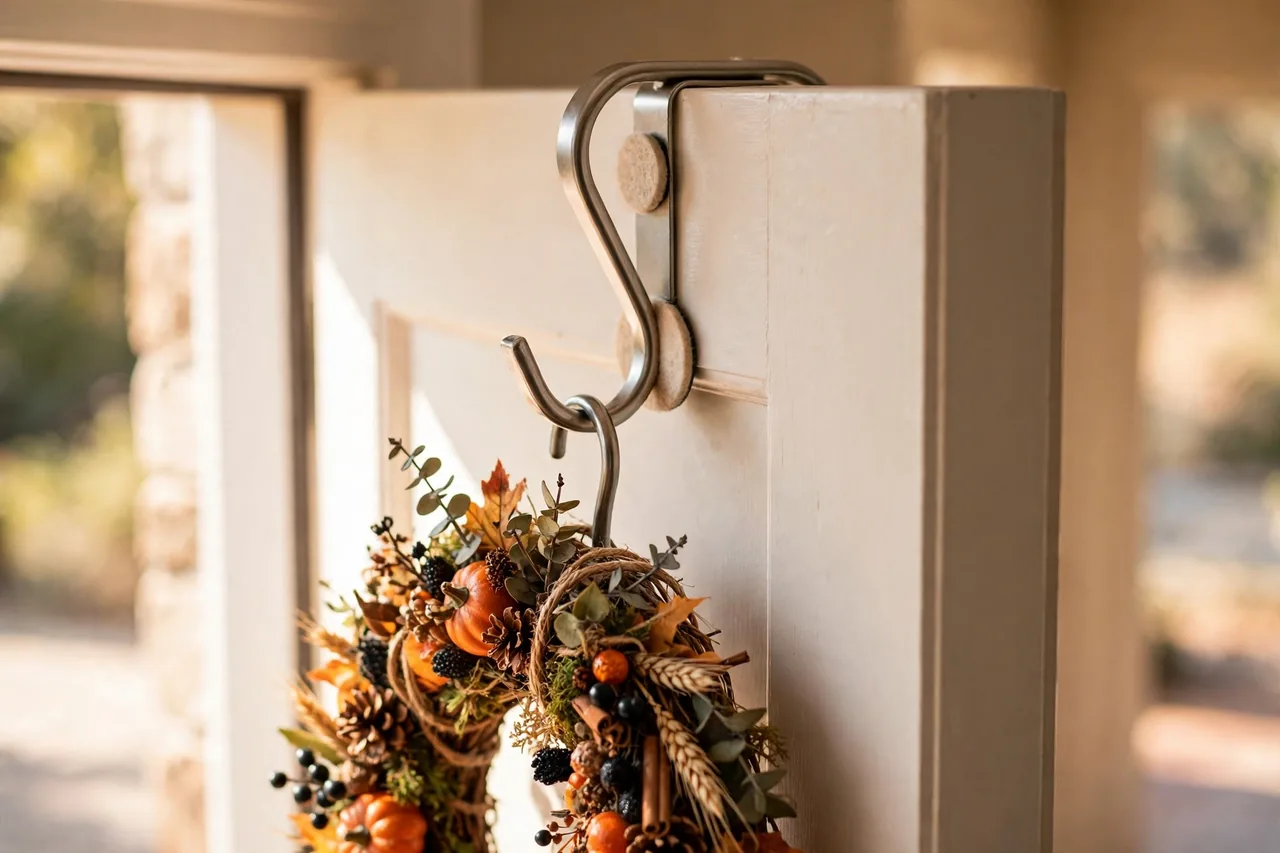
You have four good options, and the right one depends on your door material and whether you rent:
- Over-the-door hanger: the strongest simple choice. Check it fits your door’s thickness and that the door still closes without rubbing the frame. Add felt pads where metal touches paint.
- Removable adhesive hook: the renter-friendly choice for smooth doors. Clean the spot with rubbing alcohol, press the hook as the package directs, and wait the full curing time — 3M’s instructions for its Command hooks say to wait 1 hour before hanging weight — and never hang more than the package’s weight rating. 3M also advises against doubling up hooks to carry a heavier item, because the weight may not share evenly; if your wreath is too heavy for one hook, use a hanger instead. See 3M’s Command hooks FAQ for the official guidance.
- Magnetic hook: for steel doors, and for glass panels with a magnet on each side. Test with any magnet first — fiberglass and wood doors will not hold one. Add felt behind the magnet to prevent scratches.
- Ribbon over the top: loop a wide ribbon through the wreath’s hanger, run it over the top of the door, and secure it to a hook on the inside. Nothing shows on the front except the ribbon, and nothing sticks to the finish.
Whatever you choose, stick two or three felt furniture pads on the back of the wreath where it touches the door. Doors swing and wind blows; the pads stop twigs and wire ends from sanding your paint all month. Hang it so the center sits about eye level, then step out to the street once to check the view your trick-or-treaters will get.
Make It Last Outdoors: Weather, Sun, and Storage
A covered porch is the best home for almost every handmade wreath. Direct rain soaks ribbon and paper, and hard sun fades colors and weakens hot glue. Three habits protect your work:
- Wire outdoors, glue indoors. On an exposed door, wire every piece you can. Hot glue softens in strong heat and can let go on a sun-baked door; wire does not care about temperature. Save glue-only construction for indoor or covered-porch wreaths.
- Match the materials to the spot. Plastic, painted wood, and faux greenery handle weather best. Paper, crepe, feathers, and dried natural pieces belong indoors or under a roof. If you add battery lights, choose a set labeled for outdoor use and tuck the battery pack at the back where rain cannot pool on it.
- Bring it in for storms. A wreath is light and catches wind like a sail. Taking it down before a stormy night is faster than rebuilding it after.
After Halloween, dust the wreath gently, check every wired piece, and store it hanging on a hook in a closet or flat in a box with tissue between the decorations and the lid. Hanging storage is best for bows; flat storage suits the vintage paper style. Stored dry and uncrushed, a faux wreath is ready to go again next October with only small repairs. For the rest of the porch, our outside Halloween decorating ideas show how the wreath fits the full door-and-walkway picture.
Troubleshooting: Wreath Problems and Quick Fixes
Nearly every wreath problem shows up in the first day, and nearly every one has a five-minute fix:
| Problem | Likely cause | Fix |
|---|---|---|
| A decoration fell off | Glue-only hold on a heavy piece, or a hot, sunny door | Re-attach with floral wire through the base; move glue-only pieces to the covered side |
| The wreath looks lopsided | Heavy pieces clustered on one side | Move one large accent, or add a matching piece opposite; check against your dry-fit photo |
| Bare base shows through | Background layer too thin | Tuck extra greenery, ribbon loops, or filler picks into the gaps — no need to restart |
| The bow went flat | Satin or unwired ribbon, or storage crushing | Re-fluff the loops by hand; next time choose wired ribbon and store the wreath hanging |
| The wreath scratches the door | Wire ends or twigs rubbing the finish | Trim and bend wire ends into the base; add felt pads at every contact point |
| Colors faded by mid-October | Hours of direct sun | Move the wreath to the shaded side or indoors; choose UV-rated faux pieces for sunny doors |
A quick note on tools and safety: hot glue burns are the most common craft injury, so keep a small bowl of cool water nearby and let pieces set before pressing them hard. Spray paint belongs outdoors with the can’s directions followed, and wire ends should always be trimmed and tucked so no sharp points face out where hands and door paint will meet them.
Related Guides
- How to Make a Mesh Wreath — the ruffle, cruffle, and poof techniques for a full deco-mesh base.
- DIY Scary Halloween Decorations — lighting, webs, and silhouettes that push the scary look further.
- Do It Yourself Halloween Props — tombstones, ghosts, and spiders to build for the yard around your door.
- Outside Halloween Decorating Ideas — a whole-porch plan that starts with the wreath.
- Terracotta Pumpkins — a softer fall accent that pairs well with the classic theme.
Frequently Asked Questions
Can I make a Halloween wreath if I’m not crafty or experienced in DIY projects?
Yes. A grapevine base, three mini pumpkins, ribbon, and floral wire are enough for a good first wreath, because the base grips pieces even before you secure them. Follow the dry-fit step, wire the large pieces, and copy the classic theme recipe above. Simple and balanced beats ambitious and crowded.
How big should a wreath be on your door?
For a standard 36-inch front door, aim for a finished wreath about 20 to 24 inches across, decorations included. An 18-inch base usually lands in that range. Narrower doors look better with a 14- or 16-inch base, and double doors can take a 24-inch base or a matching pair.
Can you recommend another glue?
If your door bakes in the sun, treat glue as a helper, not the hold. Standard hot glue softens in high heat and pieces can slide or drop. Wire heavy and medium pieces to the base, use low-temperature glue only for light filler, and keep glue-only wreaths on covered porches or indoors.
How long does a finished wreath last outdoors?
A faux wreath on a covered porch easily lasts the whole Halloween season and, stored dry, many seasons after. In direct rain and sun, expect faster fading and loosening — paper and feathers may only look good for a few weeks outside. Wiring pieces on and storing the wreath uncrushed makes the biggest difference.
How do I store wreaths between seasons?
Hang the wreath on a hook in a closet, or lay it flat in a box with tissue over the decorations so nothing crushes the bow or loops. Keep the box somewhere dry and indoors, not a damp garage corner. Label the theme on the box, and next October you can hang it after a quick dust and one shake test.
Your Theme, Your Door
You now have the full method: one theme, two or three colors, a base that fits your door, a dry-fit before any glue, wire for anything heavy, and a hanger that respects your door’s finish. Pick the theme that matches your street — friendly ghosts for the little kids, gothic black for the drama — gather the supplies, and give yourself one unhurried hour. The first wreath teaches your hands; the second is where your own style shows up.