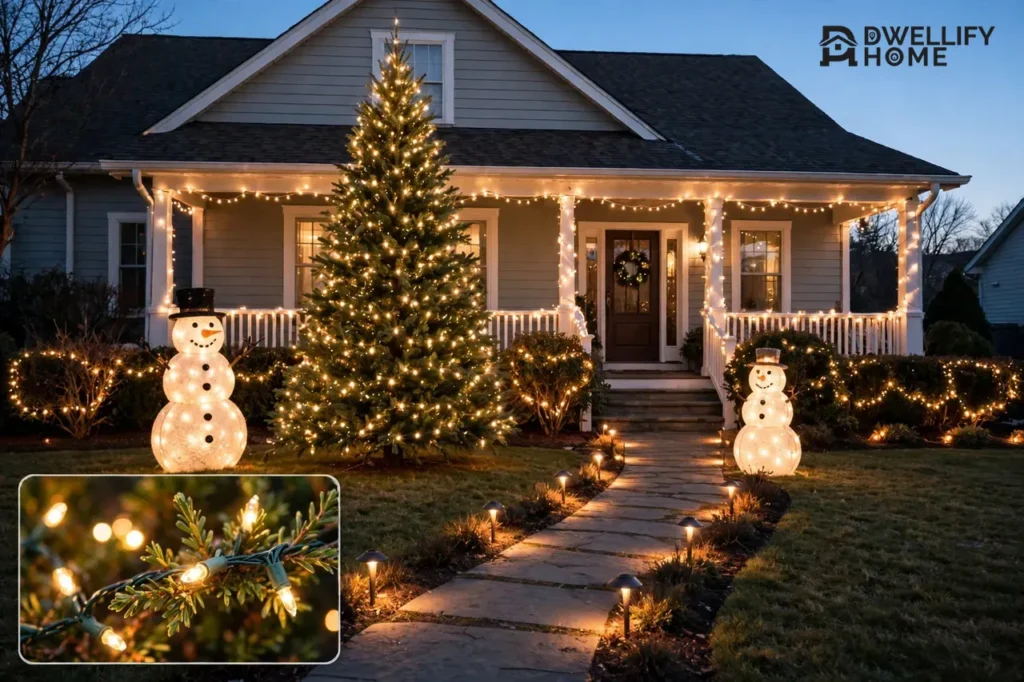
Outdoor Christmas displays turn the outside of your home into a warm, joyful holiday scene with lights, yard figures, projected patterns, and a clear layout that ties them together. The best displays start with one focal point, add layers of light around it, and use safe outdoor power so the whole scene shines night after night. You do not need the biggest yard or the most pieces to make it work. You need a simple plan, outdoor-rated gear, and a layout that looks good from the street.
This guide walks you through every part of that plan. You will learn the main types of displays, how to pick a theme, how to lay out lights and figures, and how to power it all safely. By the end, you will know exactly what to buy, where to put it, and what to check before you switch it on.
What Counts as an Outdoor Christmas Display?
An outdoor Christmas display is any holiday decoration you set up outside your home for others to enjoy. It can be as simple as string lights on a porch and a lit wreath on the door. It can also be a full front-yard scene with glowing figures, a lighted tree, and patterns dancing across a wall.
Most displays mix four building blocks. Lights set the mood and outline the space. Figures and scenes give the eye something to land on. Projection adds motion and color with very little effort. And layout, the way you arrange it all, turns separate pieces into one scene that makes sense. When one of these blocks is missing, a display often looks scattered. When all four work together, even a small yard looks planned and polished.
Outdoor xmas displays work best when you design for two views. In daylight, figures, greenery, and structure should still look neat and intentional. At night, light takes over, so your brightest pieces should sit where people actually look: the front walk, the porch, and the center of the yard.
Outdoor Christmas Lights: The Foundation of Every Display
Lights do more work than any other piece in your display. They set the color story, guide the eye, and make figures visible after dark. Start with lights first, then add figures around them. That order keeps you from buying figures that disappear at night because nothing lights them.
String Lights for Trees, Shrubs, and Porches
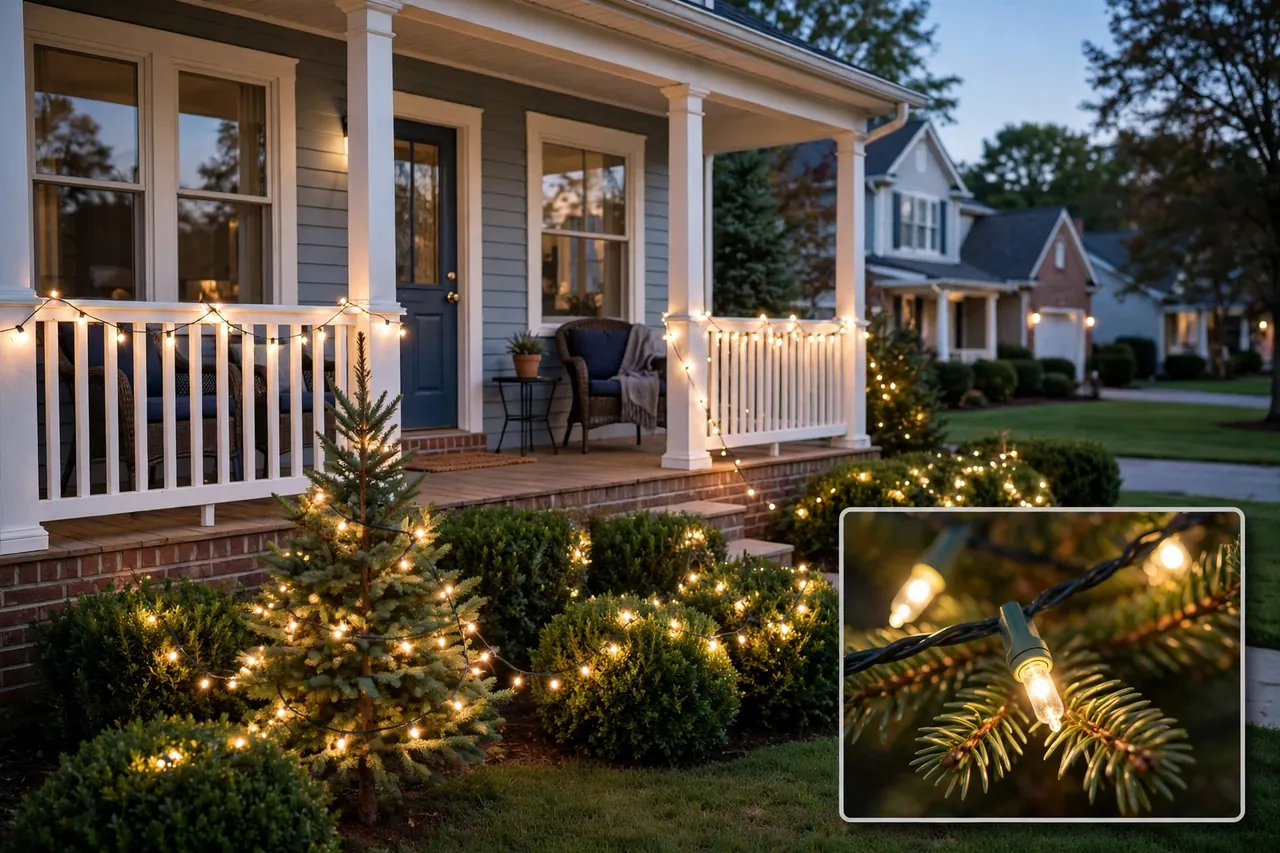
String lights are the most flexible lights you can buy. Wrap them around small trees, drape them over shrubs, and run them along porch railings and window frames. Warm white gives a classic, cozy glow. Multicolor feels playful and bright. Cool white looks crisp and icy, which suits a winter woodland theme.
LED string lights are the smart default for most homes. They use far less power than old incandescent bulbs, stay cool to the touch, and let you connect many more strands end to end. Check the box for the maximum number of strands you may link, and never go past it. For more on lighted pieces in general, see our guide to light-up Christmas decorations.
Net Lights, Curtain Lights, and Pathway Lights
Net lights spread evenly over a bush in minutes, which beats wrapping each branch by hand. Curtain lights hang in straight vertical drops and work well on a porch wall or across a wide fence, where they form a glowing backdrop. Pathway lights, such as stake lights and lanterns, line the walk and guide guests safely to your door.
Use pathway lights for safety as well as beauty. A dark walk is a tripping hazard on winter nights, and a lit path tells visitors exactly where to step. Solar stake lights suit spots far from an outlet, but place them where they get direct daylight so they charge fully before dusk.
Spotlights and Accent Lighting
Spotlights make figures and trees pop after dark. Aim a warm spotlight at a tree trunk and its branches glow from within. Aim one at a yard figure and it reads clearly from the street instead of fading into a dark lawn. A few well-aimed spotlights beat a dozen weak ones, because they create depth and contrast.
Test your lighting at night before you call the job done. Walk to the street, look back at your home, and note any dark gaps or pieces that glare too hard. Small moves, a spotlight shifted a foot to the left or a strand added to a bare shrub, often fix the whole scene.
Yard Figures and Scenes That Tell a Story
Figures give your display personality. A pair of glowing reindeer, a cheerful snowman family, or a tall nutcracker by the door tells visitors what kind of Christmas your home celebrates. Pick figures that match your theme and your yard size. One large, well-lit figure makes a stronger statement than five small ones crowded together.
Group figures into scenes instead of scattering them. Place reindeer near a tree as if they wandered into your yard. Set snowmen beside the walk where guests can greet them up close. Keep the tallest figure at the back of a group and shorter ones in front, so every piece stays visible. For big, bold pieces, our guide to large Christmas decorations can help you judge scale before you buy.
Inflatables: Big Impact With Little Effort
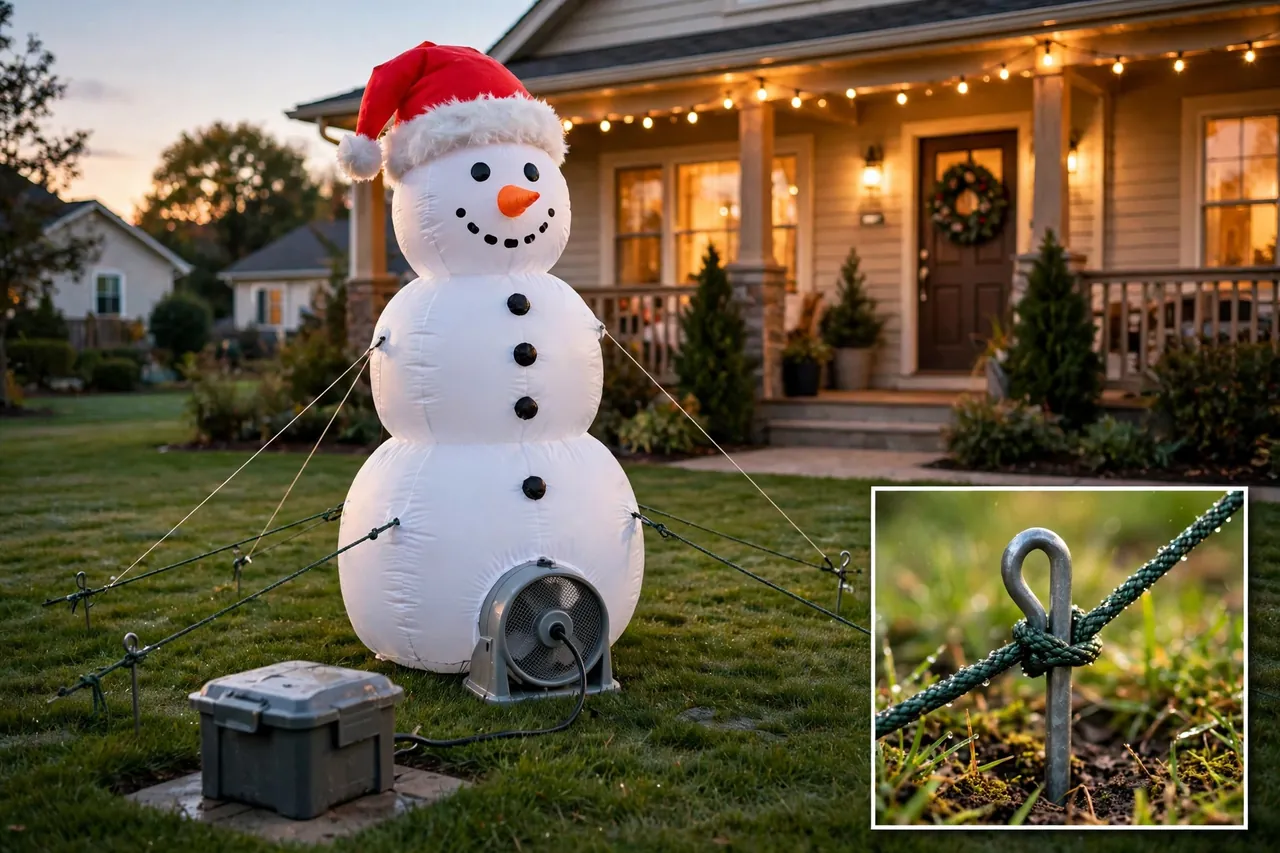
Inflatables are the fastest way to add a large scene to your yard. They pack down small for storage, set up in minutes with a built-in fan, and read clearly from far away. Kids love them, and drivers slow down for them, which makes them great focal points.
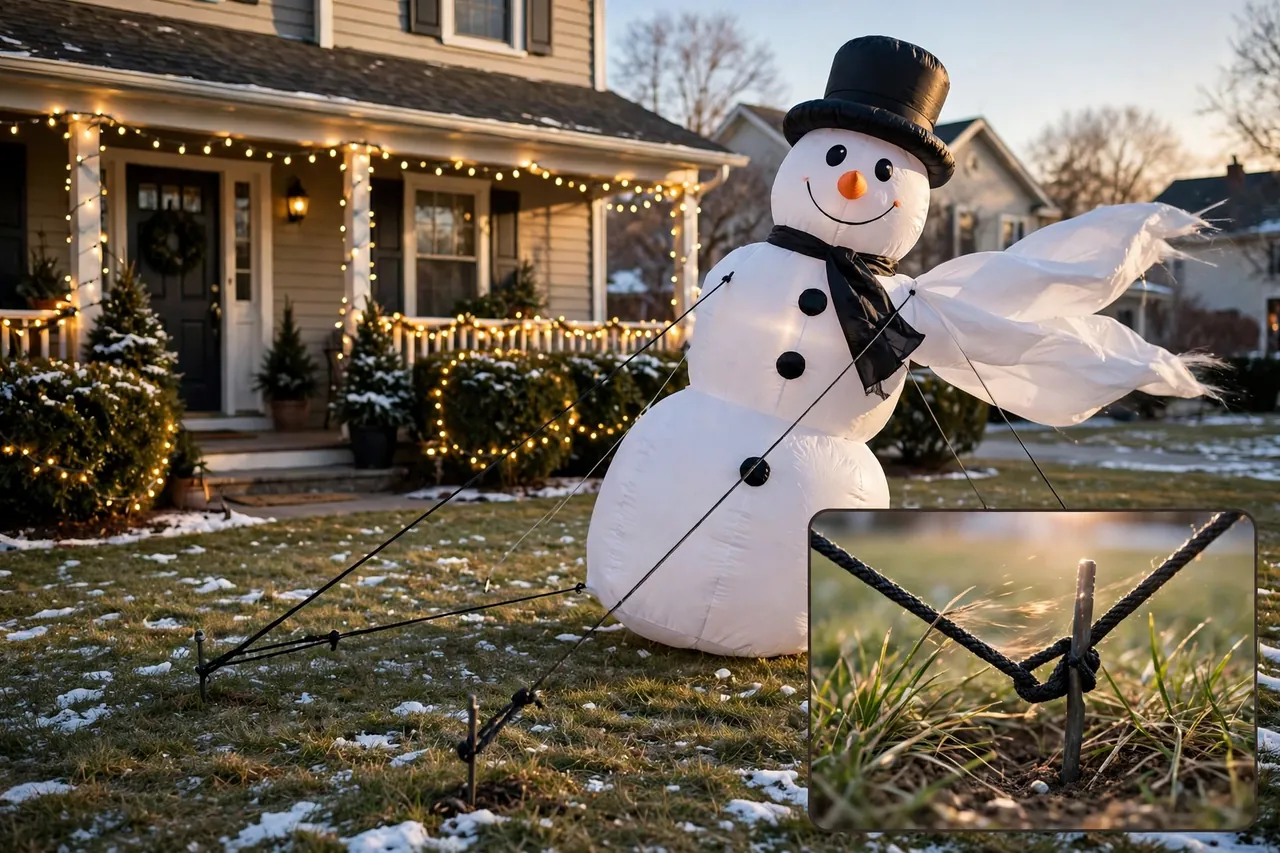
Anchor every inflatable well. Use all the stakes and tethers in the box, and add extra stakes if your yard gets strong wind. Check the fan intake stays clear of leaves and snow, and keep the power cord and plug off wet ground with a weatherproof cover. In a storm, deflate large inflatables rather than letting wind tear them loose.
Silhouettes and Cutout Scenes
Silhouette figures, flat shapes lit from behind or edged with lights, look sharp both day and night. A glowing star, a snowflake, or a row of trees on a fence creates a clean, graphic look that suits modern homes. Because silhouettes are flat, they also fit narrow spots where a round figure would crowd the walk.
Place silhouettes where light can work for them. A wall-mounted star needs a dark wall behind it to shine. A cutout scene on the lawn needs a spotlight or its own lights, or it will vanish after sunset. If you want a porch-centered scene rather than a lawn scene, see our ideas for Christmas decor on the porch.
For one narrow accent, a lighted gift-box display can round out a porch or walkway scene; our guide to Christmas present outdoor decorations covers that look in full.
Projection Displays: Motion and Color Without Climbing
A projector throws moving snowflakes, stars, or holiday patterns across a wall, garage door, or fence. You stake it in the ground, aim it, and plug it in. In minutes, a plain wall becomes a living backdrop, which makes projection perfect for beginners and for homes with few places to hang lights.
Projection works best on a light, flat surface. A pale wall shows patterns crisply, while a dark or busy surface swallows them. Set the projector back far enough that the image fills the space without stretching, and angle it slightly upward so the pattern lands where people look. Keep the plug and transformer off wet ground, just as you would with any outdoor cord.
Do not rely on projection alone if you want a full display. It adds magic, but it cannot replace the warm glow of string lights or the charm of a figure. Pair it with lit trees or pathway lights, and the whole yard gains depth instead of one bright wall floating in the dark.
Pick a Theme Before You Buy Anything
A theme stops impulse buys from turning your yard into a jumble. Pick one idea, then let every piece serve it. Your theme can be simple, and simple themes often look the most elegant.
A classic theme uses warm white lights, fresh greenery, and traditional figures for a timeless, cozy feel. A colorful theme mixes red, green, blue, and gold lights with playful figures for a bright, joyful yard that kids adore. A winter woodland theme leans on cool white and blue lights, snowflake shapes, and deer or snowmen for a calm, snowy scene.
Character-themed displays are another strong choice, especially for families. If your household loves animated favorites, our guide to Disney outdoor Christmas decorations shows how to build a character scene without losing a polished look. And if an old-fashioned glow appeals to you, our vintage outdoor Christmas decorations guide covers that nostalgic style in detail.
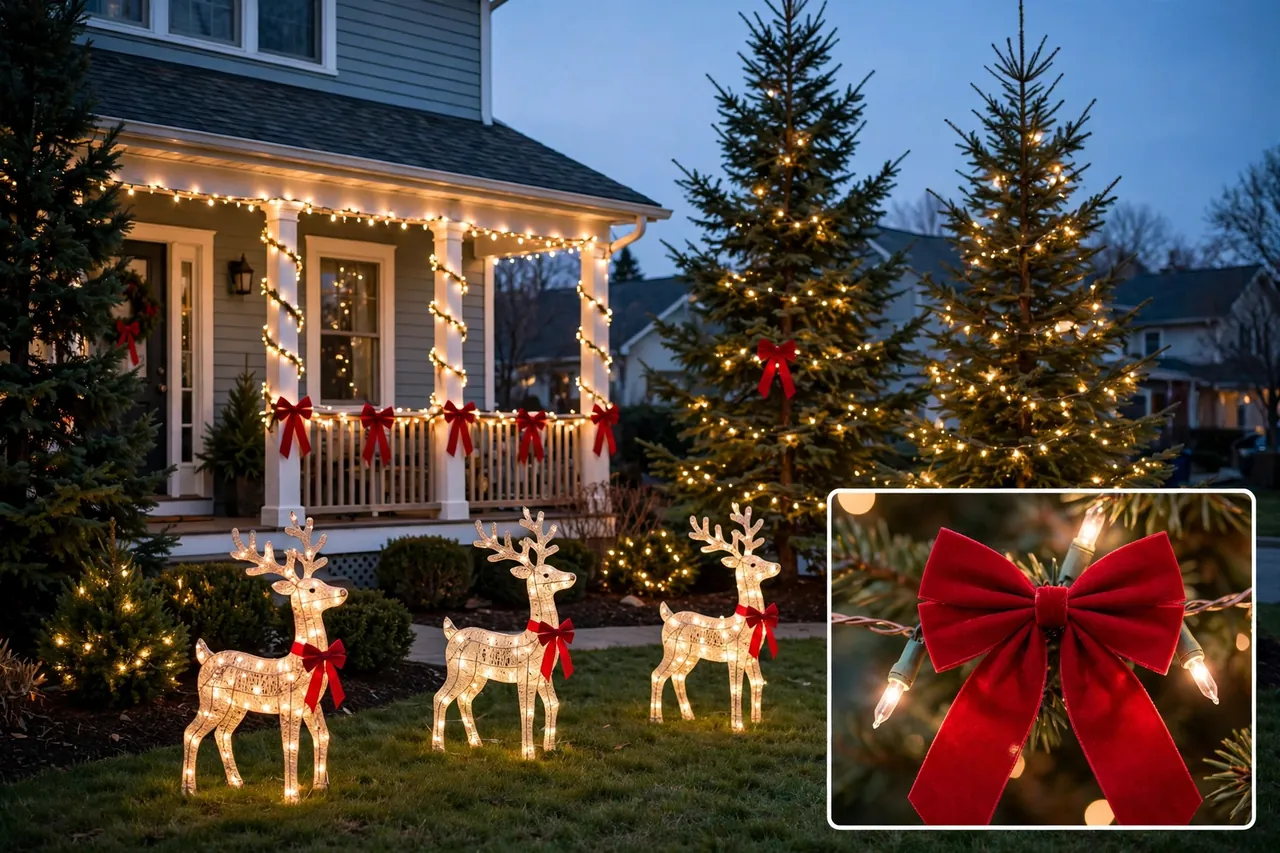
Whatever theme you pick, repeat its colors at least three times across the yard. Repeat the main light color on the porch, the trees, and the figures. Repeat one accent, such as red bows or gold stars, in two or three spots. Repetition is what makes a theme read as a plan instead of a pile of decorations.
Plan Your Layout Like a Designer
Good layout follows a simple rule: one focal point, supporting layers, and clear sightlines. Your focal point is the first thing a visitor notices, often a lighted tree, a large figure group, or a glowing porch. Build around it, and keep everything else a little quieter so the eye knows where to land.
Work in layers from the street inward. The outer layer, near the curb or fence, frames the scene with pathway lights or lit shrubs. The middle layer holds your figures and scenes. The inner layer, the porch and door, welcomes guests up close with a wreath, lanterns, and warm light. When each layer has something to offer, the display feels deep and full from every angle.
Sketch your plan before you shop. Draw a rough map of your yard, mark your outlets, and note where each strand and figure will go. Measure the spots you plan to light so you buy enough strands without guessing. For whole-exterior planning ideas, our Christmas decor exterior ideas guide pairs well with this layout step.
Daytime Looks Matter Too
Your display spends daylight hours on show as well, so check it in the sun. Straighten leaning figures, hide loose cords under mulch or cord covers, and remove empty boxes and tangled strands from view. Greenery, bows, and sturdy figures look good in daylight and give the display structure before the lights switch on.
Keep walkways and driveways fully clear. Figures should sit on the lawn or in beds, never where someone steps or a car pulls in. A beautiful display that blocks the path is not a success, no matter how bright it shines.
Power Planning: How Much Electricity Your Display Needs
Power planning sounds dull, but it is the step that keeps your display running safely all season. The math is simple, and doing it once saves you from tripped breakers on the coldest night of the year.
Start by adding up the watts of everything you plan to plug into one circuit. You will find the wattage on the tag near the plug or on the box. A standard US home circuit runs at 120 volts, and most outdoor circuits are 15 or 20 amps. Multiply volts by amps to find the circuit total: 120 times 15 gives 1,800 watts, and 120 times 20 gives 2,400 watts.
For lights that run for hours each night, use only 80 percent of that total as your safe limit. That means 1,440 watts on a 15-amp circuit and 1,920 watts on a 20-amp circuit. LEDs make this easy, since a typical LED strand draws only a few watts, while an old incandescent strand can draw 40 watts or more. Divide your safe limit by one strand’s wattage to see how many strands that circuit can carry, and spread the load across more than one circuit when you get close to the limit.
Power planning at a glance:
| Circuit size | Full capacity | Safe limit (80 percent) |
|---|---|---|
| 15 amps | 1,800 watts | 1,440 watts |
| 20 amps | 2,400 watts | 1,920 watts |
Also respect the end-to-end limit printed on each light box. That limit says how many strands you may link in one chain, and it differs between LED and incandescent sets. Never exceed it, even if your circuit still has room, because the wires inside a long chain can overheat. When in doubt, start a new chain from a separate outlet instead of adding one more strand.
For the full wattage method, the 1000Bulbs guide to maximum light runs walks through the same volts-times-amps math with worked examples. The EngineerFix guide to safely powering outdoor lights covers cord gauge and weatherproofing in more detail.
Outdoor Electrical Safety You Must Not Skip
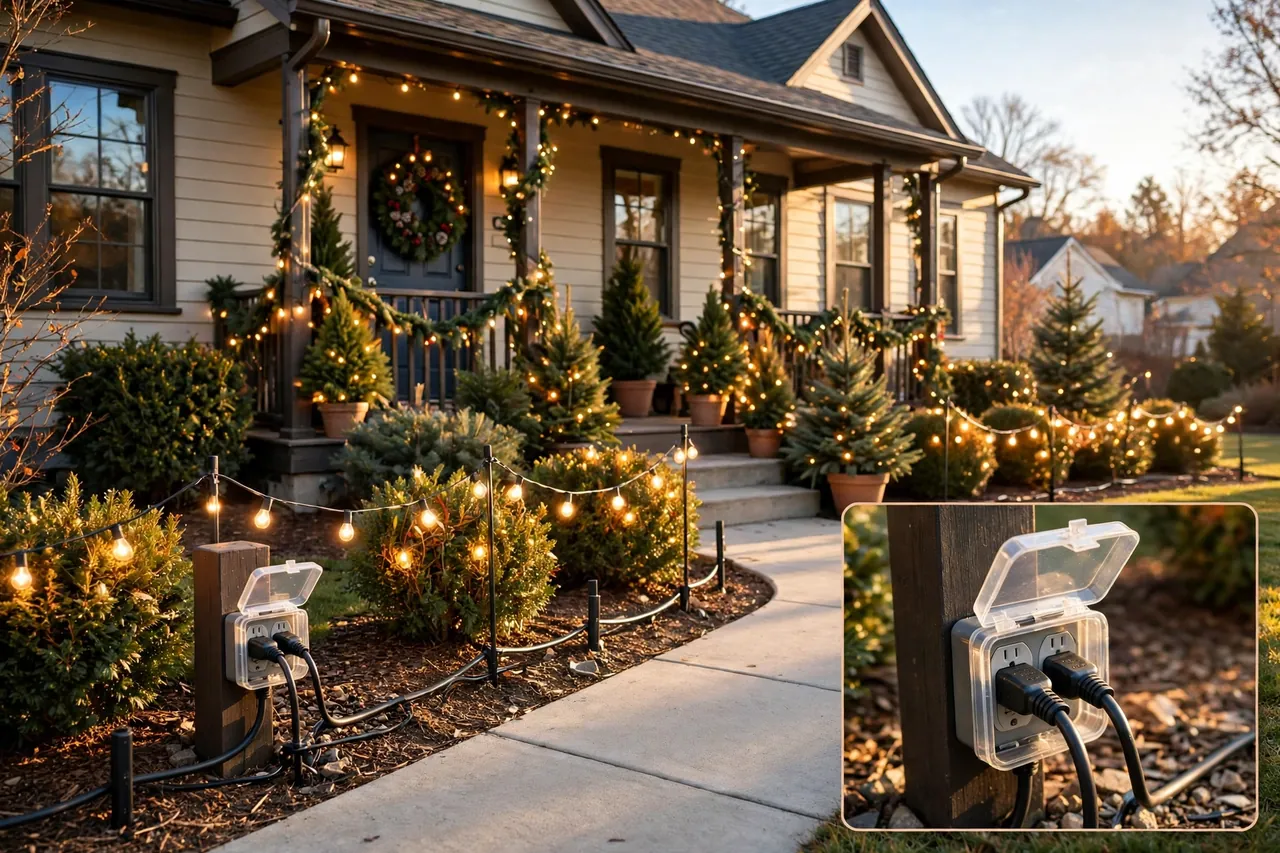
Outdoor power and winter weather are a risky mix, so treat safety as part of the design, not an afterthought. Plug every outdoor decoration into a GFCI-protected outlet. A GFCI, the outlet with test and reset buttons, cuts power in a fraction of a second if current leaks through water or a person. Test the GFCI button before you decorate, and if it does not trip, call an electrician before you plug anything in.
Use only outdoor-rated lights and cords outside. Outdoor-rated gear has thicker insulation built to handle rain, snow, and cold, while indoor cords can crack and short in the same weather. Keep plugs and connections off the ground with a weatherproof cover or a stake, and never run a cord through a door or window where it gets pinched. The US Consumer Product Safety Commission advises using only lights tested by a recognized lab, checking every set for frayed wires or cracked sockets, and turning lights off when you go to bed or leave the house; see the CPSC holiday decorating safety tips.
Work safely at height, too. For high placements on tall trees, use a sturdy ladder on level ground, keep three points of contact, and ask someone to steady the ladder and hand you pieces. Never lean sideways to reach one more branch, and never work near overhead power lines. If a spot needs a tall ladder or feels unsafe, hire a professional installer or choose a ground-level display instead.
Set lights on a timer so they switch off late at night. A timer saves power, gives your cords a rest, and keeps the display from glowing all night for no one. Check your display weekly for wind damage, fallen strands, and plugs sitting in puddles, and fix problems in daylight, never in the dark or rain.
Choose Pieces That Fit Your Home, Budget, and Storage
Buy for your actual yard, not for a photo of someone else’s. Measure your trees, porch, and walk before you shop, and bring those numbers with you. A strand that looks generous online may barely wrap one shrub, while a giant figure may swallow a small porch whole.
LED lights cost more up front than incandescent sets, but they use roughly a tenth of the power and last far longer, which usually makes them cheaper across several seasons. Check for an outdoor rating and a recognized safety-lab mark, such as UL or ETL, on every set. Skip bargain sets with no safety mark, thin wire, or missing wattage labels, because you cannot verify what they can safely carry.
Think about storage before you buy. Inflatables fold small, string lights coil into bins, and large rigid figures need real shelf or garage space. Label each bin with its contents and its location in the yard. Next December, you will thank yourself when setup takes an afternoon instead of a weekend.
Weather, Wind, and Troubleshooting
Winter weather tests every outdoor display. Wind pulls at inflatables, rain finds weak connections, and snow weighs down branches. A little planning now prevents most mid-season failures, and a quick troubleshooting routine fixes the rest.
Work through problems in this order, from the safest and simplest check to the bigger fix:
- Check the GFCI first. If the whole display is dark, press the reset button on the GFCI outlet, then check whether the breaker tripped.
- Check one strand at a time. Unplug the chain, test each strand alone, and replace the faulty strand instead of guessing at the whole display.
- Look for wet connections. Dry a wet plug cover, lift connections off the ground, and replace any cord with cracked insulation.
- Check the timer and settings. Confirm the timer schedule, the dusk-to-dawn sensor, and any remote or app mode before you blame the lights.
- Re-anchor wind-blown pieces. Add stakes and tighten tethers, and deflate inflatables during storms rather than chasing them across the yard.
- Replace bulbs with matching wattage. A wrong bulb can dim a strand or overheat a socket, so match the wattage printed on the set.
- Call a professional for outlet or wiring problems. If a GFCI will not reset, a breaker trips again and again, or you smell burning, stop and call an electrician.
Take the display down with the same care you set it up. Unplug everything before you touch a strand, coil lights loosely instead of yanking them, and store gear dry. A gentle takedown is what makes next year’s setup fast and safe.
When to Set Up and Take Down Your Display
Most families set up outdoor displays in late November, once the weather allows a comfortable afternoon outside. Set up in daylight, on a dry day, and give yourself more time than you think you need. Rushing leads to loose stakes, tangled strands, and ladders used in the dark.
Take the display down soon after the holidays, before winter storms batter it for weeks. Cold, brittle plastic cracks more easily, and cords left out all winter wear out faster. A prompt takedown also keeps your yard tidy for neighbors and protects your gear for next year.
Disclaimer: Homes, yards, wiring, and weather vary, so treat the wattage limits and safety steps here as general guidance for typical US homes. For outlet, GFCI, or circuit work, and for any display that feels electrically or physically unsafe, hire a qualified electrician or installer. Turn lights off when you leave the house or go to bed.
Related Guides
If you want to go deeper on one part of your display, these dwellifyhome guides cover the next step: light-up Christmas decorations, large Christmas decorations, Christmas decor exterior ideas, Christmas decor on the porch, vintage outdoor Christmas decorations, Disney outdoor Christmas decorations.
Frequently Asked Questions
How do I plan an outdoor Christmas display?
Start with one focal point, such as a lighted tree or a figure group, then add lights around it in layers from the street to the porch. Sketch your yard, mark your outlets, measure each spot, and pick a theme before you buy. Plan power at the same time so every strand has a safe outlet.
How many Christmas lights can I plug into one outlet?
Add the wattage of every strand on that circuit and stay under 80 percent of the circuit total, which is 1,440 watts on a 15-amp circuit. Also follow the end-to-end limit on each box, since LED and incandescent sets allow different chain lengths. Spread large displays across more than one circuit.
Do outdoor Christmas lights need a GFCI outlet?
Yes. Plug every outdoor decoration into a GFCI-protected outlet, which cuts power fast if current leaks through water or a person. Test the outlet’s test button before decorating, keep connections covered and off the ground, and call an electrician if the GFCI will not reset.
Are LED or incandescent outdoor lights better?
LEDs suit most homes because they use roughly a tenth of the power, stay cool, and let you link more strands safely. Incandescent bulbs give a warmer, old-fashioned glow that some people prefer, but they draw far more power and burn out sooner. Choose LEDs for large displays and incandescent only for small accent spots.
How do I keep inflatable Christmas displays from blowing away?
Use every stake and tether in the box, add extra stakes in windy yards, and keep the fan intake clear of leaves and snow. Place inflatables on level ground away from sharp branches, and deflate large ones during storms. Check anchors weekly, since wind and thawing ground loosen them over time.
When should I take my outdoor Christmas display down?
Take it down soon after the holidays, before winter storms wear out plastic, cords, and fabrics. Unplug everything first, coil lights loosely, and store gear dry and labeled. A prompt takedown protects your investment and makes next year’s setup much faster.
Your Next Step to a Display You Love
Start tonight with a walk around your yard and a simple sketch. Pick your focal point, choose one theme, and list the lights and figures that serve it. Then check your outlets, test your GFCI, and do the wattage math before you buy a single strand. Your display will look planned, shine safely all season, and welcome everyone who passes by with real Christmas warmth.