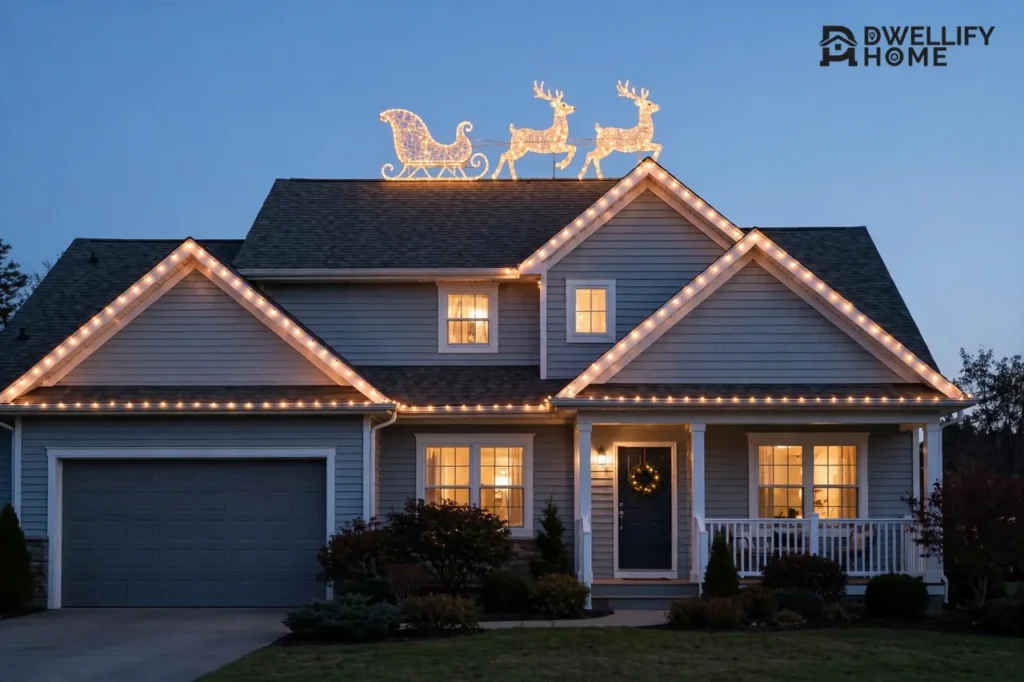
Rooftop Christmas decorations turn your roofline into the star of the street. The best approach is simple: outline your eaves and gables with outdoor-rated lights held by plastic clips, add a light roof-mounted figure only if your roof can hold it safely, and do all the work from a steady ladder, never by walking the roof.
In this guide, you will learn how to pick the right lights and clips for your roof type, place figures on the ridge and gables without damage, handle wind, weight, ice, and snow, and take everything down in January without leaving holes or torn shingles behind. If your home is two stories, steep, wet, or icy, hire a professional installer instead of climbing up yourself.
What Rooftop Christmas Decorations Include
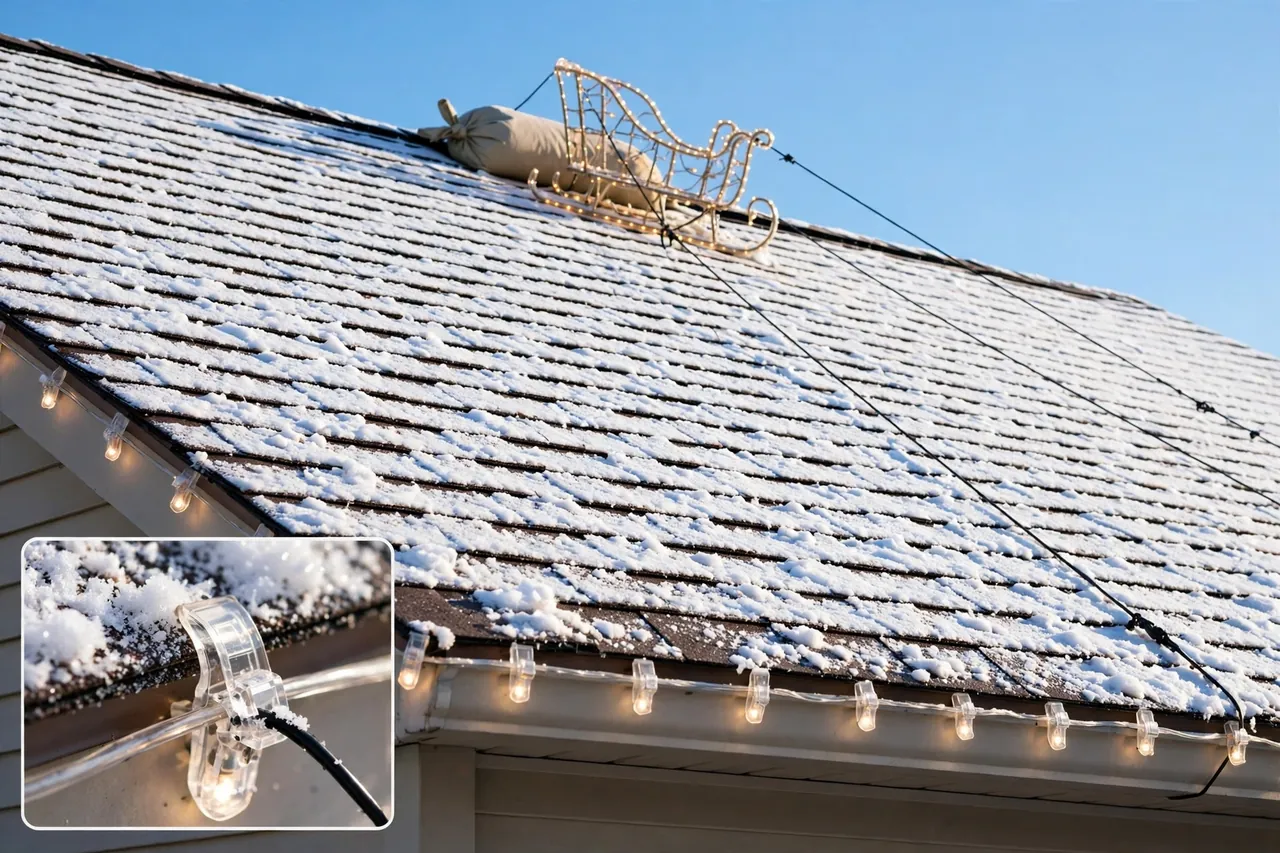
Rooftop Christmas decorations sit on or along the roof itself. They include roofline lights, which trace the edges of your home, and roof-mounted figures, such as Santa, a sleigh, and reindeer placed near the ridge or a gable.
That roof-only focus matters. A roofline display works with height, wind, and slope in ways a display at ground level does not. The clips, the weight, the power cords, and the ladder plan all change once you work above the eaves.
Think of your roof display in two parts. First, the outline gives your home its shape at night. Second, one clear focal point, such as a sleigh silhouette near the peak, gives neighbors something to look at. You do not need both on every edge. A clean outline plus one figure often looks better than a crowded roof.
Choose Your Roofline Look
Start with the outline, because it carries the whole display. Three light styles do most of the work on a roof, and each one creates a different feel from the street.
C9 bulbs are large, round bulbs that read clearly from far away. They suit two-story homes and long rooflines, where small bulbs can fade into the dark. C7 bulbs are smaller and softer, and they suit single-story homes and close-up views from the sidewalk.
Icicle lights hang in short drops below the eaves. They create a snowy, dripping edge and work well along a straight front gutter line. Mini lights give a fine, twinkling line, but they can look thin on a tall roof, so save them for porches and smaller roof edges.
Pick one bulb style and one color temperature for each continuous roof edge. Warm white feels classic and cozy. Cool white feels crisp and icy. Multicolor feels playful and bold. When you mix styles on the same edge, the line looks messy, even if each string looks fine on its own.
Test your strings together on the ground before you hang them. Two boxes labeled warm white can still look different side by side. Plug them in at dusk, step back to the street, and keep only the strings that match.
Roof-Mounted Figures: Santa, Sleigh, and Reindeer
A roof-mounted figure tells a story in one glance. Santa in a sleigh, pulled by reindeer along the ridge, is the classic rooftop scene, and it works because the roof peak already looks like a horizon line.
Place figures where viewers can see the full shape. The ridge near the front gable gives the best silhouette. A flat, low-slope section near the front of the roof also works well for a smaller figure. Avoid spots above doors, walkways, or driveways, where a loose figure could fall on someone below.
Choose light figures over heavy ones. Flat plywood or plastic silhouettes, lighted wire-frame figures, and small inflatables put far less strain on your roof than large, heavy displays. Heavy figures also catch more wind, and wind is what pulls a roof display loose.
Anchor every figure at more than one point. Use sandbags or weights hidden behind the base, plus tethers tied to strong, fixed points such as a chimney bracket or a secure roof anchor installed for this purpose. Never rely on a single tie, and never screw an anchor through shingles unless a roofing professional approves the spot and seals it.

Pick the Right Clip for Your Roof
Clips, not nails, hold a safe roof display together. Nails, staples, and screws punch holes in shingles, fascia, and gutters. Each hole lets water in, and water damage costs far more than a bag of clips.
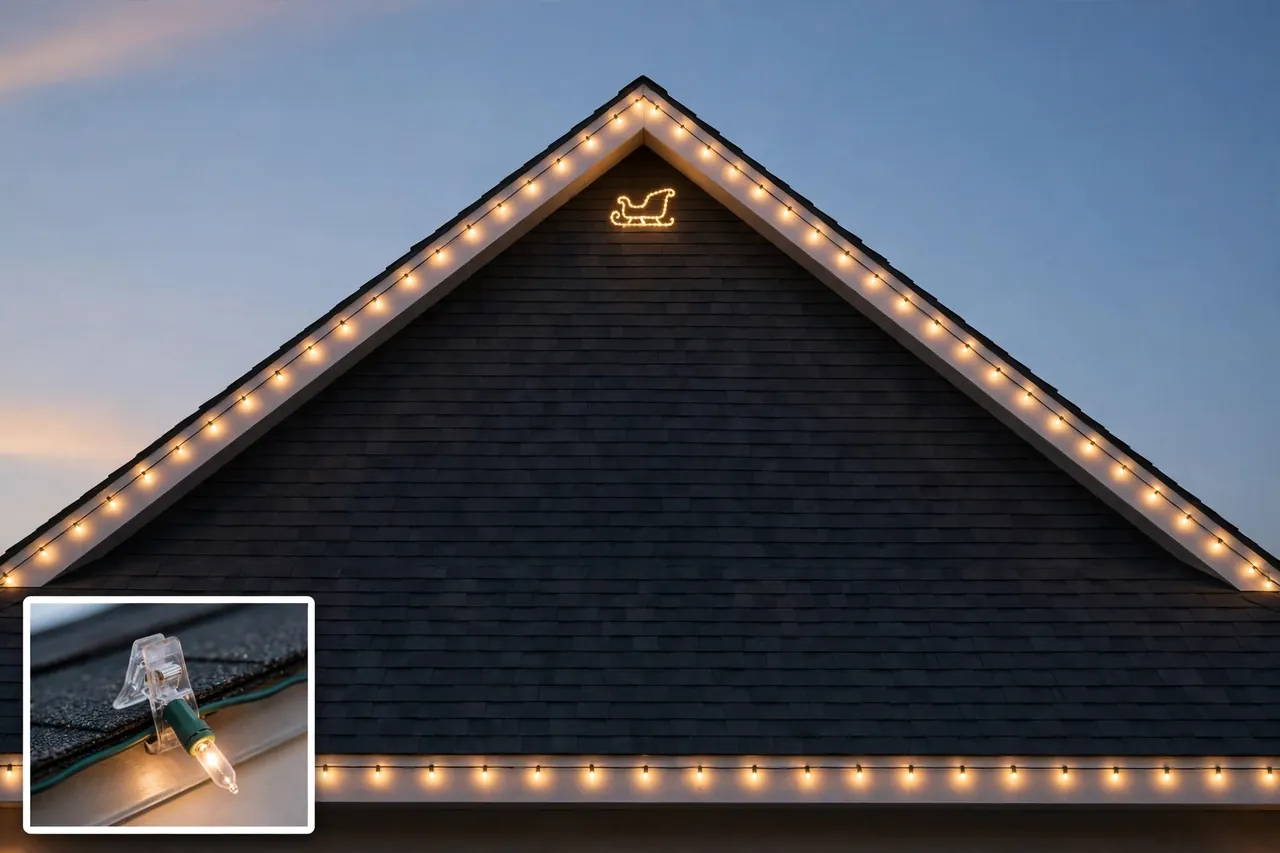
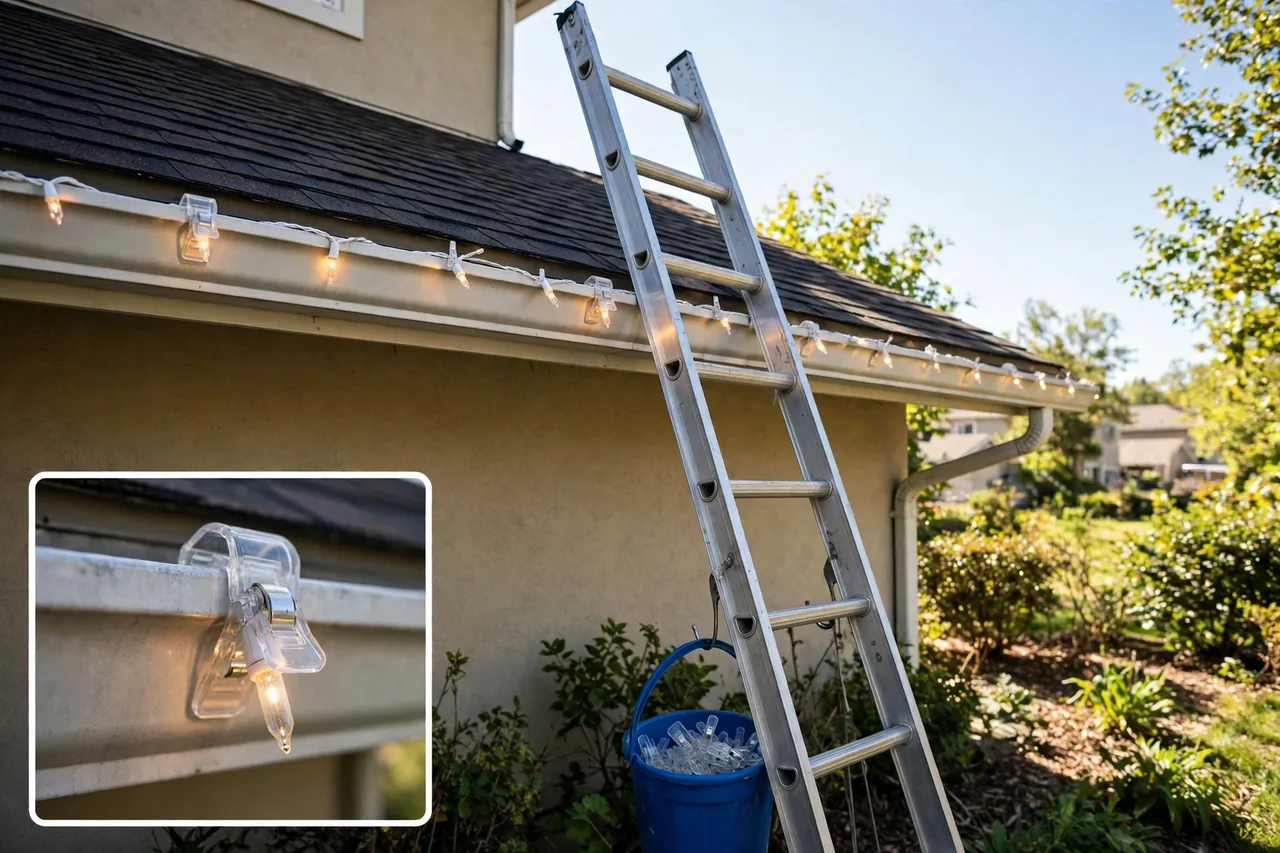
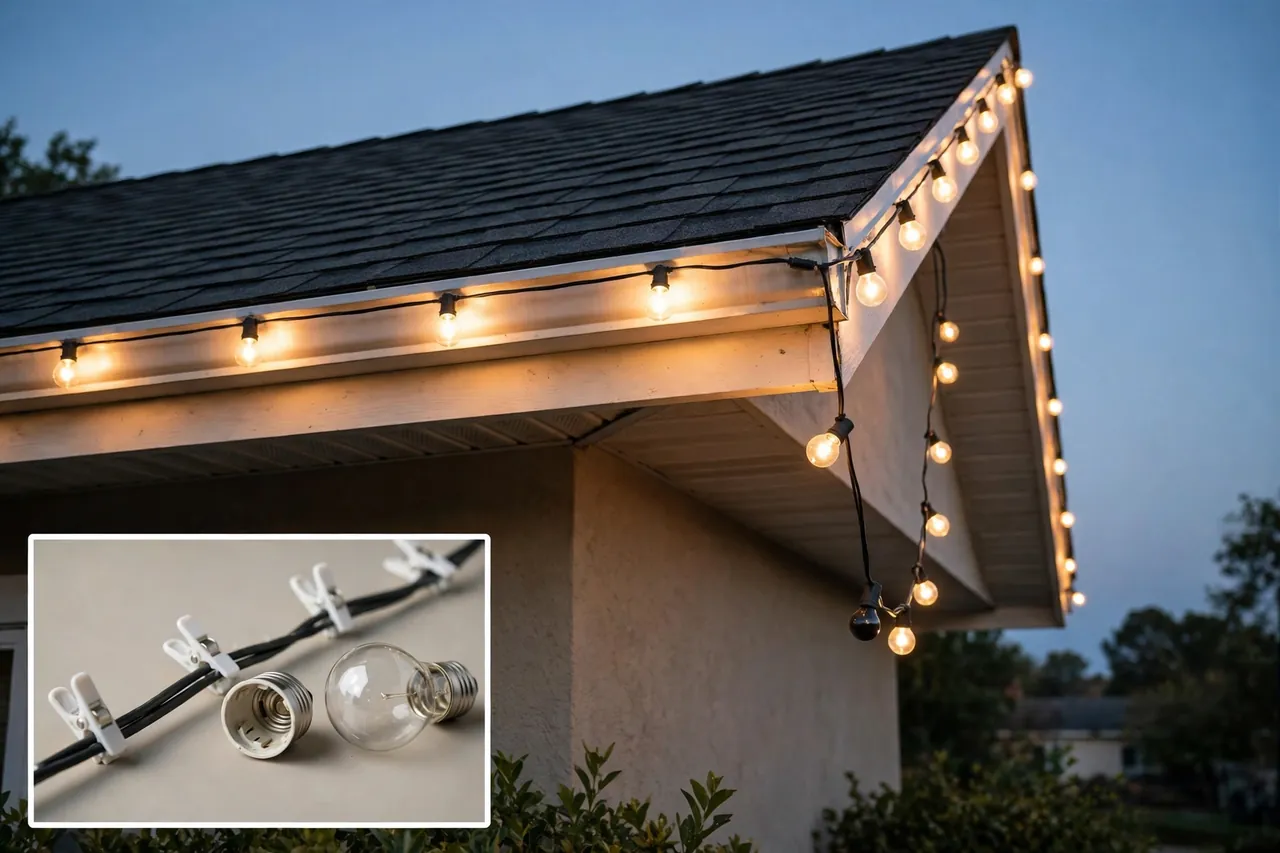
Plastic clips grip what your home already has: the gutter lip, the shingle edge, the drip edge, or the fascia board. They pop off cleanly at takedown, and you can reuse most of them next year. Match the clip to both your surface and your bulb type before you buy.
Roofline light clips by surface
| Roof surface | Clip to use | How it holds |
|---|---|---|
| Gutter | Gutter clip | Hooks over the front lip |
| Asphalt shingles | Shingle tab clip | Slides under the shingle edge |
| Drip edge | Drip-edge clip | Grips the metal roof edge |
| Metal roof | Magnetic or seam clip | Grips steel or a standing seam |
| Tile roof | Gutter clip | Uses the gutter, not the tile |
Space clips about every 12 inches along the roofline, or one clip per socket for C7 and C9 strings. Wide spacing lets the wire sag and swing in the wind, and a swinging wire works its clips loose over the season.
Buy a few extra clips. Clips break, gutters vary in thickness, and a corner always needs one more than you planned. A small spare bag on the ground saves a second trip up the ladder.
Plan Your Roofline Before You Climb
Most roof damage happens when people improvise on a ladder. Do the thinking on the ground, in daylight, with both feet planted firmly.
Sketch your home from the front. Mark each roofline, peak, gable, and dormer you want to light. Mark your outdoor outlet too, because every run must end near power without a cord stretched across a walkway.
Measure each run in feet with a tape measure, then add a little extra for corners and the drop down to the outlet. Count your strings from those measurements, not from a guess. A short string at the far end of a roofline is a frustrating problem to fix at height.
Inspect every string on the ground. Look for cracked sockets, frayed wire, loose bulbs, and missing bulbs. Use only strings marked for outdoor use and tested by a recognized lab, such as UL. Throw away any damaged set instead of trying to repair it on the roof.
Pre-clip your lights on the ground. Snap a clip onto each socket before you climb, so you only need to hook clips into place once you reach the roofline. This one step cuts your time on the ladder in half.
Plan your power before you hang a single light. Outdoor lights belong on a GFCI-protected outlet, which shuts off power fast if water or damage creates a shock risk. Keep every connection off the ground, covered from rain, and away from spots where snow piles up.
Hang Roofline Lights Step by Step
Work in daylight, in dry weather, with a helper on the ground. Your helper steadies the ladder, passes up strings, and watches for problems you cannot see from above.
Caution: never climb a wet, icy, or windy roofline, and never work near overhead power lines. If you feel unsteady, rushed, or unsure at any point, climb down and call a professional. No decoration is worth a fall.
- Set the ladder on firm, level ground. Extend it at least 3 feet above the roof edge, lean it at a safe angle, and add a stabilizer so it does not rest its full weight on the gutter.
- Start at the outlet end. Work away from the power source so the plug ends up where you need it, not stranded at the far peak.
- Hook each pre-clipped socket onto the gutter lip, shingle edge, or drip edge. Work one short section at a time, and move the ladder instead of leaning past its rails.
- Keep the wire snug but not drum-tight. A little slack lets the wire shrink and flex in cold weather without pulling clips free.
- Keep bulbs pointing the same way along each run. A consistent direction makes the line read crisp and clean from the street.
- Check the run from the ground at dusk before you call it done. Look for dark bulbs, sagging sections, and cords pulling hard around corners.
- Switch the power off before you adjust anything. Never adjust a live string while you stand on a ladder.
Hang lights from the ladder, not from the roof. Walking on shingles scuffs them, cracks them in cold weather, and strips away the protective granules that shield your roof from rain. A roof that looks fine after one walk can leak months later.
Ladder and Roof Safety Come First
Falls cause more holiday decorating injuries than any other decorating hazard. The U.S. Consumer Product Safety Commission reports that emergency rooms treat about 12,500 people each year for injuries related to holiday lights, decorations, and Christmas trees, including falls, cuts, and shocks. Treat every ladder trip as the most dangerous part of the job, because it is.
Choose a ladder rated for your weight plus your gear, and pick fiberglass or wood when you work near lights. Metal ladders conduct electricity, so they add a shock risk around live cords. Inspect the ladder before you climb, and replace it if a rung, foot, or lock looks damaged.
Keep three points of contact at all times: two hands and one foot, or two feet and one hand. Carry lights in a bucket clipped to the ladder or passed up by your helper, never in your hands while you climb. Face the ladder, move slowly, and never stand on the top two rungs.
Stay at least 10 feet away from overhead power lines in every direction. If a roofline sits near a service line, skip that section or hire a professional. Power lines deserve more respect than any decoration.
Never work alone above single-story height. Your helper watches the ladder base, keeps children and pets clear of the drop zone, and calls for help if something goes wrong. A phone in your pocket, not in the house, completes the plan.
Skip the roof entirely when the pitch is steep, the home is two stories tall, or the surface is wet, icy, or snowy. A professional crew brings harnesses, anchors, and experience for those roofs. Hiring help for the high or steep parts still leaves you the fun of choosing the design.
Wind, Weight, Ice, and Snow on the Roof
Your roof display lives outside for weeks, through storms you cannot predict on install day. Design for the worst weather your area usually gets, not the calm day you hang the lights.
Wind lifts and shakes anything with a large, flat surface. Space clips closely, keep wires snug, and add extra clips at corners and peaks, where wind hits hardest. For figures, add sandbags behind the base and tethers at two or more points. After the first big storm, check the display from the ground and tighten anything that shifted.
Weight matters more than most people expect. Light strings weigh little, but a large figure, a water-filled base, and a snow load together can strain gutters and shingles. Keep heavy decor low, near the eaves, or skip it on a fragile roof. When in doubt, choose a lighter figure and a brighter light outline.
Ice and snow change the rules. Cold shingles turn brittle, so never force a clip under a frozen shingle. Wait for a day above freezing, and slide the tab in gently. Never chip ice off a roofline with a tool, and never walk on a snowy roof to fix a decoration. Melt and refreeze cycles also loosen adhesive mounts, so check adhesive-held strings after a thaw.
Snow sliding off a roof can rip lights and figures down with it. If your roof sheds snow in sheets, keep displays off the slide path, or use a breakaway setup that lets a string drop without tearing the gutter. Clear heavy snow from gutters only from the ground with a proper roof rake, never from a ladder in a storm.
Power, Timers, and Electrical Safety
Roof lights look magical at night, and they stay safe when you respect a few electrical limits. The rules are simple, and they protect both your home and your display.
Use only outdoor-rated lights, cords, and timers. Indoor strings lack the insulation and seals that outdoor weather demands. Check the label on every part, including the power adapter and controller, because one indoor-rated part can spoil an otherwise outdoor-safe setup.
Follow the maker’s limit on how many strings you can connect end to end. As a general guide from safety authorities, do not connect more than three incandescent strings end to end unless the packaging clearly allows more. LED strings draw far less power, so they usually allow longer runs, but the package limit still rules.
Plug roof displays into a GFCI-protected outlet, and test the GFCI button before the season starts. Use outdoor-rated extension cords with no cuts, cracks, or fraying, and keep connections dry and off the ground. Never run a cord under a rug, through a window that pinches it, or across a walkway where someone can trip.
Put your display on an outdoor-rated timer, and switch the lights off before bed and whenever you leave the house. The U.S. Consumer Product Safety Commission gives this same advice, because a short in an unattended display can start a fire. A timer also saves power and gives your neighbors a predictable show.
If a breaker trips, a GFCI keeps tripping, or a string smells hot, switch everything off and unplug it. Do not keep resetting the breaker to force the display to run. That symptom points to a real fault, and an electrician should check it.
Roof Types Need Different Mounts
One clip does not fit every roof. The material on your roof decides which mount holds safely and which one causes damage.
Asphalt Shingles
Asphalt shingles cover most American homes, and shingle tab clips suit them well. Slide the tab gently under the bottom edge of a shingle, with just enough force to hold. Prying a shingle up hard breaks the seal that keeps wind-driven rain out, so a gentle touch protects your roof.
Work on a mild day when shingles flex. On a freezing day, shingles crack instead of bending, so wait for warmer weather. If a shingle already looks cracked or curled, clip to the gutter or fascia nearby instead of stressing that shingle further.
Metal Roofs
Metal roofs dent and corrode when pierced, so never drill into one for a decoration. Magnetic clips grip steel surfaces fast, and seam clips grip the raised standing seams of a metal roof without a hole. Test a magnetic clip’s hold before you trust it with a full run, because paint thickness and metal type change its grip.
Tile and Slate Roofs
Clay, concrete, and slate tiles crack under foot traffic and under prying tools. Stay off the tiles, and hang your outline from the gutter or fascia instead. If your home has no gutter on a tiled edge, use a lighted outline from below or hire a roofing professional, because a cracked tile invites a leak.
For any roof type, keep lights and cords clear of chimneys, vents, and exhaust pipes. Heat and exhaust damage wire insulation over a season, and a cord draped over a hot vent is a fire risk worth avoiding.
Take-Down and Storage Without Damage
Takedown day decides whether next year’s install takes an hour or a full weekend. Work in daylight, with the power off, and unclip each light one by one. Never yank a string down, because a yank tears clips, cracks shingles, bends gutters, and can wrap a cord around a power line.
Let the strings dry fully before you store them. Wind them loosely, label each bundle by roof section, and store the clips attached to the string when you can. Next year, you will hang a labeled, pre-clipped run in a fraction of the time.
Inspect your roofline as you take lights down. Look for lifted shingles, bent gutter sections, and loose fascia boards, and fix small issues before spring rain finds them. Store figures clean and dry, with tethers and sandbags bagged beside them, so nothing goes missing over the year.
Fix Common Rooftop Problems Fast
Most roof display problems have a quick, safe fix when you catch them early. Work through this list from the ground first, and climb only when daylight and dry weather allow.
- A dark section: check the bulbs and the connection at the dark end first. Swap one bulb at a time, and replace a string with frayed wire instead of patching it.
- A sagging run: add clips between the existing ones until the wire sits level. Sagging usually means clips sit too far apart, not that the wire is too long.
- A string that keeps blowing loose in wind: add clips at corners and peaks, shorten the unsupported span, and check that each clip matches the surface it grips.
- A tripping breaker or GFCI: unplug the display, split the load across two outlets if you can, and cut the number of connected strings. If it still trips, call an electrician.
- A figure that leans after a storm: lower it, add weight behind the base, and add a second tether before you put it back up. A leaning figure is a falling figure.
- Water dripping near a clip: check for a lifted shingle or a gutter clip packed with debris. Clear the debris, reseat the clip gently, and watch the spot after the next rain.
When a fix needs roof walking, a new anchor hole, or electrical repair, stop and hire a professional. A quick fix that damages the roof or risks a fall costs far more than the call-out fee.
A Short Safety Disclaimer
Roof work carries real fall and electrical risks, and every home, roof, and weather pattern differs. This guide covers general beginner steps only, and it cannot replace a roofing professional or a licensed electrician for steep, tall, damaged, or complex roofs. If you feel unsure at any point, hire help and enjoy the display from the ground.
Related Guides
Keep building your outdoor display with these related guides from Dwellify Home. Light-up Christmas decorations cover glowing figures and light styles that pair well with a roofline outline. Christmas decor exterior ideas help you plan the whole front of your home so the roof display matches the rest of the house. For a bigger show, large Christmas decorations explain how to scale up safely, and solar Christmas outdoor decorations show a low-power option for spots far from an outlet.
Frequently Asked Questions
What is the safest way to hang Christmas lights on a roof?
Use outdoor-rated lights with plastic clips matched to your surface, spaced about 12 inches apart, and hang them from a steady ladder with a helper at the base. Plug the display into a GFCI-protected outlet, keep connections dry and off the ground, and skip the job when the roof is steep, wet, or icy.
How do you secure Christmas lights to a roof without damage?
Use gutter clips, shingle tab clips, or drip-edge clips instead of nails, staples, or screws, which punch holes that let water in. Slide shingle tabs in gently on a mild day, keep the wire snug but not tight, and unclip each light one by one at takedown instead of pulling the string down.
Can you put a Santa and sleigh figure on the roof?
Yes, when the figure is light and you anchor it well. Place it near the ridge or front gable, away from walkways below, and secure it with weights behind the base plus tethers at two or more points. Skip heavy figures on fragile roofs, and take the figure down before a major storm if you can.
Can you hang different types of lights on the same roofline?
Yes, as long as the total load stays within the maker’s limits and your circuit capacity. Keep one bulb style and color per continuous edge so the line looks clean, test mixed strings together on the ground first, and follow the package limit for end-to-end connections, especially with incandescent strings.
How do you hang Christmas lights on a tile or metal roof?
Never drill into tile or metal, and stay off tile roofs, which crack easily. On a metal roof, use magnetic clips or standing-seam clips. On a tile roof, hang the outline from the gutter or fascia instead of the tiles, and hire a professional if no safe mounting point exists.
Your roof is ready to shine. Start with a simple, well-clipped outline this year, add one light figure near the peak if your roof suits it, and check the display from the street at dusk. Next year, your labeled, pre-clipped strings will make the whole job faster, safer, and even better looking.