
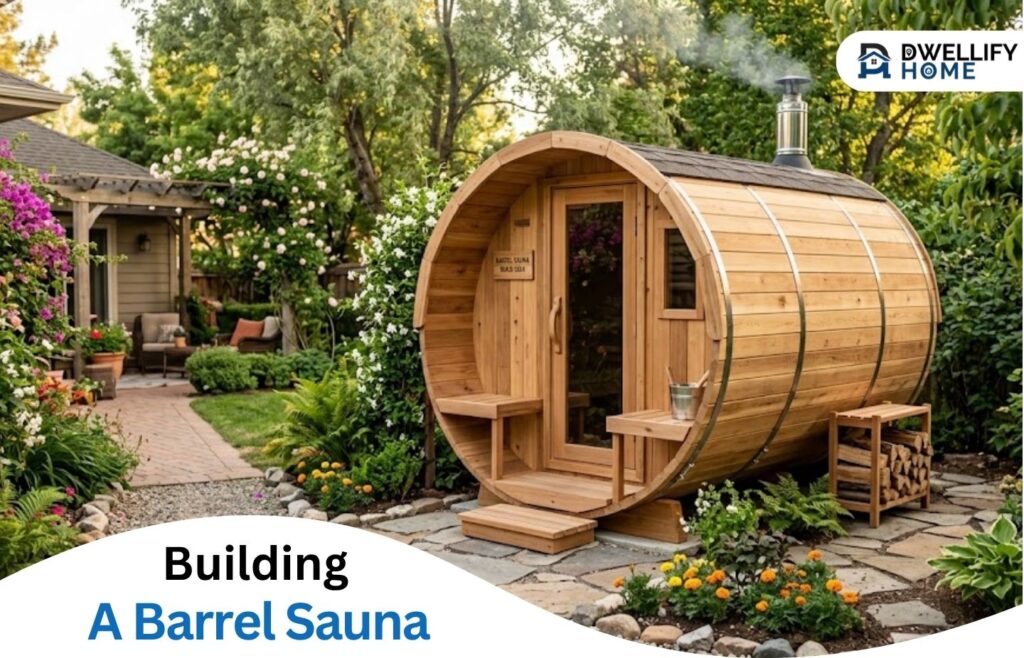
Most garden projects start small and grow. A raised bed turns into three, a gravel path gets extended to the back fence, a simple seating area picks up a pergola a year later. A barrel sauna doesn’t really work that way. It’s one of the few outdoor additions that benefits from being planned fully before a single board goes down, rather than built up in stages.
That’s partly because a barrel sauna kit arrives mostly pre-cut, which removes a lot of the carpentry decisions a DIYer would normally make on the fly. What’s left is a sequence of choices about foundation, siting, and finish that are much easier to get right the first time than to fix once the structure is sitting on the ground.
Starting with the kit itself saves a lot of downstream guesswork. A barrel sauna kit that arrives with pre-cut staves, a finished roof, and clear assembly instructions turns what could be a multi-weekend carpentry project into something closer to a large-scale furniture build, which matters a lot for anyone tackling this as a solo or weekend DIY job rather than hiring it out.
Foundation choice is the first real decision, and it’s worth treating as seriously as any other structural element in the yard. A concrete pad offers the most permanent, level base, but it demands accurate measurements before the sauna even arrives. Pavers or a compacted gravel bed are more forgiving to install and adjust, and they handle a barrel sauna’s weight just fine as long as the base compaction is done properly rather than rushed through.
The barrel shape itself changes how weight gets distributed compared to a square shed or playhouse kit. Most of the load concentrates along two or three support points running the length of the structure rather than spreading evenly across the whole footprint, which means the foundation needs to be level along that specific line, not just level in general. Skipping this detail is the most common reason a first-time barrel sauna build develops a noticeable lean within the first year.
The appeal driving this project for a lot of homeowners goes beyond the build itself. Heat exposure during a sauna session raises skin and core temperature, increasing blood flow and triggering a mild stress response tied to long-term cardiovascular health. A 2018 study published in Neurology followed 1,628 adults in Finland for a median of nearly 15 years and found that those who used a sauna four to seven times a week had a 61 percent lower risk of stroke compared with those who used one once a week. The association held even after accounting for age, diabetes, blood pressure, and other standard risk factors. It’s a long-term, frequency-based benefit, which is part of why getting the build right from the start matters more here than with most backyard projects.
Siting the structure well before pouring anything saves a lot of regret later. A spot with some afternoon shade keeps the interior from overheating the exterior siding in summer, while full sun exposure for part of the day still helps with heat-up time in cooler months. Walking the footprint out with stakes and string, using the kit’s actual dimensions rather than guessing from a product photo, catches spacing mistakes before they’re permanent.
Drainage is easy to underestimate on a first build. A sauna sheds more condensation and roof runoff than most people expect, concentrated along a narrower line than a flat-roofed shed would produce. If the surrounding grade slopes even slightly toward the house or a neighboring fence line, that runoff turns into a standing water problem by the first wet season, regardless of how solid the foundation itself is.
Ventilation inside the structure needs the same attention as the foundation, even though it’s easy to treat as an afterthought once the exterior looks finished. Vents positioned low and high manage both the heat source and the moisture the sauna produces during a session. Positioning the structure too close to a fence line or dense shrubs restricts that airflow, which slows heat-up time and leaves more residual moisture in the wood than cedar is built to handle over several seasons.
Not every barrel sauna kit on the market is built to the same standard, and the differences usually aren’t obvious from a listing photo. Peak Primal Wellness put together a side-by-side look at how budget barrel sauna kits compare, which is worth a read before ordering since wood grade and joinery quality tend to show up within the first season of regular use, long after a return window has closed.
Cedar remains the standard exterior and interior material for good reason. It resists rot and insect damage without chemical treatment, which matters more here than on most other outdoor structures since a sauna sits in repeated moisture cycles from both weather and condensation. A builder used to pressure-treated lumber for other yard projects sometimes assumes the same approach applies, but cedar’s natural resistance is part of what makes the barrel format hold up without a sealed, treated base underneath it.
Sizing deserves a firm decision before any foundation work starts, since it affects nearly every other choice in the build. A two or three person barrel keeps both the structure and the foundation footprint manageable for a first DIY project, while anything built for four or more changes the math enough to shift which foundation option makes the most sense. Working from the kit’s actual interior clearance rather than its exterior diameter avoids the most common sizing mistake on a first attempt.
Leveling deserves more patience than most DIYers expect to give it. A flat deck or shed base can absorb a small amount of unevenness without anyone noticing, since the weight spreads broadly enough to compensate. A barrel resting on two support rails has no such margin, and even a quarter inch of difference between those rails shows up as a visible lean once the staves and roof are fully assembled. Checking level at several points along the footprint, not just at the corners, catches this before it becomes a disassembly problem.
Assembly day itself goes more smoothly with a second set of hands than most kit instructions let on. The staves are heavier and more awkward to position solo than they look in a photo, and getting the first few staves square to the foundation sets the alignment for everything that follows. Rushing this step to finish in a single afternoon is a common source of small gaps that let in drafts once the structure is in regular use.
Maintenance after the build is lighter than most people assume, but it isn’t zero. An annual check of the roof seams, door seal, and any exterior finish keeps small issues from becoming structural ones, the same way a quick fall inspection of gutters or fence posts heads off bigger repairs elsewhere in the yard. Treating the sauna as part of the same seasonal maintenance routine as the rest of the property, rather than a separate project that gets forgotten, is what keeps it looking and performing well years in.
None of this turns a barrel sauna into a complicated build. The carpentry is mostly done before the kit arrives, and the remaining decisions, foundation, siting, drainage, and ventilation, are the same categories of planning that go into any serious garden structure. Getting them right the first time is what separates a sauna that gets used every week for years from one that turns into a weekend repair project by the second summer.
We use selected affiliate and sponsored partnerships to help support Dwellifyhome.com. Some links in this article may therefore generate a small commission when you make a qualifying purchase, at no additional cost to you.