Outdoor patio tiles turn a plain concrete slab into a patio you actually want to use, and exterior-rated porcelain is the best choice for most homes because it absorbs 0.5% water or less, so it survives freezing winters without cracking. Pick a textured or matte finish with a slip rating of DCOF 0.42 or higher, choose 2 cm thick pavers if you want a dry-lay install, and match the tile to your climate before you fall in love with the color.
This guide walks you through every material, the real costs, the patterns that look expensive, and the install and care steps that keep tile looking good for decades. You will also learn which tiles to avoid outdoors, because the wrong tile cracks in the first winter and costs twice as much to fix as it did to lay.
Outdoor Patio Tiles at a Glance
Not every tile belongs outside. Indoor tile soaks up water, and that water expands when it freezes and splits the tile from the inside. Outdoor tile flooring starts with a different test: can it stay dry, stay grippy when wet, and hold its color under the sun?
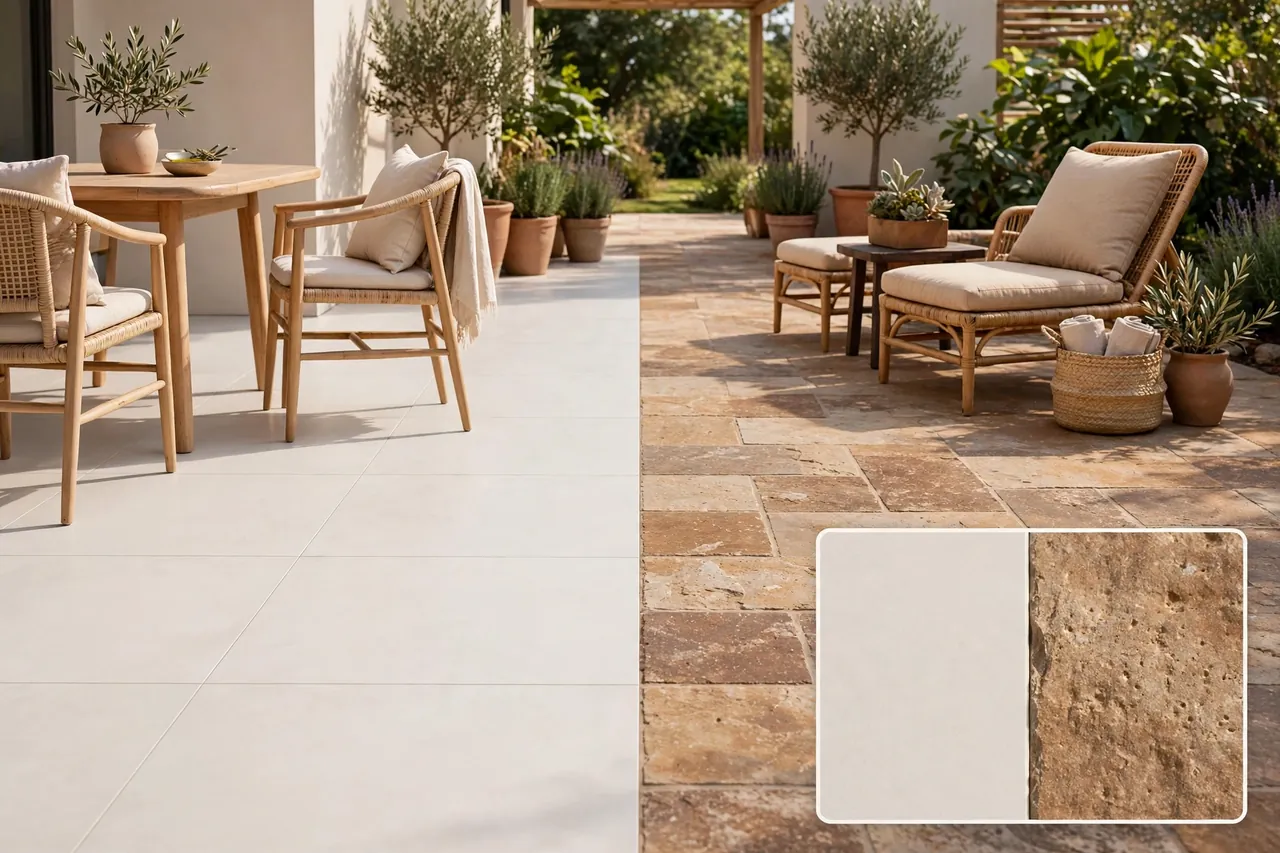
The table below sums up the main options. Porcelain leads for most patios, natural stone wins on character, and interlocking deck tiles win when you want a fast, renter-friendly change.
Outdoor patio tile materials compared
| Material | Best for | Water absorption | Upkeep |
|---|---|---|---|
| Porcelain tile | Most patios, all climates | 0.5% or less | Very low, no sealing |
| 2 cm porcelain pavers | Dry-lay patios, rooftops, balconies | 0.5% or less | Very low, easy to lift and relay |
| Natural stone | Warm, natural look | Varies by stone | Sealing needed, varies by stone |
| Quarry tile | Rustic patios, heavy use | Low | Low, seal for stain protection |
| Interlocking deck tiles | Quick cover over old concrete | Depends on material | Low, lift to clean below |
| Terracotta | Mild climates, Mediterranean style | High unless sealed | High, regular sealing |
| Ceramic tile | Not recommended outdoors | Often above 10% | High risk of freeze cracks |
Porcelain is the safest default when you want one answer and one order. Stone is the better pick when you want a one-of-a-kind surface and you accept sealing as part of the deal.
Porcelain Tiles: The Safest Default for Most Patios
Porcelain is dense, fired clay that barely drinks water. The Tile Council of North America (TCNA) requires porcelain tile to absorb no more than 0.5% of its weight in water, measured by ASTM C373, and that low absorption is what lets it survive freeze-thaw cycles that destroy ordinary ceramic tile. Bedrosians explains that this 0.5%-or-lower rate makes porcelain one of the most water-resistant hard surfaces you can put outside, and its frost-resistance case rests on the ASTM C1026 freeze-thaw test. Read their full comparison at Bedrosians’ natural stone vs. porcelain tile guide.
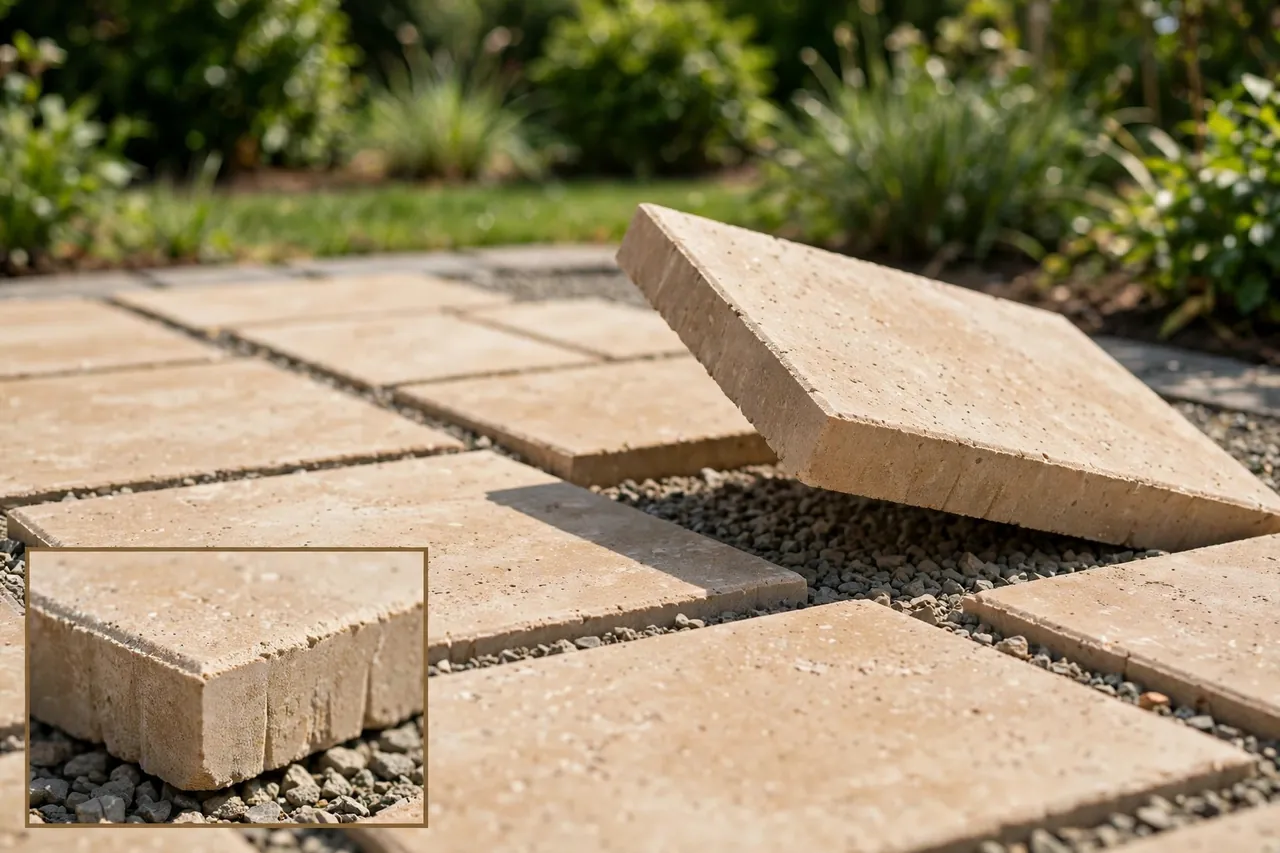
Standard outdoor porcelain tile is usually 8 to 10 mm thick and must be wet-laid on a cured concrete pad with modified thinset. The newer 2 cm porcelain pavers are a different animal: at about 3/4 inch thick, they are heavy enough to dry-lay on gravel, sand, grass, or pedestals, and you can lift one paver to fix a low spot without breaking anything. A single 24 by 24 inch 2 cm paver weighs about 35 pounds, so plan for help on delivery day.
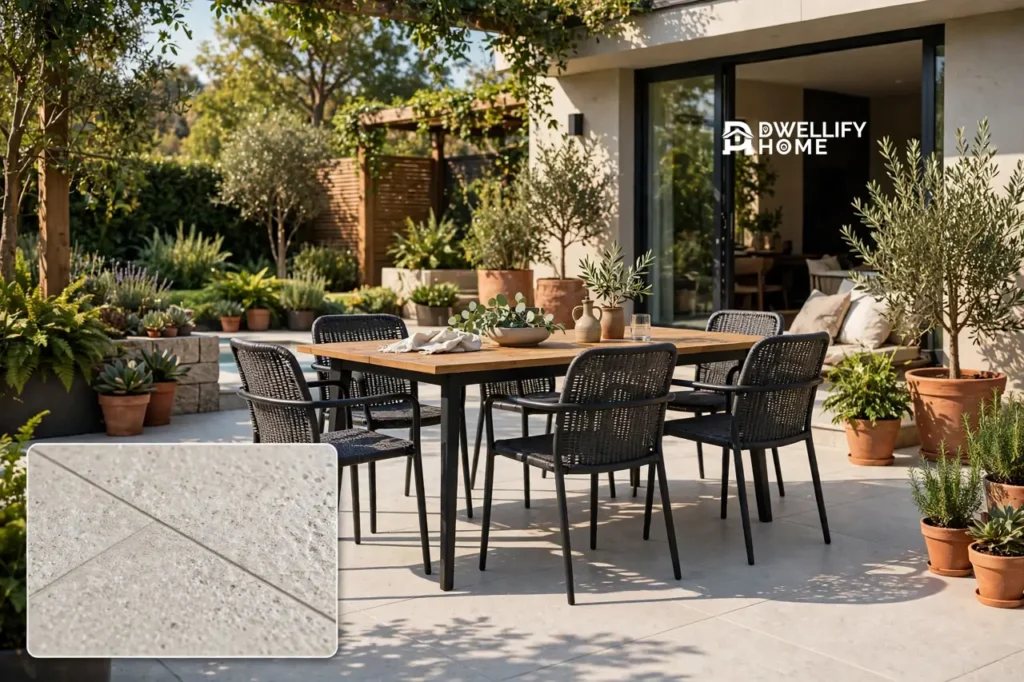
Porcelain also wins on looks. Digital printing gives you wood-look planks, stone looks, and concrete looks that stay true in full sun, because porcelain resists UV fading. Choose a matte or textured finish, never a polished one, for any patio that gets rain. Polished porcelain looks great in a showroom and turns into a skating rink after a storm.
Watch the PEI rating too. For a patio, look for PEI 4 or 5, which marks tile built for heavy home use and light commercial traffic. A PEI 3 tile may survive a quiet patio, but chairs, planters, and a grill will wear it faster than you expect.
Natural Stone Tile Flooring for Patios
Natural stone tile flooring gives a patio a depth that printed tile cannot copy. Every piece is a little different, and that variation is the whole point. The trade-off is care: stone is a natural material, so its water absorption and freeze performance change with the type of stone.
Granite and quartzite are the tough ones. Their low porosity handles freeze-thaw cycles well, and granite shrugs off scratches from chairs and heavy planters. Slate is another strong pick, with a naturally textured surface that grips well when wet and deep charcoal, green, and rust tones that hide dirt.
Travertine and limestone look softer and warmer, and they are the riskier pair in cold climates. Some limestones and travertines absorb more than 10% water, and that much trapped water can crack the stone over repeated freezes. In a mild climate with no hard freezes, travertine makes a lovely pool-side patio, but it still needs sealing.
Seal stone and reseal it on schedule. A good penetrating sealer keeps stains and water out of the pores, and skipping it is the most common reason a stone patio ages badly. If you love the look of stone around the garden, pair the patio with landscaping ideas with rocks and stones so the floor and the beds feel like one design.
Other Outdoor Tile Options Worth Knowing
Porcelain and stone cover most patios, but a few other exterior tile choices fit special cases. Each one solves a different problem, so match the tile to the job, not to the photo.
Quarry tile is unglazed, dense clay tile with a naturally slip-resistant surface. It suits rustic patios and heavy-use spots, and it costs less than most stone. Seal it if you want stain protection around a grill or dining table.
Terracotta brings warm, earthy color that no other tile matches, and it suits Mediterranean and Spanish-style homes. It only works outdoors in climates without hard freezes, and only when it is properly sealed. In a cold climate, terracotta absorbs water, freezes, and flakes.
Outdoor cement tiles look striking, with bold patterns and handmade character, but they are porous and need sealing and gentle cleaning. Treat them as a feature area, like a small dining zone, rather than a whole uncovered patio in a wet climate.
Interlocking deck tiles are the fastest route to a new patio floor. Patio interlocking deck tiles snap together over an existing concrete slab, and wood, composite, and stone-look versions all exist. They are a smart pick for renters and for anyone who wants to test a look before committing to mortar. Lift a tile to clean underneath, and replace one tile instead of repairing a whole floor.
Rubber tiles are worth a look where safety matters most, like a play area or a patio used by small children. They are soft, grippy, and drain well, but they do not give the polished look of porcelain or stone.
Skip ordinary indoor ceramic tile outdoors. Ceramic often absorbs more than 10% water, and in a freeze it cracks, pops loose, and leaves you with a repair bill bigger than the original install.
How to Choose Tile for Your Patio Floor
Choosing tile for a patio floor is a short checklist, not a guessing game. Work through climate, grip, size, color, and weight in that order, and the right tile usually picks itself.
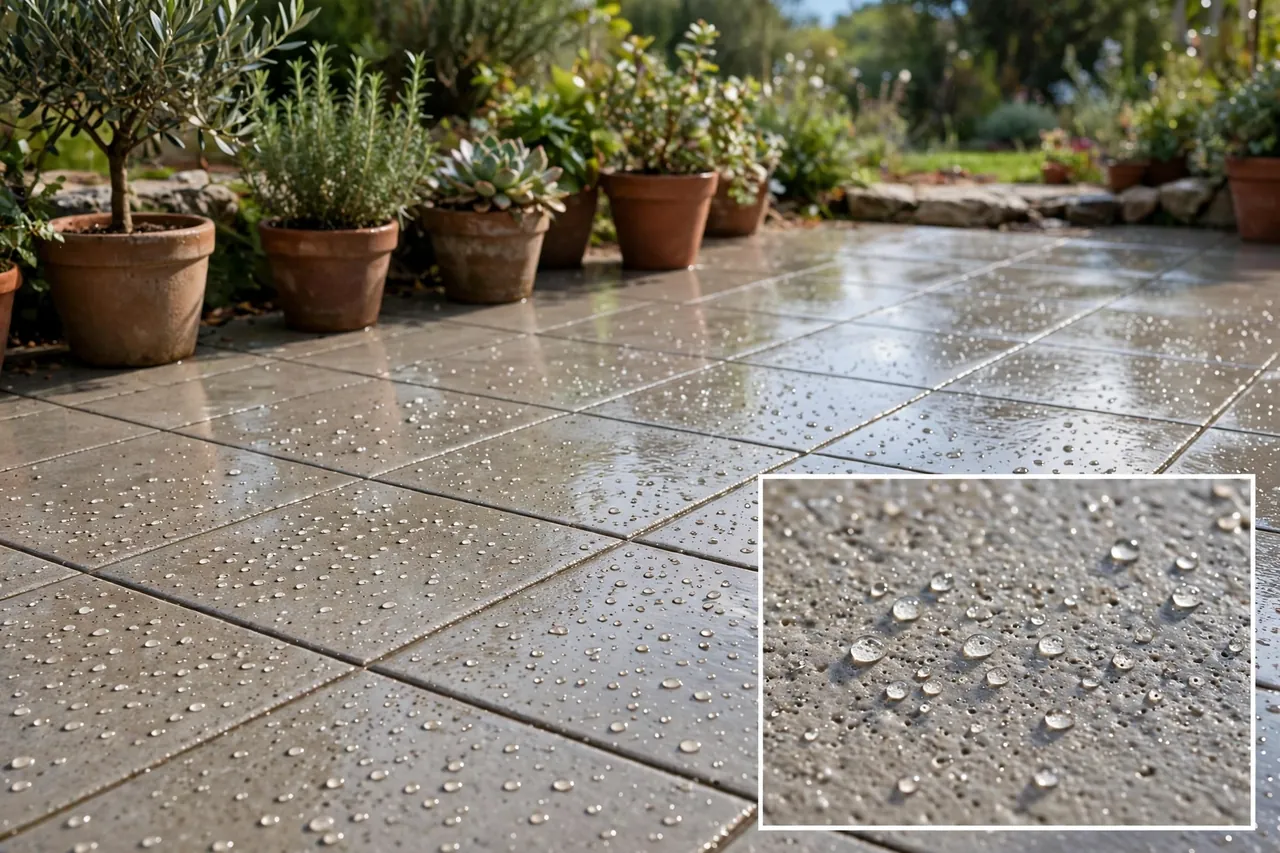
Start with your climate
If your winters freeze, your tile must be rated freeze-thaw resistant with water absorption at or below 0.5%. That single number rules out indoor ceramic and most unsealed terracotta. In hot, sunny climates, UV resistance and surface heat matter more: light colors stay cooler under bare feet, while dark tiles can get uncomfortably hot by mid-afternoon.
Check the slip rating before the color
Wet tile is where patios hurt people. Look for a DCOF rating of 0.42 or higher for outdoor walkways and patios, and choose a matte or textured finish over a glossy one. In Europe the same idea shows up as an R rating, and R10 to R11 is a good target for a patio. Clé Tile’s outdoor tile guide explains that every outdoor tile should carry its DCOF rating in the technical specifications, and that freeze-thaw and UV resistance matter just as much as grip. See Clé Tile’s guide to the best outdoor tile for patios and porches for the full checklist.
Pick a size that fits the patio
Large-format tiles, like 24 by 24 inch pavers, make a small patio feel bigger because they cut down on grout lines. Small tiles and mosaics grip better on slopes and curves, and they suit steps and edging. On outdoor tiles for steps, use a tile with a strong grip rating and a bullnose or rounded edge so toes catch nothing sharp.
Plan for the weight before delivery day
Tile is heavy, and a pallet is heavier than most people expect. A full pallet of porcelain pavers can weigh 2,240 pounds for 256 square feet, as listed for MSI Tierra Beige 2 cm pavers at The Home Depot, and natural stone pallets often run heavier still. Make sure the delivery truck can reach a flat, hard spot near the patio, and have two people ready to move boxes. A single 24 by 24 inch 2 cm paver weighs about 35 pounds, so nobody should carry them alone all day.
Order 10% extra tile. Cuts, breakage, and one cracked tile years from now all come out of that spare box, and matching a dye lot later is rarely possible.
Patio Tile Ideas and Patterns That Look Expensive
Good outdoor patio tile ideas start with the pattern, not the tile color. The layout decides whether a patio looks calm and open or busy and cramped, and a simple pattern in a good tile beats a fancy tile in a random layout.
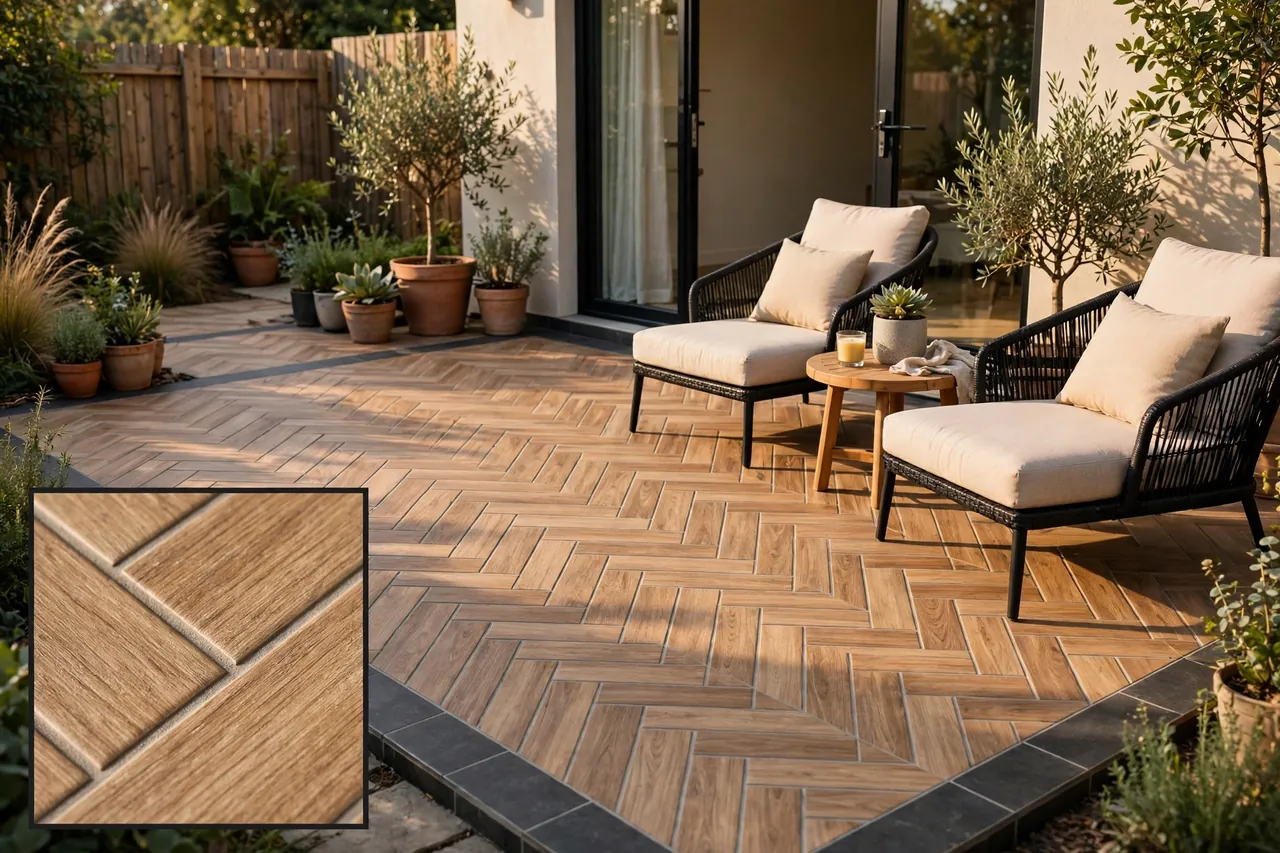
A herringbone pattern adds movement and suits rectangular tiles, especially wood-look planks laid like a real wood floor. A stacked grid in large-format stone-look porcelain feels modern and quiet, and it makes a small patio look wider. A basketweave pattern gives a classic, crafted feel that suits older homes and brick houses.
Try a border to frame the space. A darker border tile around a lighter field defines the dining area without a rug, and it hides the cut tiles at the edges where the patio meets the lawn. For a tile patio that flows into the house, run the same tile from the kitchen or living room out onto the patio in a matching finish. The eye reads it as one bigger room.
Mix materials with care. A porcelain field with a stone accent strip, or a wood-look tile path through a stone-look patio, adds interest without chaos. Keep to two materials and one pattern change, and let the furniture and plants do the rest. If you want more layout inspiration, browse patio ideas and small patio designs to see how the floor works with the whole space.
For a covered patio, you have more freedom: a covered roof keeps rain off the tile, so a smoother finish and a lighter color stay practical. See covered patio ideas for layouts that pair a roof with a tiled floor. And if you like softness underfoot, layer an outdoor rug over the tile in the seating area; our guide to indoor outdoor rugs covers sizes, materials, and care.
How Much Do Outdoor Patio Tiles Cost?
Outdoor patio tile prices swing widely by material, size, and finish, so think in ranges, not single numbers. The ranges below come from Bedrosians’ 2026 outdoor tile cost guide, checked November 13, 2026, and they separate material cost from the full installed cost. Read the full breakdown at Bedrosians’ outdoor tile cost guide.
Outdoor tile costs by material, 2026
| Material | Material only, per sq ft | Installed, per sq ft |
|---|---|---|
| Standard outdoor porcelain tile | $3 to $15 | $10 to $30 |
| 2 cm porcelain pavers | $5 to $18 | $12 to $35 |
| Travertine | $4 to $8 | $10 to $18 |
| Granite | $5 to $12 | $12 to $25 |
| Limestone | $5 to $11 | $12 to $24 |
For most projects, the total installed cost runs $15 to $50 per square foot, and a standard 250-square-foot patio typically runs $3,700 to $9,800 all in, according to the same 2026 guide. A mid-range porcelain patio on a new concrete pad usually lands in the $18 to $35 per square foot range.
Three things push the price up: a new concrete pad or major base work, large-format tiles that need an experienced installer, and demolition or drainage fixes under an old patio. Three things keep it down: tiling over a sound existing slab, a simple grid layout with few cuts, and a mid-range porcelain instead of imported stone.
Before you compare quotes, check what each one includes. A low quote that skips the base prep, the membrane, or the freeze-rated grout is not a bargain; it is a repair waiting to happen. For a full picture of what a paver project costs, see paver patio renovation cost.
How to Install Patio Tiles
There are three honest ways to install patio tiles, and the right one depends on your tile and your base. Pick the method first, then buy the tile that fits it.
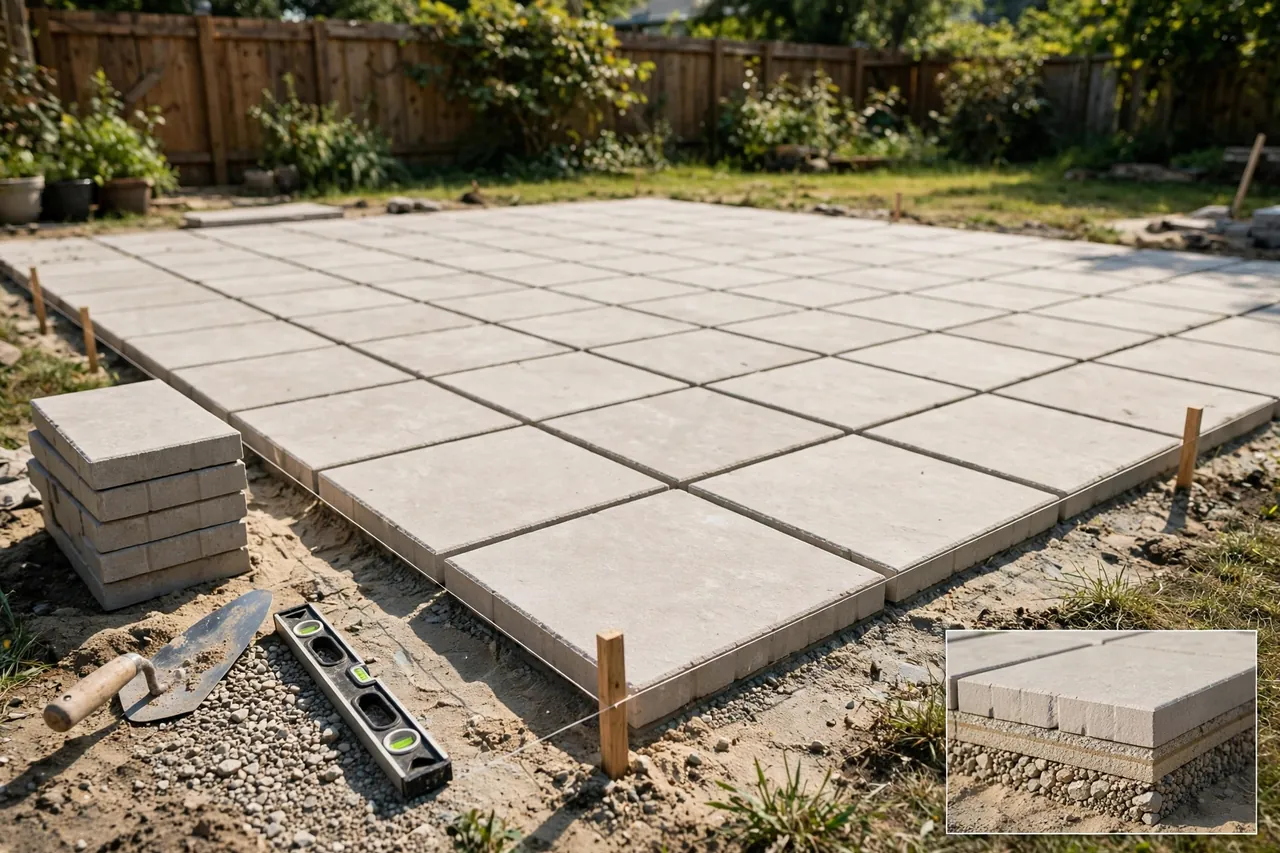
Method 1: Wet-lay on a concrete pad
This is the standard method for 8 to 10 mm porcelain and most stone tile. The concrete pad must be cured, sound, and sloped away from the house so water drains off the tile, not toward the door. Spread modified thinset, set each tile with full coverage underneath, and use a freeze-rated grout. An uncoupling or crack-isolation membrane under the tile protects it when the concrete moves with temperature.
Method 2: Dry-lay 2 cm pavers
Thick 2 cm porcelain pavers can sit dry on compacted gravel, sand, grass, or pedestals. Level the base, lay the pavers with small, even joints, and fill the joints with sand or fine gravel. The big win is repair: lift one paver, fix the base, and set it back down. This method suits balconies and rooftops too, where a wet mortar bed would add too much weight.
Method 3: Interlocking tiles over an old slab
Snap-together deck tiles go straight over a sound concrete slab with no mortar and no mess. They are the best choice when you want a new look in a weekend and you can live with a slightly raised floor. Leave a small gap at the edges so water can escape from under the tiles.
Follow these steps in order, whichever method you choose:
- Measure the patio, then order the tile plus 10% extra for cuts and breakage.
- Check the base: fix cracks, confirm the slope drains away from the house, and clean off dirt and loose material.
- Dry-lay a few rows first to check the pattern, the cuts at the edges, and the color mix across boxes.
- Set the tile with the right adhesive or base for your method, and keep joints even with spacers.
- Let the install cure fully, then grout or fill the joints and clean the surface before first use.
Hire a pro for large-format tile and for any patio with drainage problems. Big slabs need full thinset coverage and a flat base, and a pro spots a slope or water problem before it becomes a cracked floor.
How to Clean and Care for Outdoor Tiles
Outdoor tiles are low care, not no care. A little routine cleaning keeps the color true and the grip strong, and it costs far less than replacing stained or slippery tile.
Sweep the patio once a week to clear leaves, dirt, and grit, because grit under chairs scratches tile over time. Wash with warm water and a mild, pH-neutral cleaner, and rinse well so no soap film stays behind. A soft brush handles most stains; skip harsh acids and wire brushes, which can etch the surface and dull the finish.
Mold and mildew grow where water sits and air stays still. Keep the patio draining freely, clear leaves from corners and joints, and clean any green film early with a cleaner made for outdoor tile. A quality sealer on stone and cement tile adds a second layer of protection against mold and stains.
Seal natural stone and cement tile when new, then reseal on the schedule your sealer maker gives, often every one to three years. Porcelain needs no sealing at all, which is one more reason it is the low-care pick. In cold climates, clear snow with a plastic shovel and skip metal blades and harsh de-icing salts, which can damage grout and stone.
7 Mistakes to Avoid With Outdoor Tiles
Most tile patio failures come from a short list of avoidable mistakes. Check your plan against this list before you order anything.
- Using indoor tile outside. If the box does not say exterior or freeze-thaw rated, do not use it on a patio.
- Picking a polished or glossy finish. It looks smart when dry and turns slippery with the first rain.
- Skipping the slip rating. Ask for the DCOF number and pick 0.42 or higher for a patio.
- Ignoring drainage. A patio that holds water grows mold, stains grout, and freezes into a hazard.
- Skimping on the base. A weak or uneven base cracks tile no matter how good the tile is.
- Forgetting spare tile. Order 10% extra, because dye lots change and one cracked tile is hard to match later.
- Grouting with the wrong product. Use a freeze-rated grout outdoors, and keep joints sealed where the maker calls for it.
The cheapest tile is the one you install once. A slightly better tile with the right base and grout costs less over ten years than a cheap tile replaced twice.
Related Guides
If you are planning the whole patio, these guides pick up where this one leaves off:
- Patio Ideas — layouts, styles, and features for every size of patio.
- Small Patio Designs — seven layouts that make a tiny patio feel bigger.
- Covered Patio Ideas — roofed patios where tile and furniture stay dry.
- Paver Patio Renovation Cost — what a paver project really costs, line by line.
- Indoor Outdoor Rugs — sizes, materials, and care for rugs over tile.
- Talavera Tiles Guide — hand-painted tile designs, prices, sealing, and uses for accent areas.
- Concrete Patio Design Ideas — design ideas for the concrete patios tiles often cover
- Small Patio Decorating Ideas — decorating a tiled patio with rugs, furniture, and planters
- Outdoor Furniture for Small Spaces — the furniture that sits on the tile
Frequently Asked Questions
What is the best tile for an outdoor patio?
Exterior-rated porcelain is the best tile for most outdoor patios. It absorbs 0.5% water or less, resists freezing, fading, and stains, and needs no sealing. Pick a textured or matte finish with a DCOF slip rating of 0.42 or higher, and use 2 cm pavers for dry-lay installs.
Are porcelain tiles good for outdoor patios?
Yes, porcelain tiles are one of the best options for patios because they are non-porous, weather-resistant, and low maintenance. They do not absorb water, they resist stains and moss, and they keep their color for years. Use only tile rated for exterior use, not indoor porcelain.
Do outdoor patio tiles get slippery when wet?
They can, but the right tile stays safe. Polished and glossy tiles get slippery when wet, while matte and textured tiles keep their grip. Choose a tile with a DCOF rating of 0.42 or higher, or an R10 to R11 rating, and keep the surface clean of algae and soap film.
Can you lay patio tiles on grass or sand?
Yes, but only with the right tile. Thick 2 cm porcelain pavers can be dry-laid on grass, sand, or gravel for a stable temporary or low-traffic patio. For a permanent patio, lay tile on a solid base or mortar bed so it does not shift, crack, or sink over time.
What thickness is best for outdoor patio tiles?
For a wet-lay install on concrete, standard 8 to 10 mm outdoor porcelain works well. For a dry-lay install on gravel, sand, or grass, use 2 cm (about 3/4 inch) porcelain pavers, which are heavy enough to stay put without mortar. Thicker tile also handles heavier loads.
How do I clean outdoor patio tiles?
Sweep the patio weekly, then wash with warm water and a mild, pH-neutral cleaner and rinse well. Use a soft brush for stains and skip harsh acids and wire brushes. Clear leaves from joints, keep water draining freely, and reseal natural stone on schedule to stop mold and stains.
Do I need to winterize outdoor tiles in a cold climate?
Yes, start with tile rated freeze-thaw resistant and water absorption at or below 0.5%. Before winter, clean the patio, clear the joints so water drains, and seal stone tile if it is due. Clear snow with a plastic shovel and avoid harsh de-icing salts that damage grout and stone.
A tiled patio rewards a careful choice. Pick exterior-rated porcelain in a textured finish, give it a sound base and a slope that drains, and you get a floor that looks good in year one and still looks good in year ten. Start with one sample box, lay a few tiles in the sun and the rain, and let the real patio tell you which tile is yours.