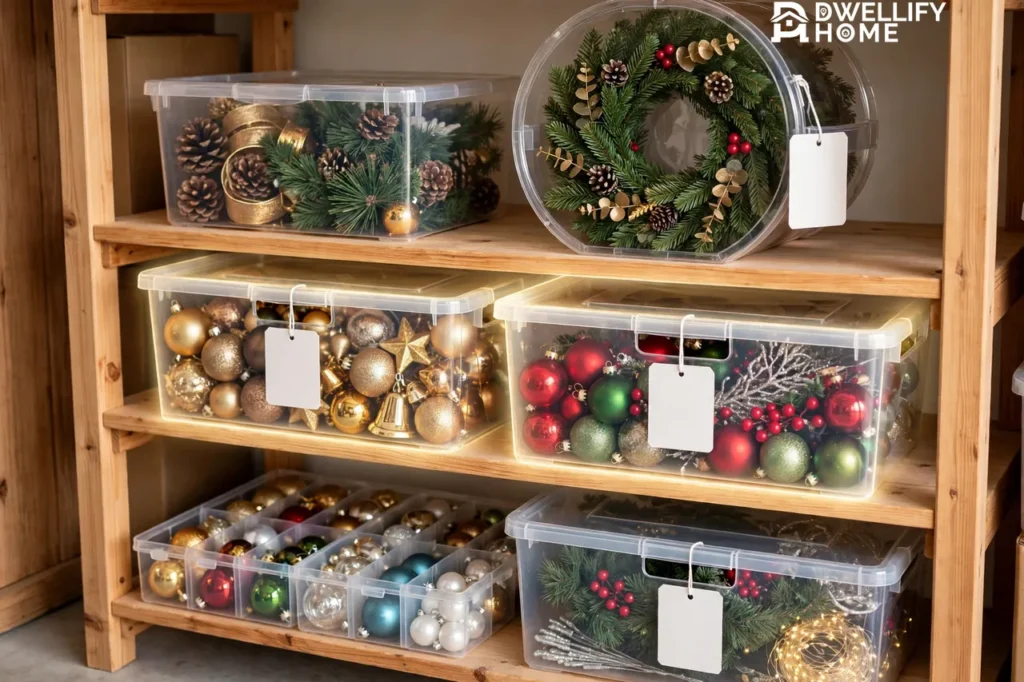
Christmas decor boxes are sturdy, lidded containers that protect your holiday decorations between seasons. Use a clear plastic bin for tough items, a divided ornament box for fragile pieces, a long wrapping-paper box for rolls, and a round wreath box for wreaths. Label each box with its contents and its room, and you will find everything fast next December.
That simple system solves the real problem. Most decorations do not break because you stored them wrong for one year. They break because they bumped together, got crushed under a heavier box, or sat in damp cardboard for eleven months. This guide shows you which box fits each decoration, what goes inside it, and how to pack it all away in one calm afternoon.
The Short Answer: Which Box Goes Where
Match the box to the decoration, not the other way around. Fragile items need dividers and padding. Round items need round boxes. Long items need long boxes. When you force a wreath into a square bin or pile glass ornaments loose in a tote, you invite damage.
Use this quick map before you buy anything:
| Decoration | Best box | Why it works |
|---|---|---|
| Glass and ceramic ornaments | Ornament box with dividers | Each piece sits alone, so nothing chips or scratches |
| Sturdy figurines and table decor | Clear plastic bin with a locking lid | It resists moisture, dust, and pests |
| Wrapping paper and ribbons | Long wrapping-paper box | Rolls stay straight instead of bending and creasing |
| Wreaths and garlands | Round wreath box or hanging storage | It holds the shape instead of flattening it |
| Stockings and fabric decor | Sealed plastic bin, clean and dry | It keeps out dust, damp air, and moths |
If you already own plain plastic bins, you do not need to replace them all. Add dividers, tissue paper, and smaller boxes inside them, and a plain bin can protect fragile items almost as well as a specialty box.
Plastic Bins: The Workhorse for Most Holiday Storage
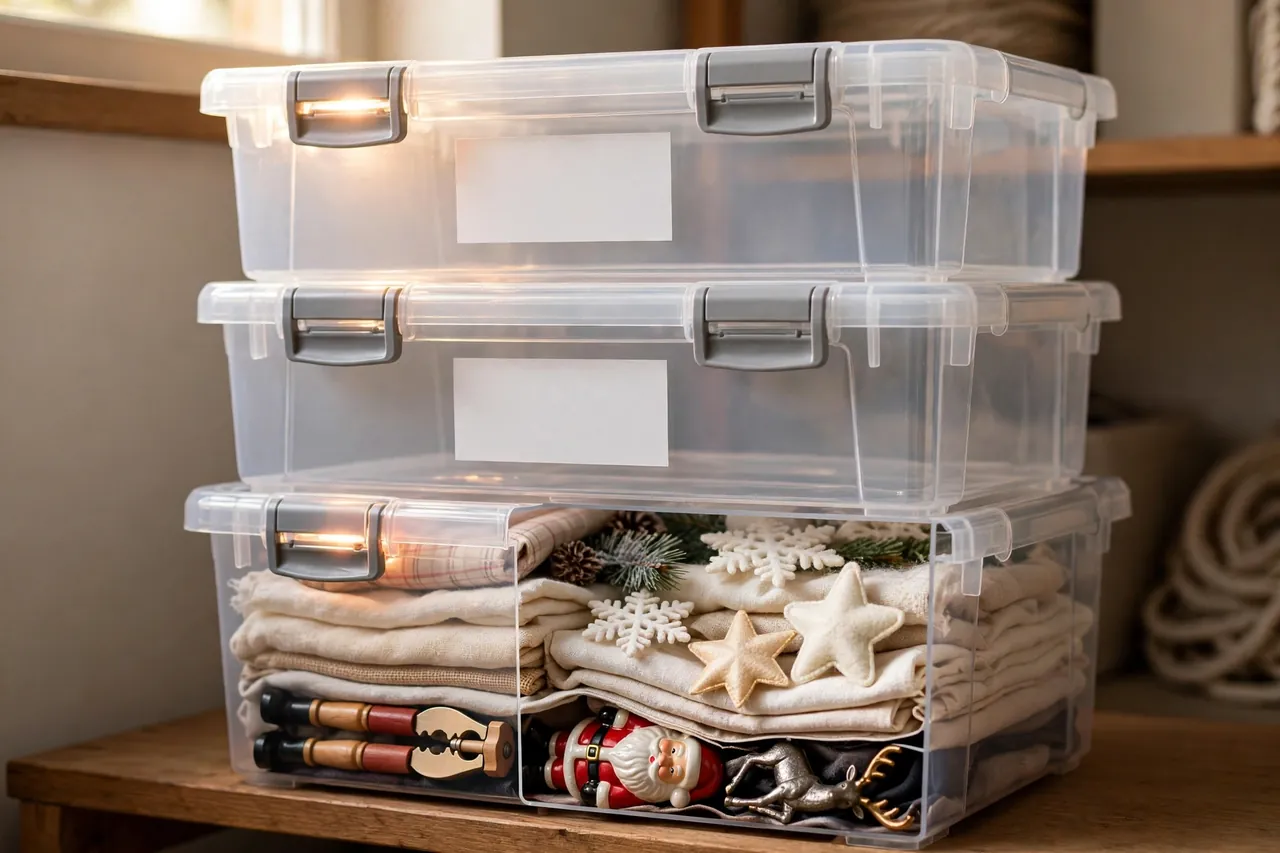
A clear plastic bin with a tight lid handles most of your holiday storage. Clear sides let you see what sits inside without opening every box. A locking lid keeps out dust, damp air, and pests far better than a cardboard flap does. Cardboard absorbs moisture, collapses under weight, and gives mice an easy way in, so A Blissful Nest’s Christmas storage tips recommend plastic bins with secure lids over cardboard for holiday decor.
Pick one size and stick with it when you can. Same-size bins stack neatly, and a tidy stack wastes less shelf space. Medium bins suit most decorations. Large bins tempt you to overload them, and a heavy bin hurts your back and crushes the items at the bottom. Put heavy items at the bottom of each bin and light items on top, and never stack a fragile bin under a heavy one.
Check the lid before you buy. A lid that snaps shut with a clear click seals better than a lid that just rests on top. If you store boxes in a garage or basement, choose bins with latching handles. They hold through temperature swings and bumps much better than loose lids do.
Ornament Boxes With Dividers: The Fragile-Decoration Fix
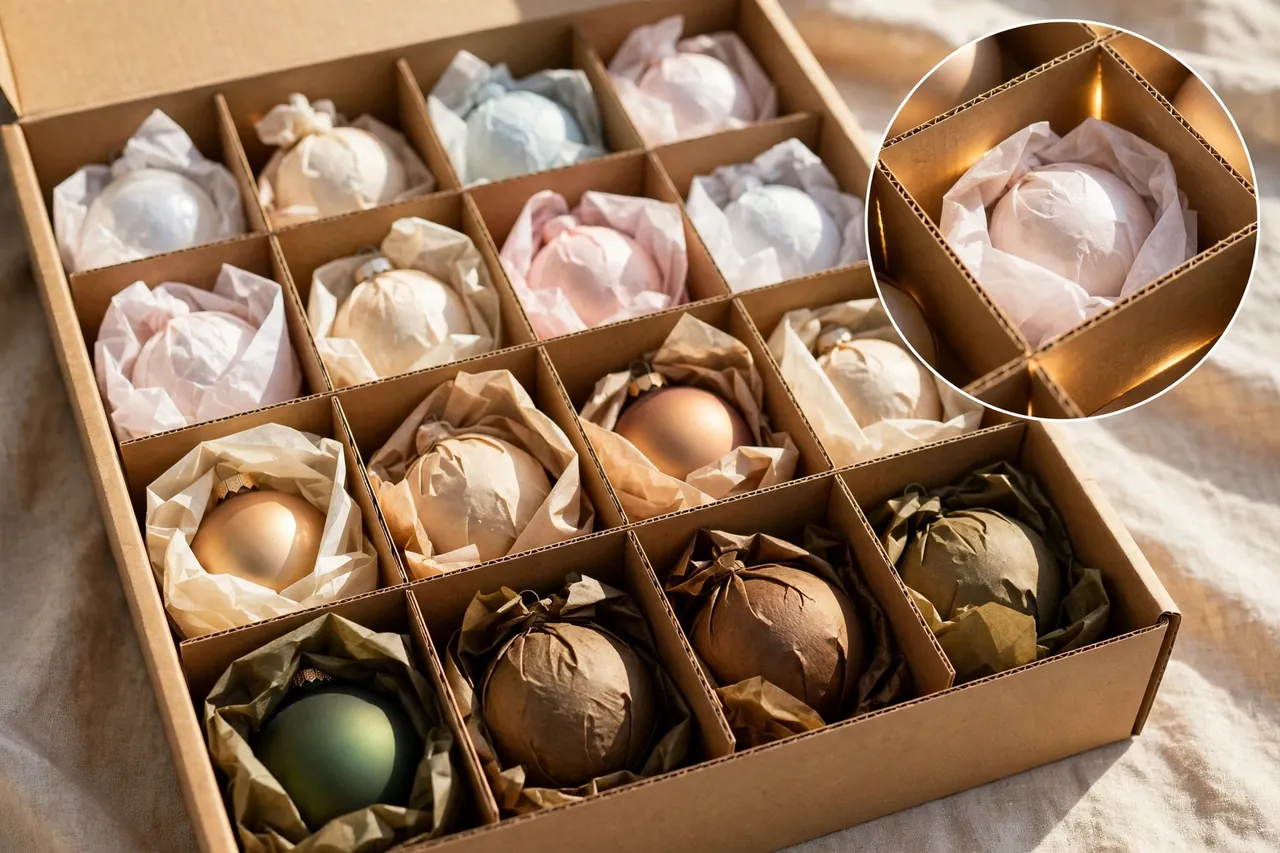
Ornaments cause the most heartbreak at unpacking time. Glass balls chip, glitter rubs off, and heirloom pieces crack when they knock together in a loose pile. A christmas decoration box with dividers fixes this by giving each ornament its own cell. Adjustable cardboard dividers let you resize the cells for big balls, small figurines, and odd shapes.
Count your ornaments before you shop. Many divided boxes hold 64 or 128 standard ornaments, and the slot size matters as much as the count. A box built for 3-inch ornaments will crush a 4-inch heirloom ball, so measure your largest pieces first. For very large or oddly shaped ornaments, remove a divider or two and wrap the piece in tissue paper instead of forcing it into a small cell.
Wrap each fragile ornament on its own, even inside a divided box. Tissue paper works well for most pieces, and bubble wrap suits thin glass and sharp edges. Set heavier ornaments at the bottom of the box and lighter ones on top. If you run out of dividers, clean egg cartons and small cardboard boxes lined with tissue make a fine backup for small ornaments.
For a sense of what these boxes cost, Target listed a Hearth & Harbor ornament storage box with dividers for 128 ornaments at $35.99, in stock, when checked on October 27, 2026. A smaller Syncfun box with dividers for 64 ornaments listed at $47.99, in stock, on the same date. Prices change, so check the current price before you buy.
Wrapping-Paper Boxes: Long, Narrow, and Easy to Crush
Wrapping paper causes a different kind of damage. Rolls bend, crease, and tear when you toss them across the top of a bin or lean them in a corner. A long, narrow christmas storage container made for wrapping paper keeps rolls straight, and it holds ribbon, bows, tape, and gift tags in the same place.
Stand rolls upright when the box allows it, and lay them flat when it does not. Either way, keep heavy items off the rolls. A roll trapped under a bag of ornaments will come out creased next year. If you have only a few rolls, a tall gift-wrap organizer or a clean, long bin works just as well as a specialty box.
Use one small pouch or zip bag inside the box for bows, tags, and ribbon spools. Loose bows crush fast, and loose tags vanish faster. When you open the box next December, you will find a ready wrapping station instead of a tangle.
Wreath Boxes: Keep the Round Shape Round
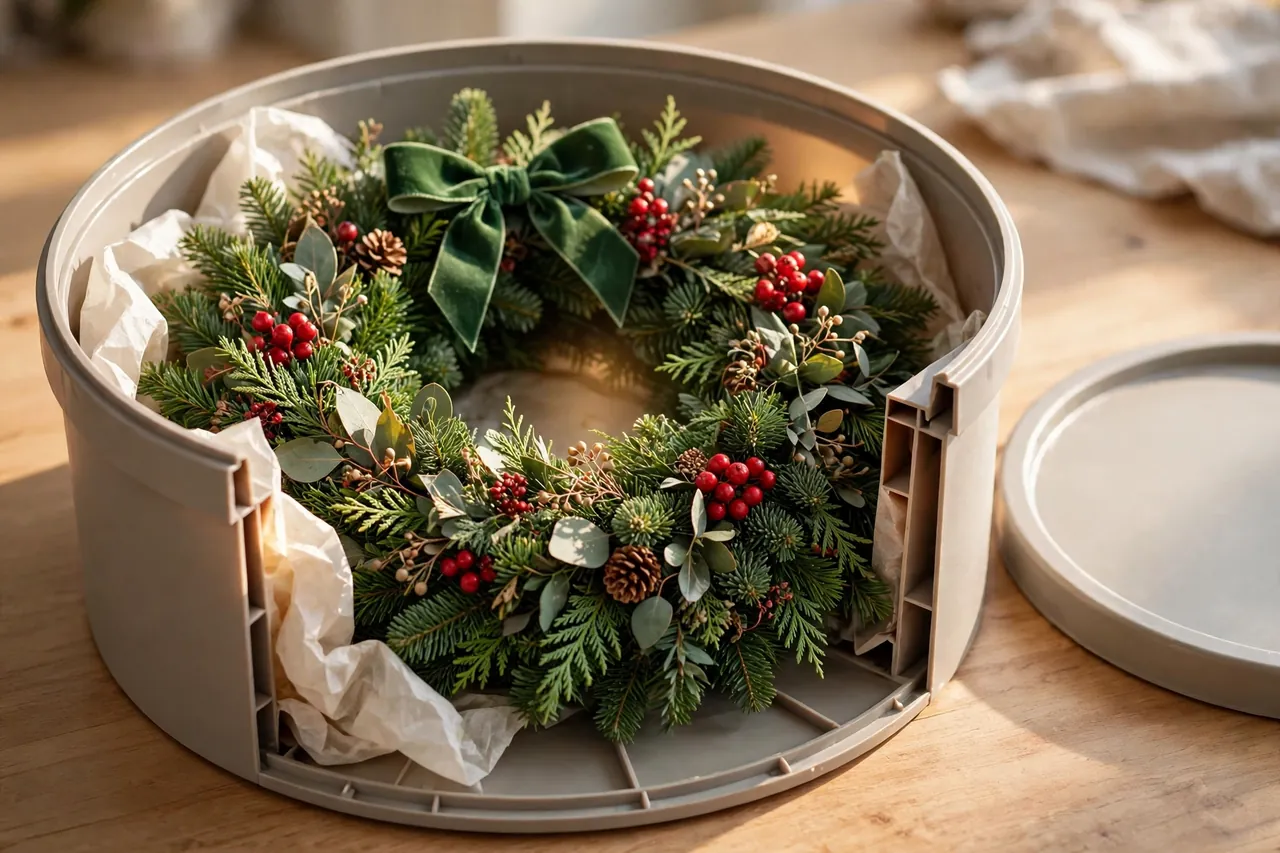
Wreaths lose their shape fast when you stack other boxes on top of them. Branches bend, bows flatten, and berries snap off. A round wreath box holds one wreath in its natural shape and stops other items from pressing on it. If you have closet space, hanging a wreath on a hook works just as well and costs nothing.
Measure your wreath before you buy a box, and include the bow and any picks that stick out. A box that fits the green ring but not the bow will crush the prettiest part. Slip tissue paper around delicate picks and berries, and never pack garlands on top of a wreath in the same box.
Garlands need a gentler touch than most people give them. Coil each garland loosely, like a garden hose, and set it in its own shallow bin or bag. Tight coils kink wired garlands, and a garland stuffed under heavy items comes out flat. Label the garland box with its length and its usual spot, such as “mantel garland, 9 feet,” so you grab the right one first.
What Goes in Each Box: A Room-by-Room Pack-Away Plan
Sort by room or by type, and pick one method for the whole house. Sorting by room speeds up decorating because you carry one box straight to the room it serves. Sorting by type helps when you mix and match pieces each year. Either method beats sorting by “whatever fits,” which guarantees a treasure hunt next December.
Work through one room at a time, and pack each decoration the moment you take it down. This habit matters more than any box you buy. Decorations that sit in a pile on the floor for a week get stepped on, knocked over, and mixed up. Pack as you go, and the job stays calm.
| Box | Pack inside it | Keep out of it |
|---|---|---|
| Ornament box with dividers | Glass balls, ceramic pieces, heirloom ornaments | Heavy figurines that crush the dividers |
| Clear plastic bin | Figurines, table decor, stockings, fabric pieces | Loose glass ornaments with no padding |
| Wrapping-paper box | Rolls, ribbons, bows, tags, tape | Heavy items that bend the rolls |
| Wreath box | One wreath, plus tissue around picks | Garlands or boxes stacked on top |
| Small lidded box | Tree topper, hooks, clips, spare bulbs | Anything heavy or sharp |
Give the tree topper its own small box, and set that box on top of the ornament bin. Toppers break more often than any other single piece because they sit loose at the top of a big bin or ride home in a grocery bag. A small box with tissue paper solves the problem for good.
Keep hooks, clips, and ornament caps in a zip bag taped inside the ornament box lid or tucked in the small-parts box. Next year you will thank yourself when every ornament still has its hook.
How to Label Christmas Decor Boxes So Next December Feels Easy
Label every box before you seal it. Vague labels like “Christmas stuff” waste the whole system because you still have to open each box to find the tree topper. Write the room, the decoration type, and one detail that matters, such as “Living room — glass ornaments — fragile.”
Use big, clear labels you can read from a few feet away. Masking tape and a thick marker work fine, and printed labels hold up better in damp garages. Put the same label on two sides of the box so you can read it no matter how the box sits on the shelf. If you use clear bins, a label still beats peeking through the side, especially when tissue paper hides the contents.
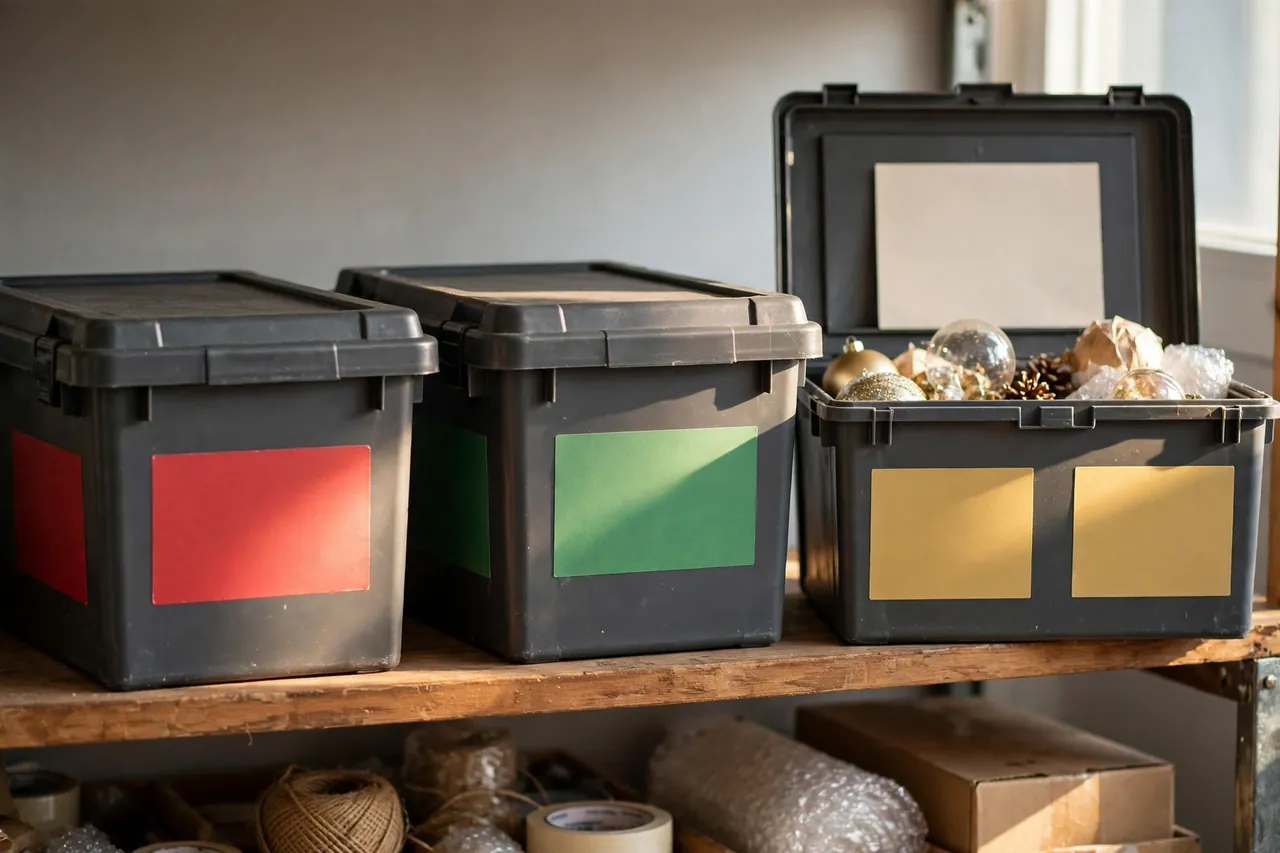
Color coding speeds things up even more. Red labels for the living room, green for the dining room, and gold for outdoor pieces let you spot the right box at a glance. Add a short inventory list inside the lid or on your phone. Snap a quick photo of each open box before you close it, and you will know exactly what sits inside without opening a single lid.
For ideas on what to display once you unpack, see indoor Christmas decorations and Christmas decorations on the front door. Plan the display while you label, and packing becomes part of next year’s decorating, not just this year’s cleanup.
The Pack-Away Method: Sort, Wrap, Pack, Stack
Follow four steps, in order, and the whole job takes less time than you expect.
- Sort. Gather every decoration in one room, and sort it into keep, donate, and toss piles. Pack only what you truly love and use. Broken, faded, or duplicate pieces just take up box space.
- Clean and dry. Wipe dust off ornaments and figurines with a soft cloth. Wash fabric pieces only if their care labels allow it, and let everything dry fully before you pack it. Damp fabric sealed in a bin grows musty fast.
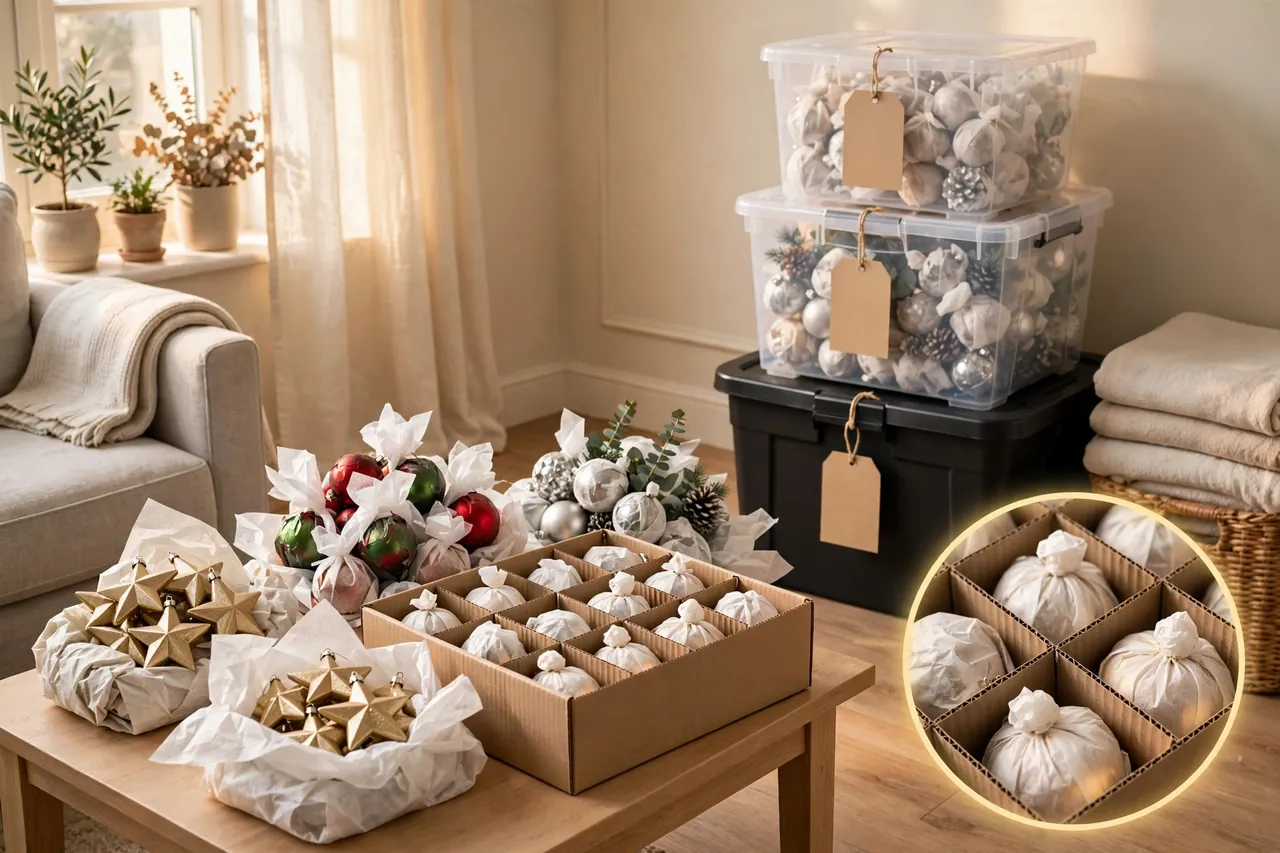
- Wrap and pack. Wrap each fragile piece on its own. Set heavy items at the bottom of each box and light, fragile items on top. Fill empty gaps with tissue paper so pieces cannot shift when you carry the box.
- Label and stack. Label each box on two sides, snap a photo of the contents, and stack heavy bins at the bottom and fragile bins on top. Store the boxes you need first, such as the tree topper and hooks, where you can reach them easily.
Test this system on one room before you buy a full set of boxes. Pack the living room decorations, live with the labels for a week, and see what feels awkward. Then buy the rest of your boxes with real experience behind the choice.
Where to Store the Boxes (and Where Not To)
A cool, dry spot beats a big spot. Closets, spare-room shelves, and dry basements with shelving all work well. Attics and garages work too, but heat and cold swing harder there, and delicate items age faster. If you must use an attic or garage, choose the most sheltered shelf, keep boxes off the floor, and leave a gap between boxes and exterior walls.
Basements deserve a quick check before you trust them. Look for water stains, damp spots, musty smells, and pest signs. Sealed plastic bins protect against humidity, minor condensation, and dust, but they cannot protect against standing water or flooding, so lift bins onto shelves or pallets and keep them away from floor drains and sump pumps. Erie Home’s basement storage guide gives the same advice: use sealed bins, raise them off the concrete floor, and keep them clear of exterior walls. For more on pest-proofing your storage, see the pest-prevention guidance that recommends rigid plastic bins with snap lids, since mice chew through cardboard with ease.
Keep heirloom ornaments, vintage paper pieces, and anything truly irreplaceable in the most stable spot you have, such as an indoor closet. A climate-controlled closet protects sentimental pieces from the temperature swings that warp wood, fade fabric, and crack old glue. Check your boxes once or twice a year, ideally before the holidays and during humid months. Look for damp lids, pest signs, and cracked bins, and fix small problems before they ruin a whole box.
Mistakes That Break Decorations in Storage
Most storage damage comes from a few repeat mistakes. Avoid these, and your decorations will last for years.
- Mixing heavy and fragile pieces. A ceramic village house on top of glass balls will win that fight every time. Keep heavy and fragile pieces in separate boxes.
- Skipping the wrap. Bare ornaments rub glitter off each other and chip at the edges. Wrap each fragile piece, even in a divided box.
- Overfilling the bin. A lid that bulges upward will pop open or crack under the next box in the stack. Leave a little room at the top.
- Using damp cardboard. Old shipping boxes feel free, but they absorb moisture, collapse, and invite pests. Use them only for short trips, not for eleven months of storage.
- Forgetting the labels. An unlabeled box costs you time and risks damage, because you open and repack boxes just to find one item.
- Storing lights loose. Loose light strands tangle into a knot that tempts you to yank, and yanking breaks bulbs. Wind each strand around cardboard and set it in its own bag or bin section. (Light reels are a side topic here; the boxes in this guide handle the rest of your decor.)
One more note on scope: this guide covers boxes for decorations in general. Your artificial tree needs its own solution, and our guide to Christmas tree storage bags covers how to pack, choose, and protect your tree. Keep tree storage separate from decor-box storage, and neither job will crowd out the other.
What Christmas Decor Boxes Cost
You can build a solid system without spending much. Plain clear bins cost the least and cover the most decorations. Divided ornament boxes and wreath boxes cost more, but they protect the pieces that cost the most to replace. Buy the specialty boxes for fragile and oddly shaped items first, and use plain bins for everything else.
January brings the best deals on holiday storage, when stores clear seasonal stock. If you can wait, buy next year’s boxes in January and store them flat or nested until you need them. If you need boxes now, buy one divided ornament box and one wreath box first, since those two protect the decorations most likely to break.
As noted above, Target listed a 128-ornament divided box at $35.99 and a 64-ornament divided box at $47.99, both in stock when checked on October 27, 2026. Treat any price as a snapshot, not a promise, and compare a couple of sellers before you buy.
Related Guides
If you love detailed holiday displays, our Christmas village display guide shows how to build a tiny town that glows, and its figurines and tiny houses need the same padded-box care as your ornaments. If you craft your own wreaths, how to make a mesh wreath pairs well with the wreath-box advice above, since a handmade wreath deserves a box that holds its shape.
Frequently Asked Questions
How do you store Christmas ornaments safely?
Wrap each fragile ornament in tissue paper or bubble wrap, then set it in an ornament box with dividers so pieces cannot bump together. Keep larger ornaments apart with adjustable dividers, and set heavier pieces at the bottom of the box.
What storage bins work best for Christmas decorations?
Plastic storage bins with secure, locking lids work best because they keep out moisture, pests, and dust. Clear bins help you see the contents at a glance, and same-size bins stack neatly on shelves.
Should holiday decorations be stored in cardboard boxes or plastic bins?
Plastic bins beat cardboard for long-term storage. Cardboard absorbs moisture, collapses under weight, and lets pests in. Sealed plastic bins resist humidity, condensation, and dust, though they still need lifting off the floor away from standing water.
How do you keep Christmas wreaths from losing shape?
Store each wreath in its own round wreath box, or hang it on a hook in a closet. Never stack other boxes on top of a wreath, and wrap delicate picks and berries in tissue paper before you close the box.
How do you organize holiday decor for next year?
Label each box with its room and contents, such as “living room, glass ornaments, fragile,” and snap a photo of the open box before you seal it. Group decorations by room or type, keep wrapping paper in a long box, and store the boxes you need first within easy reach.
How do you label holiday storage bins?
Use large, easy-to-read labels on two sides of each bin, and list the contents in plain words, not vague terms like “decorations.” Color-coded labels by room help even more, and a short inventory list on your phone covers anything the label misses.
Next December will feel different when every box opens to exactly what you expect. Start with one room, pack it well, label it clearly, and let the system grow from there. Your future self, standing in front of a tidy shelf with a cup of cocoa in hand, will be glad you did.