Christmas decorations for outdoor planters turn plain pots into a warm welcome at your front door. Fill a sturdy pot with fresh evergreens, add tall birch branches or red twigs for height, tuck in berries and pine cones for color, and finish with weatherproof lights and a bow. That simple recipe works for one small pot by the steps or a matched pair of urns flanking the door, and it stays beautiful all winter with a little care.
You do not need a big porch, a big budget, or a florist’s skill to pull it off. You need a pot that can survive a freeze, greens in three shapes, and a firm base that holds every stem upright through wind and snow. This guide walks you through each choice and each step, so your planters look full and festive on the first try, not thin and lopsided.
Choose a Planter That Survives Winter
Start with the pot, not the decorations. A beautiful arrangement in the wrong container can crack, tip over, or sink into a puddle of frozen water before Christmas Day. Pick a container that suits your porch and your weather, and the rest of the project gets much easier.
Pick a Frost-Proof Material
Thin terracotta and cheap glazed ceramic absorb water, and that water expands when it freezes. The pot can crack right down the side on the first hard freeze. Fiberglass, resin, concrete, metal, stone, and thick frost-proof stoneware handle freeze-and-thaw cycles far better, so choose one of these for winter planters.
If you love a terracotta pot you already own, you can still use it. Set a plastic nursery pot inside it and build your arrangement in the liner instead. The liner takes the wet soil and the freeze, while the pretty pot just frames it. Drainage holes matter in any container, because trapped water can freeze into a solid block and push stems loose.
Size the Pot to Your Door
Scale makes or breaks a porch planter. A pot about 14 to 20 inches across suits most front steps, and a taller urn suits a grander entry. As a rule of thumb, plan for the finished arrangement to stand about one and a half times as tall as the pot. A 20-inch urn should reach roughly 30 inches once you add birch poles and greens, or it will look lost beside the door.
Weight matters just as much as size. Tall branches act like sails in winter wind, and a light pot can tip and spill across the steps. Heavy pots stay put on their own. If your pot feels light, add a brick or a sandbag at the bottom before you add soil, and keep the pot in its final spot before you start building. A finished planter is heavy and awkward to move without knocking stems loose.

Pick a Style That Fits Your Porch
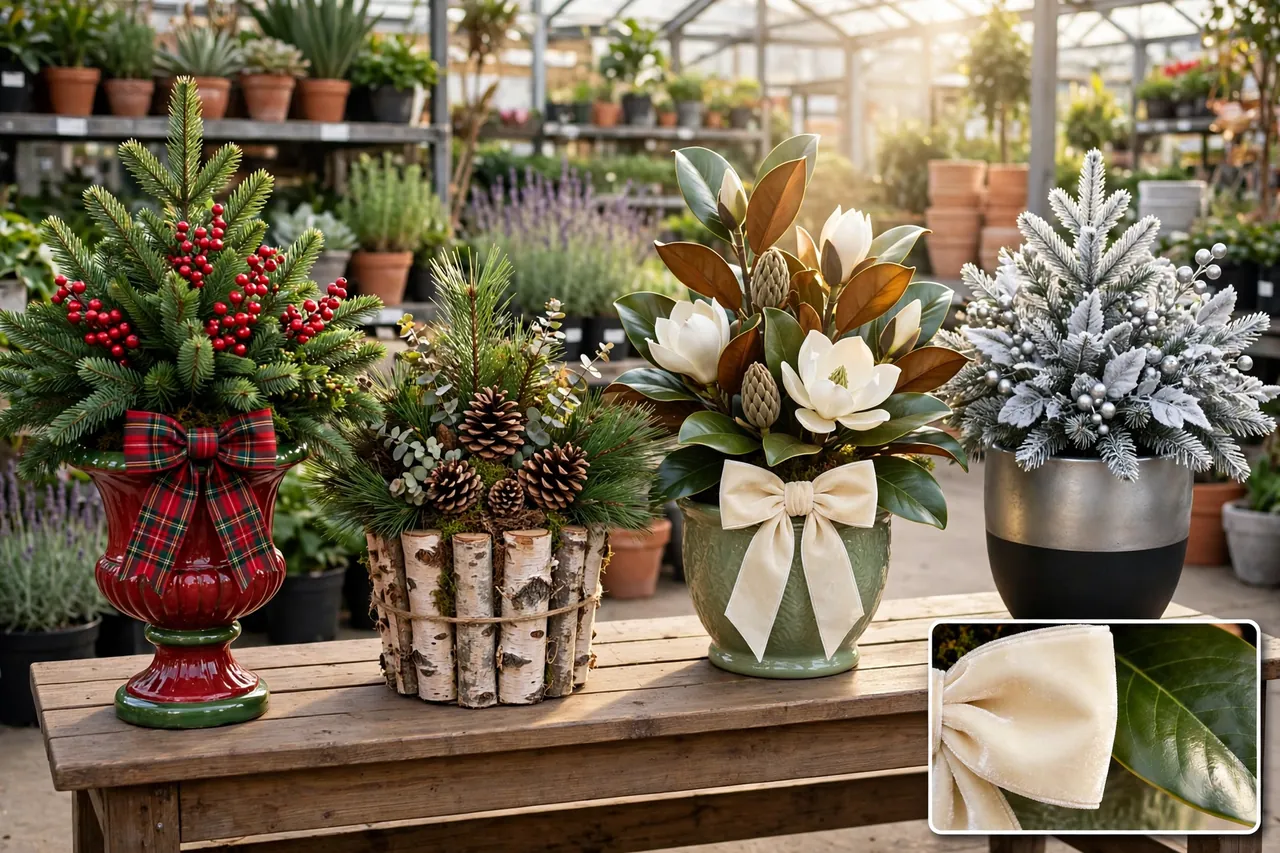
Choose one style before you buy anything, and let every stem and accent serve it. A clear style keeps you from grabbing one of everything at the garden center and ending up with a pot that looks confused. These four styles cover most homes, and each one uses the same basic building method.
Classic Red and Green
Classic red and green never goes out of style, and it suits brick homes, white trim, and traditional wreaths best. Fill a dark urn or a wooden box with fir, spruce, and cedar, then add clusters of red winterberry, pine cones, and shatterproof red ornaments. Finish with a big red or plaid bow at the front of the pot. Keep the red in clusters of three rather than dots spread evenly, because grouped color reads stronger from the street.
Rustic Birch and Pine Cones
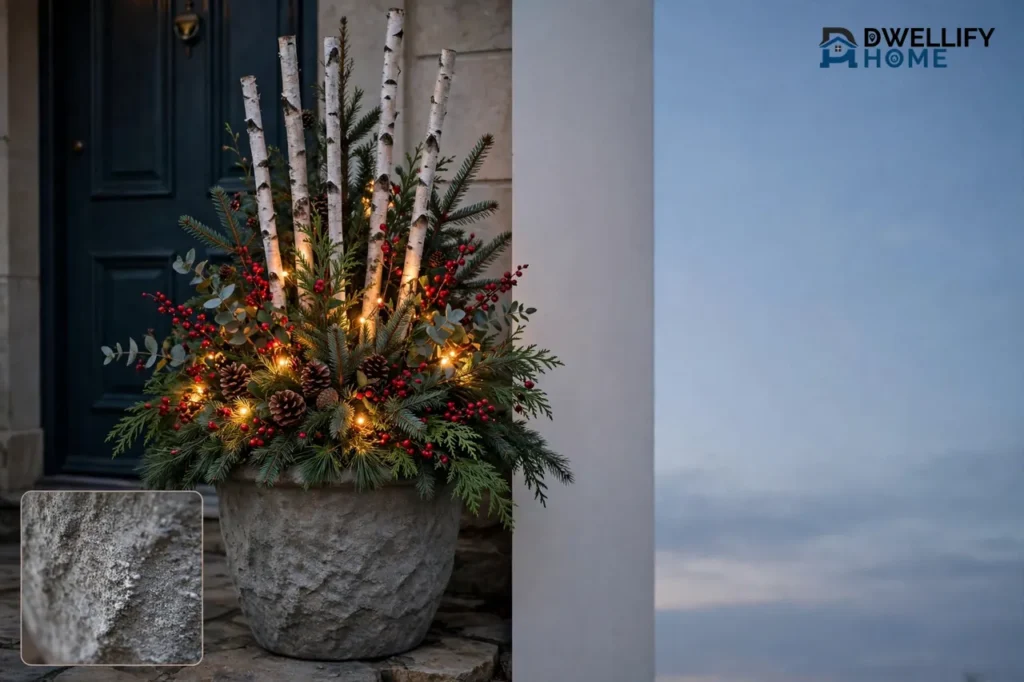
Rustic planters lean on natural textures instead of bright color. White birch poles rise from the center, cedar spills over the rim, and large pine cones sit at different heights through the greens. A burlap bow or a plaid ribbon ties the look together. This style fits farmhouse porches, log homes, and wooden doors especially well, and it slides easily into a plain winter display after Christmas by dropping the bow.
Elegant Magnolia and Velvet
For a quieter, dressier porch, skip the bright red. Glossy magnolia leaves show their velvety brown undersides, silver-blue eucalyptus adds softness, and one moss-green or cream velvet bow finishes the pot. This style reads as seasonal without shouting Christmas, and it pairs beautifully with a simple wreath and warm white lights. Use fewer accents here, because the leaves themselves carry the look.
Modern Frosted and Silver
Modern planters use a cool palette: frosted branches, silver or white berries, cool white lights, and a black or concrete pot. White-painted twigs give height, silver ornaments catch the light, and a silver or white bow keeps the palette tight. This style suits gray siding, black doors, and modern farmhouse exteriors, and it also makes the easiest after-Christmas transition, since almost nothing in it screams holiday.
Build Your Christmas Planter Step by Step
Every good winter planter follows the same three-part recipe: thriller, filler, and spiller. The thriller gives height in the center, the filler gives body around it, and the spiller softens the rim by draping over the edge. Add accents last, and your pot will look full and balanced instead of flat or top-heavy.
The table below sums up the recipe so you can shop and build from it.
| Role | What to Use | Where It Goes |
|---|---|---|
| Thriller (height) | Birch poles, red twig dogwood, or white-painted sticks | Center, or slightly back if the pot sits against a wall |
| Filler (body) | Noble fir, spruce, pine, boxwood, or juniper | Middle ring, packed tightly around the thriller |
| Spiller (softness) | Cedar, white pine, or trailing juniper | Rim, angled down so it drapes 6 to 12 inches |
| Accents | Berries, pine cones, ornaments, ribbon, lights | Front and gaps, added last |
Prepare the Base
Clear out tired summer plants and fall mums, but keep the old potting soil if the pot already has it. Damp soil grips stems far better than dry soil, so water the soil before you start. If the pot is empty, fill it with potting mix or sand to within about 2 inches of the rim and press it down hard. Loose, fresh soil will not hold heavy birch branches, so compacting the base is the step people skip and regret.
Wet floral foam works well in shallow or decorative pots. Soak the blocks, set them in the pot, and fill around them with soil. In a deep pot, add soil underneath first so the stems still reach the foam. Another handy trick is to cut old annuals down to soil level and use their dense roots as an anchor for new stems.
Anchor the Tall Stems First
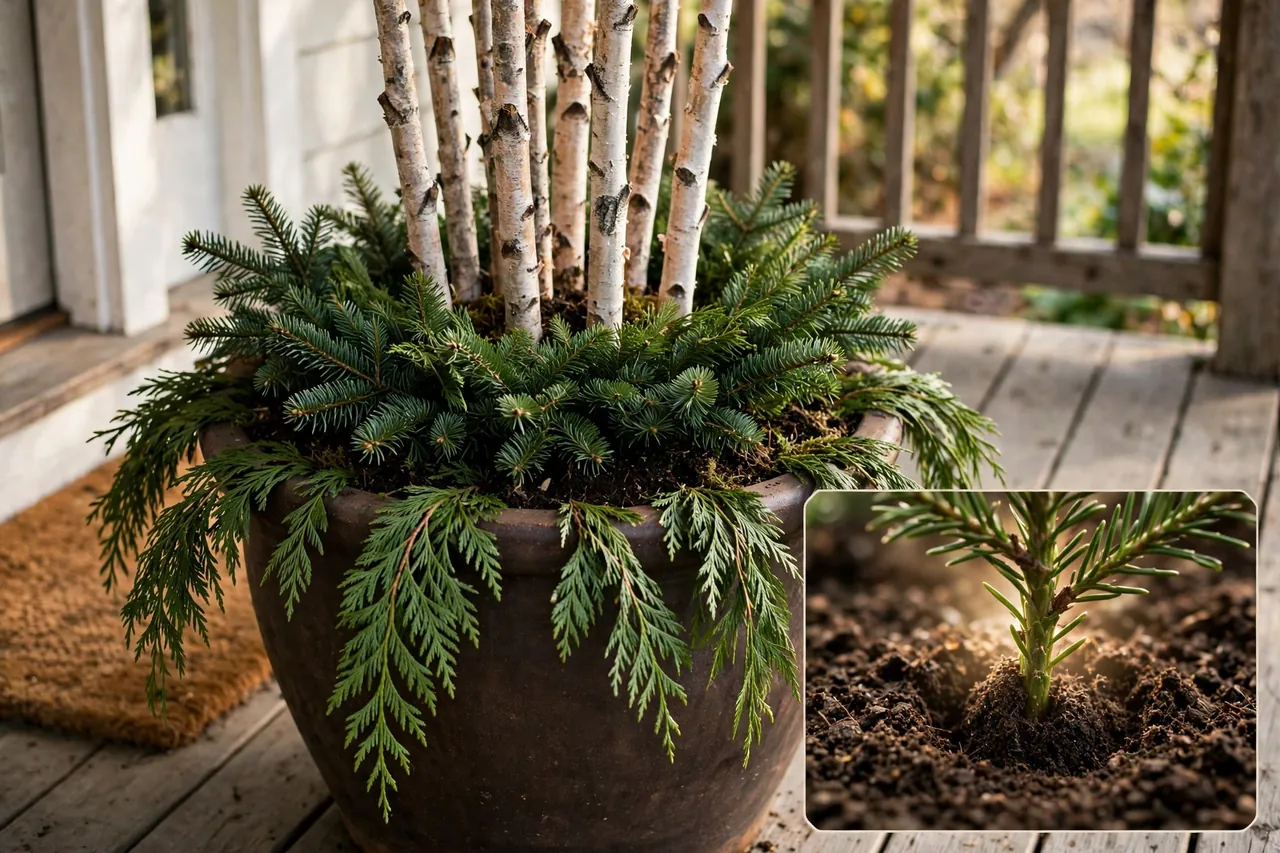
Push one tall birch branch or dogwood stem into the exact center, at least 6 inches deep. Add three to nine tall branches in total, in odd numbers, at staggered heights and angled slightly outward so they fan into a loose V shape. Tug each one after you place it. If it wobbles, press soil around its base or wedge a few rocks against it before you move on.
Keep the tallest stems taller than everything else. That height is what makes the planter visible from the street and gives the whole arrangement its shape. For a pair of planters flanking the door, compare the two pots side by side as you build and even out their heights, so they mirror each other.
Layer the Greens from Rim to Center
Work from the outside in. Strip the needles and side shoots from the bottom 3 to 4 inches of each stem so it slides cleanly into the soil or foam. Start at the rim with cedar or white pine at a low angle, spilling over the edge. Then fill the middle ring with stiffer fir and spruce pointing up and out, packed tightly around the tall stems.
Mix at least three green textures. A pot of one kind of pine reads flat from a distance, while soft white pine, stiff fir, flat cedar, and round boxwood leaves together look rich even before you add color. Plan on a full armload of mixed cuttings, about 20 to 30 stems, for a 16-inch planter. Step back to the sidewalk and look at the pot from 30 feet away before you add accents, because bare spots and lopsided shapes show up clearly from there and hide up close.
Add Lights and Color to Your Planters
Color and sparkle go on last, after the greens lock in. Add accents in this order: berries first, then pine cones, then ornaments, then ribbon, then lights. That order lets each layer sit on something solid instead of fighting for space.
Place Berries, Pine Cones, and Ornaments
Before you add berries, read this caution: many real winter berries are toxic to dogs and cats, and holly berries can cause vomiting and diarrhea in pets. The Ohio State University Extension guide to holiday plants and pets lists holly berries as low toxicity with vomiting and diarrhea as the primary signs, so if curious pets can reach your planters, choose faux berry picks instead and skip real mistletoe. Birds may strip real berries too, so expect to replace them through the season.
Place berry stems in groups of three toward the front, where eyes land first. Wire pine cones onto floral picks or bamboo skewers so they stand at different heights, and rest a few loose cones at the base to hide bare soil. Choose shatterproof plastic ornaments in two or three sizes and mix shiny and satin finishes. Skip glass ornaments outdoors, because a gust can blow one onto concrete and shatter it. Run floral wire through each ornament cap loop and twist it around a sturdy branch so nothing flies off in a storm.
Weave in Lights Safely
Stop and check your lights before you weave a single strand. Only use lights rated for outdoor use, and inspect every set for cracked sockets, frayed wires, or loose connections. The U.S. Consumer Product Safety Commission advises people to use only lights tested by a recognized testing laboratory, to discard damaged sets, and to plug outdoor lights into circuits protected by ground fault circuit interrupters (GFCIs). Plug your planter lights into a GFCI-protected outlet, never run an indoor-rated cord outside, and never let a cord cross a walkway where guests can trip on it.
Battery-operated fairy lights on thin, clear or green wire suit planters best, because they disappear during the day and glow at night. Start at the top of the tallest stem and spiral down, then weave loosely through the greens. Pick a set with a 6-hour timer so the batteries last for weeks, and hide the battery pack deep in the greenery or under a cluster of ornaments. Slip the pack into a small zip-top bag first to keep out snowmelt. Warm white lights give a classic cozy glow, while cool white lights match frosted or metallic themes. If you want more ideas for the lighting itself, see our guide to LED Christmas decor for porch planters and beyond.
Finish with Ribbon and a Wind Check
Tie one generous bow at the front of the pot or around the base of a tall stem, and match its ribbon to your door wreath if you have one. Large bows suit large planters, while a small pot looks better with a modest one. Pin ribbon tails with U-shaped floral pins so they cannot tear free and flap.
Now give the planter a firm shake. Anything that moves will end up in the yard after the first storm, so loop green floral wire around every ornament hanger, bow, and light strand until nothing shifts. If your porch catches strong gusts, a sandbag or brick at the bottom of a light pot adds cheap insurance. For more on keeping tall outdoor displays upright, read our guide to weights for outdoor Christmas decorations.

Keep Your Planters Fresh All Winter
Fresh-cut greens last six to eight weeks outdoors in cold weather with basic care, and often longer in a sheltered spot. Your job is simple: water until the soil freezes, check the pot every couple of weeks, and replace what fades instead of rebuilding the whole arrangement.
Water and Shelter the Greens
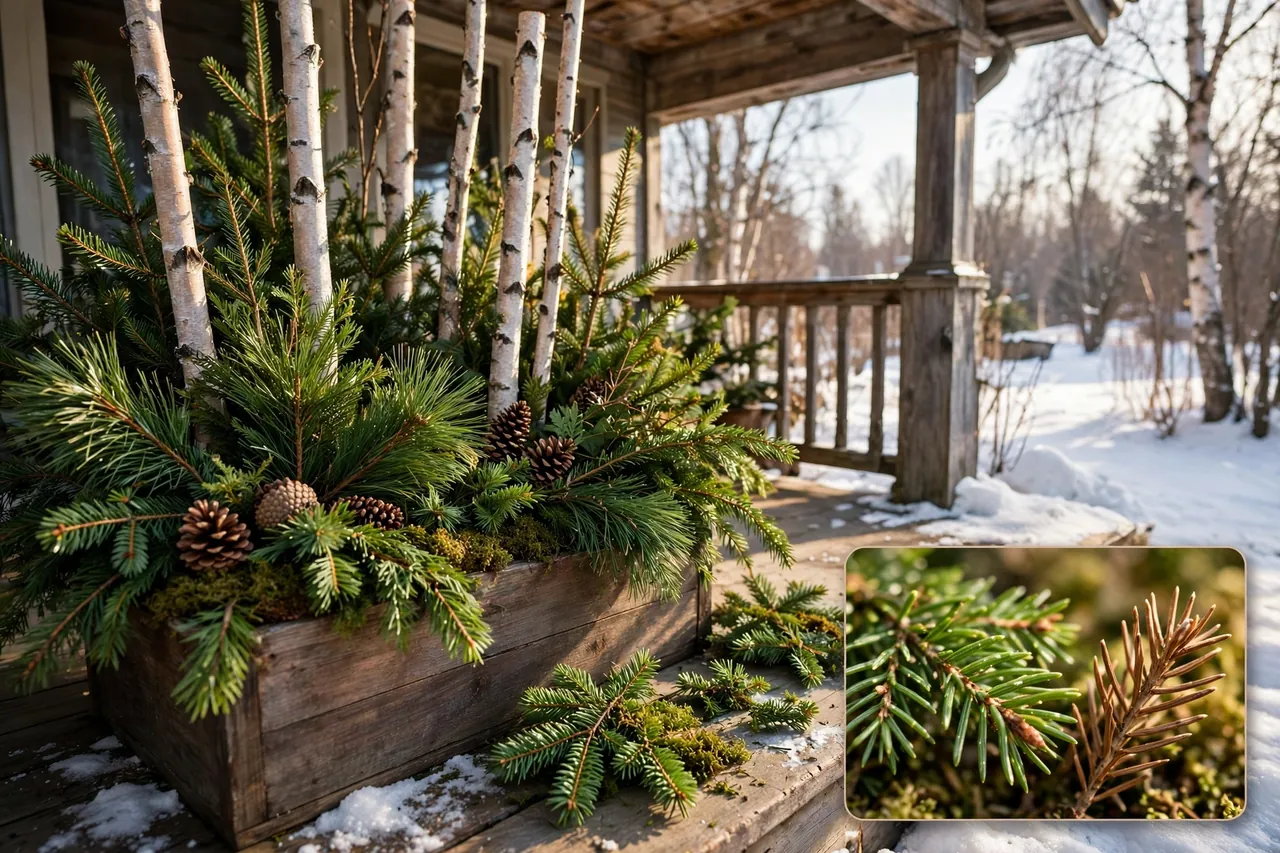
Water the soil or foam weekly until it freezes solid. After that, the frozen base holds the stems in place and keeps them hydrated. Mist or spray the greens with an anti-desiccant before a hard freeze to slow needle drop, and cover the soil surface with mulch or moss to insulate it. Pots under a porch roof last noticeably longer than fully exposed ones, because frost does not settle on the needles overnight. Keep pots away from dryer vents and heated doorways too, since hot, dry air browns greens fastest.
Refresh, Do Not Redo
Walk past the planter every couple of weeks and fix what looks tired. Pull browned sprigs and tuck in new cuttings, replace berries that birds stripped or that shriveled, test the lights at dusk, and retighten any wire that loosened in the wind. Change batteries at the first dim evening rather than waiting for the lights to die completely. Small touch-ups keep the pot looking fresh without a full rebuild.
After the holidays, you can stretch the same planters into February with one quick swap. Take out the red bows, ornaments, and themed picks, and leave the birch, greens, cones, and lights in place. Add a few stems of silver-blue eucalyptus, frosted pine cones, or white-painted branches, and the pot reads as winter decor rather than Christmas decor. The same evergreen base works beautifully here, and our guide to outdoor Christmas greenery covers the cuttings that hold up longest.
Fix Common Planter Problems
Most planter problems have a fast fix, and catching them early saves the whole display. Work through this list from the cheapest fix to the biggest one.
- Stems lean or fall over: push the stem deeper, press soil firmly around its base, and wedge rocks against it. Loose soil causes most leaning, so compact the base before you add more stems.
- The pot looks thin from the street: add more filler greens, not more decorations. Pack fir and spruce tightly around the thriller and step back to the sidewalk to check again.
- Greens brown early: move the pot out of hot, dry air near vents or heated doors, water whenever the soil is not frozen, and spray an anti-desiccant before the next hard freeze.
- Ornaments and bows blow away: wire every piece to a sturdy branch, pin ribbon tails with floral pins, and add a brick or sandbag to light pots.
- Lights go dim or die: change the batteries first, check that the battery pack stayed dry, and inspect the wire for breaks where it rubs against branches.
- Berries vanish overnight: birds likely ate them. Swap in faux berry picks, which look convincing from the sidewalk and last all season.
- The pot cracks: move the arrangement into a frost-proof pot or a plastic liner inside the cracked one, and keep drainage holes clear so water cannot pool and freeze.
Planter Mistakes to Avoid
Avoid glass ornaments, indoor-rated lights, and real candles in or near planters. Glass breaks on concrete, indoor cords and lights are not built for snow and rain, and a real flame beside dry evergreens is a fire risk. Battery candles inside a lantern beside the pot give you the same glow with none of that risk.
Avoid one more trap: decorating only the front of the pot. Guests approach from the sidewalk, neighbors see the side, and you see the pot every time you open the door. Turn the pot as you build and fill every side, even the back, so the arrangement looks good from every angle. Finally, do not wait until mid-December to build. Right after Thanksgiving is ideal, because the soil is still workable, greens are fresh at tree lots, and you enjoy the planters for the whole season.
Related Guides
Outdoor Christmas Greenery: Garlands, Wreaths, and Swags That Last the Season · Decorating Driveway for Christmas · Outdoor Lit Christmas Gifts: Light-Up Gift Boxes That Glow All Season
Frequently Asked Questions
How long do fresh evergreens last in outdoor planters?
In cold weather, fresh evergreens last six to eight weeks, and often longer if you spray them with an anti-desiccant and keep the soil moist until it freezes. In warmer climates, expect three to four weeks and plan a refresh in early January.
Can I use artificial greens in Christmas planters?
Yes. Good-quality faux stems are reusable and look convincing from the sidewalk. Many people mix them: faux stems for the base and fresh greens for texture and scent.
What planters won’t crack in winter?
Fiberglass, resin, concrete, metal, and frost-proof stoneware hold up best in winter. Avoid thin terracotta and inexpensive glazed ceramics, or protect them by placing a plastic nursery pot inside as a liner.
Are winter planters safe for pets?
Most common evergreens are low-risk, but holly berries and mistletoe are toxic to cats and dogs. If curious pets can reach your planters, use faux berries, skip mistletoe, and call your veterinarian if a pet eats berries.
When should I make my winter planters?
Right after Thanksgiving is ideal. The soil is still workable, greens are fresh at tree lots, and you will enjoy the planters for the whole season.
Disclaimer: This guide covers general home decorating only. Outdoor electrical work beyond plugging lights into a GFCI-protected outlet, and any pet illness after eating berries or leaves, calls for a qualified electrician or veterinarian. Turn lights off when you leave the house or go to bed, and discard any light set with frayed wires or cracked sockets.
Start with one pair of pots by the front door, and let that success guide the rest of your porch. Once you see evergreens, birch, and warm lights glowing beside your door each evening, you will wonder why you ever left your planters bare for winter.