Decorating driveway for Christmas works best when you treat the driveway as its own stage: light its edges, mark its entrance, and keep every cord and decoration clear of tires and feet. You do not need to cover the whole front of the house. A clean line of lights along both edges, a few warm luminaries, and one strong entrance feature will make the whole arrival feel festive the moment a car turns in.
This guide stays on the driveway itself. You will plan the layout, pick lights that survive weather and traffic, build luminaries, frame the entrance, add driveway-edge greenery, wire everything safely, and fix the problems that show up mid-season. Every step keeps cars moving, guests walking safely, and your display glowing all season.
Start With a Driveway Plan, Not a Shopping Cart
Walk your driveway before you buy anything. Notice where cars turn, where guests step out, where the snow shovel travels, and where water pools after rain. Your decorations belong outside those working zones, not inside them.
Measure both edges of the driveway with a tape measure, then add about 10 percent extra for curves and overlap. That small cushion saves a second trip to the store and keeps you from stretching a strand tight, which pulls stakes loose and strains connections.
Mark three zones on your plan. The entrance zone sits at the street end and carries your boldest feature, such as lit entrance markers or an arch. The middle stretch uses simple repeated lights that guide the eye. The arrival zone near the garage or parking area gets a little more detail, because guests see it up close.
Decide your power source now, not after the lights are up. Find the nearest outdoor outlet, and check whether it has ground-fault circuit interrupter (GFCI) protection. If you need a long cord run, plan the route along a wall, a fence line, or a grass edge, never straight across the pavement where tires and shoes will hit it.
Pick one color story and stick to it. Warm white reads classic and calm. Multicolor reads playful and loud. Mixing both along the same driveway usually looks messy, so choose one and repeat it from the street to the garage.
Light Lines That Guide the Eye
A line of lights along each driveway edge is the single most effective driveway decoration. It frames the drive, guides guests after dark, and looks good from the street without blocking anything.
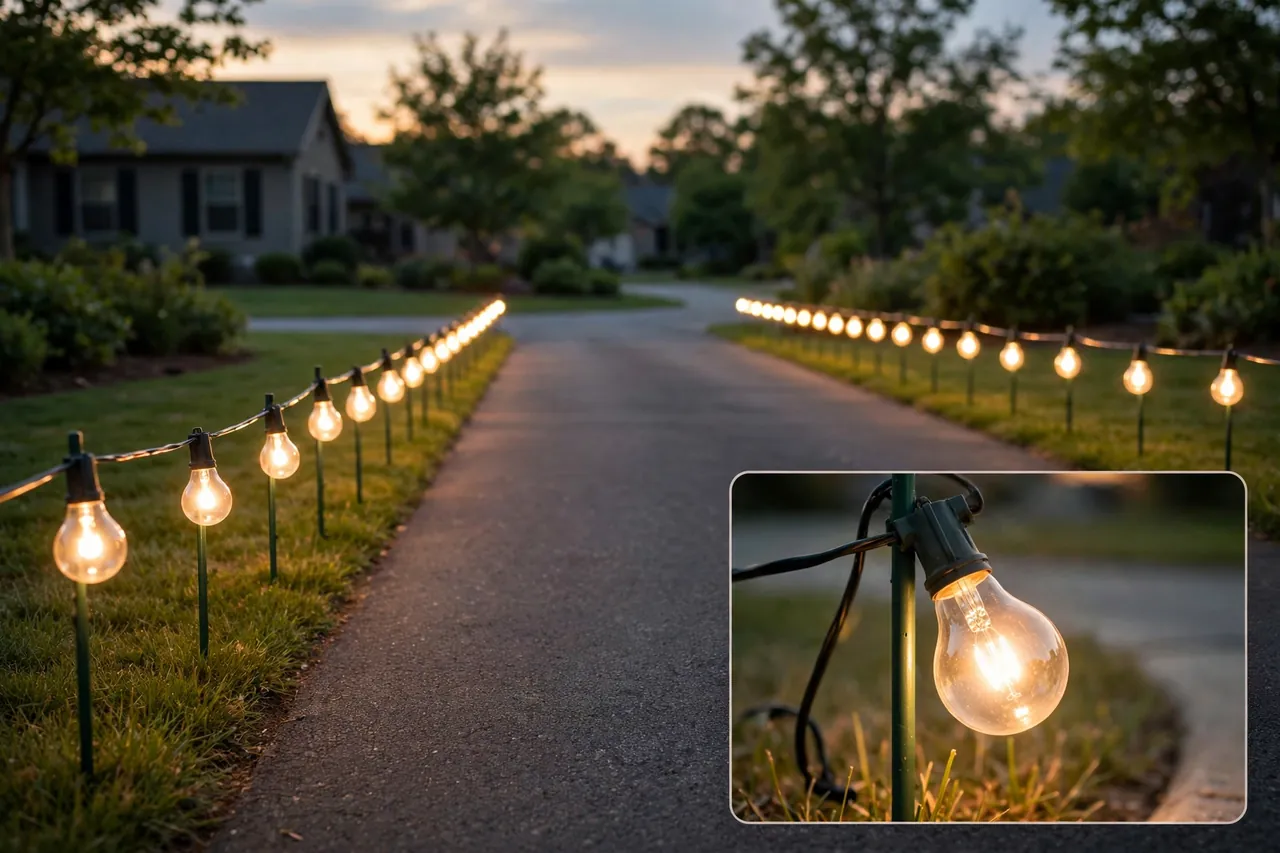
Choose large, easy-to-see bulbs for this job. C7 and C9 bulbs in LED versions show up well from the street, use less power than old incandescent bulbs, and stay cooler to the touch. Look for sets labeled for outdoor use and tested by a recognized lab, such as UL or ETL.
Mount the bulbs on stakes, not flat on the pavement. Pathway or universal light stakes lift each bulb a few inches off the ground, so drivers and walkers can see the line and snow does not bury it at the first storm. Space the stakes 12 to 18 inches apart for a full, even line, and keep the same spacing around curves so the line flows instead of bunching up.
Set the stakes back 6 to 12 inches from the paved edge, on grass, mulch, or soil. That setback keeps tires, snow shovels, and plows from clipping your lights. On a driveway with no soft edge, use weighted bases or masonry clips made for hard surfaces instead of forcing stakes into concrete.
Point the bulbs slightly inward, toward the driveway, rather than straight out at the street. Inward light warms the pavement and the borders beside it, and it cuts glare for passing drivers. A driveway that blinds the street helps nobody.
If you want a second layer of light, wrap the bushes or shrubs that already border the driveway in net lights or string lights. Keep this layer on the driveway borders only, so the eye still follows the drive itself. For more LED ideas that work along a drive, see our guide to LED Christmas decor.
Luminaries Along the Drive
Luminaries give a driveway a soft, old-fashioned glow that strings alone cannot match. They look like a runway of candles guiding guests home, and they cost very little to build.
Start with the classic paper bag version. Fold down the top inch of a white or brown paper lunch bag to make a lip, pour about two inches of sand into the bottom for weight, and set a battery-operated LED tea light inside. The sand holds the bag steady in wind and keeps the light upright.
Space luminaries about four feet apart along both sides of the driveway. That spacing reads as a steady rhythm from the street, and it keeps the project affordable on a long drive. For a shorter driveway, you can tighten the spacing a little, but keep it even on both sides.
Use LED tea lights, not real candles, in paper bags. Real flames in paper bags beside a driveway invite trouble from wind, dry leaves, and passing cars. LED lights give you the same warm flicker with no open flame, and they keep glowing when wind would have blown a candle out.
For a sturdier version you can reuse year after year, swap the bags for glass hurricane lanterns or mason jars with battery LED strands coiled inside. These stand up to rain and wind better than paper, and they look lovely beside stone or brick driveway borders.
Put luminaries out only when the weather allows, and bring paper bags inside during heavy rain or snow. Wet paper tears, sags, and loses its glow. A quick evening check keeps the line looking intentional instead of soggy.

Entrance Markers and a Driveway Arch
The entrance is where your driveway display makes its first impression, so give it one clear focal point. Two matching markers, one on each side of the driveway mouth, frame the entrance and tell drivers exactly where to turn in.
Good entrance markers stay low, heavy, and stable. Lit columns, small lit trees in weighted pots, or gift-box shapes with lights all work, as long as wind cannot push them into the driving path. Anchor every marker well, and check it after the first windy night.
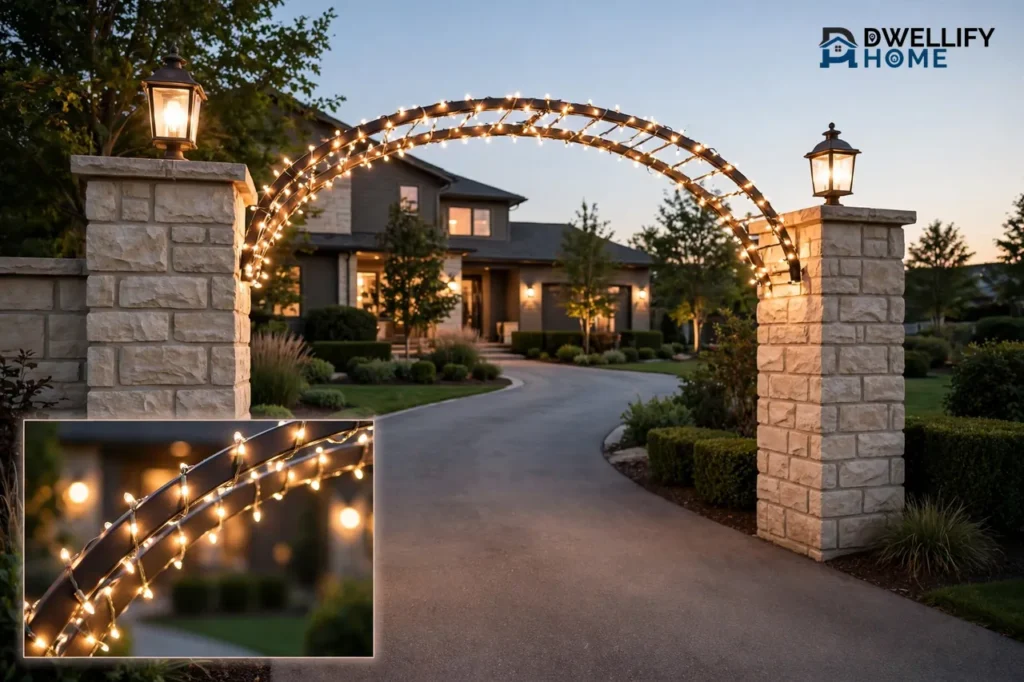
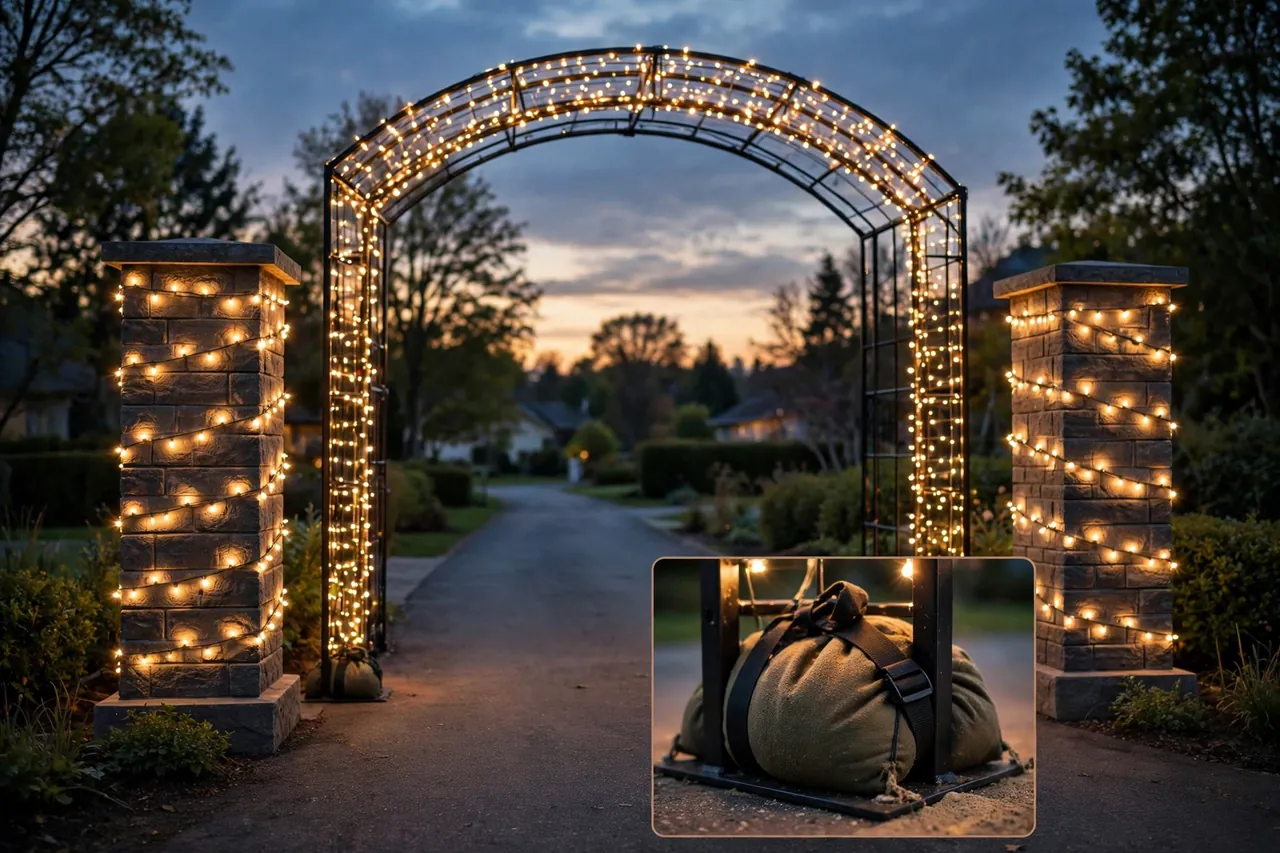
A light arch over the driveway makes arrival feel like an event. Build it from a frame bent into an arch and wrapped in string lights, and wrap the frame evenly before you stand it up. Wrapping on the ground is far easier than wrapping overhead.
Before you build an arch, check clearance with care. Plan for at least 12 feet of clear height under the arch, and make the arch wider than the driveway itself. Measure your tallest vehicle, including roof boxes, and add generous room above it. If you feel unsure about clearance, stability, or wiring, skip the arch and use two light-wrapped columns instead. You get a similar framed entrance with none of the risk.
Anchor both feet of an arch firmly with stakes or sandbags so wind cannot shift it. Keep every cord and connection off the ground and out of tire paths, and never let the arch narrow the driving lane. Guests, delivery drivers, and emergency vehicles still need full, clear access.
Heavy entrance pieces need real holding power in winter wind. Our guide to weights for outdoor Christmas decorations explains how to anchor driveway markers and arches so they stay put through storms.
Greenery and Planters at the Driveway Entrance
Greenery softens the hard edges of a driveway and makes lights look richer. Keep the greenery on the driveway itself: its borders, its entrance, and the planters that flank it.
Flank the driveway entrance with two matching planters filled with fresh evergreen branches, pinecones, and a few red berries. The pair frames the turn-in like gateposts, and the evergreen scent greets guests before they even reach the door. Match the two planters in size, plant, and decoration so the entrance reads as one deliberate design.
Run a simple evergreen garland along a low fence or wall that borders the driveway, and weave a single strand of warm white lights through it. One garland line, evenly lit, beats a tangle of competing decorations. If your driveway has no border fence, lay a garland swag across the entrance pillars or gateposts instead.
For planter and border greenery ideas that suit an entrance, see our guide to Christmas decorations for outdoor planters and our guide to outdoor Christmas greenery. Both focus on the plants and containers at the edges of outdoor spaces, which is exactly where driveway greenery belongs.
Keep greenery trimmed back from the driving lane. Branches that droop over the pavement snag mirrors, scratch paint, and drip water onto lights. A quick trim before you decorate saves damage all season.
Water fresh greenery when you can, and check it after dry, windy spells. Dry branches near lights are a fire risk, so replace any arrangement that turns brown and brittle. Fresh greenery smells better and looks better anyway.

Power, Weather, and Safe Cords
Driveway lights live at ground level, where rain, snow, and feet all reach them. Safe power habits matter more here than anywhere else in your display.
Before you plug in any outdoor light, check the label for outdoor use and for a recognized testing lab mark, such as UL or ETL. Indoor-only lights and cords lack the moisture and cold protection outdoor gear has, and they fail fast outside, even under a covered area.
Plug every outdoor light into a GFCI-protected outlet. The U.S. Consumer Product Safety Commission (CPSC) advises plugging outdoor electric lights and decorations into circuits protected by ground-fault circuit interrupters (GFCIs) for added protection against electric shock, and you can read the CPSC holiday safety tips for the full list. Test the GFCI with its test button before the season starts, and replace it if it will not trip or reset.
Inspect every strand before you install it. Look for cracked sockets, frayed or bare wires, and loose connections, and throw out any damaged set. The CPSC gives the same advice for new and old sets alike, because last year’s damage hides in storage.
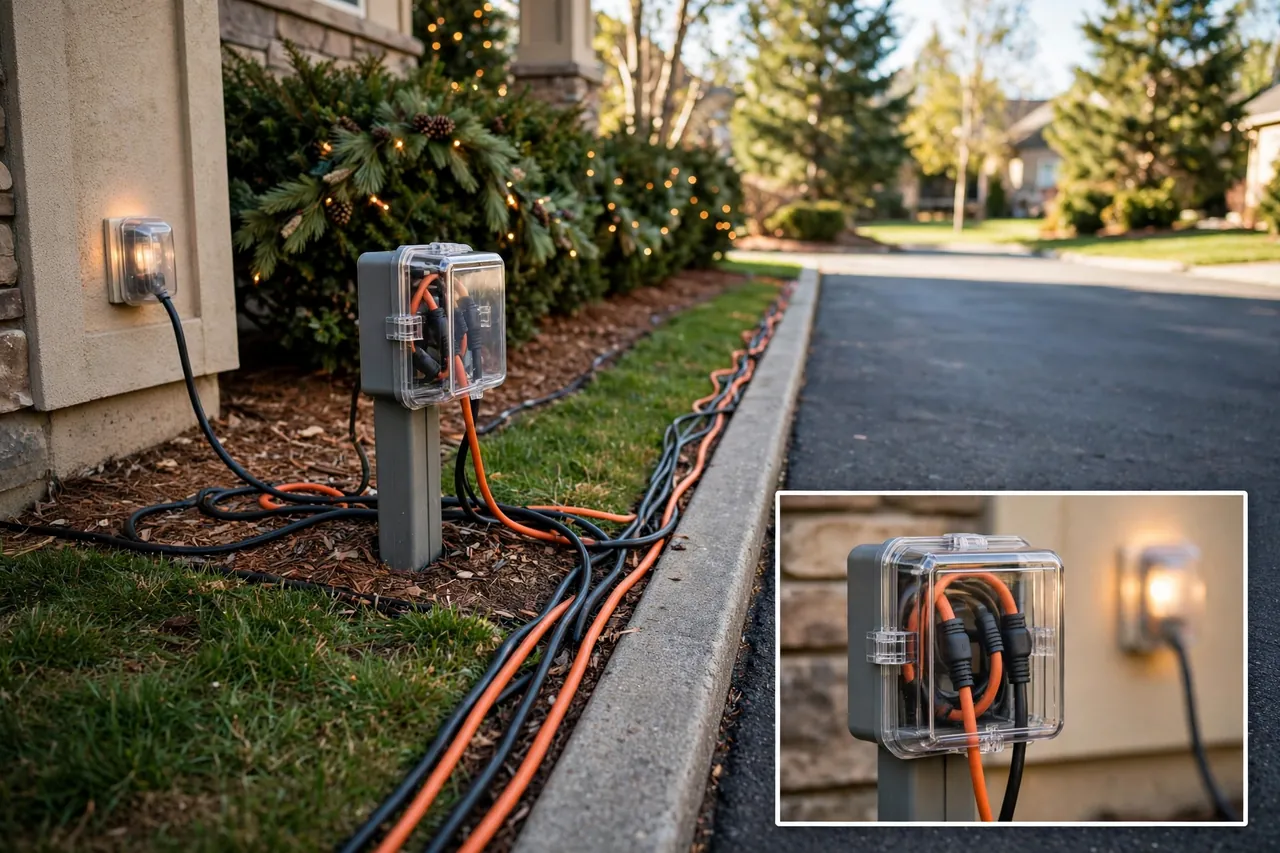
Keep connections dry, raised, and out of tire paths. House plug connections in weatherproof boxes or bubble covers, lift them off the ground, and route cords along walls, grass edges, or mulch beds. Never let a connection sit in a puddle or a snowdrift.
Respect the limits printed on the box. The CPSC advises using no more than three standard-size sets of lights per single extension cord, and every strand has a maximum number of sets you can link together. Going past that limit overheats wires and trips breakers. Use a timer so the display turns off when you go to bed or leave the house, which the CPSC also recommends.
For a broader safety checklist covering outlets, cords, and holiday lights, the Electrical Safety Foundation International (ESFI) publishes holiday safety guidance that echoes the same core rules: outdoor-rated gear, GFCI protection, inspected cords, and no overloaded outlets.
Keep Cars, Feet, and Snow Tools Safe
A driveway is a working surface first and a display second. Every decoration must survive cars, footsteps, shovels, and plows without creating a hazard.
Never run a light strand or cord across the driving surface. Cars crush bulbs, cut insulation, and drag cords across the pavement. If a cord must cross a walking path, cover it with a low-profile cord cover or bridge made for foot traffic, and mark the crossing clearly.
Keep cords out of walking paths wherever you can. Route them through grass or mulch, tuck them under a shallow layer of soil or mulch in soft borders, or fasten them snug to stakes every 18 to 24 inches so nothing dangles or loops. Loose cords cause trips even when guests can see them, because snow and shadows hide them at night.
Talk to everyone who clears your driveway before the first snow. Show snow shovelers and plow drivers where the stakes, cord covers, and markers sit, and agree on a shoveling path that misses them. A stake set 6 to 12 inches back from the pavement edge survives most shoveling, but a plow blade will still catch anything in its path.
Check the display once a week through the season. Look for stakes knocked loose, cords pressed under ice, dark sections that signal moisture in a connection, and damage from tires or tools. Fix small problems early, before they grow into dead sections or hazards.
Choose low, stable decorations for the driveway itself, and save tall, tippy pieces for spots cars never reach. A decoration that falls into the driving lane at night is a hazard for the next driver who turns in.
Troubleshooting: When Part of the Drive Goes Dark
Most driveway light problems trace back to a short list of causes. Work through these steps in order, cheapest and safest first, and unplug the strand before you touch any bulb, socket, or connection.
- Check the GFCI and timer first. Press the GFCI reset button and confirm the timer is on. A tripped GFCI often means moisture reached a connection, so find and dry that connection before you reset again.
- Look for a loose bulb or a dark section. Reseat loose bulbs gently, and check the fuse in the plug if the whole strand is out. Replace a blown fuse with the exact type the maker specifies.
- Inspect for water in connectors. Open each connection box, dry it fully, and reseal it raised off the ground. A connection that keeps filling with water needs a new route, not another reset.
- Find the crushed or cut spot. Walk the line and look for tire marks, shovel nicks, or stakes pulled sideways. Move the strand back from the pavement edge and re-anchor it.
- Retire a strand that keeps failing. If one section fails again after you fix bulbs, fuses, and connections, take that strand out of service. Repeated field repairs on outdoor wiring add risk, and a fresh strand costs less than a hazard.
Take the Display Down and Store It Right
Take driveway lights down soon after the holidays, while you still remember how they ran. Work from the far end back toward the outlet, remove clips and stakes one by one instead of yanking strands free, and test each strand before you store it.
Wind each strand neatly on a reel or in a loose coil, and label it by location, such as “Driveway Left” or “Driveway Entrance.” Next year’s setup goes twice as fast when every strand already knows where it belongs.
Clean plugs and connectors with a dry cloth, and store everything in a cool, dry place in sealed containers. Moisture left in sockets corrodes contacts over winter, and mice love nesting in loose coils. Good storage is what makes this year’s display work again next year.
Please Read This Before You Plug In
Outdoor electrical decorations carry real shock and fire risks, especially at ground level where water, snow, and traffic reach them. Use only outdoor-rated, lab-tested lights and cords, plug them into GFCI-protected outlets, inspect them before use, and turn them off when you go to bed or leave the house. If your outlet lacks GFCI protection, your wiring looks damaged, or you feel unsure about any electrical step, ask a qualified electrician for help before you plug anything in. This guide shares general decorating advice, not electrical advice for your specific home.
Related Guides
Outdoor Lit Christmas Gifts: Light-Up Gift Boxes That Glow All Season · Outdoor Christmas Greenery: Garlands, Wreaths, and Swags That Last the Season · Weights for Outdoor Christmas Decorations
Frequently Asked Questions
Can I leave Christmas lights on my driveway all winter?
Most seasonal driveway lights are not built for all-winter duty. Snow, ice, and repeated freeze-thaw cycles wear down insulation and connections, so take the display down after the holidays and store it dry. Only lights rated for permanent outdoor installation should stay up longer.
Are battery-operated lights a safer option for driveways?
Battery lights remove cords and shock risk, which makes them safer in theory, and they work well for luminaries and small accents. They often lack the brightness and runtime for a full driveway outline, though, and cold weather drains batteries faster. Use them for accents, not for the whole drive.
What should I do if a section of lights stops working?
Unplug the strand first, then check for loose bulbs, damaged sockets, or water in the connectors, and inspect the plug fuse. If the problem persists after those checks, retire that section instead of patching outdoor wiring again and again. A fresh strand is cheaper and safer than a repeated repair.
How do I make paper bag luminaries for Christmas?
Fold down the top inch of a white or brown paper bag, pour about two inches of sand into the bottom, and set a battery-operated LED tea light inside. Space the finished luminaries about four feet apart along both sides of the driveway. Use LED lights, not real candles, for safety.
How tall should a driveway light arch be?
Plan for at least 12 feet of clear height under the arch, and build the arch wider than the driveway itself. Measure your tallest vehicle first, including any roof box, and leave generous room above it. If clearance or stability feels uncertain, use two light-wrapped columns instead of an arch.
A well-decorated driveway does not need the most lights on the street. It needs a clear plan, lights set safely back from the pavement, one strong entrance feature, and cords that nobody trips over or drives over. Start with the light lines this weekend, add luminaries for warmth, and finish with the entrance. Then step back to the street at dusk and enjoy the arrival you built.