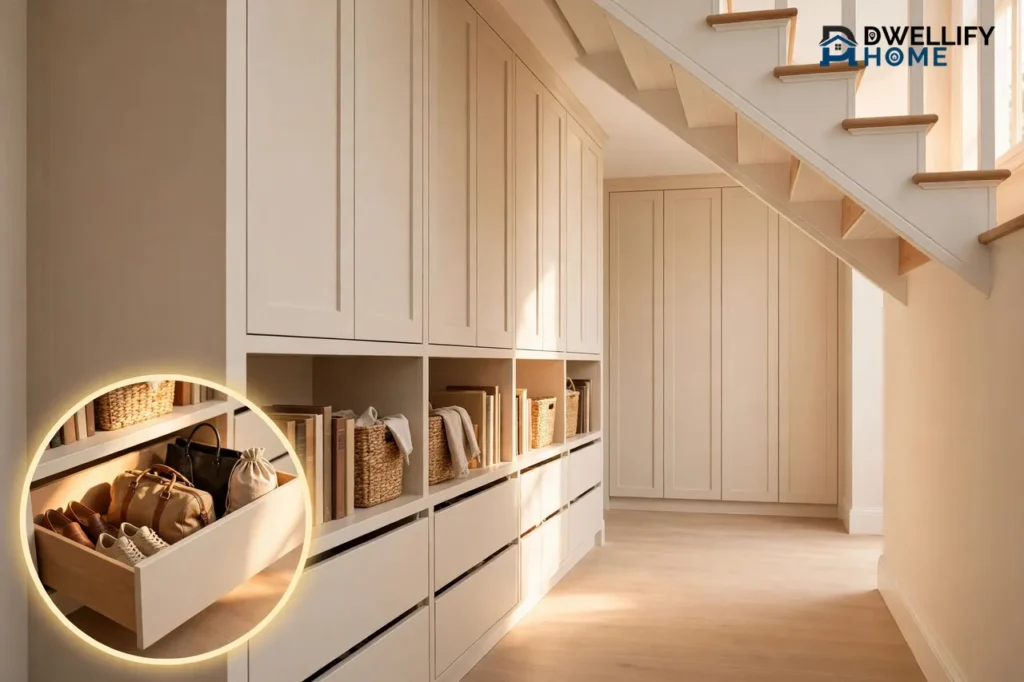
The best under stairs storage ideas turn that sloped, often wasted space into storage you actually use every day. Pull-out drawers, closed cabinets, open shelves, a closet, or a reading nook with storage all work, and the right pick depends on your stair shape, your headroom, and what you need to store.
Start with one clear job for the space, measure it well, and then choose storage that fits the slope instead of fighting it. That simple order keeps the project useful, tidy, and easy to live with long after you finish it.
Start by Measuring and Planning the Space
Good under-stairs storage starts with a tape measure, not a shopping trip. The space under a staircase is almost never a neat rectangle, so you need real numbers before you buy bins, shelves, or drawers.
Measure the height at the tallest end, the height at the lowest end, the full width, and the depth from the front face to the back wall. Then measure again at a few points along the slope, because the ceiling drops a little with each step. Write each number down and sketch the shape on paper, slope included.
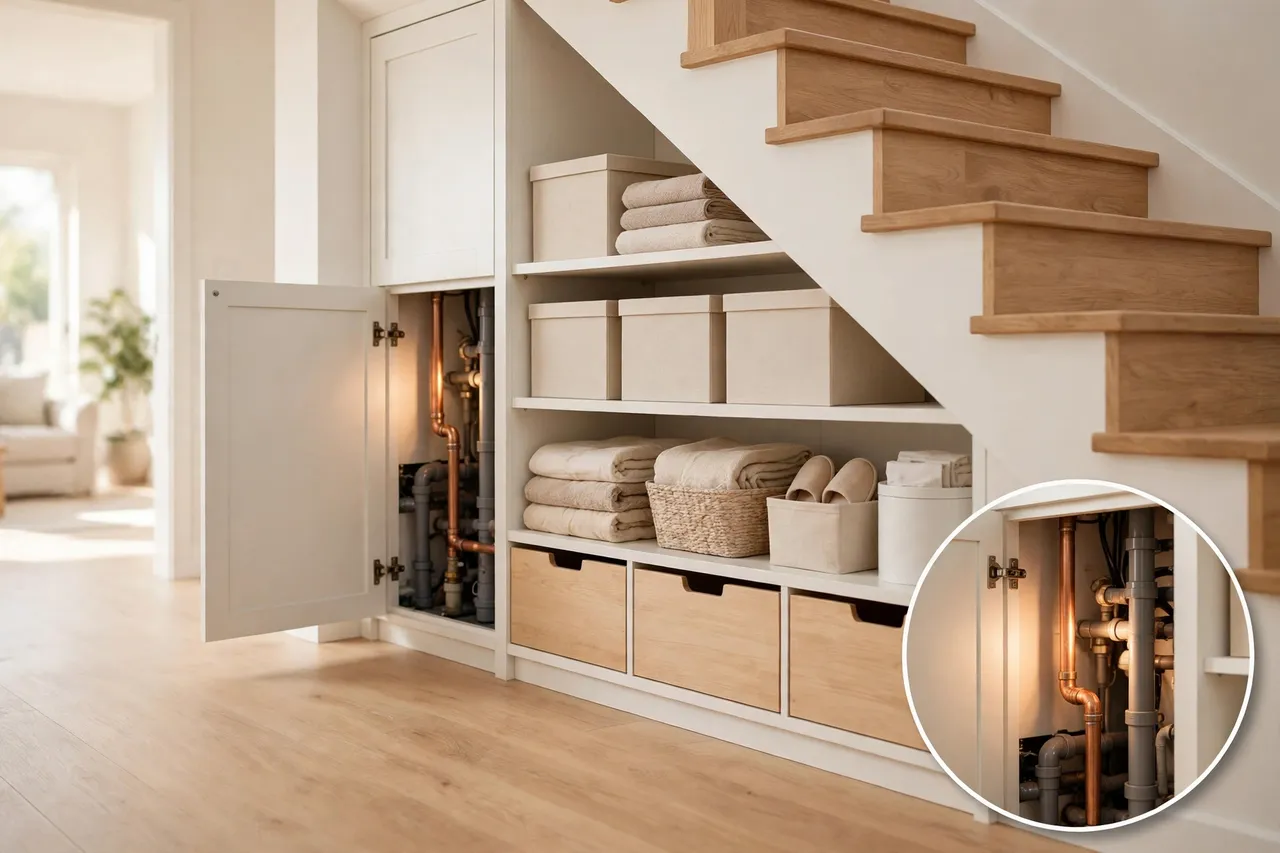
Next, check what already lives inside that space. Look for pipes, wires, ducts, heating equipment, and access panels for plumbing or wiring. Do not cover an access panel with a fixed cabinet, and do not move pipes or wires yourself. If you find any of these, plan around them or ask a qualified pro for advice before you build.
Also think about how you reach the space. A deep closet with one small door can hide a lot, but you may dread digging to the back of it. Pull-out storage brings the contents to you, so it often wins in deep, low spaces. Public Storage makes the same planning point: measure the height, width, depth, and slope first, then give the space one clear purpose before you add bins, shelves, or cabinets.
Finally, sort what you plan to store before you build anything. Group shoes, coats, cleaning tools, books, toys, and seasonal items, and set aside anything you no longer need. You will buy less storage, and the storage you buy will fit the real stuff, not a guess.
Match the Plan to Your Stair Shape
Straight stairs give you one long, sloped run, so a row of drawers or cabinets along the wall often works best. You can put tall storage at the high end and low drawers at the low end, and the whole run can look like one neat built-in.
L-shaped stairs, with a landing and a turn, give you two zones to plan. Treat the landing area and each straight run as its own small project, and keep a clear path through the turn. A closet under the landing can hold tall items, while drawers under the lower run can hold shoes and daily gear.
Spiral or very steep stairs leave a smaller, more awkward triangle. In that case, keep the plan simple: a few open shelves, a small cabinet, or rolling bins you can pull out. A complex built-in rarely pays off when the space is tight and hard to reach.
Pull-Out Drawers: The Easiest Storage to Reach
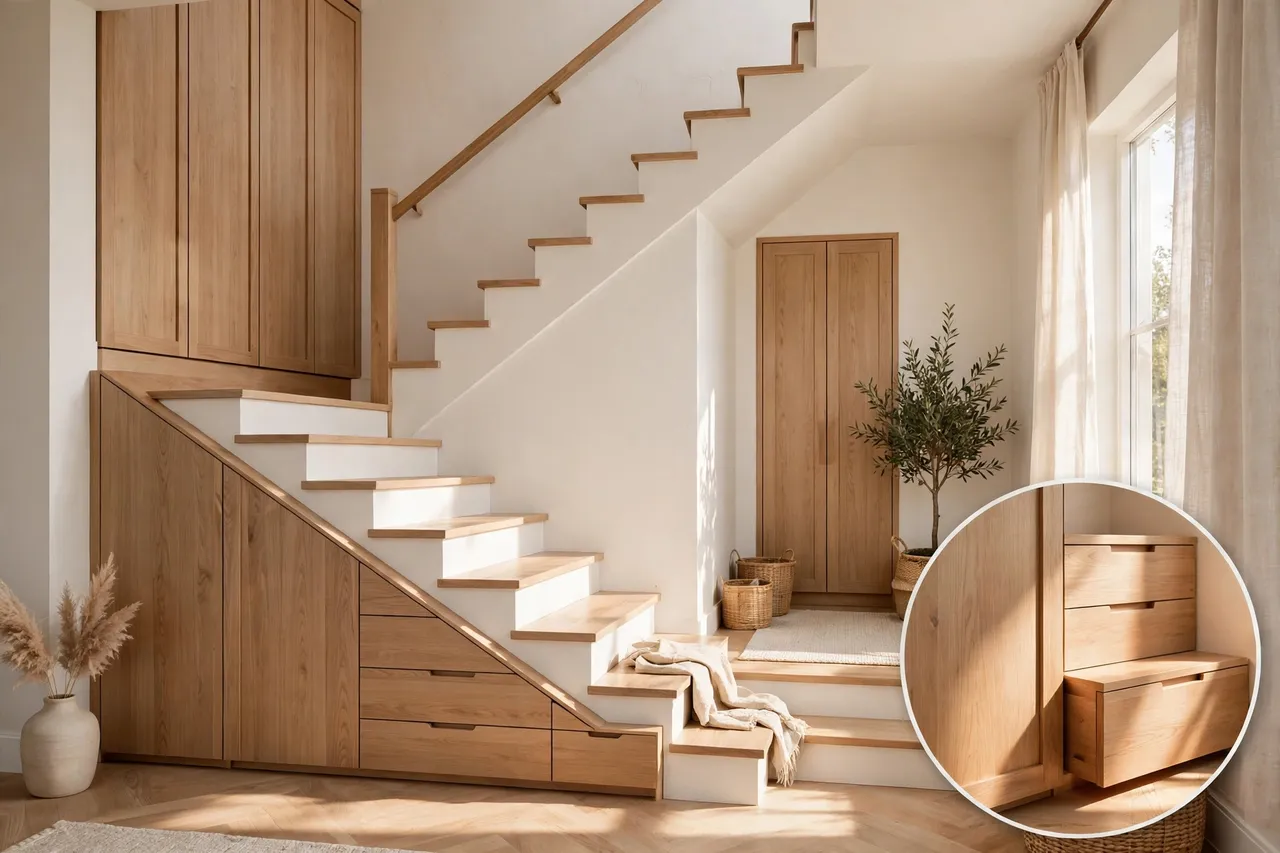
Pull-out drawers are the star of most under stairs storage ideas, and for good reason. A drawer slides out toward you, so you can see and grab what sits at the very back without crawling into a dark cupboard.
Use shallow drawers near the entry for shoes, bags, and daily grab-and-go items. Use deeper drawers for bulky things like sports gear, cleaning tools, or board games. In the lowest, hardest-to-reach section, a low drawer still beats an open hole, because you can pull the whole drawer out and sort it at waist height.
Choose strong drawer slides that match the weight you plan to store. Shoes and books get heavy fast, so check the slide rating before you buy, and pick full-extension slides when you can. Full-extension slides let the drawer come all the way out, which matters most in deep under-stairs spaces.
For a beginner project, start with one or two drawers rather than a full wall of them. You will learn how your stairs measure up, how the slides feel, and how much your household actually uses the space. You can always add more drawers later, in the same style.
Storage units for under stairs come in many forms, but a pull-out unit earns its place when you need daily access. If you only open the space twice a year, a simple lidded bin may serve you just as well, for far less work.
Closed Cabinets and Closets for a Clean Look
Closed cabinets and closets hide clutter and make a hallway look calm. They work best for things you want out of sight: cleaning supplies, vacuum parts, seasonal decor, extra linens, and luggage.
A tall door at the high end of the stairs can create a real closet. Hang coats there, or add a rod and a shelf above it for bags and hats. At the low end, add a short cabinet or a drawer so no height goes to waste.
Match the cabinet fronts to the room around them. Flat, plain fronts in the same paint color as the wall blend in and read as part of the house, not as an add-on. Push-latch doors work well when you want a clean face with no handles, but handles help kids and older family members open heavy doors with ease.
Keep one rule in mind: every closed door needs a reason to open. If you seal off a section and never use it, that section will fill with forgotten boxes. Label the inside of each door, or keep a short list of what lives behind it, so the tidy look stays honest.
Open Shelving for Books, Baskets, and Display
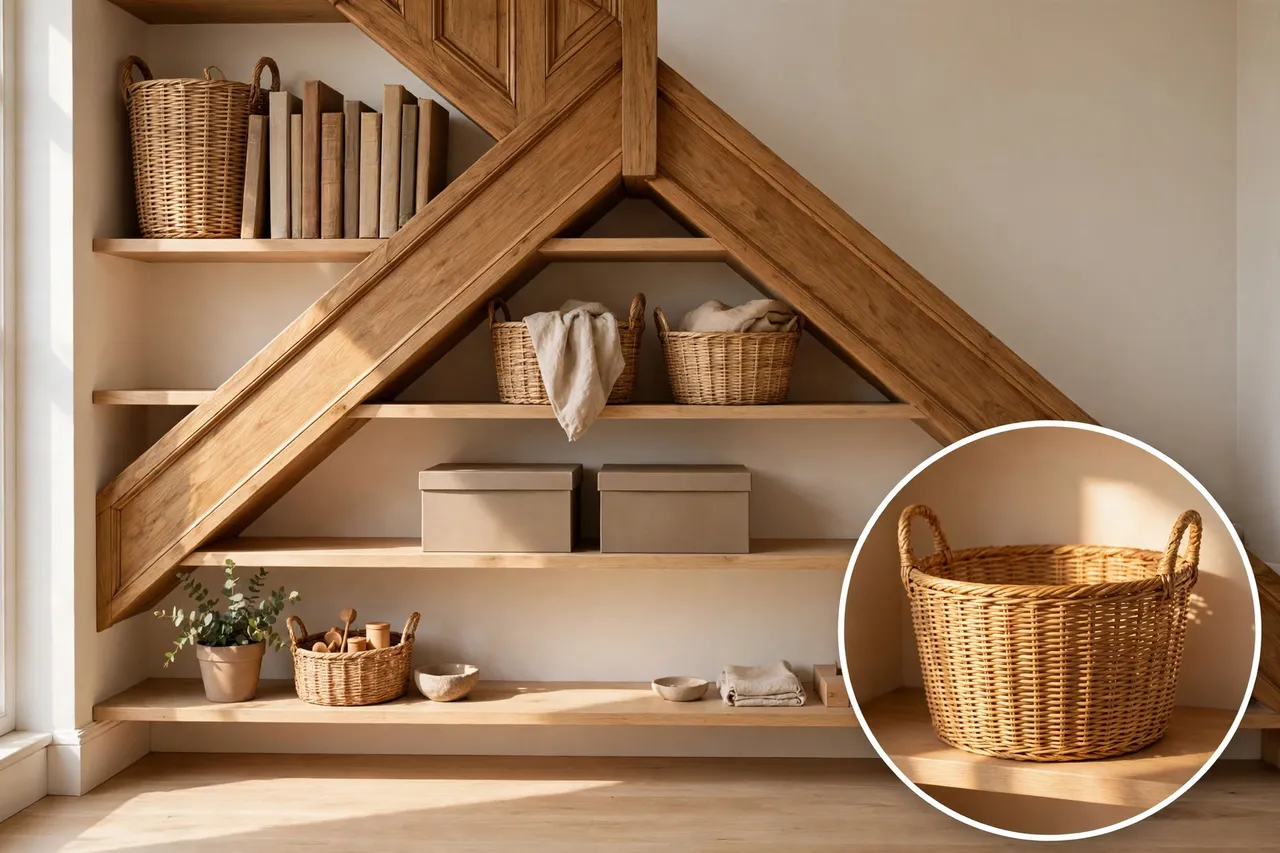
Open shelves suit things you grab often and enjoy seeing: books, baskets, plants, board games, and pretty storage boxes. They also suit renters, because you can often build the look with freestanding shelves or wall shelves instead of a fixed built-in.
Keep shelves shallow in the deepest part of the slope. A shelf that runs too deep turns into a dark tunnel where items slide to the back and stay there. Shallow shelves, baskets with handles, and labeled bins keep each shelf useful.
Use the slope to your advantage. Place tall books and baskets at the high end, and short items at the low end, so the shelf line follows the stairs. Leave a little breathing room on each shelf, too. A shelf packed edge to edge looks busy and makes it hard to pull one item out without knocking over three more.
Open storage does collect dust, so it fits best in rooms you clean often, like a living room or entry. For dusty spots, like a stairwell near a garage door, closed doors may serve you better.
Turn the Space into an Entryway Drop Zone
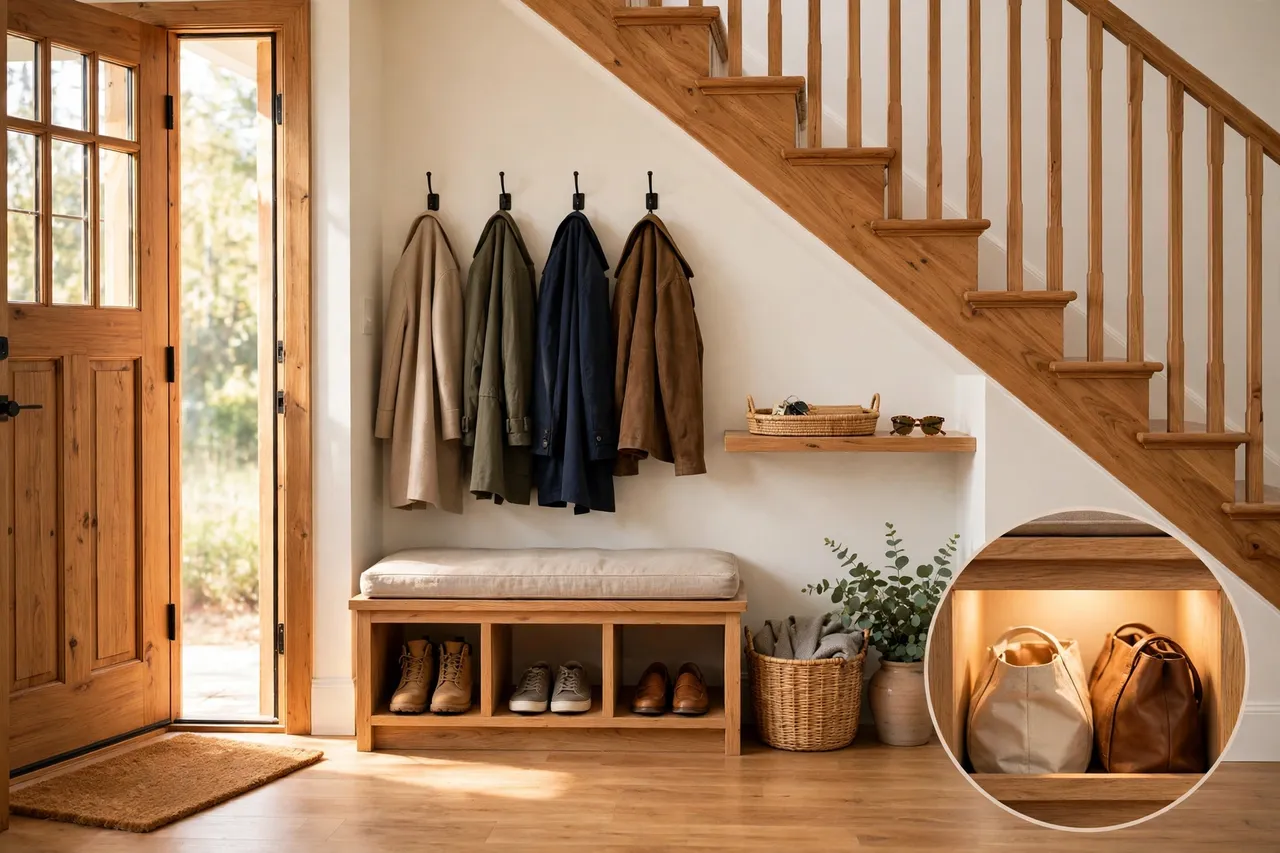
Stairs near the front door give you a natural drop zone for coats, shoes, bags, keys, and umbrellas. This setup solves the daily pile by the door, because each item gets a home the moment you walk in.
Build the zone around your routine. Add hooks or a tall cabinet for coats, drawers or cubbies for shoes, and a small shelf or tray for keys, mail, and sunglasses. A bench with storage under the seat adds a place to sit while you put shoes on, and it hides bags and seasonal gear at the same time.
Keep the walkway clear. The drop zone should pull clutter off the floor, not push storage into the path you walk. Leave enough room to pass with bags in hand, and keep shoe storage close to the door so wet shoes never travel far across the floor.
If your entry also needs a slim surface for a lamp or a bowl for keys, a narrow console can help. Dwellify Home’s guide to a table for consoles covers sizing and storage features for entryways and hallways, which pairs well with an under-stairs drop zone.
Reading Nooks, Work Nooks, and Cozy Corners
Not every under-stairs idea must hide things away. When the tall end gives you enough sitting height, a reading nook with storage can become the coziest spot in the house.
Start with a bench that fits the slope, and build storage into the bench itself. Drawers under the seat hold books, blankets, and chargers, while shelves beside the bench hold the books you reach for most. Add a cushion, a throw, and a small lamp, and the nook feels done, not just stored.
Check sitting height before you commit. Sit on a chair of the height you plan to use, and make sure you can sit up straight without bumping your head on the slope. If you cannot sit up fully, use the spot for storage instead, and save the reading chair for a room with full height.
A compact work nook follows the same logic. A small desk under the tall end, with shelves above and a drawer below, can hold a laptop, notebooks, and chargers. For small-space desk ideas, Dwellify Home’s corner of a desk ideas show how a tight corner can still work well as a focused work zone.
Keep cords tidy in any nook. Run a power strip where you can reach it without crawling behind the bench, and keep the cord path away from walkways so no one trips over it.
Pantry, Utility, and Seasonal Storage
Stairs near the kitchen can hold a pantry overflow zone: canned goods, small appliances you use once a week, table linens, and serving pieces. Use pull-out shelves here, because pantry items hide fast on deep, fixed shelves.
Stairs near a laundry area or back door can hold a utility closet instead. Cleaning tools, a vacuum, mops, and detergents fit well in the tall section, while low drawers hold rags, spare bulbs, and small tools. Keep cleaning products in closed cabinets, away from kids and pets, and never store them next to food.
Seasonal items belong in the lowest, least-used section. Holiday decor, winter coats in summer, camping gear, and luggage do not need daily access, so they can live in the deep, low triangle. Label each bin clearly, and keep a short list on the inside of the door so you never have to unpack three bins to find one box.
Do not store damp, dirty, or heat-sensitive items under the stairs. Store only clean, dry household items there, and keep the space dry. If the area smells musty or shows damp spots, fix the moisture source first, before you fill it with boxes.
Doors or Open Storage: How to Choose
Doors and open storage each solve a different problem, so pick by what you store and how often you reach it. The table below sums up the trade-off in plain terms.
Caption: Doors vs. open storage under the stairs
| Feature | Closed doors | Open storage |
|---|---|---|
| Best for | Clutter, cleaning tools, seasonal bins | Books, baskets, daily shoes and bags |
| Look | Calm, tidy, built-in | Open, airy, easy to scan |
| Access | Slower, one door at a time | Fast, grab and go |
| Upkeep | Less dust inside | Needs regular dusting |
| Best mix | Doors on the low, deep section | Open shelves at eye level |
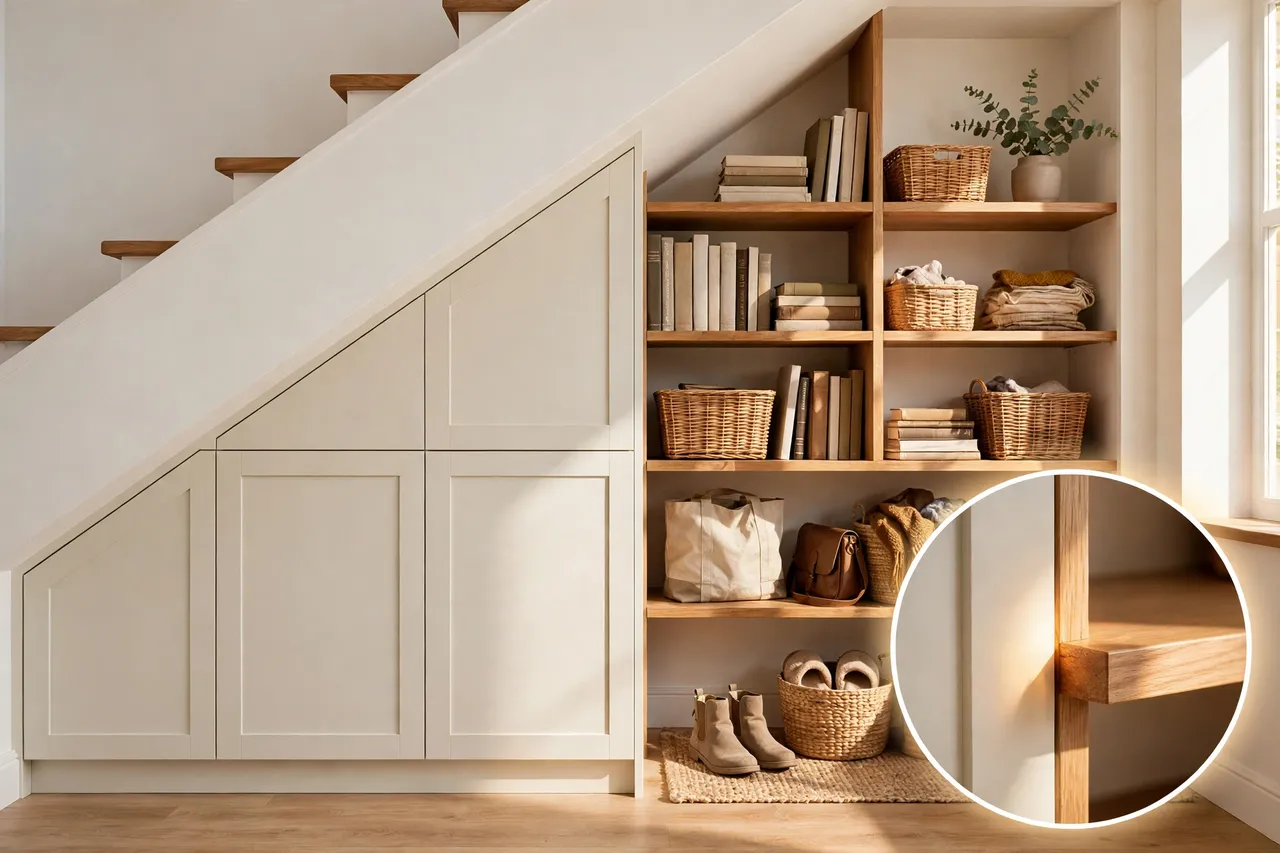
Many homes land on a mix: closed doors where the slope gets low and dark, and open shelves where you can see and reach things with ease. That mix gives you the tidy look of cabinets and the speed of open storage, in the same run.
Sliding doors can help in a narrow hallway, because they never swing into your path. Hinged doors suit wider spaces, where you can open a full section at once. Test the swing with a piece of cardboard before you buy doors, and make sure no door blocks a light switch, a vent, or an access panel.
Lighting and Access Make or Break the Space
Dark under-stairs storage goes unused, no matter how pretty it looks. Light turns a dark triangle into a space you actually open, so plan lighting early, not as an afterthought.
Battery puck lights work well for a first step, because you need no wiring to try them. Stick-on lights inside a cabinet or under a shelf show you where light helps most, and you can move them until the layout feels right. For a permanent fix, a wired light with a switch near the opening beats a light you must reach deep inside to turn on.
Keep access simple, too. Label bins, use handles you can grip with one hand, and leave a clear space in front of drawers and doors. If you must move furniture or crouch under a slope to open a drawer, you will use that drawer less and less over time.
Caution: if your lighting plan needs new wiring, a new circuit, or work inside a wall near pipes or ducts, stop and get a qualified electrician. Wiring mistakes can cause fires, and they can hide inside a wall where you cannot see them. A pro can also tell you whether a light will fit safely under the slope without breaking headroom rules for the stairs above.
Beginner DIY or Pro-Built: Know the Boundary
Beginner-friendly projects stay on the surface: freestanding shelves, rolling bins, baskets, a bench with storage, and simple wall shelves fixed to studs. These projects need basic tools, a level, and careful measuring, and you can undo most mistakes with little damage.
Intermediate projects add fitted drawers, cabinet boxes, and trim work that follows the stair slope. These take more time and skill, because each drawer must fit a different height. Family Handyman’s under-stairs pull-out project shows this kind of build, with drawer boxes sized to the opening and heavy-duty slides to carry the load.
Caution: stop and call a qualified pro before you cut into a stair stringer, remove a wall, move a support post, or change anything that holds the stairs up. This Old House gives the same warning in plain terms: before you start a built-in under the stairs, make sure the stairs are self-supporting and no hidden wiring or ductwork sits in the way. Structural stair work is not a beginner job, and a wrong cut can weaken the stairs or break local building rules.
Renters should check their lease and ask the landlord before they fix anything to the wall or alter a closet. Freestanding shelves, rolling carts, and bins give renters most of the benefit with none of the repair risk at move-out time.
When you hire a pro, ask for a drawing with real dimensions, a list of materials, and a clear note on which access panels stay reachable. That drawing protects you if the finished built-in hides a panel or blocks a vent you need later.
Mistakes That Waste Under-Stairs Space
The most common mistake is building storage before you sort what goes in it. Boxes move in, doors close, and a year later no one knows what sits behind them. Sort first, label always, and keep a short list of what each section holds.
The second mistake is blocking access panels, vents, shut-off valves, or electrical panels. These parts need to stay reachable in an emergency, so never seal them behind a fixed cabinet. Build around them, or use a removable panel that you can lift off in seconds.
The third mistake is overloading drawers and shelves. Heavy books, tools, and canned goods add up fast, and weak slides or thin shelves sag, stick, or break. Check weight ratings, spread heavy items across several drawers, and keep the heaviest items low, where they put less strain on the fitting.
The fourth mistake is ignoring headroom and walkways. Storage that juts into a hallway trips people, and a reading nook with no sitting height frustrates everyone who tries it. Keep paths clear, test sitting height in person, and leave the stair path itself fully clear at all times.
The fifth mistake is storing the wrong things: damp gear, food that attracts pests, paint and chemicals near heat, or anything that needs a cool, dry, ventilated spot. Under-stairs spaces can trap heat and dust, so keep chemicals, fuel, and open flames out of them, and store only clean, dry household items there.
Quick Troubleshooting: When Under-Stairs Storage Stops Working
Use this list when your storage starts to feel more like a chore than a help. Work from the top down, because the safest and cheapest fixes come first.
- Drawers stick or sag: empty the drawer, check the slides for loose screws, and move heavy items to a lower drawer. Replace bent or weak slides with a higher-rated pair before you reload.
- Items vanish at the back: switch deep fixed shelves to pull-out drawers, rolling bins, or shallow baskets, and label the front of each one.
- The space smells musty: empty it, dry it fully, and find the moisture source before you put anything back. Do not seal damp items behind new doors.
- Doors bump the walkway: swap hinged doors for sliding doors, or move the storage back so the door swing stays out of the path.
- You avoid opening it: the job is wrong, not you. Re-sort the contents, give the space one clear purpose, and move daily items to the front and seasonal items to the back.
- You find pipes, wires, or a panel behind the wall: stop cutting, leave the panel reachable, and ask a qualified pro before you build over it.
💡 Practical Home Tip: Give every under-stairs section one job and one label, and keep daily items at the front where your hand lands first. When a drawer or bin starts to fill with random extras, empty it once, sort it in five minutes, and put back only what matches the label. That small habit keeps the whole run useful for years.
Related Guides
How to Organize a Small Apartment · How to Organize a Bookshelf · Cheap Garage Organization Ideas That Work on a Tight Budget
Frequently Asked Questions
What can you do with the space under your stairs?
You can turn it into organized storage, an entryway drop zone, a bookshelf, a compact workspace, a reading nook, or a spot for household supplies. The best option depends on the staircase location, its dimensions, and the items you want to keep nearby, so match the idea to the room first.
What is the best use for space under the stairs?
The best use matches the nearby room and your daily routine. Stairs near the front door suit coats and shoes, stairs near a living room suit books or a reading nook, and stairs near a kitchen suit pantry overflow. Pick the job that solves the clutter you see every day.
Can I put storage under any staircase?
Not quite. Storage under some stairs, especially stairs that serve as a required exit, may face stricter rules on enclosure, fire separation, and clear space. Check your local building rules and keep escape paths clear, and ask a qualified pro if your stairs serve as an exit route.
What can you store in under-stairs drawers?
You can store shoes, coats, bags, cleaning products, tools, toys, pet supplies, school gear, and seasonal items. Keep heavy items in drawers with strong runners and proper support, keep cleaning products in closed drawers away from kids and pets, and store only clean, dry items there.
How much does it cost to build under-stairs storage?
The cost varies too much for one honest number, because it depends on size, materials, and whether you build it yourself or hire a pro. Simple DIY shelving and bins cost the least, fitted drawers cost more, and a full custom built-in costs the most. Get two or three quotes for pro work before you commit.
Disclaimer: This article gives general home storage guidance only, and homes, stairs, and local building rules vary. For structural stair work, wiring, plumbing, or anything that affects a safe exit path, ask a qualified professional and check your local rules before you cut, move, or cover anything.
Start with the tape measure, pick one clear job for the space, and build the simplest version that solves your daily clutter. Once that version works, you can add drawers, doors, or a nook with confidence, because you will know exactly what your stairs, and your household, actually need.