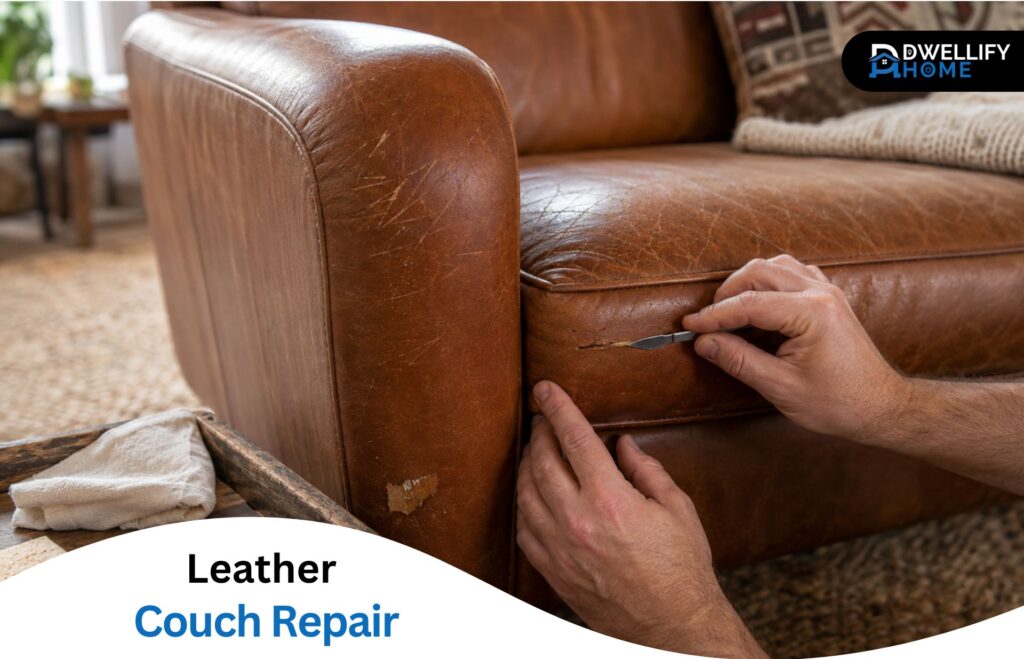
A pale scuff, a deep claw mark, a clean tear, and a peeling cushion may look like versions of the same problem, but they need different repairs. Successful leather couch repair starts by identifying the upholstery and determining whether the damage affects only the finish or reaches the material underneath.
The following methods will help you choose a realistic DIY fix, avoid incompatible products, and recognize damage that belongs in professional hands.
Short Definition
Leather couch repair is the process of cleaning, stabilizing, filling, recoloring, or patching damaged upholstery to improve scratches, cracks, tears, holes, or peeling while preserving the couch when practical.
Mission Statement
DwellifyHome helps homeowners, renters, and home lovers create practical, stylish, and comfortable spaces through clear, trustworthy guidance.
Quick Repair Checklist
- Identify the upholstery material and finish.
- Determine whether the damage is superficial or structural.
- Check the manufacturer’s care instructions.
- Test repair products in a concealed area.
- Match the repair method to the damage.
- Follow the stated drying and curing times.
- Choose professional help for extensive or high-risk repairs.
Can a Leather Couch Be Repaired?
Yes, many leather couches can be repaired when the damage is limited to scratches, color loss, small cracks, or an isolated tear. The result depends on the upholstery, damage depth, location, and surrounding condition. Widespread bonded or faux leather peeling is harder to repair because the surface may continue separating elsewhere.
Run a fingertip gently across the damaged area. A mark you can barely feel may involve only the color or finish. Rough edges, a recessed groove, visible fibers, or exposed fabric usually indicate deeper damage.
| Damage | Likely approach | Realistic result |
| Light scuff or scratch | Cleaning and a finish-compatible care or color product | Often becomes less noticeable |
| Deep scratch or crack | Binder or flexible filler, followed by color and finish | Can be blended but may remain visible |
| Small clean tear | Flexible adhesive, often with a sub-patch | May form a strong repair away from seams |
| Hole or missing material | Sub-patch, filler, color, and finish | More difficult to conceal |
| Widespread peeling | Temporary resurfacing, covering, reupholstery, or replacement | Spot repairs may not stop continued peeling |
Damage along a seam, reclining joint, cushion edge, or favorite seating position deserves extra caution because these areas flex repeatedly.
Identify Your Couch Material Before You Start
Check the manufacturer’s label, receipt, product page, or care documents before judging the material by appearance alone. Terms describing the hide, such as full-grain or top-grain, are not the same as terms describing its surface finish.
Aniline, Semi-Aniline, and Protected Leather
Aniline leather has little surface coating, so it can absorb moisture and develop natural color variation. A treatment that works on protected leather may darken or stain it.
Semi-aniline leather has a light protective finish, while pigmented or protected leather has a stronger surface coating. Scratches on these couches may affect the coating without cutting into the hide.
Use products approved for the specific finish. Valuable aniline leather, two-tone finishes, and unfamiliar specialty leathers are good candidates for professional assessment.
Bonded Leather, Faux Leather, and Vinyl
Bonded leather contains leather fibers combined with binding materials and covered by a manufactured surface. Faux leather is synthetic, while vinyl is another form of coated upholstery.
Peeling on these materials often means the top layer is separating from its fabric backing. Conditioner cannot reconnect that coating. A localized cosmetic repair may improve its appearance, but widespread delamination often continues beyond the repaired spot.
Prepare the Couch and Choose Compatible Repair Products
Preparation affects both adhesion and color matching. Before applying anything:
- Read the couch-care instructions and check whether DIY treatment could affect a warranty.
- Photograph the damage and inspect the surrounding upholstery.
- Test each cleaner, conditioner, filler, and colorant beneath a removable cushion or in another concealed spot.
- Clean the repair area with a product approved for the material, then let it dry fully.
- Gather only the supplies required for that damage, such as flexible adhesive, backing fabric, filler, colorant, or topcoat.
- Follow the product label for ventilation, protective equipment, application, and curing.
Avoid reaching automatically for household oil, shoe polish, craft glue, or a homemade cleaner. A product that disguises one scratch can discolor another finish or interfere with later restoration.
How to Fix Scratches and Scuffs on a Leather Couch
Start by cleaning the area and checking whether the scratch has altered only the finish or exposed the fibers underneath.
Light Surface Scratches and Scuffs
A light scuff usually has no deep groove or raised fibers. Once the surface is clean and dry, apply a small amount of a care or touch-up product approved for that leather finish. Work gradually and inspect the result after it dries.
Conditioner may soften and reduce some marks on compatible, absorbent leather. It may not penetrate protected leather, and it cannot replace missing color or finish. A pigmented surface may instead require a matching color product and protective coating.
Deep Scratches and Pet Claw Marks
A deeper scratch may feel rough or show small raised fibers. Depending on the repair system, the process may involve:
- Cleaning and drying the area.
- Stabilizing loose fibers with a compatible binder or adhesive.
- Filling recessed marks with thin layers of flexible filler.
- Smoothing the cured repair without removing sound surrounding finish.
- Applying matching color in light layers.
- Sealing it with the specified topcoat.
A claw mark on a side panel is generally easier to blend than one on a seat cushion that bends every time someone sits down. Consider professional refinishing when numerous scratches cover a prominent or heavily used area.
How to Repair Cracks and Worn Leather
Creases and dry-looking areas are not always true cracks. Conditioning may improve flexibility on compatible leather, but it won’t close a split or rebuild missing surface material.
For a crack that feels rough or exposes the layer beneath the finish:
- Clean the area and let it dry.
- Stabilize loose fibers if the chosen repair system requires it.
- Apply flexible filler in thin layers rather than one thick coat.
- Allow each layer to cure according to its instructions.
- Smooth the repair carefully.
- Add compatible colorant and finish.
Stop if the surrounding upholstery feels brittle or cracks under light pressure. Widespread weakness on a frequently used cushion suggests that a small surface repair may not hold.
How to Repair a Tear or Hole in a Leather Couch
A lasting tear repair needs support below the visible surface. Simply spreading adhesive over the top can create a stiff line without reinforcing the opening.
Repairing a Clean-Edge Tear
Clean and dry the area, then trim only loose fibers that prevent the edges from meeting. For a tear that opens under pressure, insert a flexible sub-patch beneath it. Rounded patch corners are less likely to create noticeable points under the upholstery.
Apply leather-compatible adhesive between the sub-patch and the underside of the tear. Align the edges carefully and allow the bond to cure. If a groove remains, fill it in thin layers before restoring the color and protective finish.
Repairing a Hole or Missing Material
A hole usually requires a larger sub-patch and more filling than a clean cut. The filler should bridge the visible gap without becoming a thick, rigid mound. Color, grain, and sheen must then be rebuilt over the repair.
Large holes, exposed foam, missing leather, seam failures, and damage near reclining mechanisms are difficult beginner projects. Professional leather repair is more likely to preserve flexibility and produce a convincing color match.
Can You Fix a Peeling Leather Couch?
A peeling couch can sometimes be improved, but first determine whether genuine leather’s finish is damaged or a bonded or faux coating is separating from its backing. Localized finish damage may be refinished. Widespread delamination usually cannot be stopped with conditioner or a small filler patch.
Peeling Finish on Genuine Leather
Genuine leather may lose an applied color or protective coating while the grain beneath remains intact. A compatible refinishing process can involve careful preparation, color restoration, and a new protective finish.
Don’t scrape, sand, or strip the area until the material and finish have been identified. Removing too much can turn a finish problem into damage to the hide.
Peeling Bonded or Faux Leather
Thin flakes lifting away to reveal fabric usually indicate coating failure. A repair system may let you remove unstable material, smooth the exposed area, and recolor it, but this is often a cosmetic treatment. Nearby coating can continue peeling.
For a small hidden spot, a temporary repair may buy useful time. A slipcover can be more practical for multiple damaged panels. Reupholstery may suit a well-built or sentimental couch, while replacement often makes more sense when both the upholstery and cushions are failing.
How to Match the Color, Grain, and Finish
Color matching is only one part of making a repair blend. Texture, sheen, flexibility, and surrounding wear also affect the result.
Test the color in a concealed area and allow it to dry before judging it. Check it in daylight and under the room’s normal lighting. Apply thin layers so the shade can be adjusted gradually.
Use the repair system’s recommended method for recreating grain or texture. The final topcoat should match the surrounding sheen as closely as possible. Prominent, aged, mottled, or two-tone leather may require professional color mixing.
DIY Repair, Professional Restoration, or Replacement?
DIY work is most reasonable for small, isolated damage on clearly identified upholstery. Professional restoration becomes more valuable as the couch’s value, damage size, visibility, or material sensitivity increases.
| Option | Usually makes sense when |
| DIY repair | Damage is small, the material is known, and a slightly visible result is acceptable |
| Professional restoration | The couch is valuable, the color is complex, or damage affects a seam or high-flex area |
| Reupholstery | The frame is well built, but several upholstery panels have failed |
| Replacement | Multiple surfaces, cushions, or structural components are deteriorating |
What Affects Leather Couch Repair Cost?
There is no reliable one-price answer. Cost depends on the upholstery, damage size and location, required disassembly, color and grain matching, local labor, and whether an entire panel must be replaced.
Ask local repair specialists for itemized estimates based on clear photographs. Compare the quote with the couch’s frame quality, comfort, replacement cost, and sentimental value rather than its age alone.
When to Call a Professional or Replace the Couch
Professional assessment is sensible for:
- Large tears, holes, or missing material
- Damage along seams or reclining sections
- Valuable aniline, vintage, or specialty leather
- Extensive color loss or a difficult two-tone finish
- Widespread peeling across several panels
- Uncertain upholstery material
- Broken frames, springs, or reclining components
- A failed DIY repair that is lifting or discoloring
Leather Couch Repair Mistakes That Can Make Damage Worse
The most common repair problems begin before the filler or colorant is applied:
- Treating every leather-like surface as genuine leather
- Using conditioner as a substitute for repairing a crack or tear
- Applying craft glue that dries stiff
- Using unapproved oils, polish, solvents, or homemade cleaners
- Skipping the concealed compatibility test
- Sanding beyond the damaged surface
- Applying thick filler that can crack at a flex point
- Matching color while it is still wet
- Rushing the specified drying or curing time
- Adding more products after the repair begins failing
Pause when the result changes color unexpectedly, feels tacky after the stated curing period, or starts lifting. Repeated applications can make professional correction more difficult.
How to Protect the Repair and Prevent New Damage
Keep the repaired area unused until every product has cured according to its label. Afterward, clean the couch with manufacturer-approved methods and condition it only when the finish permits.
Limit strong sunlight and direct heat, which can contribute to fading and surface stress. Rotate removable cushions where possible, use a throw on a pet’s favorite seat, and address new scratches before they deepen. Check the repair occasionally for lifting, stiffness, discoloration, or cracking.
Leather Couch Repair FAQs
Is It Worth Repairing a Leather Couch?
Repair is often worthwhile when the damage is isolated and the couch has a sound frame, supportive cushions, quality upholstery, or sentimental value. Replacement may be more practical when bonded or faux upholstery is peeling across several panels or the frame and cushions also require major work.
How Much Does It Cost to Repair a Leather Sofa?
The price varies with material, damage, location, color matching, couch construction, and local labor. A small DIY touch-up and a professionally rebuilt panel are very different projects. Obtain current local estimates and compare them with the couch’s quality and replacement value before deciding.
Do Leather Couch Repair Kits Really Work?
A compatible kit can improve small scratches, cracks, tears, and color loss when the material is correctly identified and the instructions are followed. No kit works equally well on every finish, and a spot treatment generally cannot stop widespread bonded or faux leather delamination.
How Long Does a Leather Couch Repair Last?
Repair life depends on preparation, product compatibility, workmanship, damage location, surrounding material, and everyday use. A repair on a decorative side panel faces less stress than one on a seat seam. Avoid fixed lifespan promises unless they come from the technician or product warranty for that specific repair.
Will the Repaired Area Still Be Visible?
A careful repair can make damage far less noticeable, but complete invisibility isn’t guaranteed. Differences in color, grain, sheen, aging, or texture may remain visible under certain lighting. Professional color matching can improve the result, particularly on prominent, natural, or two-tone leather.
Repair the Right Damage the Right Way
Good leather couch repair is less about finding one powerful product and more about making the correct diagnosis. Identify the upholstery, judge the damage depth, test compatible materials, and set realistic expectations. Small defects may suit careful DIY work, while widespread peeling, structural tears, and valuable furniture deserve professional evaluation.
Disclaimer
DwellifyHome content is for general informational purposes only. Homes, needs, preferences, budgets, and circumstances vary. Consult a qualified professional for safety-sensitive repairs, installations, legal matters, or structural, electrical, plumbing, HVAC, and major property decisions.