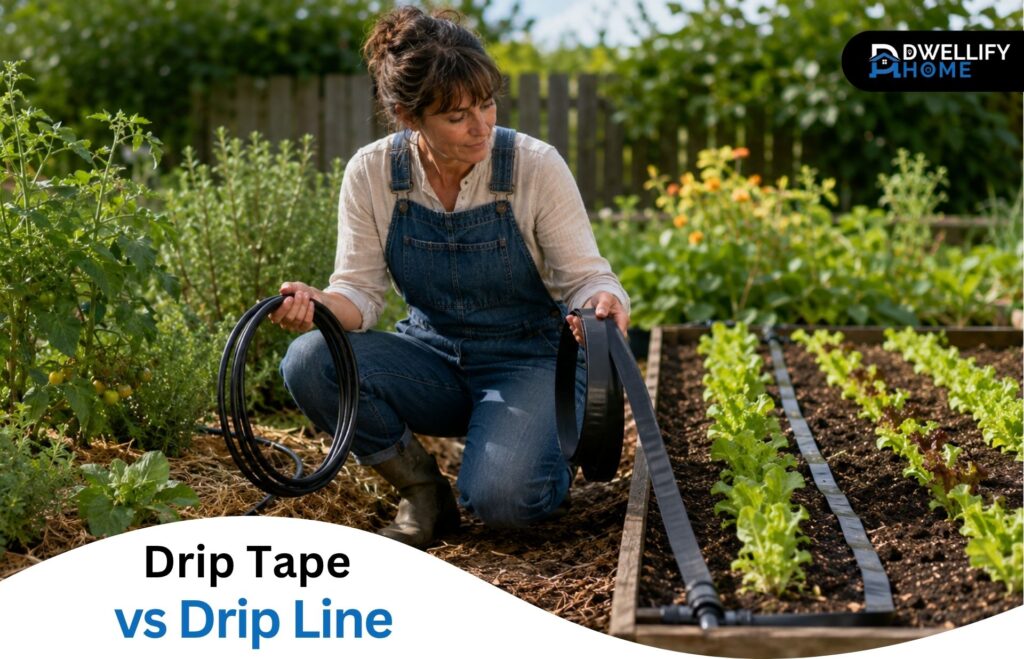
Most watering problems I see on residential properties and small farms don’t come from bad installation — they come from choosing the wrong product before installation even starts. Drip tape and drip line look similar sitting on a shelf. Both are polyethylene tubing. Both deliver water directly to plant roots. But they are designed for different jobs, and using one where the other belongs creates real problems: uneven watering, premature system failure, and wasted money.
Understanding the difference between the two comes down to a few key factors — wall thickness, flexibility, operating pressure, and how long you need the system to last. Once you understand those, the decision becomes straightforward.
Snippet-Ready Definition
Drip tape is a thin, flat tube for straight row crops and seasonal use. Drip line is thicker, more flexible, and built for permanent setups. The right choice depends on your layout, budget, and how long the system needs to last.
Mission Statement
At Dwellify Home, we help homeowners make practical, well-informed decisions about their living spaces — from the garden to the interior. Every guide we publish is written to give you clear, honest information so you can act with confidence, not guesswork.
What Is Drip Tape and How Does It Work?
Drip tape is a thin-walled, flat polyethylene tube with pre-spaced emitters built directly into its walls. It lies flat when empty and fills into a round shape under water pressure. It operates at low pressure — typically 8 to 15 PSI — and delivers water at precise intervals through laser-cut slits or molded channels. It’s one of the most water-efficient options for straight-row plantings.
Drip tape is widely used in commercial vegetable production, market gardening, and cut flower operations for exactly this reason. Water goes straight to the root zone with very little waste.
Why Drip Tape Starts Flat — and What Happens Under Pressure
The flat design is intentional. It makes drip tape lightweight, easy to roll out over long distances, and simple to store at the end of the season. When water starts flowing, the tape expands and becomes firm. When pressure drops, it flattens again.
That same flat design means drip tape cannot curve or bend. It must be laid in straight lines. Trying to work it around corners or through curved beds causes kinking and inconsistent flow — a common mistake that leads people to think the product is faulty when the real issue is the wrong application.
Emitter Design, Flow Rates, and Pressure Requirements
Drip tape emitters are built into the tape during manufacturing, releasing water through a short internal channel that slows flow and reduces pressure loss over long runs.
Most residential drip tape flows at around 0.45 GPM per 100 feet at 8 PSI. That’s effective for vegetable rows and annual crops but not enough for deeper-rooted trees or shrubs. The tape also needs a pressure regulator — without one, standard municipal pressure can cause splits or blowouts at fittings.
Quick Comparison Table
| Feature | Drip Tape | Drip Line |
| Wall Thickness | 4–25 mils | 40+ mils |
| Shape | Flat when empty | Stays round |
| Flexibility | Straight lines only | Curves and bends |
| Operating Pressure | 8–15 PSI | 15–50 PSI |
| Lifespan | 1–5 seasons | 3–8+ years |
| Best For | Row crops, annual vegetables | Landscaping, trees, permanent beds |
| Cost Per Foot | $0.03–$0.08 | $0.15–$0.40 |
Key Decision Factors at a Glance
- Drip tape works best for long, straight, flat-ground plantings with seasonal crops
- Drip line handles curves, slopes, and permanent setups that need to last for years
- Soil type affects which emitter spacing and flow rate your setup actually needs
- Drip tape requires a pressure regulator — standard municipal pressure will damage it
- Drip line with pressure-compensating emitters delivers even water output on sloped terrain
- For raised beds with mixed planting, drip line is the more practical long-term choice
What Is Drip Line and How Is It Different From the Start?
Drip line is a thick-walled, round polyethylene tube with emitters installed at regular intervals inside the tubing. It holds its shape whether pressurized or not, operates at pressures from 15 to 50 PSI, and is built for long-term, multi-season use in both residential and commercial settings. It stays round, stays flexible, and handles real-world terrain in ways drip tape simply cannot.
Unlike drip tape, drip line doesn’t change shape with pressure. It’s a durable product that can curve around beds, weave through plantings, and handle uneven terrain without losing performance.
How Drip Line Is Built to Stay Round and Handle More Pressure
Drip line is typically made from virgin-grade polyethylene with wall thicknesses starting around 40 mils and going higher for commercial-grade products. That thickness resists crushing from foot traffic, kinking around corners, and UV degradation in exposed outdoor conditions.
It can be installed above ground, under mulch, or fully buried underground as part of a subsurface drip irrigation system. Buried drip line delivers excellent long-term performance — it’s out of the sun, protected from equipment damage, and nearly invisible once in place.
What Pressure-Compensating Emitters Are — and When They Matter
Many drip lines come fitted with pressure-compensating (PC) emitters. These maintain consistent output — usually 0.5 to 1.0 GPH per emitter — regardless of pressure variation along the line.
If your garden slopes, if you’re running long distances, or if your water pressure fluctuates, PC emitters prevent plants at the end of the line from receiving less water than those near the start. On flat, short runs, standard non-PC emitters work well and cost less. On anything with grade changes, PC emitters are worth every additional cent.
Drip Tape vs Drip Line — Key Differences Side by Side
Here’s a direct comparison across the factors that matter most:
| Feature | Drip Tape | Drip Line |
| Wall Thickness | 4 to 25 mils | 40+ mils |
| Shape When Empty | Flat | Round |
| Flexibility | Straight runs only | Curves, bends, contours |
| Operating Pressure | 8–15 PSI | 15–50 PSI |
| Emitter Type | Laser-cut or molded slits | Inline or PC emitters |
| Typical Lifespan | 1–5 seasons | 3–8+ years |
| Best For | Row crops, annual vegetables | Landscaping, trees, permanent beds |
Wall Thickness and Durability — How Far Apart Are They Really?
At 8 mils, standard drip tape is thin enough to pierce with a fingernail. It’s not designed for heavy use — it’s designed to be replaced. Higher-mil tape (15 to 25 mil) holds up longer, but still doesn’t approach the durability of even entry-level drip line.
If the system will be walked on, driven near with a mower, or left in place year-round, drip tape won’t hold up.
Shape and Flexibility — Straight Rows vs Curved Layouts
Drip tape must run straight. Drip line can handle 90-degree turns using standard barbed elbow fittings. This single difference eliminates drip tape as an option for most ornamental landscaping, curved flower beds, and irregularly shaped garden areas.
Emitter Type and How Each System Delivers Water
Drip tape emitters are uniform and spaced at set intervals — commonly 6, 8, or 12 inches. That works well for closely planted rows. Drip line emitters are typically spaced at 12, 18, or 24 inches, which suits wider-planted crops, shrubs, and trees more effectively.
Operating Pressure — Low-Flow Tape vs High-Pressure Line
Running drip tape above 15 PSI causes leaks and blowouts at fittings. Running it below 8 PSI gives poor emission uniformity. Drip line handles a much wider pressure range, making it more compatible with standard home water supplies without requiring a tightly calibrated regulator.
Lifespan — How Long Each System Realistically Lasts
Thin drip tape at 4 to 8 mil is often treated as a single-season consumable. Heavier tape can last two to three seasons with careful storage. Quality drip line, properly maintained, runs well for five to eight years or more.
Drip Tape vs Drip Line Cost — What You’re Really Paying For
Drip tape costs significantly less upfront — usually $0.03 to $0.08 per foot — while drip line runs $0.15 to $0.40 per foot. For large-scale row plantings, that gap across thousands of feet is significant. For smaller setups, the long-term replacement cost of drip tape quickly narrows the difference.
Upfront Price Per Foot — Where the Gap Shows Up
For a 500-foot vegetable row setup, drip tape might cost $25 to $40. Drip line for the same run could cost $75 to $200. On a large market garden or farm, that difference multiplies fast — and drip tape becomes the clear budget choice for seasonal crops.
Long-Term Cost: When the Cheaper Option Becomes the Expensive One
Thin drip tape replaced every one to two seasons adds up. A drip line system installed once and maintained well can last the better part of a decade. For permanent landscaping or perennial beds, the math consistently favors drip line over any five-year period. The drip tape vs drip line cost comparison looks very different at year one versus year five.
Is Drip Tape or Drip Line Better for Raised Beds?
For most raised beds, drip line is the better choice. It handles the curved or irregular layouts common in home vegetable gardens, lasts multiple seasons, and works well with varied plant spacing. Drip tape suits raised beds only when they are long, straight, and replanted annually with row crops at consistent spacing.
The typical raised bed — four feet wide with a mix of tomatoes, herbs, and greens — isn’t a natural fit for drip tape. The tape needs to run in straight parallel lines, which only works if the bed is planted in neat, uniform rows. The moment plant spacing varies or a trellis enters the picture, you need the layout flexibility drip line provides.
For permanent raised beds that stay in use year-round, drip line is also the smarter long-term investment. Install it once, adjust emitter positions if planting changes, and it handles season after season without replacement.
Where Drip Tape Works Best — and Where It Falls Short
Drip tape excels in large, flat, straight-row applications. Market gardeners growing tomatoes, peppers, cucumbers, and greens rely on it for exactly this reason. The economics work, installation is fast, and at end-of-season cleanup it rolls up cleanly for storage or disposal.
It also performs well for cut flower production, field corn, and other row-planted annuals where layout doesn’t change significantly year to year.
Where it falls short: anything curved, sloped, or permanent. The thin wall also makes it vulnerable to UV exposure if left above ground through a full summer. Under mulch or row cover, it holds up considerably longer.
Where Drip Line Works Best — and What Makes It Worth the Extra Cost
Drip line is the right tool for anything staying in the ground longer than one season. Trees, shrubs, perennial flower beds, and permanent landscape plantings all benefit from its durability and layout flexibility.
On sloped terrain, pressure-compensating drip line is particularly valuable. Gravity creates pressure differences in standard systems — plants at the bottom of a slope get more water than those at the top. PC emitters correct for this, delivering uniform output across elevation changes that would cause drip tape to perform unevenly.
The main limitation is cost and run-length scale. Drip line isn’t designed for the 1,000-foot continuous runs that drip tape handles comfortably.
Does Your Soil Type Change Which One You Should Use?
Yes — soil type directly affects which emitter spacing and flow rate you need, which in turn influences which product is more practical. Clay soils absorb water slowly and need wider emitter spacing to avoid surface pooling. Sandy soils drain fast and need higher flow rates. Loam falls in the middle and works well with either system when properly configured.
In clay-heavy soil, drip tape with 12-inch emitter spacing performs better than 6-inch spacing, which can cause puddling at the surface. In sandy soil, higher-flow emitters and more frequent run times compensate for rapid drainage. Matching emitter spacing to soil type is one of those details that most beginner guides skip over — but it has a real impact on plant performance.
What Size Drip Tape or Drip Line Should You Choose?
The right size depends on your run length, plant spacing, and water supply. For most home setups, ½-inch drip line or ⅝-inch drip tape handles the main lateral runs effectively. Quarter-inch tubing works well for short spur lines delivering water to individual plants but shouldn’t be used as a long primary distribution line.
Diameter Sizes Explained — ⅝”, ½”, and ¼” and When to Use Each
⅝-inch drip tape is the most common agricultural size — it carries enough flow for long runs while keeping friction loss manageable. Half-inch drip line handles most home and landscape applications well. Quarter-inch polyethylene tubing is best reserved for short runs of 10 to 15 feet off a larger mainline, directing water to a specific plant or container.
Wall Thickness in Mils — Matching the Right Thickness to Your Setup
For a home vegetable garden, 15-mil drip tape is a solid middle ground — durable enough for two to three seasons, reasonably priced, and strong enough to handle standard drip tape fittings without tearing. If you’re outfitting a large farm operation and plan to replace annually anyway, 8-mil tape keeps per-foot costs down. For anything permanent, skip tape entirely and move to drip line.
Run Length Limits and the 30/30 Rule Explained
One of the most overlooked design rules in small drip systems involves the 30/30 guideline for ¼-inch micro-tubing: no single run should exceed 30 feet, and total flow across that run should stay under 30 GPH. Beyond those limits, friction loss creates uneven watering across the line.
The rule scales with tubing size. For ½-inch tubing, the practical guideline becomes roughly 200 feet and 200 GPH. For ¾-inch tubing, it’s approximately 480 feet and 480 GPH. Staying within these limits is one of the simplest ways to ensure consistent water delivery from the first plant to the last.
How to Install Each System — What the Process Actually Looks Like
Setting Up Drip Tape — Step by Step
- Connect your mainline (½-inch or ¾-inch poly tubing) to your water supply.
- Install a filter — 120 mesh or finer — to prevent emitter clogging.
- Add a pressure regulator set to 10 PSI.
- Use drip tape fittings to connect each tape run to the mainline.
- Lay tape flat along your rows, emitter-side up.
- Cap or fold the ends of each tape run.
- Flush the system before your first full irrigation cycle.
Setting Up Drip Line — Step by Step
- Run your mainline from the water source to the irrigation zone.
- Install a filter and pressure regulator matched to your line’s pressure rating.
- Punch holes in the mainline using a barbed fitting tool and insert drip line connectors.
- Route the drip line around plants, using barbed elbows for corners and direction changes.
- Stake the line every few feet to prevent shifting.
- Cap each line end and flush before the first use.
The Three Components Every Drip System Needs: Filter, Pressure Regulator, and Fittings
No matter which product you use, these three components aren’t optional. A filter prevents sediment and debris from blocking emitters — the single most common cause of drip system failure. A pressure regulator protects tubing and ensures even flow. Properly matched drip irrigation fittings prevent the leaks and blowouts that make new users think the product itself is defective.
Drip Tape vs Soaker Hose — How Do These Two Compare?
Drip tape and soaker hose are different products with different mechanics. Soaker hoses seep water along their entire length through porous walls — there are no emitters and no controlled spacing. Drip tape delivers water only at specific, pre-spaced points. Drip tape offers better water uniformity and efficiency; soaker hoses are simpler to set up but less precise in their output.
Soaker hoses work reasonably well for a small flower border where consistent moisture along the full bed length is acceptable. For vegetable crops or any situation where water efficiency and placement accuracy matter, drip tape consistently outperforms soaker hose — and typically lasts longer with proper care.
Maintenance, Clogging, and What to Expect Each Season
Keeping Drip Tape Running Clean — Common Clog Points and Prevention
The emitters on drip tape are small and can clog with mineral deposits, algae, or fine sediment. Running the system for two to three minutes before the main irrigation cycle — effectively flushing the tape at start-up — reduces buildup over time. A good inline filter is the first line of defense. Checking it every two to four weeks during peak season takes only a few minutes and prevents most issues before they affect plant health.
Drip Line Upkeep — What to Check and When to Replace Emitters
Drip line emitters, particularly PC types, are self-flushing by design and less prone to clogging than drip tape emitters. Still, inspect emitters at the start and end of each growing season. If one isn’t dripping when the rest of the line runs normally, clean it or swap it out. Blocked emitters are usually the only maintenance issue with quality drip line across its full lifespan.
End-of-Season Flushing, Winterizing, and Storage for Both Systems
Before the first frost, flush all lines by opening end caps and running water through until it runs clear. For drip tape, detach from fittings, roll carefully onto a spool, and store in a dry location away from direct sunlight. For drip line, disconnect from the mainline, drain fully, and either leave in place or coil for storage depending on your setup.
Freezing water in any drip system can split fittings and crack tubing. Don’t skip the drain step, even in climates with mild winters.
Drip Tape vs Drip Line — Pros and Cons at a Glance
| Drip Tape | Drip Line | |
| Pros | Low cost per foot | Durable and long-lasting |
| Lightweight and fast to install | Flexible — curves and bends | |
| Effective for large-scale row crops | Works on slopes with PC emitters | |
| Easy to roll up and store seasonally | Suited for trees and perennials | |
| Low pressure operation | Wide pressure range compatibility | |
| Cons | Thin walls — prone to damage | Higher upfront cost |
| Straight lines only | Less practical for very long rows | |
| Shorter replacement cycle | Heavier and less portable | |
| Requires precise pressure control | More involved fitting installation |
How to Choose Between Drip Tape and Drip Line — A Practical Decision Guide
The choice between drip tape and drip line comes down to four factors: how long the system will stay in place, whether the layout is straight or curved, your budget per foot, and whether the terrain is flat or sloped. Neither product is universally better — but one will almost always fit your situation more cleanly than the other.
Choose Drip Tape If This Describes Your Setup
- You’re planting vegetables or annual row crops in straight, parallel rows.
- Your garden or farm has flat ground with no significant slope.
- You want the lowest possible upfront cost per foot of coverage.
- You’re comfortable replacing or rotating the system every one to three seasons.
- Your rows are long — 50 feet or more — with uniform planting spacing where fixed emitter intervals work well.
Choose Drip Line If This Describes Your Setup
- You’re watering a permanent or semi-permanent area: trees, shrubs, perennial beds, or landscaping.
- Your garden layout curves, bends, or follows an irregular shape.
- The terrain slopes or changes elevation across the irrigation zone.
- You want a system that lasts five or more years without full replacement.
- You need pressure-compensating performance for even water delivery across a long run.
Can You Use Drip Tape and Drip Line Together in the Same System?
Yes — and many setups benefit from using both. A common approach is running drip line as a permanent mainline backbone through a garden and connecting drip tape laterals for seasonal vegetable rows. The drip line stays in place year-round, and the tape gets swapped out as needed each growing season. This hybrid approach works well on larger properties where different zones serve different irrigation purposes.
Frequently Asked Questions
Is drip tape reusable from one growing season to the next?
It depends on wall thickness. Thin 4 to 8 mil tape is generally a single-season product — reusing it is possible but risks split seams and emitter failure. Heavier 15 to 25 mil tape can be cleaned, rolled, stored, and reused for two to three seasons if handled carefully and kept out of UV exposure during off-season storage.
How long does drip line typically last when installed outdoors?
Quality polyethylene drip line installed above ground with UV inhibitors typically lasts five to eight years. Buried subsurface drip line, protected from sun and physical damage, can last significantly longer — fifteen years or more in agricultural installations where water quality and filtration are properly managed from the start.
Do I need a pressure regulator for drip tape?
Yes, always. Drip tape operates within a narrow pressure window of 8 to 15 PSI. Standard residential water pressure is often 40 to 60 PSI — more than enough to burst tape fittings or cause uneven emission across the run. A pressure regulator isn’t an optional add-on; it’s a core component of any functional drip tape system.
What comes in a drip tape irrigation kit — and what do you still need to buy?
A typical drip tape irrigation kit includes a length of drip tape, a header connector, end caps, and sometimes a filter and pressure regulator. What most kits don’t include: the mainline poly tubing to tie it all together, ground stakes to hold the tape in position, and a backflow preventer if your local code requires one. Always check kit contents before assuming it’s a complete, ready-to-install package.
Can drip tape handle slopes or uneven ground?
Not reliably. Drip tape without pressure compensation loses emission uniformity on slopes — plants at the lower end of the run receive more water than those near the top. If your ground slopes more than a few percent, you’ll need pressure-compensating drip line or you’ll need to break the system into shorter segments, each with its own pressure regulator.
Is drip line worth the extra cost for a small home garden?
For most home gardens — particularly those with mixed planting, curved beds, or perennial plantings — yes. The cost difference for a small setup isn’t dramatic in absolute terms. A 100-foot drip line installation might cost $15 to $40 more than the equivalent in drip tape, but it will last years longer and require significantly less seasonal maintenance. Over two or three growing seasons, drip line almost always comes out ahead on total cost.
How deep should drip tape be buried?
Drip tape can be buried 2 to 6 inches below the soil surface for subsurface irrigation. For most vegetable crops, 2 to 4 inches works well. Deeper installation reduces soil disturbance during cultivation but makes inspection and replacement more involved at end of season.
How long should I water with drip tape?
Run times vary by soil type, crop, and emitter flow rate — but a practical starting point is 30 to 45 minutes per session for most vegetable gardens. After the first run, dig down 4 inches near an emitter to check moisture depth. Adjust run time up or down based on what you find.
How effective is drip tape?
Drip tape operates at around 90 percent water efficiency when properly installed and maintained. Because water is delivered directly to the root zone at low pressure, evaporation and runoff are minimal. The system’s effectiveness drops quickly if emitters clog or pressure falls outside the 8 to 15 PSI operating range.
What is the 30/30 rule for drip irrigation?
The 30/30 rule applies to ¼-inch micro-tubing: no single run should exceed 30 feet, and total emitter flow on that run should stay under 30 GPH. Beyond those thresholds, friction loss causes uneven watering across the line. The rule scales with tubing size — for ½-inch tubing it becomes roughly 200 feet and 200 GPH.
Is drip line worth the extra cost for a home garden?
For most home gardens with mixed planting, curved beds, or perennial areas, yes. The upfront cost difference on a small setup is modest — often $15 to $40 more than equivalent drip tape — but drip line lasts years longer and needs far less seasonal maintenance. Over two or three growing seasons, the total cost usually favors drip line.
Conclusion
Picking the right system isn’t complicated once you understand what each one is built to do. Drip tape is a practical, low-cost tool for straight row plantings and seasonal crops. Drip line is a durable, flexible system for permanent or semi-permanent setups that need to handle varied layouts and last for years. The comparison between drip tape vs drip line really comes down to how you use your space and how long you need the investment to hold.
Look at your layout, consider how long the system needs to stay in place, and factor in your terrain. Those three things will point you clearly toward one option — and help you avoid the most common and expensive mistake people make when setting up drip irrigation for the first time.
Disclaimer
The content on Dwellify Home is provided for general informational purposes only. While we aim to keep all information accurate and up to date, individual results, garden conditions, and product performance may vary. Always consult a qualified irrigation professional for advice specific to your property and setup.