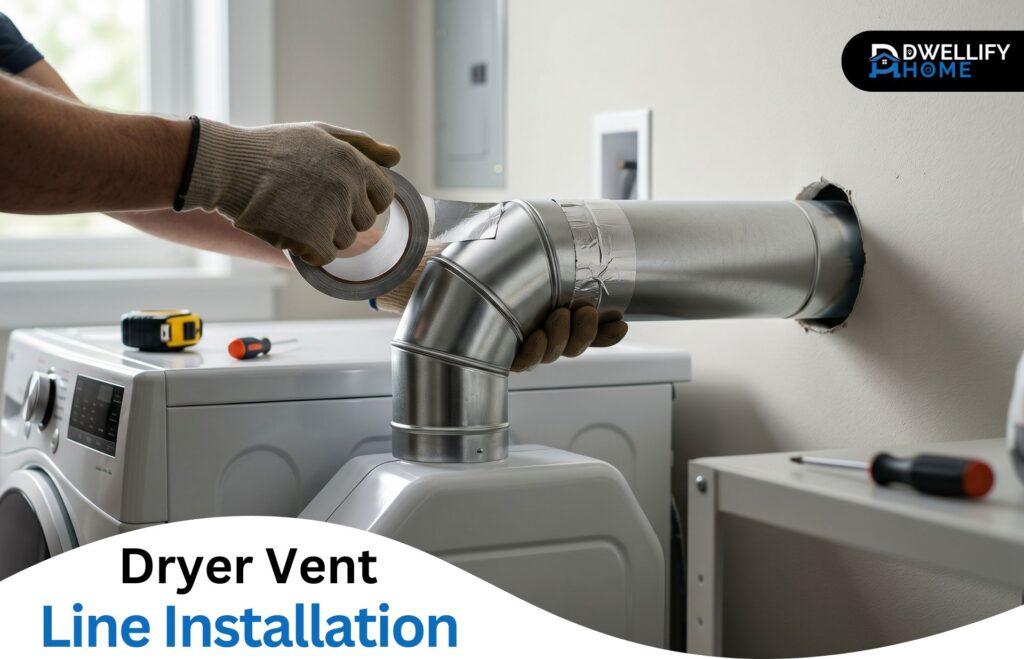
A dryer vent line is one of those things most homeowners don’t think about until something goes wrong. The dryer takes two cycles to dry a load. The laundry room feels warmer and more humid than it should. Or there’s a faint burning smell that wasn’t there last month.
Every one of those problems traces back to the same place — the vent line. Getting it installed correctly from the start prevents all of it.
This guide walks you through the full process: choosing the right materials, planning the route, cutting the wall opening, running the duct, sealing the joints, and testing the finished system. Whether you’re setting up a laundry room from scratch or replacing a vent that was never done properly, you’ll have a clear picture of exactly what to do by the end.
The Short Answer
Dryer vent line installation is the process of connecting a clothes dryer to the exterior of a home using approved metal ductwork. It removes heat, moisture, and lint safely, preventing fire hazards, mold buildup, and poor dryer performance.
About Dwellify Home
At Dwellify Home, we help homeowners make practical, well-informed decisions about their living spaces — whether that’s improving safety, enhancing comfort, or creating a home that works better every day. Our content is built on clarity, honesty, and real-world guidance you can actually use.
What a Dryer Vent Line Does — and Why Installation Affects Your Home’s Safety
How the System Works: Heat, Moisture, and Lint Need a Direct Path Out
Every drying cycle produces hot, moist air loaded with lint particles. That air has one job: get out of the house. The dryer vent line is the path it takes — a dedicated exhaust duct running from the back of the dryer to an opening in the exterior wall.
When that path is short, straight, and made of the right materials, the dryer runs efficiently. Clothes dry in one cycle. Lint moves through rather than settling inside the duct walls.
When the path is restricted — too many bends, the wrong materials, a loose connection — airflow backs up. The dryer runs hotter, works harder, and lint begins to accumulate in places you can’t see.
What Happens When a Dryer Vent Line Is Installed Incorrectly
The National Fire Protection Association consistently identifies dryer lint buildup as one of the leading causes of residential dryer fires in the United States. That lint doesn’t appear out of nowhere — it builds up inside improperly installed duct lines over months and years.
Beyond fire risk, poor installation causes moisture to collect inside wall cavities, mold to form in laundry rooms, and appliance wear that shortens your dryer’s working life considerably. These aren’t rare outcomes. They’re what happens regularly when the installation is rushed or done with the wrong materials.
Duct Material Quick Comparison
| Duct Type | Code-Compliant | Fire Safe | Best Use |
| Rigid aluminum | Yes | Yes | Full duct run inside wall |
| Rigid galvanized steel | Yes | Yes | Full duct run inside wall |
| Semi-rigid aluminum | Yes (transition only) | Yes | Short connector behind dryer (max 8 ft) |
| Foil accordion flex | No | No | Not recommended — prohibited by IRC |
| Flexible vinyl | No | No | Not permitted — fire and code violation |
Key Benefits of a Properly Installed Dryer Vent Line
- Reduces lint buildup that causes residential dryer fires
- Removes moisture from the home, preventing mold in walls and ceilings
- Allows the dryer to run efficiently — clothes dry in one cycle
- Extends the working life of the appliance by reducing heat stress
- Meets IRC building code standards, protecting home value and insurability
What You Need to Know Before You Start
Do You Need a Building Permit for Dryer Vent Line Installation?
For a brand-new installation — cutting a fresh opening through an exterior wall and running new ductwork — most U.S. municipalities require a building permit. If you’re simply replacing the transition hose or resealing an existing duct, a permit is generally not needed.
The safest approach is to check with your local permitting office before you start. An unpermitted installation can complicate a home sale or an insurance claim down the road.
The IRC Code Requirements That Apply to Every Dryer Vent Installation (M1502)
The International Residential Code, Section M1502, sets the national baseline for dryer vent installations. Every residential installation in the U.S. should meet these standards:
- Duct material: Rigid or semi-rigid metal — aluminum or galvanized steel — with a 4-inch diameter and smooth interior walls
- Maximum length: 35 feet for a straight run, reduced by 5 feet per 90-degree elbow and 2.5 feet per 45-degree elbow
- Termination: Must exit to the outdoors through a louvered backdraft damper — no screen covers permitted
- Fasteners: Joints secured with foil tape or hose clamps — no screws that protrude into the duct interior
- Support: Duct braced every 12 feet and at every joint
These aren’t suggestions. They’re the standard a home inspector or building official will hold your installation to.
How to Use a Dryer Vent Line Installation Diagram to Map Your Route First
Before drilling anything, sketch the route on paper. Mark the dryer location, the exterior wall, and every turn the duct will need to make along the way.
This step matters because every elbow costs you usable duct length. A quick diagram helps you calculate whether your planned route stays within the 35-foot limit — and it often reveals a shorter, cleaner path you hadn’t initially considered. It takes five minutes and can save an hour of backtracking.
Choosing the Right Duct Material for Your Dryer Vent Line
Rigid Metal Duct (Aluminum or Galvanized Steel) — The Right Choice for Most Homes
For the main duct run inside the wall, rigid metal is the standard. Its smooth interior allows air to move freely and lets lint pass through rather than catch on the walls. It doesn’t sag over time, doesn’t crush under pressure, and holds its shape for years without needing replacement.
Use either aluminum or galvanized steel — both are code-compliant. Don’t mix the two in a single run, as they can react differently to temperature changes over time.
Semi-Rigid Aluminum Transition Duct — When It’s Acceptable and How Long It Can Be
The short connector between the back of the dryer and the wall opening — called the transition duct — can be semi-rigid aluminum. It has enough flexibility to accommodate the dryer’s exact position while still maintaining decent airflow.
Per the IRC, the transition duct must be UL-2158A listed and no longer than 8 feet. In practice, the shorter it is, the better. Six inches to two feet is ideal. This section is the most accessible part of the system, which also makes it the easiest to inspect and replace.
Why Flexible Vinyl and Plastic Ducts Are a Fire Hazard and Code Violation
Flexible vinyl and foil accordion-style ducts are still sold at hardware stores, which is part of the reason they still turn up in homes. But they’re genuinely problematic.
Their ribbed interiors collect lint with every load. They can’t withstand the heat output of a gas dryer. And they’re prohibited under the IRC for the main duct run. If an inspector or home buyer finds vinyl ducting behind your dryer, it’s a flag — and sometimes a condition of sale that has to be corrected.
Tools and Materials You’ll Need for the Job
Gather everything before you start. Stopping mid-installation to make a hardware run is how small mistakes get made.
- Power drill with standard and masonry bits
- 4¼-inch hole saw
- Tin snips or aviation snips
- Tape measure and marker
- Level
- Caulking gun and exterior caulk
- 4-inch rigid metal duct sections (aluminum or galvanized steel)
- Adjustable 90-degree and 45-degree elbows
- Dryer vent hood with louvered backdraft damper (not screened)
- Semi-rigid aluminum transition duct (8-foot maximum, UL-2158A listed)
- Hose clamps and metal foil tape
- Pipe hanger straps for longer runs
- Work gloves
For masonry walls, add a cold chisel and hammer. For vinyl siding, pick up a surface-mounting block that matches your siding profile.
Planning Your Dryer Vent Line Route
Find the Shortest, Straightest Path from the Dryer to the Exterior Wall
The target is always a straight horizontal run to the nearest exterior wall with the fewest obstacles in the way. No turns, no extra length, no bends where lint can settle.
Walk the route physically before you plan it on paper. Look for studs, plumbing lines, electrical runs, and insulation. The path that looks short on a diagram sometimes has more in the way than expected.
Maximum Duct Length Rules — And How Every Elbow Reduces What You Have to Work With
Thirty-five feet is the IRC maximum for a straight run — but that number shrinks quickly once elbows are involved. Two 90-degree elbows alone reduce your allowable run length to 25 feet. A route with three 90-degree bends leaves only 20 feet to work with.
Calculate your total equivalent length before you cut anything. If the number is close to the limit, simplify the route first. A cleaner path now prevents airflow problems later.
Where to Position the Exterior Vent Hood (Height, Clearance, and Orientation)
The vent hood must sit at least 12 inches above the ground. It needs a minimum of 3 feet of clearance from any window, door, or other opening — and at least 10 feet from an AC condenser or heat pump unit.
The hood should face downward or outward, with louvered flaps that open when the dryer runs and close when it stops. Avoid any hood with a built-in mesh screen — screens accumulate lint faster than almost anything else and block airflow within months of installation.
How to Install a Dryer Vent Line: Step-by-Step
Step 1 — Mark the Exit Point and Cut the Opening Through the Exterior Wall
With your route planned, mark the center of the exit point on the interior wall. Drill a pilot hole through to the outside using a long ¼-inch bit. Go outside and confirm the position is clear of any obstacles and sits where the vent hood will rest correctly.
Once confirmed, use a 4¼-inch hole saw to cut the full opening. For wood framing and standard siding, start from the outside for a cleaner cut. For stucco or brick, drill a ring of masonry pilot holes around the circle, then knock out the center section with a cold chisel.
Step 2 — Install and Seal the Exterior Vent Hood
Slide the vent hood pipe through the opening from outside. Press the hood plate flat against the siding and secure it with the provided exterior screws.
Run a bead of exterior caulk along the top edge and both sides of the hood plate. Leave the bottom edge open. That gap allows any condensation behind the hood to drain out rather than collect and cause damage. It’s a small detail that gets skipped regularly and causes problems down the road.
Step 3 — Run the Rigid Duct Through the Wall and Connect Each Section
Working from the exterior vent hood back toward the dryer location, connect rigid duct sections by inserting the crimped end of each piece into the uncrimped end of the next. Run all joints in the direction of airflow so condensation moves toward the exterior rather than pooling at the seams.
For runs that travel along a wall, support the duct with hanger straps every 12 feet. Aim for a slight downward pitch toward the exterior — about ¼ inch per foot — to let any moisture in the line drain outward.
Step 4 — Seal Every Joint with Foil Tape (Why This Step Is Non-Negotiable)
Once all sections are connected, wrap every joint completely with metal foil tape. Foil tape is the only tape that holds up to the heat and humidity a dryer generates. Regular duct tape and household tapes break down quickly and fail — often within a season.
A properly sealed joint keeps lint inside the duct where it belongs, maintains strong airflow from end to end, and stops moist air from escaping into wall cavities.
Step 5 — Connect the Duct to the Wall Connector and the Dryer Exhaust Outlet
At the laundry room end, fit the rigid duct into the dryer vent duct to wall connector. Then attach the semi-rigid transition duct between the wall connector and the exhaust port on the back of the dryer.
Secure both connections with hose clamps and seal the joints with foil tape. Keep the transition duct as short and straight as the dryer’s position allows. A kinked or sharply bent transition duct is one of the most common sources of lint buildup in residential installations.
Step 6 — Run a Test Cycle and Verify Airflow at the Exterior Hood
Carefully push the dryer into its final position, watching that the transition duct doesn’t kink as the dryer moves back. Run a full drying cycle and go outside to check the vent hood. You should feel a firm, steady flow of warm air, and the louvers should be opening and closing cleanly with the airflow.
Weak airflow or louvers that barely move means there’s a leak, a kink, or a blockage somewhere in the system. Check every connection point before running the dryer unattended.
Tricky Installations: How to Handle the Most Common Challenges
How to Install a Dryer Vent Hose in a Tight Space Behind the Dryer
Tight laundry closets leave very little room for the transition duct to connect cleanly. When the dryer sits only a few inches from the wall, a standard transition hose often gets pushed into a sharp bend the moment the dryer is moved back into place.
The practical fix is a low-profile periscope-style duct or a recessed dryer vent box set into the wall cavity. A recessed box gives the transition duct space to connect at a straight angle, keeps the system clean, and lets you push the dryer flush with the wall without crimping the hose.
How to Run a Dryer Vent Through an Interior Wall
An interior wall route means the duct has to travel farther — through more framing, more insulation, and more turns — before it reaches the exterior. Every extra elbow reduces your allowable run length and adds another joint that needs to be sealed.
Plan the route carefully using a diagram first. Use rigid metal throughout the in-wall section, and insulate any duct that passes through an unheated space to prevent condensation from forming inside the line.
How to Install a Dryer Vent Hose Through the Floor for Basement Laundry Rooms
In basement installations, the most common route runs vertically from the dryer up through the rim joist — the framing at the top of the basement wall — and exits through the exterior siding above ground level.
Use a 90-degree elbow at the dryer exhaust to redirect the duct upward. A second elbow at the rim joist turns it horizontally toward the exterior wall. Support the vertical section with hanger straps and confirm the exit point sits at least 12 inches above the outside ground level.
Drilling Through Brick, Stucco, or Vinyl Siding — What Changes and What to Use
Brick and stucco require masonry drill bits for the pilot hole. For the full 4¼-inch opening, use a masonry hole saw if your drill has the torque for it, or drill a ring of close-spaced pilot holes around the circle and knock the center out with a cold chisel. Take your time — forcing the cut can crack the surrounding material.
For vinyl siding, use a surface-mounting block that sits over the existing siding and gives the vent hood a flat, weather-tight base. Drill slightly oversized holes for the mounting screws so the vinyl has room to expand and contract with temperature changes.
When the Duct Run Is Too Long: How to Add a Dryer Vent Booster Fan
When a layout genuinely can’t be shortened to meet code length limits — common in older homes with centrally located laundry rooms — an inline dryer vent booster fan can maintain adequate airflow over a longer run.
A booster fan activates automatically when the dryer runs and pushes air through the duct with enough force to compensate for the extra distance. It’s a situational fix, not a first choice. Exhaust the shorter-route options before considering one, and follow the manufacturer’s installation and wiring requirements carefully when you do.
Getting the Dryer Vent Duct to Wall Connector Right
The dryer vent duct to wall connector sits at the laundry room end of the system, bridging the in-wall rigid duct and the flexible transition hose. It’s a small fitting, but it’s responsible for one of the most common air leak points in residential dryer venting.
The connector needs to fit snugly into the wall opening, align straight with the duct on both sides, and be secured with a hose clamp at each end. If it sits recessed or at an angle, the transition duct will have to bend to reach it — and that bend restricts airflow from the first day of use.
When installing, make sure the connector sits flush with the drywall surface before securing it. Once the dryer is pushed back into place, this connection point becomes nearly impossible to check visually, so getting it right before the dryer goes in saves a lot of effort later.
Safety Rules That Cannot Be Skipped
Use Metal Duct Only — No Vinyl, No Plastic, No Foil Flex Accordion
Rigid aluminum, rigid galvanized steel, and UL-listed semi-rigid aluminum for the transition section are the only approved materials for dryer exhaust ducting. Everything else — flexible vinyl, plastic pipe, foil accordion — is either a code violation, a fire risk, or both.
This rule comes directly from the IRC and from fire investigation reports. It applies to every installation regardless of dryer type or duct route.
Never Use Screws Inside the Duct — This Is Where Lint Fires Start
Sheet metal screws feel secure, which is why people reach for them. But any screw tip that pokes through into the duct interior creates a surface where lint catches and builds up with every load. Over time, that accumulation becomes a serious fire hazard — and one you can’t inspect or clean from the outside.
Foil tape and hose clamps hold every connection just as securely and leave the duct interior completely smooth.
Always Vent Outside — Why Attics, Garages, and Crawlspaces Are Never Acceptable
A dryer releases roughly a gallon of moisture per load. Route that moisture into any enclosed space — attic, crawlspace, garage, or basement — and you’re creating conditions for mold, structural damage, and pest activity.
Venting indoors is prohibited by the IRC and voids most dryer manufacturer warranties. There is no workaround. The duct must terminate outside the home through an approved exterior vent hood.
Clearance Rules for the Exterior Hood (Ground Height, Windows, and AC Units)
- At least 12 inches above the ground
- At least 3 feet from any window, door, or other building opening
- At least 10 feet from an AC condenser or heat pump unit
- No screen installed over the duct termination opening
These distances prevent exhaust air from re-entering the home, protect mechanical equipment from lint contamination, and keep pests from nesting inside the duct over winter.
How to Know Your Dryer Vent Line Was Installed Correctly
Signs the Installation Is Working as It Should
- Strong, consistent airflow at the exterior hood while the dryer runs
- Louvers opening fully during the cycle and closing when the dryer stops
- Clothes drying in a normal amount of time for the load size
- No unusual humidity or heat buildup in the laundry room during a cycle
- No burning smell and no visible condensation around the duct or hood
Red Flags That Mean Something Needs to Be Fixed
- Clothes requiring two or more cycles to fully dry
- Exterior louvers barely moving or not opening
- Moisture appearing on laundry room walls or ceiling
- A musty or burning smell during or after a cycle
- Lint accumulating around the dryer or near the exterior hood
Any of these signs point to restricted airflow. Check connection points and the transition duct first. If the issue persists, have the full duct run inspected from both ends before continuing to use the dryer.
DIY or Hire a Professional? How to Make the Right Call
What Most Homeowners Can Confidently Handle Themselves
Reconnecting an existing vent system, replacing an old transition duct, resealing loose joints, or completing a straightforward new installation through an exterior wood-framed wall are all jobs a careful homeowner can manage with basic tools and a few hours.
Situations Where a Professional Is the Better Choice
Gas dryer installations, duct routes that travel through multiple floors, exterior walls made of brick or concrete block, and any run where access for future cleaning would be difficult — these are situations where a licensed HVAC contractor is worth the cost.
For local help, search “dryer vent installation near me” or contact HVAC services in your area. Many offer dryer vent line installation as a standalone service with flat-rate pricing.
How Much Does Dryer Vent Line Installation Cost?
A standard professional dryer vent line installation — single floor, direct route through an exterior wall — typically runs between $100 and $300. More complex jobs involving masonry walls, long duct runs, or multiple elbows can reach $400 or higher.
DIY material costs are straightforward: duct sections, a vent hood, transition hose, clamps, and foil tape usually total between $30 and $80 depending on run length and wall type.
The cost of a failed or unsafe installation — water damage, a lint fire, or a failed home inspection — is considerably higher than either of those numbers.
Maintaining Your Dryer Vent Line After Installation
How Often Should You Clean a Dryer Vent Line?
Clean the dryer vent line at least once per year for a standard household. If you run more than eight to ten loads per week, or if you have pets whose hair binds with lint and clogs faster, increase that to every six months.
A dryer vent cleaning kit with a flexible brush and a drill attachment handles most residential duct lines effectively from inside the laundry room. For long or complex runs, a professional cleaning service is more thorough.
Signs Your Vent Line Needs Inspection or Replacement
- Drying times gradually getting longer over weeks or months
- The exterior surface of the dryer feeling unusually hot during a cycle
- More than 12 months since the last cleaning
- The duct is over ten years old and has never been professionally inspected
- Visible kinks, damage, or separation in any section of the duct
Catching these early is far less disruptive than dealing with a blocked duct, a moisture-damaged wall, or a dryer that burns out ahead of schedule.
Frequently Asked Questions About Dryer Vent Line Installation
What size duct is required for dryer vent line installation?
A 4-inch diameter metal duct is the standard required by the IRC. This applies to both the rigid duct inside the wall and the semi-rigid transition duct connecting the dryer to the wall outlet. Using a smaller diameter restricts airflow and creates lint buildup faster.
Can a dryer vent line be installed through the floor?
Yes. In basement laundry rooms, the duct typically runs vertically from the dryer through the rim joist and exits through the exterior wall above ground. The exterior opening must be at least 12 inches above the outside ground level.
How long can a dryer vent line be?
The IRC sets a maximum of 35 feet for a straight run. Subtract 5 feet for each 90-degree elbow and 2.5 feet for each 45-degree elbow. Your dryer manufacturer may specify a shorter maximum — always check the owner’s manual, as manufacturer specs take precedence.
Can I use regular duct tape to seal the connections?
No. Standard duct tape breaks down under the heat and humidity of dryer exhaust within a short period of time. Use metal foil tape rated for HVAC use. It holds up to the temperature of dryer exhaust and maintains a proper seal for years.
Is it acceptable to vent a dryer into the garage?
No. Venting into any enclosed space — garage, attic, crawlspace, or basement — is prohibited by the IRC. It introduces moisture and lint into areas where both can cause significant damage. The duct must always terminate outside the home through a proper exterior vent hood.
What is the difference between the transition duct and the main exhaust duct?
The transition duct is the short semi-rigid connector between the back of the dryer and the wall opening. The main exhaust duct runs through the wall from that point to the exterior vent hood. The transition duct can be semi-rigid aluminum up to 8 feet. The main duct run should be rigid metal throughout.
Conclusion
A solid dryer vent line installation comes down to a handful of consistent principles: rigid metal duct, the shortest possible route, every joint sealed with foil tape, and a proper exterior termination with a louvered hood. None of it requires specialized expertise, but every detail matters.
Most dryer vent problems don’t come from obvious mistakes. They come from small shortcuts that seem harmless at the time — a flexible vinyl duct left in place, a screw used to hold a joint together, a route that was just a bit too long. Those decisions compound over months and years.
Done correctly from the start, the vent line needs almost nothing from you — just an annual cleaning and an occasional check of the exterior hood. That’s a reasonable return on an afternoon of careful work.
Disclaimer
The content published on Dwellify Home is intended for general informational purposes only. It does not constitute professional contracting, legal, or safety advice. Installation requirements, building codes, and material specifications vary by location and individual circumstance. Always consult a licensed professional and verify local code requirements before beginning any home improvement project. Individual results may vary.