Sediment buildup is the number one reason water heaters fail early. Minerals from your water supply settle at the bottom of the tank with every heating cycle, and over time that layer silently reduces efficiency, raises energy bills, and wears down internal parts. Learning how to flush a water heater once a year takes less than an hour — and it’s one of the most effective things you can do to protect that appliance.
This guide covers both tank and tankless models, including what to do when things don’t go as expected.
The Short Answer
Flushing a water heater removes accumulated mineral sediment from the tank using cold water bursts after draining. It improves heating efficiency, lowers energy costs, and extends the unit’s lifespan. Annual flushing is recommended for most households.
Dwellify Home
At Dwellify Home, our goal is straightforward: help homeowners make practical, confident decisions about their living spaces. From everyday maintenance to room-by-room styling, we cover the topics that matter to real people managing real homes — with honest guidance, no fluff, and advice grounded in actual experience.
Why Flushing Your Water Heater Actually Matters
Every time water heats inside your tank, dissolved minerals like calcium and magnesium separate and settle to the bottom. That sediment layer acts as an insulating barrier between the heat source and the water above it.
In a gas unit, the burner has to run longer to push heat through the buildup. In an electric unit, the lower heating element gets buried under sediment and overheats. Either way, you’re using more energy to get the same amount of hot water — and the unit is working harder than it should.
Regular water heater flushing removes that sediment before it hardens, keeps heating efficient, and extends the lifespan of the tank significantly.
What Happens If You Never Flush It?
Skipping this maintenance doesn’t just reduce efficiency. Over time, sediment calcifies and becomes almost impossible to remove without professional equipment. Gas heaters develop hotspots that weaken the tank floor and eventually cause leaks. Electric heating elements burn out prematurely. Drain valves seize completely. What starts as a minor buildup becomes a replacement-level problem.
Tank vs. Tankless: Flushing at a Glance
| Feature | Tank Water Heater | Tankless Water Heater |
| Method | Drain and cold water flush | Descaling with circulation pump |
| Tools Needed | Garden hose, screwdriver, bucket | Pump, hoses, vinegar or descaler |
| Time Required | 30–60 minutes | 60–90 minutes |
| Recommended Frequency | Once a year (every 6 months for hard water) | Once a year (every 6 months for hard water) |
| DIY Friendly | Yes, for most homeowners | Moderately — requires pump setup |
| Main Risk if Skipped | Sediment hardening, element damage, leaks | Scale buildup in heat exchanger, reduced flow |
Key Benefits of Flushing Your Water Heater Regularly
- Removes mineral sediment that reduces heating efficiency
- Lowers monthly energy bills by helping the heater work less
- Prevents premature failure of heating elements and tank components
- Extends the overall lifespan of the unit by several years
- Reduces the risk of drain valve seizure and unexpected leaks
- Keeps hot water output consistent and at full volume
Warning Signs Your Water Heater Needs Flushing Now
You don’t always need to wait for the annual date. Your heater will show signs when sediment has become a problem:
- A rumbling, popping, or knocking sound during the heating cycle
- Discolored or rusty hot water from the tap
- Hot water running out faster than it used to
- Longer wait times for the water to reach temperature
- A faint sulfur or metallic smell from the hot side
Any one of these is worth acting on. More than one together means the job is overdue.
A Simple Test to Check Sediment Levels at Home
Knock firmly on the side of the tank near the bottom, then knock again higher up. A sediment-heavy tank sounds noticeably denser at the base compared to a clear, hollow ring further up.
You can also open the drain valve just a quarter turn into a bucket and close it immediately. If the water that comes out is murky or carries small particles, a full flush is needed. Clear water means you’re likely in good shape.
How Often Should You Flush a Water Heater?
For most households, flushing once a year is the right schedule. That’s the standard recommendation from manufacturers and plumbing professionals, and it prevents sediment from reaching the point where it causes structural damage.
That said, household size, local water quality, and heater type all influence the ideal frequency.
If Your Heater Has Never Been Flushed — Read This First
A water heater that has gone three to five years — or more — without being flushed presents some specific risks. The drain valve may be fully or partially blocked. The sediment may have calcified, meaning it won’t flush out with a single cycle. And in some cases, disturbing old sediment reveals corrosion that had been masked by the buildup.
Don’t skip the flush. But go in knowing it may take multiple cycles, and check the valve before opening it fully. If the heater is over ten years old and showing symptoms alongside the neglected maintenance, replacement may be worth calculating against repair.
Does Hard Water Mean You Should Flush More Often?
Yes. Hard water contains higher concentrations of calcium and magnesium, which accelerate sediment buildup at roughly double the rate of soft water. Homeowners in hard water areas — much of the Midwest and Southwest — should flush every six months rather than annually. White residue on dishes, glassware, and fixtures is a reliable indicator that your water is hard.
What You’ll Need Before You Start
No special tools are required. Gather these before you begin:
- Garden hose — long enough to reach a floor drain, exterior ground, or large bucket
- Flathead screwdriver — for drain valves without a handle
- Bucket — useful for the preliminary water check and catching drips
- Thick rubber gloves — the water will be very hot, especially at the start
- Old towels — for drips around fittings
- Wet/dry vacuum (optional) — helpful if the drain valve is clogged
- Adjustable wrench (optional) — for tight hose fittings
Safety Precautions You Should Not Skip
The water stored in a tank heater sits at 120°F or higher. That’s enough to cause a serious burn almost instantly. Treat the process with the same caution you’d give to handling a pot of near-boiling water.
For Electric Water Heaters
Turn the circuit breaker for the water heater to the OFF position before touching anything else. Never allow heating elements to run without water fully covering them — a dry element burns out in minutes and is an avoidable expense.
For Gas Water Heaters
Set the thermostat dial to “Pilot” or close the gas supply valve entirely. If you shut the gas off completely, you’ll need to relight the pilot afterward — check the label on your unit for the specific procedure before you start. Give the tank at least an hour to cool down if you have time, or do the job in the morning after shutting the heater off the night before.
Draining vs. Flushing — They’re Not the Same Thing
This distinction matters and often gets skipped in online guides. Draining means emptying the tank. Flushing is the step that actually removes sediment — you turn the cold water supply back on while the drain valve is still open, using pressurized water to stir up and push out what settled at the bottom.
Draining alone doesn’t clean the tank. The flush cycle — the repeated cold water bursts — is what does the real work. Understanding this helps you follow the steps correctly and know when the job is actually done.
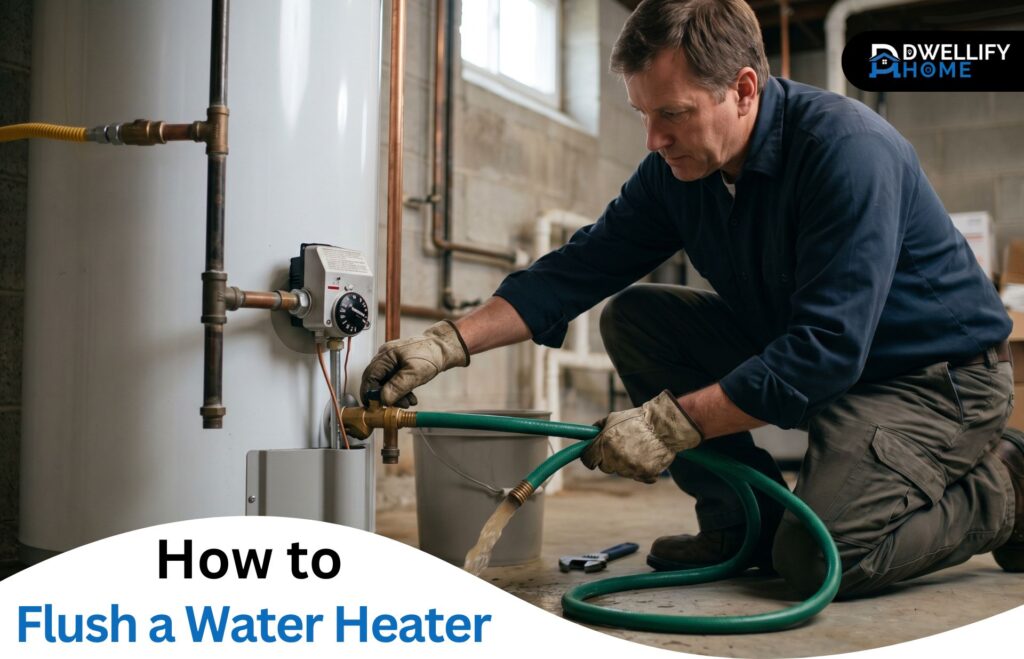
How to Flush a Tank Water Heater (Step-by-Step)
Work through these in order. The full process takes 30 to 60 minutes for most standard tank sizes.
Step 1 — Turn Off the Heat Source
Electric: Flip the water heater breaker at your main panel to OFF. Gas: Turn the thermostat dial to “Pilot” or close the gas supply valve.
Don’t skip this step. Running heating elements or a burner without water in the tank causes immediate damage.
Step 2 — Shut Off the Cold Water Supply
Find the cold water inlet valve at the top of the tank and turn it clockwise to close it. If there’s no dedicated shutoff valve, use the main house water supply valve instead.
Step 3 — Open a Hot Water Faucet Nearby
Turn on a hot water faucet at a nearby sink or fixture and leave it open throughout the drain. This lets air into the system so the tank drains freely. Without it, the vacuum inside the tank slows drainage significantly.
Step 4 — Connect a Garden Hose to the Drain Valve
The drain valve is at the base of the tank, threaded for a standard garden hose. Screw the hose on and route the other end to a floor drain, outside to the ground, or into a large bucket. The water that comes out will be hot immediately — confirm the hose is positioned correctly before opening the valve.
Step 5 — Open the Drain Valve and Let the Tank Empty
Turn the valve counterclockwise to open it. If there’s no handle, use a flathead screwdriver. A 40-gallon tank typically drains in 20 to 30 minutes. A larger or more sediment-heavy tank may take longer. Watch the flow — if it slows or stops before the tank is empty, the valve may be clogged.
Step 6 — Flush Out the Sediment with Cold Water Bursts
Once the tank is empty, turn the cold water supply back on with the drain valve still open. Fresh water will push through the tank and carry sediment out through the hose. Run it in 30 to 60 second bursts, then let the flow settle and repeat.
The job is done when the water coming out of the hose is completely clear — no cloudiness, no particles, no discoloration. Don’t stop based on time. Stop when the water tells you it’s clean.
Step 7 — Close the Valve, Remove the Hose, and Refill
Close the drain valve firmly — don’t overtighten, especially on plastic valves. Remove the hose. Open the cold water supply fully to refill the tank. The hot water faucet you opened earlier will sputter as air is pushed out. When a steady stream of water flows without sputtering, the tank is full. Close the faucet.
Step 8 — Restore Power and Check for Leaks
Electric: Flip the breaker back on — only after the tank is full. Gas: Open the gas valve, relight the pilot if needed, and return the thermostat to your normal setting.
Run a dry paper towel around the drain valve and hose connection area. If anything is damp, tighten the fitting. Give the tank 20 to 30 minutes to reach temperature before expecting full output.
What to Do If the Drain Valve Is Clogged
A clogged drain valve is one of the most common problems people run into mid-flush, particularly with older or neglected units. Here’s how to work through it:
Close the drain valve and briefly turn the cold water supply back on to build pressure in the tank. Then quickly open the valve again — the pressure surge often breaks the blockage loose. Repeat this two or three times.
If that doesn’t work, hold a wet/dry vacuum hose directly against the valve opening and run it for 30 seconds. This pulls the sediment blockage rather than pushing against it.
As a last resort, gently insert a thin wire or straightened coat hanger into the valve opening to dislodge the material sitting at the entrance. Work carefully — you’re clearing an opening, not drilling through the valve.
If the valve still won’t flow after these attempts, it likely needs to be replaced. A brass ball valve is a worthwhile upgrade over the standard plastic valve most heaters ship with.
How to Flush a Tankless Water Heater (Descaling Process)
Tankless water heaters don’t store water, so there’s no sediment to flush in the traditional sense. Instead, mineral scale builds up inside the heat exchanger — the component that heats water on demand — and needs to be dissolved using a cleaning solution circulated through the system.
What You’ll Need for Descaling
- Submersible circulation pump (included in most tankless flush kits)
- Two washing machine hoses
- A clean 5-gallon bucket
- 4 gallons of undiluted white vinegar, or a manufacturer-approved descaling solution
Step-by-Step: Descaling a Tankless Water Heater
- Turn off power to the unit at the breaker (electric) or close the gas supply valve (gas).
- Close the cold water inlet valve, the hot water outlet valve, and the main service valve.
- Open the purge port valves on both the hot and cold isolation valves — these are the small T-shaped handles.
- Connect one hose from the pump’s discharge port to the cold water purge port. Connect the second hose from the hot water purge port back down into the bucket. Place the pump in the bucket.
- Fill the bucket with 4 gallons of white vinegar. Plug in the pump and run the descaling solution through the heat exchanger for 45 to 60 minutes.
- Turn off the pump. Disconnect the inlet hose and replace the service cap. Empty the bucket, place the outlet hose back in the empty bucket, and open the cold water valve to flush clean water through the system for at least 5 minutes.
- Remove and rinse the cold water inlet filter screen — mineral debris collects here and restricts flow.
- Close all purge ports, reinstall service caps, restore water and power, and run a hot faucet briefly to clear any air from the lines.
How Often Does a Tankless Water Heater Need Descaling?
Once a year is sufficient for most households. In hard water areas, every six months is a better schedule. Reduced water flow, inconsistent temperature, or the unit cycling on and off during use are signs that descaling is overdue.
Can You Flush a Water Heater Too Often?
Flushing more frequently than recommended won’t harm the tank or its internal components. The concern is the drain valve itself. Standard plastic drain valves aren’t designed for repeated operation — frequent turning causes the rubber seat inside to wear, eventually leading to a slow drip even when the valve is closed.
Annual or bi-annual flushing is well within safe limits. Upgrading to a brass ball valve largely removes this concern, since brass valves are far more durable and handle repeated use without issue.
Two More Things Worth Checking While You’re At It
Since the tank is already partially drained, it takes only a few extra minutes to check two components that directly affect the heater’s safety and lifespan.
Test the Temperature and Pressure Relief (TPR) Valve
The TPR valve is a safety device that releases automatically if pressure or temperature inside the tank exceeds safe levels. It’s located on the side of the tank near the top, with a small lever and a discharge pipe running downward.
To test it, lift the lever briefly and let it snap back. You should hear a quick rush of water or steam from the pipe. If lifting the lever produces nothing, or if it continues to drip after releasing, the valve needs to be replaced. It’s an inexpensive part and a non-negotiable safety component.
Check the Anode Rod While the Tank Is Partially Drained
The anode rod is a magnesium or aluminum rod suspended inside the tank that attracts corrosive elements from the water, protecting the steel tank walls from rusting. It degrades over time and typically needs inspection every three to five years.
To check it, locate the hex head on top of the tank (sometimes under insulation or a plastic cap), remove it with a socket wrench, and pull the rod out. If it’s still solid and close to its original diameter, it’s fine. If it’s heavily corroded, coated in chalky white crust, or worn thin, replace it. A new anode rod costs $20 to $40 and adds years to the tank’s life.
When to Call a Plumber Instead of Doing It Yourself
Most tank flushes go smoothly with no issues. But there are situations where stopping and calling a professional is the right call:
- The drain valve is completely seized and none of the clearing methods work
- There’s active leaking from the tank body — not fittings — after the flush
- The water never runs clear after multiple full flush cycles
- The heater is over 10 years old and showing several performance issues simultaneously
- There’s any uncertainty around gas components, valves, or pilot relighting
Knowing when not to push through is part of doing the job well.
Frequently Asked Questions
How long does it take to flush a water heater?
Most tank water heaters take 30 to 60 minutes to flush completely. A smaller, recently maintained tank drains faster. A larger tank with significant sediment buildup may take closer to 90 minutes. Tankless descaling typically runs 60 to 90 minutes including setup and the cleaning cycle.
Can I flush a water heater myself with no plumbing experience?
Yes. A standard tank flush doesn’t require plumbing skills — just the ability to follow sequential steps carefully. The two things to get right are turning off the power or gas before you start, and making sure the tank is completely full before restoring power at the end.
How do I know when the flush is finished?
The water coming out of the garden hose should be completely clear — no cloudiness, discoloration, or visible particles. Don’t stop based on time. Use the clarity of the outflowing water as your indicator.
Is flushing a gas water heater different from an electric one?
The flushing process is essentially the same. The only difference is how you shut down and restart the heat source. Electric units use the circuit breaker. Gas units use the thermostat dial and gas supply valve, and may require relighting the pilot afterward.
What does it mean if the water never runs clear?
Persistent cloudiness after multiple flush cycles usually points to heavy calcification or internal corrosion. At that stage, continued flushing is unlikely to resolve the issue. A professional assessment is the right next step — replacement may be more cost-effective than further maintenance.
Should I flush my water heater before or after winter?
Before winter is the better choice. Heading into the coldest months — when hot water demand is highest — with a clean, efficient tank means lower energy bills and a heater that isn’t working harder than it needs to. End of summer or early fall is an ideal time to build this into your annual routine.
Conclusion
Water heater flushing is one of those tasks that’s easy to overlook precisely because the heater keeps working even when it shouldn’t be. But sediment builds quietly, costs gradually, and fails suddenly. Staying on top of this once a year — or twice a year in hard water areas — keeps the unit running the way it was designed to, extends its usable life by several years, and prevents the kind of gradual damage that’s expensive to fix.
Add it to your home maintenance calendar. It’s a small investment of time that pays back consistently.
Disclaimer
The content on Dwellify Home is provided for general informational purposes only. While we aim to keep all guidance accurate and up to date, individual home systems, water conditions, and heater models vary. Always consult your unit’s manufacturer manual and, where in doubt, contact a licensed plumbing professional. Results and outcomes may differ based on your specific situation.