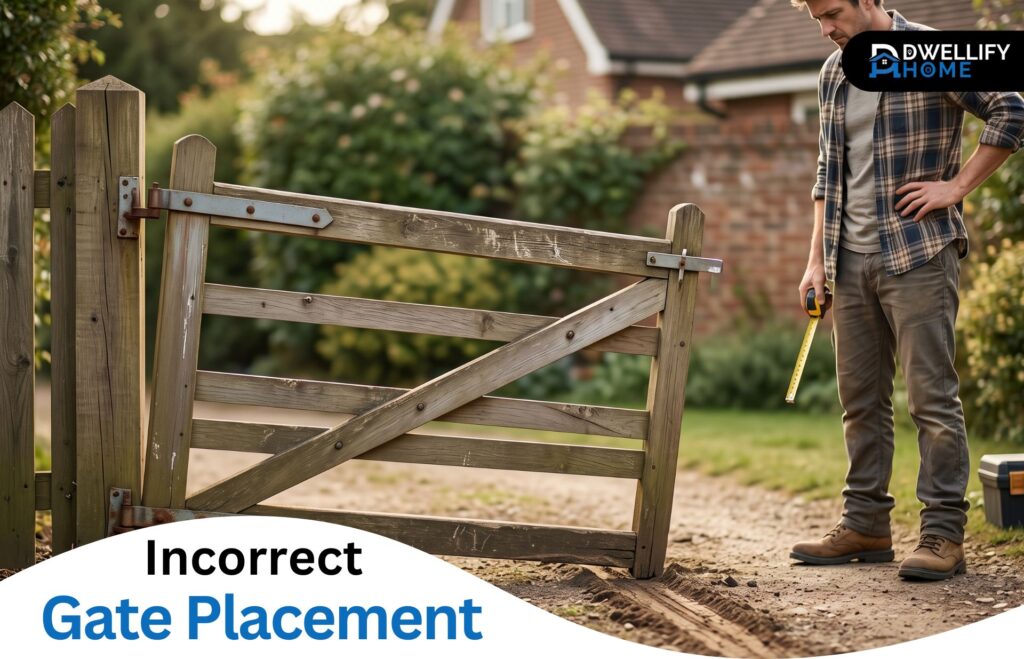
Most homeowners only think about their gate when it stops working — when it drags across the patio, refuses to latch, or scrapes a fresh arc into the dirt every time it swings open. By that point, the real problem usually isn’t the gate itself. It’s where, and how, it was placed in the first place.
After two decades of pulling sagging gates back into square and resetting posts that should never have been sunk where they were, the pattern is hard to miss. Get the placement right at the start, and the gate behaves itself for fifteen years. Get it wrong, and you’re calling someone like me within two.
This guide walks through what actually goes wrong, why it goes wrong, and what you can realistically do about it.
A Short Answer
Incorrect gate placement is any error in a gate’s position, post depth, hinge alignment, swing direction, or clearance that weakens its function over time. Identifying it early prevents sagging, binding, security gaps, and costly repairs down the line.
Mission Statement
At Dwellify Home, we help homeowners make practical, stylish, and well-informed decisions about their living spaces. From everyday home improvements to outdoor and property projects, our goal is to deliver clear, experience-based guidance that turns confusing choices into confident ones.
What Is Incorrect Gate Placement?
Incorrect gate placement is any error in where the gate sits, how it’s anchored, which way it swings, or how its structural elements are arranged — errors that quietly undermine its function, lifespan, or safety.
It’s not just about the gate being in the wrong spot on the fence line. It covers post depth, hinge positioning, brace direction, swing arc, ground clearance, and how the whole assembly relates to the slope, drainage, and traffic flow around it. A gate that looks fine on day one can still be incorrectly placed if any of those elements were rushed or misjudged.
Quick Reference: Incorrect Gate Placement at a Glance
| Issue | Common Cause | Practical Fix |
| Gate sagging at the latch | Wrong brace direction or worn hinges | Anti-sag kit or rebuild brace correctly |
| Gate dragging on ground | Shallow post or ground settling | Reset post and adjust clearance |
| Gate not latching | Sagged frame or shifted post | Tensioner kit or relocate latch receiver |
| Gate binding in seasons | Tight clearance or swollen wood | Plane edge or add expansion gap |
| Gate crossing boundary line | Skipped survey before install | Reposition gate within property line |
Key Takeaways
- Gate posts must be sunk at least one-third of their length, in concrete, sized to the gate’s actual weight.
- The diagonal brace on a wooden gate must run from the bottom hinge corner to the top latch corner — never the reverse.
- Hinges should sit on the solid face of a post, not its narrow edge, and never on the high side of a slope.
- Most sagging gates can be corrected with an anti-sag kit if the post is still plumb.
- Property lines, HOA rules, and local codes should always be checked before placing a gate.
Why Correct Gate Placement Matters
A gate is the single most-used part of any fence system. It carries dynamic load every time it opens, bears its own weight constantly, and sits exposed to weather, soil movement, and human wear.
When placement is right, none of that becomes a problem. When it’s wrong, every one of those forces starts working against you — slowly at first, then all at once. Security drops, the gate stops latching, the posts shift, and what should have been a fifteen-year fixture becomes a two-year headache.
Common Causes of Incorrect Gate Placement
Most placement errors trace back to the same handful of mistakes I see repeated across job sites every year.
Undersized or Poorly Set Gate Posts
Gate posts carry several times the load of a regular line post. Treating them the same is the fastest way to kill a gate. Hinge posts need to sit at least one-third of their length below ground, set in concrete, and sized to match the gate’s weight and width. Skip any of that and you’ll see the post leaning within a season.
Hinges Mounted on the Wrong Side or Slope
When hinges go on the high side of a slope, the gate carries uneven weight every time it swings. The result is premature wear on the upper hinge and a gate that drops on the latch end. Mounting hinges on a post’s narrow edge instead of its solid face is another quiet killer — the screws lose grip far sooner than they should.
Incorrect Diagonal Brace Direction
This one wrecks more wooden gates than any other mistake. The diagonal brace must run from the bottom hinge corner up to the top latch corner. That puts the timber in compression, which it handles well. Run it the other way and the brace is in tension — and timber doesn’t resist tension. The gate sags within months.
Wrong Swing Direction Relative to Terrain and Traffic Flow
A gate should swing where it has room to swing — not where it was convenient to hang. Pathway gates that open onto stairs, driveway gates that swing into oncoming cars, side-yard gates that hit a wall mid-arc — all of these are placement mistakes, not hardware problems.
Improper Clearance and Hardware Gaps
Too tight, and the gate binds the moment humidity rises. Too loose, and it rattles, gaps appear, and security drops. Wooden gates generally need around half an inch to three-quarters of an inch on each side for seasonal movement. The bottom clearance matters too — too low, and debris and moisture rot the rail; too high, and pets or pests slip through.
Ignoring Property Lines and Setbacks
A gate placed even a few inches over the boundary line can trigger a neighbor dispute that’s far more expensive than the gate itself. Fire codes, utility easements, and HOA setbacks all dictate where a gate can legally sit. Skipping that check is a mistake I’ve watched cost people thousands.
Poor Drainage and Ground Movement Planning
Posts set in low-lying areas without drainage will heave, rot, or shift. The gate doesn’t fail because it was built badly — it fails because the ground beneath it was never going to hold still.
Convenience-Driven Placement Decisions
The most common cause of all. The gate goes where the fence layout made it easy, not where it actually serves the property. Years later, the homeowner is squeezing a wheelbarrow through a 32-inch opening that should have been 48.
Real Consequences of Incorrect Gate Placement
The fallout from poor placement shows up in more ways than people expect.
Sagging, Binding, and Latch Failure
The most obvious symptom. The gate drops, scrapes the ground, or refuses to meet the latch. Almost always traceable to a placement or installation error from day one.
Drainage and Water Pooling Problems
A gate placed at a low point traps water against the post base. Wood rots, metal rusts, and the post eventually shifts. The gate inherits all of it.
Security Weaknesses and Easy Bypass Points
A gate that won’t latch properly is functionally unlocked. A gate with excessive bottom clearance is a gap a child or animal can slip through. Placement determines both.
Boundary Disputes and Legal Risks
Gates crossing a property line — even slightly — create real legal exposure. I’ve seen homeowners forced to remove and re-set entire gate assemblies after a survey caught a six-inch encroachment.
Reduced Property Value and Curb Appeal
A crooked, dragging, or visibly misaligned gate signals neglect to anyone walking up to the property. Appraisers and buyers notice.
Daily Access, Safety, and Liability Issues
A gate that swings into a driveway, blocks a walkway, or pinches a side passage is a daily inconvenience and, in some cases, a liability. If someone gets hurt because of poor placement, the responsibility usually traces back to whoever installed it.
How to Tell If Your Gate Is Placed Incorrectly
You don’t need a contractor to spot most of the warning signs. Walk up to the gate and look for these.
- The gate drags, scrapes, or refuses to fully close
- The latch no longer aligns with its receiver
- The hinge post leans, even slightly
- There’s a visible gap that grows or shrinks with the seasons
- Water pools at the base of either post
- The gate swings into something — a wall, a step, a parked car
- The diagonal brace runs from top hinge to bottom latch (wrong direction)
Two or more of these together usually means the placement was off from the start, not just that the gate is aging.
How to Fix Incorrect Gate Placement
Knowing how to fix incorrect gate placement starts with identifying the actual cause. Patching a symptom while the root issue remains is the most common repair mistake I see.
Realigning Hinges and Adjusting Hardware
If the gate has only dropped slightly and the post is still plumb, replacing the screws with through-bolts and shimming the lower hinge often restores alignment. It’s the simplest fix, and it works more often than people expect.
Resetting or Replacing the Hinge Post
When the post itself has shifted, no amount of hinge adjustment will hold. The post needs to come out, the hole needs to go deeper, and the concrete footing needs to be sized properly for the gate’s load.
Installing an Anti-Sag Kit or Gate Tensioner
For wider gates that have started to droop, a gate tensioner — a steel cable and turnbuckle running from the bottom hinge corner to the top latch corner — pulls the frame back into square. It’s the standard retrofit for a sagging wooden gate, and it works because steel handles tension where timber can’t.
Re-bracing the Gate Frame the Right Way
If the diagonal brace was installed in the wrong direction, the gate panel has to come apart and be rebuilt with the brace running from the bottom hinge corner to the top latch corner. There’s no shortcut around this one.
Adjusting Ground Clearance and Drainage
If the gate is dragging, sometimes the answer is regrading the ground beneath the swing arc rather than lifting the gate. Adding gravel at the post bases or running a small drainage channel can save the posts from years of moisture damage.
Repositioning the Gate When Other Fixes Won’t Work
Sometimes the placement is simply wrong, and no repair will hold. If the gate swings into a wall, sits across a property line, or was hung on a section of fence that can’t support it, the honest answer is to move it. It costs more upfront and saves more long-term.
Using a Gate Placement Calculator and Measurement Tools
A gate placement calculator — there are several free ones online — helps you map the swing arc, post spacing, hardware clearance, and gap allowances before you ever pick up a shovel. The most common use is subtracting hardware clearance: a 36-inch opening usually needs a panel closer to 34.5 inches to accommodate hinges and latch.
For driveway gates, these tools are even more useful, since vehicle turning radius and approach angles matter as much as raw width. A laser measure, a long tape, and a string line will catch most placement errors before they become permanent.
Gate Placement Considerations by Gate Type
Different gates have different placement rules. Treating them all the same is where many DIY installs go sideways.
Garden and Side-Yard Gates
These usually sit close to shared boundaries, so setback rules and neighbor relations matter. Keep the swing inward, leave room for landscaping growth, and avoid placing them where roof runoff drains.
Driveway and Vehicle Gates
Width is the big one. Sixteen to twenty feet for a double gate handles most modern vehicles. Anything narrower turns daily entry into a stress test. Sliding gates are worth considering when the driveway slopes or swing space is tight.
Pedestrian and Pathway Gates
A 36-inch clear opening is the accepted standard for accessibility. Make sure the swing path doesn’t cross stairs or thresholds.
Pool, Pet, and Safety Gates
These are governed by code in most regions — self-closing, self-latching, with specific height and gap requirements. Placement near a pool deck especially needs to follow local pool fence rules to the letter.
Automated and Smart Gates
Power-operated gates need clearance for the operator arm, sensor lines of sight, and a level swing path. Placing them on uneven ground or against a wall almost always causes recurring fault errors.
Handling Gate Placement on Sloped or Uneven Ground
Sloped ground is where most installers — and most DIYers — quietly lose the plot. A square gate panel on plumb posts will only swing freely in one direction across a slope. The other direction, it drags.
The two real solutions are racking the gate panel to follow the slope, or installing a square panel with enough ground clearance to clear the high point of the swing arc. Raked gates look more deliberate; lifted gates are simpler to build. Either works. What doesn’t work is pretending the slope isn’t there.
Material-Specific Placement Mistakes to Watch For
Wooden Gates
Wood moves with humidity. Tight clearances that feel right in summer will bind in winter. The diagonal brace direction matters more here than with any other material. Always seal the bottom edge against moisture.
Metal and Wrought Iron Gates
These are heavy, and the hinge post carries more strain than most people realize. Undersized posts and shallow footings show up fast. Welded internal bracing means re-bracing isn’t an option later, so getting the placement right at install is critical.
Vinyl and Composite Gates
Vinyl flexes more than people expect, especially on wider gates. Internal aluminum reinforcement and a gate tensioner from day one prevent the slow droop these gates are prone to.
Local Codes, HOA Rules, and Setback Requirements
Before any gate gets placed, check three things: the property survey, the local building code, and any HOA guidelines. Pool gates, fire-access gates, and corner-lot gates often have specific swing and setback rules. Permits aren’t optional for many gate installations, and skipping that step has forced more than a few of my clients to rebuild from scratch.
A short call to the local planning office takes ten minutes and saves entire weekends.
When to DIY the Fix and When to Hire a Professional
Realistic guidance: hinge adjustments, latch shimming, anti-sag kits, and bottom rail trimming are all reasonable DIY jobs if you’ve got basic tools and a free Saturday.
Resetting posts, repositioning the gate, rebuilding a gate panel with reversed bracing, or correcting a gate that crosses a property line are jobs worth handing off. The cost of getting them wrong twice is almost always higher than getting them done right once.
How to Get Gate Placement Right from the Start
The best repair is the one you never have to do. Before installing a new gate, walk through this short checklist.
- Confirm the property line with a current survey
- Check local codes, HOA rules, and any pool or fire-access requirements
- Map the full swing arc on the ground with chalk or string
- Account for terrain slope and drainage patterns
- Size the posts and footings to the gate’s actual weight, not a generic spec
- Confirm hardware clearance before ordering the panel
- Plan the swing direction around real-world traffic, not convenience
Ten minutes of planning at this stage saves years of frustration later.
Frequently Asked Questions
How do I know if my gate is placed incorrectly?
Look for sagging, dragging, latch misalignment, a leaning hinge post, water pooling at the base, or a swing path that hits something. Any two of these together usually mean the placement, not just the hardware, is the real problem.
How do you fix a misaligned or sagging gate?
Start by checking whether the hinge post is still plumb. If it is, replace screws with through-bolts and add an anti-sag kit running from the bottom hinge corner to the top latch corner. If the post has shifted, it needs to be reset before any other fix will hold.
Which way should the diagonal brace run on a wooden gate?
The diagonal brace should run from the bottom hinge corner up to the top latch corner. That puts the timber in compression, which it handles well. Running it the other way puts it in tension, which timber cannot resist, and the gate will sag.
How deep should a gate post be set?
A gate post should be set at least one-third of its total length into the ground, in concrete, with extra depth in cold climates to clear the frost line. For most residential gates, that means 24 to 36 inches deep, deeper for wide or heavy gates.
Can incorrect gate placement affect property value?
Yes. A gate that visibly drags, leans, or sits awkwardly on a property signals neglect to buyers and appraisers. Boundary-line errors can also create legal complications that show up during a sale and reduce offers.
What’s the correct clearance between the gate and the ground?
Most residential gates need around two to three inches of bottom clearance. That’s enough to clear seasonal soil movement and debris without leaving a gap pets or pests can slip through. Pool gates often have stricter clearance limits set by code.
Should a gate swing inward or outward?
Most residential gates should swing inward toward the property, so they don’t open into sidewalks, streets, or shared paths. Emergency exit gates and some commercial gates are exceptions and must swing outward to meet safety codes.
Conclusion
Most gate problems people live with for years come down to the same root cause: the placement was wrong from the start. A sagging panel, a stubborn latch, a leaning post — they’re symptoms of decisions made at install. The good news is that almost every issue tied to incorrect gate placement has a practical fix, and almost every new install can avoid these mistakes entirely with a little planning.
Walk the line, check the slope, mind the boundary, and size the posts honestly. Get those right, and the gate takes care of itself.
Disclaimer
The information shared in this article is intended for general informational purposes only. Individual results, property conditions, local regulations, and personal preferences may vary. For complex installations, structural concerns, or legal questions about boundaries and codes, we recommend consulting a qualified local professional before taking action.