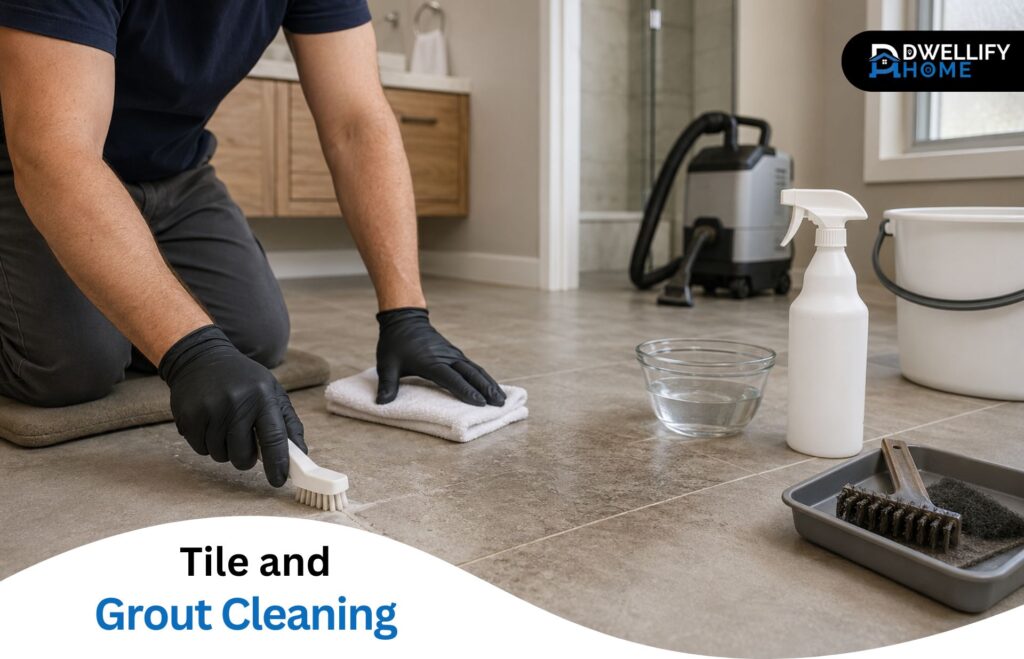
Dark grout lines can make otherwise clean floors and showers look neglected. Reaching for the strongest cleaner, however, can turn discoloration into etched tile, faded grout, or damaged sealer.
Successful tile and grout cleaning starts with three checks: the tile material, the grout type and condition, and the substance causing the buildup. Routine dirt may need only a mild cleaner, while kitchen grease, hard-water deposits, permanent staining, and failed grout require different responses.
Short Definition
Tile and grout cleaning removes dirt, grease, soap residue, and stains from tiled surfaces and grout lines using methods suited to the tile, grout type, and condition.Mission Statement
DwellifyHome helps homeowners, renters, and home lovers create practical, stylish, and comfortable living spaces through clear, trustworthy guidance.
Quick Cleaning Checklist
- Identify the tile and grout type.
- Inspect for cracks, loose tile, or failed caulk.
- Choose a manufacturer-approved cleaner.
- Test it in a hidden area.
- Remove loose dirt before wet cleaning.
- Follow dilution and dwell-time instructions.
- Scrub gently with a nylon brush.
- Rinse thoroughly and change dirty water.
- Let the grout dry before evaluating it.
- Call a professional for damage, delicate stone, or recurring moisture.
What Tile and Grout Cleaning Can—and Cannot—Fix
Cleaning can remove loose soil, grease, soap residue, mineral buildup, and some surface stains. It may also brighten grout that has gradually darkened from foot traffic or dirty mop water.
It cannot repair:
- Cracked, loose, or crumbling grout
- Missing or peeling shower caulk
- Loose or hollow-sounding tile
- Etched or deeply scratched natural stone
- Leaks or moisture behind the installation
- Permanent color changes within the grout
Grout that remains discolored after it has been cleaned, rinsed, and allowed to dry may need color restoration rather than stronger chemicals. Damaged joints may require repair or regrouting.
Check Your Tile, Grout, and Buildup Before You Clean
The safest cleaner depends on the entire installation, not just the visible stain.
| What to check | What to look for | Why it matters |
| Tile material | Ceramic, porcelain, marble, limestone, travertine, slate, or another surface | Natural stone can react badly to products tolerated by ceramic or porcelain. |
| Grout type | Cement-based, sanded, unsanded, epoxy, or unknown | Grout types differ in porosity, stain resistance, and sealing needs. |
| Condition | Sound, cracked, powdery, missing, or uneven | Aggressive scrubbing and steam can worsen deteriorated joints. |
| Buildup | Grease, soap scum, mineral deposits, floor soil, or cleaner residue | Different soils respond to different cleaning chemistry. |
| Existing treatment | Sealed, color-sealed, coated, or unknown | Strong chemicals and steam may shorten the life of some treatments. |
Check leftover packaging, installation records, or manufacturer information if the material is uncertain. For valuable or unidentified natural stone, use a conservative stone-safe method or consult a qualified surface-care professional.
What Is the Best Thing to Clean Tile and Grout With?
For routine soil, the safest starting point is usually a manufacturer-approved pH-neutral cleaner, clean water, a microfiber cloth or mop, and a nonmetallic grout brush. The best product is one confirmed as compatible with both the tile and the grout—not simply the strongest formula available.
Daltile’s ceramic and porcelain care guidance recommends removing loose dirt first, following the cleaner’s dilution and dwell-time directions, rinsing with clean water, and removing excess water. The Natural Stone Institute recommends neutral cleaners, stone soap, or mild detergent for natural stone and warns against acidic and abrasive products.
A targeted cleaner may be needed for grease, soap scum, or mineral deposits. Confirm surface compatibility and follow the label rather than improvising a stronger concentration.
How to Clean Tile and Grout Safely, Step by Step
1. Inspect and prepare the area
Look for loose tile, deteriorating grout, failed caulk, and damaged finishes. Ventilate the room and use any gloves or eye protection required by the product label.
Move small items out of the way and protect nearby wood, metal, painted surfaces, or fabrics from splashes.
2. Remove loose dirt
Vacuum or sweep the surface before using liquid cleaner. Grit left on the floor can scratch the finish or turn into muddy residue that settles inside the grout.
Use a vacuum attachment without exposed or damaged metal parts on delicate tile.
3. Prepare and test the cleaner
Dilute the cleaner exactly as directed. More product can leave a film and may be harder to rinse away.
Test it behind a fixture, beneath an appliance, or in another inconspicuous area. Let the test spot dry before checking for fading, etching, haze, or changes to the finish.
4. Work in manageable sections
Apply the cleaner to a small area so it can receive the recommended dwell time without drying on the surface. Dwell time allows the product to loosen soil before scrubbing begins.
Use a nylon grout brush or surface-safe pad. Moderate agitation is usually more controlled than aggressive pressure.
5. Rinse and remove the dirty solution
Lift away the loosened soil with clean water and a microfiber cloth, mop, or wet-extraction tool appropriate for the surface. Change the water once it becomes gray rather than spreading it across the next section.
Rinsing matters because cleaner residue can attract more soil and leave tile hazy.
6. Dry and reassess
Remove standing water and let the area dry. Wet grout naturally looks darker, so judging it immediately can lead to unnecessary repeat treatments.
If discoloration remains, identify whether it is a specific stain, permanent color change, failed sealer, or physical damage before applying anything stronger.
How to Handle Stubborn Dirt, Stains, and Buildup
Soap Scum and Hard-Water Deposits
Shower buildup may contain both soap residue and mineral deposits. Use a product approved for the tile material and the particular deposit.
Acidic mineral removers can etch marble, limestone, travertine, and other acid-sensitive stone. A non-acidic stone-safe product is the safer choice for those surfaces.
Kitchen Grease and Food Residue
Greasy kitchen grout may need a compatible alkaline cleaner rather than the bathroom product used for mineral buildup. Follow the stated dilution and dwell time, then rinse thoroughly.
Do not combine degreasers with bleach, acids, or other cleaners.
Embedded Floor Dirt and Cleaner Residue
Dark floor grout is often caused by tracked-in soil, old product residue, or dirty mop water. Apply a compatible cleaner, agitate the grout lines, and remove the suspended soil instead of pushing it around with a saturated mop.
Several light cleaning passes are safer than one overly concentrated treatment.
Recurring Dark or Mildew-Like Staining
Dark marks that return quickly may point to high humidity, slow drying, failed caulk, or moisture entering behind the surface. Clean the visible area with a compatible product, but do not assume every dark mark is mold.
Persistent dampness, odor, loose tile, or widespread recurring growth deserves professional assessment because surface cleaning cannot correct an underlying moisture source.
Is the Grout Dirty, Permanently Stained, or Damaged?
Let the grout dry fully before deciding what it needs next.
- Likely dirty: The color improves during a test cleaning, and the joint remains solid. Continue with the same compatible method.
- Possibly stained: The grout feels sound but remains uneven or discolored after cleaning. Grout recoloring or color sealing may provide a more consistent result.
- Likely damaged: The joint is cracked, powdery, recessed, loose, or missing. Stop aggressive cleaning and consider grout repair or regrouting.
- Possible moisture problem: Caulk is peeling, staining returns rapidly, tile feels loose, or the area stays damp. Investigate the source rather than repeatedly bleaching the surface.
Cleaning, whitening, color sealing, and regrouting are separate jobs. A cleaning service cannot promise to restore grout to its original color when discoloration has penetrated the material or the grout itself is failing.
Cleaning Methods That Can Damage Tile, Grout, or Sealer
Vinegar and Other Acidic Cleaners
Vinegar is frequently promoted as a household cleaner, but it is not a safe default for grout or natural stone. Acid can etch acid-sensitive stone and may affect cement-based grout or protective treatments.
Use an acidic product only when the surface and product manufacturers specifically approve it for the application.
Bleach and the Danger of Mixing Cleaners
Bleach can discolor tinted grout and may affect surrounding materials or sealers. Follow its label, provide ventilation, and test compatibility before use.
Never mix bleach with vinegar, ammonia, or another cleaner. The CDC warns against mixing bleach or disinfectants with household cleaners because dangerous vapors can be released.
Metal Brushes, Abrasives, and Excessive Pressure
Wire brushes, steel wool, and aggressive pads can scratch tile, disturb grout, and damage polished finishes. A nylon brush provides more controlled agitation.
Indoor pressure washing can also force water into joints or surrounding materials and should not be treated as an ordinary cleaning method.
Steam Cleaning Damaged or Unsuitable Surfaces
Steam reduces reliance on cleaning chemicals, but it is not universally suitable. Grout condition, sealer compatibility, tile material, installation, and equipment instructions all matter.
The Home Depot grout-cleaning guide notes that steam may remove grout sealer along with soil. Avoid aggressive steam on cracked, loose, or deteriorating joints.
DIY vs. Professional Tile and Grout Cleaning
DIY cleaning is reasonable for a small area with known materials, sound grout, and routine buildup. It costs less and gives the homeowner control over the products used, but detailed grout lines can require considerable time and physical effort.
Professional tile and grout cleaning becomes more practical when:
- The surface is delicate, valuable, or difficult to identify
- A large floor has deeply embedded soil
- Several compatible DIY treatments have failed
- Grout is unevenly discolored across a wide area
- Steam, extraction, polishing, or color sealing is being considered
- Tile, grout, or caulk shows signs of physical failure
- Moisture or recurring growth may exist behind the surface
A professional process commonly includes inspection, test cleaning, dry-soil removal, pretreatment, agitation, extraction, and a final condition check. Sealing, recoloring, and repairs may be separate services.
Professional tile and grout cleaning costs vary by square footage, tile size, grout condition, method, location, and added services. As a dated reference, Angi’s July 2026 estimate places many projects between $285 and $676, with an average near $479. Local minimum charges and restoration work can change the total substantially.
Before hiring, ask:
- What method will be used on this specific tile and grout?
- Will a test area be completed first?
- Does the quote include sealing, furniture moving, or stain treatment?
- Are repair and color restoration priced separately?
- How long must the area remain unused?
- What result is realistic for permanently discolored grout?
For substantial water damage or widespread mold, follow the professional-help guidance provided by the EPA.
Should You Seal Grout After Cleaning?
Some cement-based grout benefits from a compatible penetrating sealer because sealing can reduce the absorption of spills and soil. It does not make the tile installation waterproof or repair deteriorated joints.
Epoxy grout generally does not require the same penetrating sealer used on cement grout. Other modern formulations may have their own care requirements.
Before sealing:
- Confirm the grout and tile accept the chosen product
- Remove all cleaning residue
- Let the grout dry for the period specified by the sealer manufacturer
- Test for unwanted darkening or finish changes
- Follow the application and curing directions exactly
A universal annual sealing schedule is less reliable than checking the grout and following its manufacturer’s guidance.
How to Keep Tile and Grout Cleaner Longer
Small maintenance habits reduce the need for aggressive deep cleaning:
- Vacuum or sweep floors before mopping.
- Use a clean mop head and replace dirty water promptly.
- Rinse away products that are not designed to remain on the surface.
- Wipe up kitchen spills before they settle into grout.
- Squeegee shower walls after use.
- Run bathroom ventilation and allow wet surfaces to dry.
- Repair failed caulk and investigate recurring moisture.
- Use only routine cleaners approved for the installation.
Frequently Asked Questions
How Often Should Tile and Grout Be Deep-Cleaned?
There is no reliable schedule for every home. Kitchens, showers, entryways, pets, children, foot traffic, ventilation, and routine maintenance all affect cleaning frequency. Deep-clean when ordinary care no longer removes visible buildup, but address spills and moisture promptly so stronger treatments are needed less often.
Can You Use the Same Cleaner on Tile and Grout?
Sometimes, but only when the product is approved for the complete installation. A cleaner tolerated by porcelain may still affect cement grout, sealer, or nearby natural stone. Check the label for both materials, perform a hidden test, and avoid assuming that “tile-safe” automatically means grout-safe.
Why Does Grout Still Look Dirty After Mopping?
Mops can push dirty water and cleaner residue into recessed grout lines. Grout may also hold embedded grease or soil that routine mopping cannot lift. Use clean water, agitate the joints separately, remove the dirty solution, rinse thoroughly, and wait until the grout dries before judging its color.
Can Old Grout Be Made White Again?
Old grout may brighten when the discoloration is removable soil. It may not return to white if it was originally another color, has absorbed permanent stains, contains residual sealer, or has deteriorated. Sound but permanently discolored grout may be a candidate for professional cleaning or color restoration.
Does Every Type of Grout Need to Be Sealed?
No. Many traditional cement-based grouts can benefit from a compatible sealer, while epoxy grout generally does not need the same treatment. Modern grout formulations vary, so identify the product whenever possible and follow its manufacturer’s instructions instead of applying a universal sealing rule.
Choose the Safest Effective Method for Your Surface
Good cleaning starts with identification, not chemical strength. Confirm the tile and grout, match the cleaner to the buildup, test it, rinse thoroughly, and reassess after drying. When discoloration comes from failed grout, permanent staining, or moisture, knowing when to stop cleaning is part of protecting the surface.
Disclaimer
This content is for general informational purposes only. Homes, needs, preferences, budgets, and circumstances vary. Consult a qualified professional for safety concerns or legal, structural, electrical, plumbing, HVAC, installation, repair, and major property decisions.