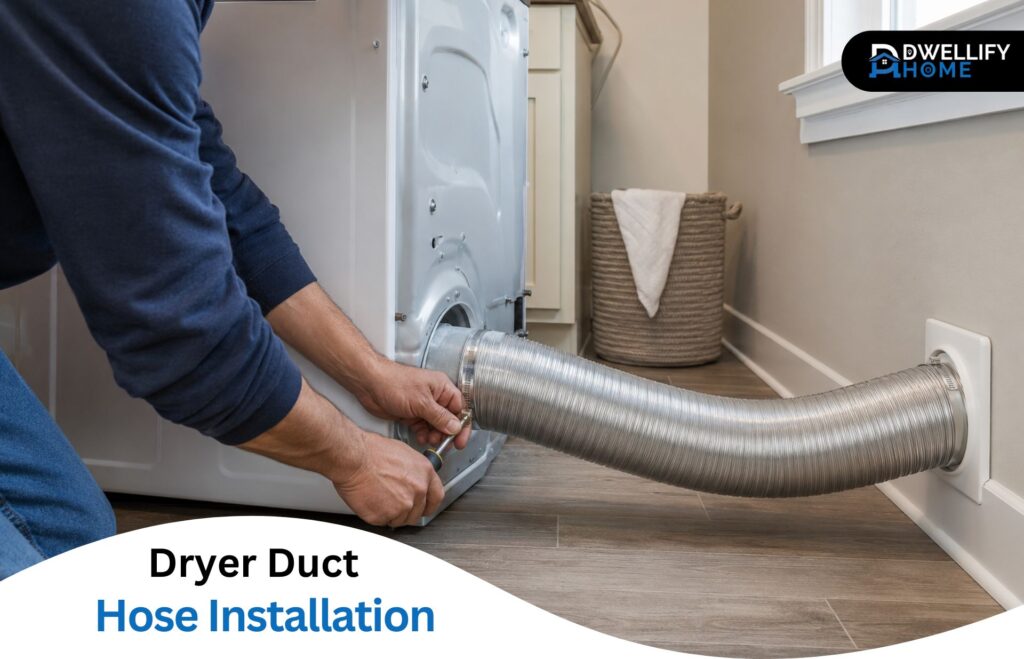
A dryer can run with a poorly fitted hose, but that doesn’t mean the connection is working properly. A loose joint can release lint and moisture, while excess hose or a crushed bend can restrict airflow.
Proper dryer duct hose installation starts with a compatible metal transition duct, secure connections, a short route, and an airflow test after the dryer is back in place. This guide focuses on connecting a dryer to an existing wall or floor vent—not constructing a new exhaust system.
Short Definition
Dryer duct hose installation is the process of connecting a vented dryer to an existing exhaust duct with a compatible transition hose that supports secure attachment and unrestricted airflow.
Mission Statement
DwellifyHome helps homeowners, renters, and home lovers make practical, stylish, and informed choices that create safer, more comfortable living spaces.
Quick Checklist
- Confirm that the existing exhaust duct terminates outdoors.
- Choose a listed, manufacturer-approved metal transition duct.
- Unplug the dryer before moving it.
- Clean and inspect both connection collars.
- Secure each end using the permitted clamps or sealing method.
- Keep the hose short, visible, and free from crushing or sharp bends.
- Test the connection and confirm airflow at the exterior vent.
Before You Start: Confirm the Installation Scope
The flexible or semi-rigid section visible behind the dryer is commonly called a vent hose. Its more precise name is a dryer transition duct. It connects the dryer’s exhaust outlet to the permanent duct system that carries exhaust outdoors.
Transition duct versus permanent exhaust duct
These parts perform related but different jobs:
- The transition duct is the removable, accessible connection behind the appliance.
- The permanent exhaust duct runs from the laundry area to the exterior vent hood.
- Concealed sections generally require smooth metal ductwork rather than a flexible hose.
The 2024 International Residential Code model provisions call for a single UL 2158A-listed transition duct no longer than 8 feet and prohibit concealing it within construction. Local adoption can differ, so the dryer manual and locally applicable requirements must guide the installation.
Simple hose connection versus new ductwork
Connecting a new hose to two clean, accessible collars is often a manageable homeowner project. Cutting an exterior opening, changing concealed ductwork, routing through a roof, or repairing a damaged wall connection is a different job and may require permits or professional installation.
Confirm that the existing wall or floor connection is part of a duct that terminates outdoors. Don’t connect a vented dryer to an opening that empties into a room, attic, crawl space, garage, or wall cavity.
Electrical, gas-dryer, and renter precautions
Unplug the dryer before moving it. Ask another person to help if the appliance is heavy or stacked.
With a gas dryer, move slowly and stop if the gas connector begins to pull, twist, or bind. Don’t disconnect or alter the gas line unless you’re qualified and permitted to perform that work. Renters should contact property management before modifying fixed venting.
Choose a Compatible Dryer Duct Hose and Connection Parts
The best material depends on which part of the system you’re replacing.
| Component | Suitable general approach | Main consideration |
| Permanent exhaust run | Smooth rigid metal duct | Supports airflow and resists crushing |
| Accessible connection behind dryer | Listed semi-rigid or other manufacturer-approved metal transition duct | Provides limited flexibility for positioning |
| Very tight connection | Compatible listed close-clearance connector | Requires accurate alignment and enough service access |
The U.S. Consumer Product Safety Commission recommends replacing plastic or foil accordion-style ducting with rigid or corrugated semi-rigid metal because the former can trap lint and is easier to kink or crush.
Rigid exhaust duct versus semi-rigid transition duct
Rigid metal provides a smoother, durable airflow path, making it suitable for the permanent exhaust route. It usually isn’t practical as the only movable connection directly behind the appliance.
A listed semi-rigid metal transition duct is easier to position, but it still needs to remain short, supported, and free from sharp bends. Always check the dryer’s installation manual because allowed materials and clearances vary by model.
Clamps, collars, couplings, and approved sealing materials
A typical connection requires two correctly sized vent clamps—one for the dryer outlet and one for the wall or floor collar. Worm-gear clamps are tightened with a screwdriver or nut driver.
Use a manufactured coupling when two parts need an adapter. Where the dryer manual permits sealing tape, use the specified metal foil product. Don’t assume ordinary cloth-backed duct tape is acceptable. Manufacturer guidance differs, and some installation manuals require clamps while restricting particular tapes or vent materials.
Materials and improvised parts to avoid
Avoid:
- Plastic or vinyl hose
- Unlisted lightweight accordion-style foil duct
- Portable air-conditioner hose
- Cardboard, food containers, or improvised adapters
- Damaged or badly corroded fittings
- Fasteners that protrude into the airflow path
- Any connector prohibited by the appliance manual
Gather Your Tools and Prepare the Existing Vent
Most straightforward connections require:
- The compatible transition duct
- Two approved clamps
- A screwdriver or nut driver
- Tape measure
- Work gloves
- Flashlight
- Vacuum with a hose attachment
- Tin snips, if the selected duct can be trimmed
- The dryer’s installation manual
- A compatible coupling or elbow, if needed
Unplug the dryer, move it forward carefully, and remove the old duct. Vacuum accessible lint from the dryer outlet and wall collar without pushing debris farther into the permanent duct.
Inspect both collars. Look for deformation, corrosion, heavy paint, sharp damage, obstructions, or a wall stub too short to hold a clamp. Measure the actual path between the two outlets, including the offset and the space available after the dryer is returned to position.
How to Install a Dryer Duct Hose
To install the hose, place a loose clamp over each end, seat the duct fully over the dryer and wall collars, and tighten both connections. Shape the duct into the shortest practical route, then reposition the dryer gradually. Finish by checking that the hose hasn’t kinked, loosened, or become crushed.
Step 1: Place the clamp and attach the hose to the vent collar
Slide the first clamp over the duct before connecting anything. Push the duct over the wall or floor collar far enough to create a stable overlap.
Position the clamp over the overlap rather than the unsupported edge of the hose. Tighten it until the duct is secure, but stop before the clamp deforms the collar. Give the connection a gentle tug.
Step 2: Trim and shape the hose for the shortest practical route
Hold the remaining duct along its intended path. Allow enough length to attach the dryer and provide reasonable service access, but don’t leave a large loop behind the appliance.
Trim only when the duct manufacturer permits it. Wear gloves around cut metal edges. Shape the duct with broad, gradual curves instead of flattening it into a hard bend.
Step 3: Secure the other end to the dryer exhaust outlet
Place the second clamp over the free end and fit the duct completely onto the dryer exhaust outlet. Keep the connection straight while tightening the clamp.
Perform another gentle tug test. The duct shouldn’t rotate freely, slide off, or show a gap around the collar. Apply approved metal foil tape only when the appliance and duct instructions allow that connection method.
Step 4: Reposition the dryer without loosening or crushing the hose
Move the dryer back in small increments while guiding the duct. Keep the power cord and any gas connector away from the vent path.
Pause before the dryer reaches its final position. Inspect from the side, above, or with a flashlight to confirm that the duct remains round and connected. A hose that looked correct with the dryer pulled forward can collapse against the wall during this step.
How Should a Dryer Vent Hose Be Positioned?
A dryer vent hose should follow the shortest practical visible route with minimal slack and gentle changes in direction. It should remain supported, accessible, and free from flattened areas, sharp bends, deep sags, or excess loops. Check its shape after the dryer reaches its normal operating position—not only while the appliance is pulled forward.
A small amount of movement may be necessary for servicing. The goal isn’t to stretch the hose tight; it’s to avoid unused length that can fold, sag, or collect lint.
Solutions for Tight Spaces, Floor Vents, and Poorly Fitting Parts
When there is not enough room behind the dryer
Don’t solve limited clearance by flattening a standard hose. A compatible recessed vent box, telescoping connector, or close-clearance system may provide a cleaner route. Verify that the product is intended for dryer exhaust and permitted by the appliance instructions.
Measure the outlet locations carefully. Close-clearance connectors work best when the dryer and wall openings align with the connector’s adjustment range.
Connecting to a floor vent or misaligned wall outlet
A floor outlet or sideways offset may require an approved elbow or purpose-made connector. Keep the transition section visible and prevent the directional change from becoming a tight fold.
A fixed outlet that points the wrong way, sits below the finished floor, or leaves no clamping surface may need professional correction. Adding several flexible sections is not a sound substitute for repairing the connection.
What to do when the hose will not fit or stay attached
Two parts labeled 4 inches may not overlap because both ends are formed the same way. One part may need a crimped end, slit cuff, or listed coupling.
Remove paint, lint, or debris that prevents the hose from seating, but don’t grind down or force the parts together. Replace a crushed or shortened collar. A clamp can secure a proper overlap; it can’t correct incompatible fittings.
Test the Connection and Airflow
Check both connections and the final hose shape
Before restoring power, confirm that:
- Both clamps remain tight
- The duct is fully seated at both ends
- No section is crushed or sharply bent
- The power cord and gas connector are unobstructed
- The dryer is stable and level
Confirm airflow at the exterior vent
Restore power and follow the appliance manual’s recommended test procedure. An air-only or short timed cycle may be suitable for some models. Go outside and confirm that the exterior damper opens and exhaust air is leaving the vent.
Some dryers include a vent blockage test. Use it when the manual provides that feature, but still inspect the physical connection and exterior outlet.
Warning signs that the installation has failed
Stop and recheck the system when:
- The exterior damper barely moves
- Airflow is weak or absent
- The hose rattles, separates, or collapses
- Lint appears around a joint
- Drying takes noticeably longer
- The dryer or laundry area becomes unusually hot
- A burning odor develops
The U.S. Fire Administration advises checking that the venting behind a dryer isn’t damaged, crushed, or restricted and that the outdoor covering opens during operation.
Common Dryer Duct Hose Installation Mistakes
Common problems include:
- Leaving excess duct coiled behind the dryer
- Using an unsuitable plastic, vinyl, or unlisted foil hose
- Tightening a clamp before the duct is fully seated
- Using ordinary duct tape as the primary connection
- Driving protruding screws through the duct
- Forcing mismatched parts together
- Hiding a transition duct inside a wall or floor
- Adding bends instead of correcting a misaligned outlet
- Pushing the appliance back without reinspecting the hose
- Assuming that heat from the dryer proves the vent has adequate airflow
Inspect and Maintain the New Connection
Recheck the hose after the first few drying cycles. Look for a shifted clamp, a developing sag, or a section that has softened into a tighter bend.
Clean the lint filter as directed by the dryer manufacturer and inspect the exterior damper periodically. The CPSC also recommends periodic cleaning of the dryer vent and exhaust duct. Keep the transition connection accessible so it can be removed for inspection and cleaning.
When to Call a Professional
Arrange qualified help when the project involves:
- Installing a completely new exhaust route
- Cutting through an exterior wall or roof
- Modifying concealed ductwork
- Moving or converting a gas connection
- Repairing electrical connections
- Replacing a damaged or inaccessible wall collar
- Correcting a long route with multiple bends
- Resolving persistent weak airflow or overheating
- Determining permit or local-code requirements
Property owners should also consider professional inspection when the destination or condition of an existing concealed duct is unknown.
Dryer Duct Hose Installation FAQs
Does every dryer vent need to terminate outdoors?
A conventional vented dryer should exhaust through a dedicated duct that terminates outside. It shouldn’t discharge into a room, attic, crawl space, garage, or building cavity. A listed ventless or condensing dryer is different and doesn’t use a conventional exhaust hose, but it must still be installed according to its drainage, clearance, and ventilation instructions.
How long can a dryer transition duct be?
The shortest practical length is best. The 2024 IRC model provision limits a transition duct to one listed, labeled length no greater than 8 feet and does not allow it to be concealed. Local rules and the dryer manufacturer may impose additional restrictions, so don’t treat 8 feet as an automatic target or universal permission.
Can ordinary duct tape be used on a dryer vent?
Ordinary cloth-backed duct tape shouldn’t be treated as a dependable dryer-vent connection. Use the clamps and sealing method specified by the dryer and transition-duct manufacturers. Some systems permit an appropriate metal foil tape, while certain appliance instructions require particular mechanical connections or prohibit other materials.
Can a transition duct run inside a wall or floor?
A transition duct should remain visible and accessible rather than disappearing into a wall, ceiling, or floor. Concealed portions of the exhaust route require the type of permanent ductwork specified by the appliance instructions and locally adopted requirements. Have concealed or damaged ducting corrected rather than feeding a flexible hose into the opening.
Why will two 4-inch dryer vent parts not fit together?
Nominally 4-inch parts may have matching male ends, matching female ends, damaged edges, or heavy paint and debris that prevent overlap. The correct fix may be a crimped end, slit cuff, or listed 4-inch coupling. Don’t force the pieces together or rely on tape to bridge a butt joint.
Final Check Before Using the Dryer
Successful dryer duct hose installation comes down to four checks: compatible materials, secure overlaps, an unrestricted final route, and clear airflow outdoors. Confirm all four after the dryer is in position. A connection that is easy to inspect and clean will also be easier to keep working properly.
Disclaimer
DwellifyHome content is for general informational purposes only. Homes, needs, preferences, budgets, and circumstances vary. Seek qualified professional advice for safety-sensitive installation or repair work and for legal, structural, electrical, plumbing, HVAC, or major property decisions.