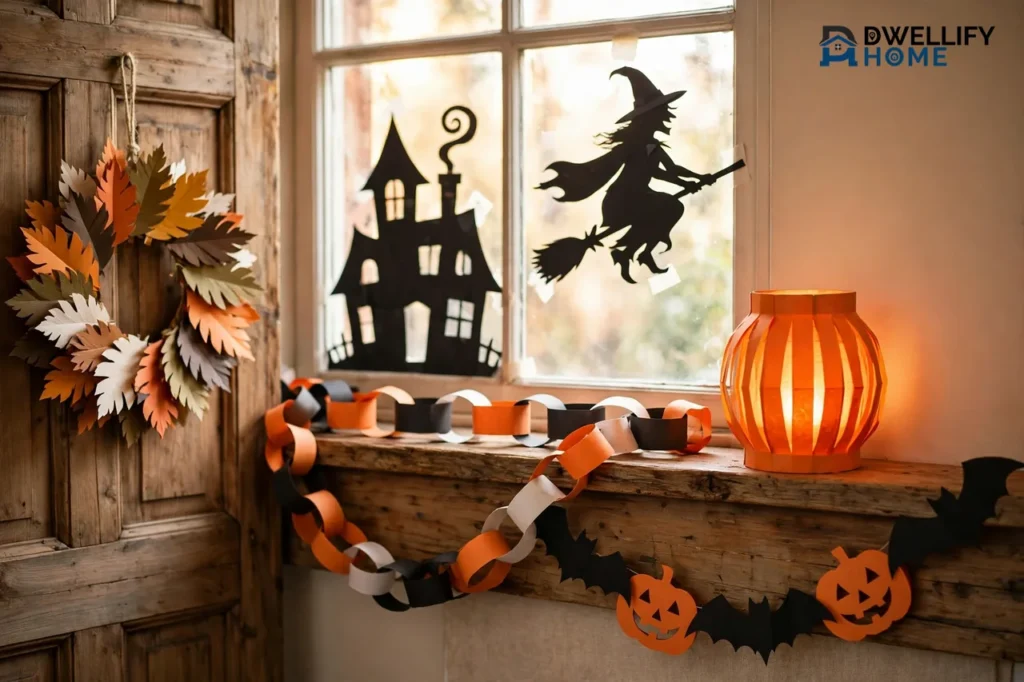
With nothing more than construction paper, scissors, and glue, you can decorate a whole home for Halloween. One pack of paper becomes shape garlands, window silhouettes, fold-and-cut spider webs, glowing paper lanterns, a layered wreath, and hanging bats and ghosts.
This guide is organized around the material itself. First you will learn how to choose paper and tools, then the four paper techniques behind almost every project, then five projects step by step, and finally how to make paper decor last all season and store flat for next year.
Why Construction Paper Works So Well for Halloween Decor
Construction paper is the rare craft supply that is cheap, forgiving, and genuinely good-looking. Its matte, slightly rough surface does not reflect light, so cut shapes read as bold, clean silhouettes — exactly the look Halloween decor wants.
It also cuts, folds, curls, and glues easily, which means one material covers flat wall art, hanging pieces, and simple 3D shapes. When a project goes wrong, you have lost one sheet, not a pricey supply.
The limits are just as clear. Construction paper fades fast in direct sunlight, softens and warps when it gets wet, and burns easily near a flame. Every project below is planned around those three limits: indoor use, shade where possible, and battery lights only.
What You Need: Paper, Tools and Workspace
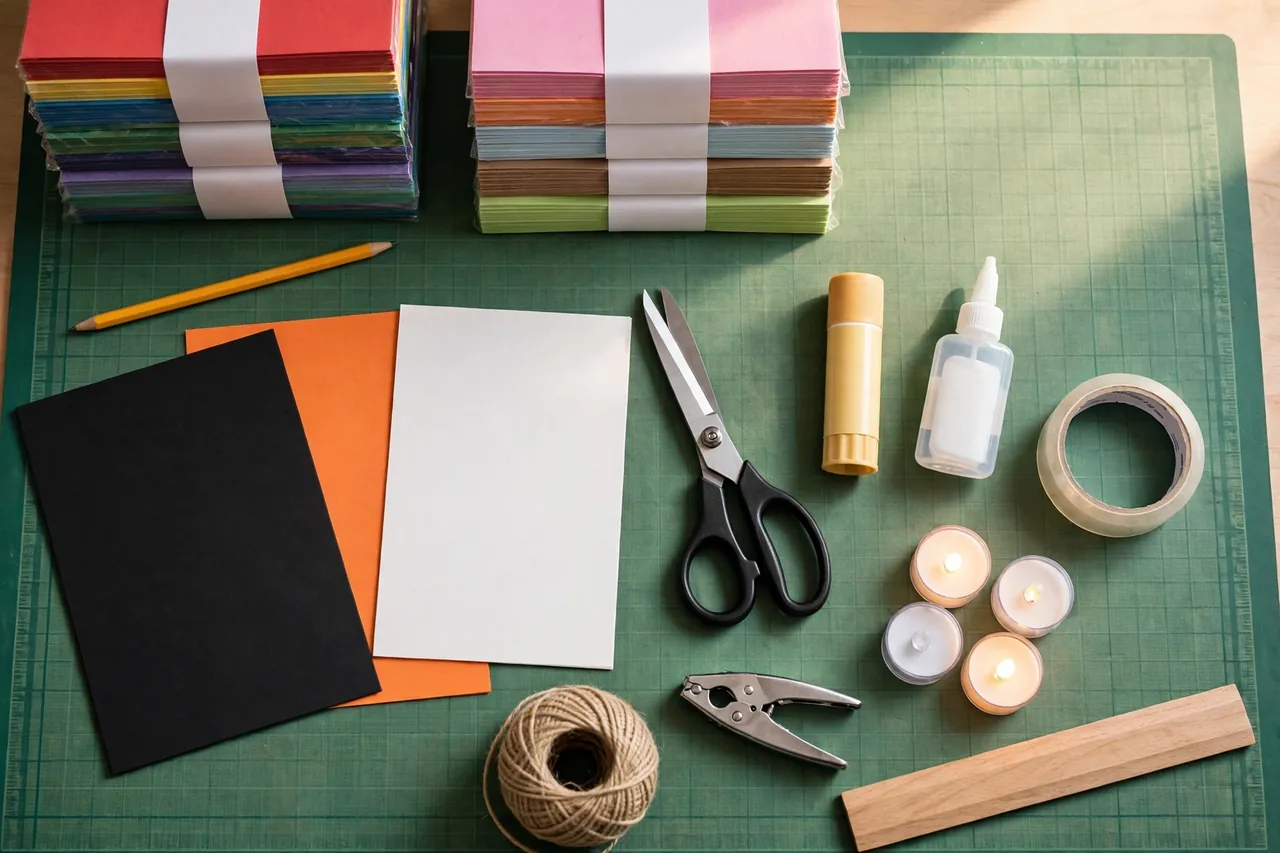
You do not need a craft room or a cutting machine. A basic kit handles every project in this guide.
For the paper itself:
- One multi-color pack of construction paper in the standard 9 x 12 inch size for most shapes and garland pieces
- A few 12 x 18 inch sheets in black, orange, and white for wreath bases, big silhouettes, and lanterns
- Lightweight sheets for folding projects like spider webs, and heavier sheets for shapes that must hold their own shape
Standard lightweight construction paper folds and cuts cleanly through several layers. Heavy cardstock looks sturdy, but it fights you on folded cuts and cracks on tight rolls, so save it for flat, single-layer shapes.
For tools and extras:
- Sharp craft scissors for adults, and blunt-tip safety scissors for children
- A glue stick for flat layering, plus a small bottle of liquid craft glue for joins that carry weight
- Clear tape and removable poster tape for hanging without damaging paint
- A pencil, a ruler, and a hole punch
- String, twine, or clear fishing line for garlands and hanging pieces
- Battery-operated LED tea lights for the lanterns — never real candles
Cover the table with an old sheet of paper or a cutting mat before you start. Paper scraps get everywhere, and a defined work surface makes cleanup a two-minute job.
Four Paper Techniques Behind Almost Every Project
Learn these four techniques and the projects below become variations, not new skills. They are also the difference between paper crafts that look homemade in a good way and paper crafts that look unfinished.
Technique 1: Trace and Cut With a Template
Draw your shape once on a folded scrap or a piece of cardboard, cut it out, and use it as a template. Trace it onto the back of your construction paper, then cut just inside the pencil line so no marks show on the front.
Templates matter most when you need many matching shapes — a garland of twelve pumpkins looks intentional when every pumpkin shares one outline. Freehand cutting is fine for one-off pieces like a single ghost.
Technique 2: Fold and Cut for Symmetry
Fold the paper in half, draw half of your shape along the fold, and cut. Open it and you get a perfectly symmetrical bat, heart-nosed pumpkin face, or butterfly-style spider.
The same idea, folded further, makes spider webs and snowflake-style medallions. The rule to remember: never cut completely across the folded spine, or the piece falls apart into separate bits.
Technique 3: Layering for Depth
Flat paper looks flat. Layering fixes that. Glue a smaller shape on a larger one in a contrasting color — a black cat on an orange moon, white web on a black sheet — and the eye reads it as depth.
For even more depth, glue only the center of the top shape and bend its edges up slightly, or stack two thin strips of folded scrap paper under it as a hidden spacer.
Technique 4: Rolling, Scoring and Curling for 3D Shapes
Paper becomes three-dimensional when you roll it into tubes and cones, score a line before folding so the fold stays crisp, or curl strips around a pencil so they spring into spirals.
Scoring is the quiet hero here: run the blunt edge of a closed scissor blade along a ruler where you want the fold, then fold on that line. Lanterns, treat cones, and standing figures all depend on it.
Project 1: Paper Chains and Shape Garlands
Garlands are the fastest way to make a room feel decorated, and they use the cheapest technique of all: repetition.
For a classic paper chain:
- Cut construction paper into strips about 1 inch wide and 8 to 9 inches long.
- Loop the first strip into a ring and glue or tape the overlap.
- Thread the next strip through the ring, loop it, and fasten it the same way.
- Keep going, alternating colors in a pattern — orange, black, orange, white reads clearly as Halloween from across the room.
For a shape garland, use your template technique instead. Cut 8 to 15 matching shapes — pumpkins, ghosts, bats, or candy corn — punch two holes at the top of each, and thread them onto twine. Leave a small gap between shapes so they can move slightly; a garland that shifts in the air looks alive.
Hang chains and garlands across a mantel, over a doorway, or along a staircase rail. A paper pumpkin garland above a display of real or faux pumpkins looks especially good — if you like that layered fall look, our guide to terracotta pumpkins shows how to style the pumpkin part of the scene.
Project 2: Window Silhouettes and Fold-and-Cut Spider Webs
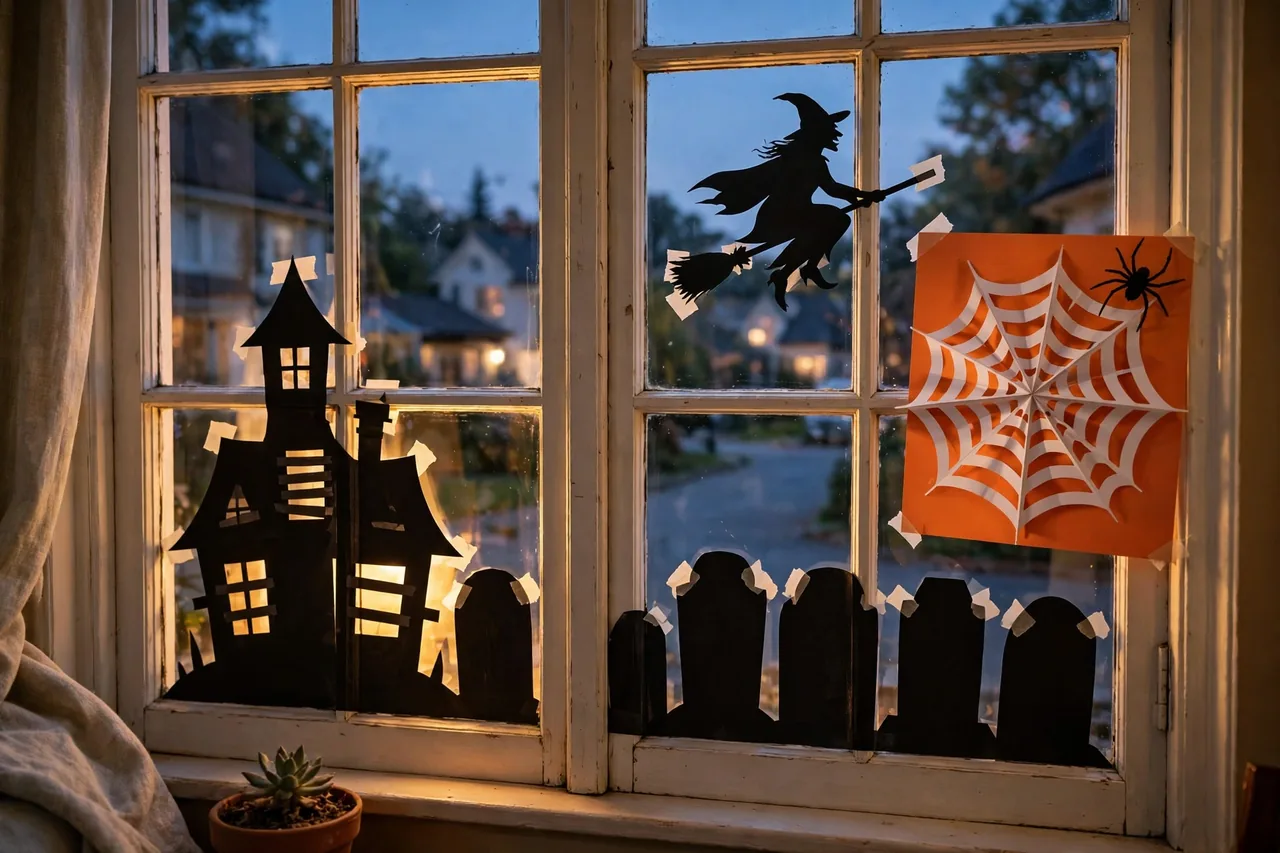
Windows are where construction paper beats almost every store-bought decoration. In daylight the shapes are bold and graphic; after dark, indoor light turns the window into a glowing scene for everyone outside.
For simple silhouettes, trace and cut large shapes from black paper — a haunted house, a witch on a broom, a row of tombstones, a cat on a fence. Tape them to the inside of the window with small loops of clear tape. One large scene per window works better than many small stickers scattered around.
For a fold-and-cut spider web:
- Cut a sheet of black or white construction paper into a square. An 8 x 8 inch square is a comfortable starting size.
- Fold the square diagonally into a triangle, then fold the triangle in half, and in half once more, into a narrow wedge. If the layers get too thick to cut, stop at fewer folds.
- Keep the pointed tip facing you — that point becomes the center of the web, so do not cut it off.
- Lightly sketch a row of long, curved openings along the wedge, leaving a narrow strip of paper between each opening and about a quarter inch of paper along the folded spine.
- Cut along the pencil lines, removing the sections between the strands. Never cut all the way across the wedge.
- Unfold slowly, one fold at a time, and flatten the web gently with your hands.
Mount the finished web on a contrasting sheet — a white web on orange paper, or a black web on white — gluing only the thicker parts and the center. The backing sheet holds the delicate strands together and turns one fragile web into sturdy wall art. Add a paper spider: two black circles for the body, eight thin legs, glued at the edge of the web.
Project 3: Paper Lanterns That Glow Safely

Paper lanterns give you the jack-o’-lantern glow without a pumpkin, a knife, or a flame. Caution first, because it decides the whole design: paper burns easily, so these lanterns are built for battery-operated LED tea lights only. The National Fire Protection Association reports that from 2020 to 2024, an average of 835 home structure fires a year began with decorations, and 33 percent of them were started by candles — read their Halloween fire safety tips before lighting anything this season.
For a classic slit lantern:
- Take one sheet of construction paper and, if you want a face, draw and cut out a jack-o’-lantern face in the middle first, while the sheet is flat.
- Fold the sheet in half lengthwise, with a light crease — just enough to guide the cuts.
- Starting at the folded edge, cut slits about 1 inch apart toward the open edge, stopping about 1 inch before the edge.
- Open the sheet, roll it into a tube with the slits running vertically, and glue or tape the short edges together.
- Press down gently so the slits bow outward into the lantern shape.
- Cut a strip of paper about 1 inch wide and glue its ends to opposite sides of the top as a handle.
- Set the lantern over a battery-operated tea light — never a real candle.
Make lanterns in a row of three sizes for a windowsill or table centerpiece. Orange paper gives the classic glow; white paper with a black cut-out face looks sharper and more modern.
Project 4: A Layered Construction-Paper Wreath
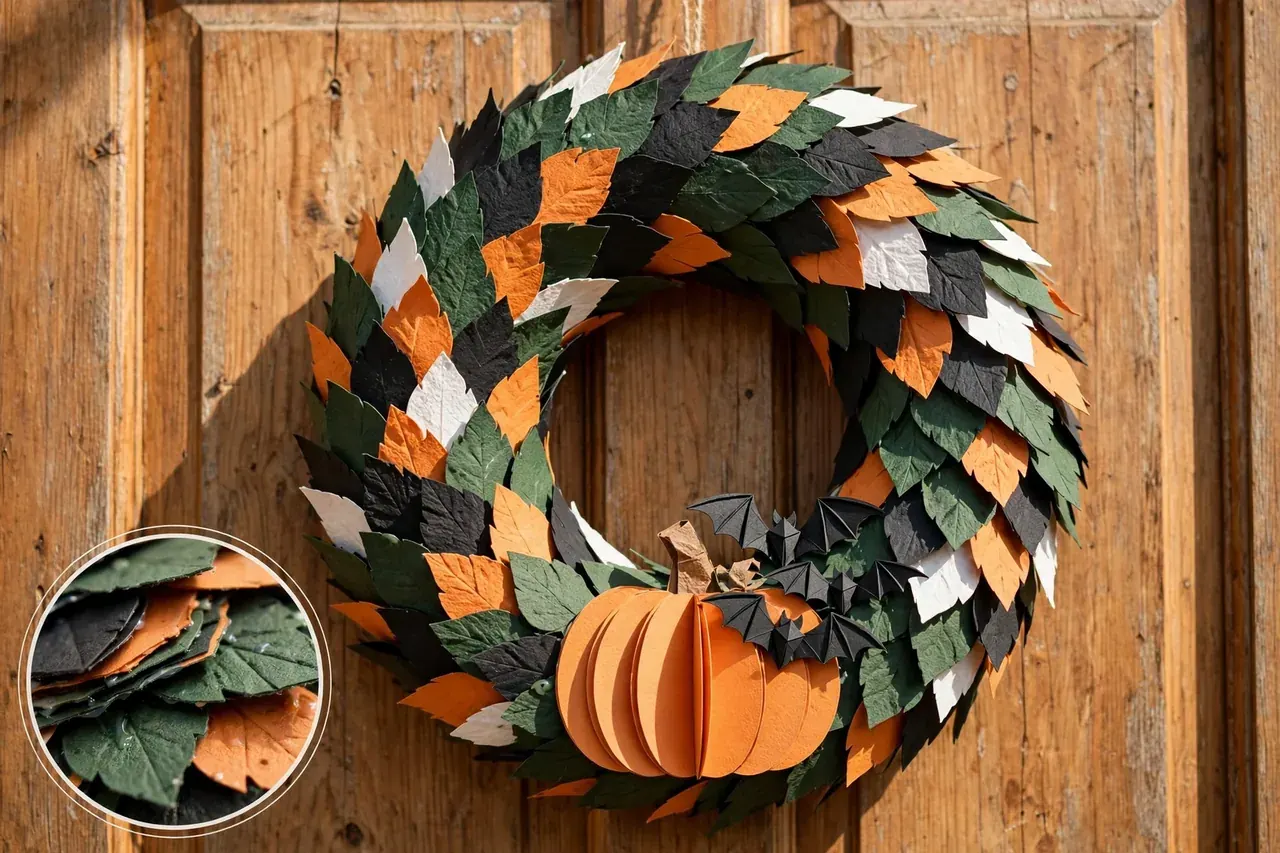
A wreath proves construction paper can look grown-up. The secret is layering — many simple shapes in a few colors, arranged in a strict ring.
- Cut a ring from a 12 x 18 inch sheet of black or dark green paper: trace a large circle, then a smaller circle inside it, and cut out the middle. For a stronger base, glue two rings together and let them dry flat.
- Cut 20 to 30 leaf shapes from two or three shades of green, or use bat and ghost shapes in black, white, and orange for a bolder Halloween ring.
- Glue the shapes around the ring in one direction, each one overlapping the last, like scales. Overlap is what hides the base and makes the wreath look full.
- Add one focal point at the bottom or side: a layered paper pumpkin, a small paper banner, or a cluster of three bats.
- Flip it over, glue a loop of twine to the back, and hang it on a door or wall hook.
Keep the ring flat while the glue dries — a warped base twists every shape glued onto it. If you enjoy this project and want to try a fuller door wreath with mixed materials and a form base, our step-by-step guide on how to make a Halloween wreath takes the idea further.
Project 5: Hanging Bats, Ghosts and Dangling Spiders
Hanging pieces add the one thing flat decor cannot: movement. They are also the best use of your paper scraps.
For bats, fold black paper in half, draw half a bat along the fold, and cut. Open it, then fold each wing down the middle in the opposite direction so the wings angle like a real bat in flight. Tape a short length of fishing line to the body and hang bats in a loose group near a doorway or window, at slightly different heights.
For ghosts, cut a simple wavy-bottomed ghost from white paper and draw or glue on black paper eyes. A curled strip of paper glued under the body makes a tail that twists slowly in the air.
For dangling spiders, glue two black circles together with eight thin leg strips and a long paper strip or thread between them. Hang the spider from a doorframe or from the edge of its own paper web so it looks caught mid-drop.
Group hanging pieces in odd numbers — three bats, five ghosts — and keep them out of walkways where faces and hair will meet them in the dark.
How to Make Paper Decor Last All Season
Paper decor fails in three predictable ways: fading, damp, and tearing. Each one has a simple counter-move.
Keep It Dry and Out of Direct Sun
Standard construction paper is known for fading quickly — a silhouette in a sunny window can wash out well before Halloween arrives. Hang window pieces in shaded or north-facing windows where you can, and accept that sun-facing pieces are one-season items. For pieces you want to keep, heavier, acid-free paper holds its color noticeably longer.
Never hang paper decor outdoors unprotected. One rainy night will soften, warp, and bleed most construction paper. A covered porch buys a little time, but indoor windows give the same street-facing effect with none of the risk.
Hang It So It Survives
Use removable poster tape or small loops of painter’s tape on walls, and clear tape on glass. Heavy pieces — wreaths, layered scenes — need a hook or a pin, not tape alone; a wreath that falls once usually tears at the glue joints.
Keep all paper decor away from open flames, stovetops, heaters, and hot light bulbs. The NFPA notes that nearly half of decoration fires start because decorations sit too close to a heat source, so treat paper like the flammable material it is.
Store It Flat for Next Year
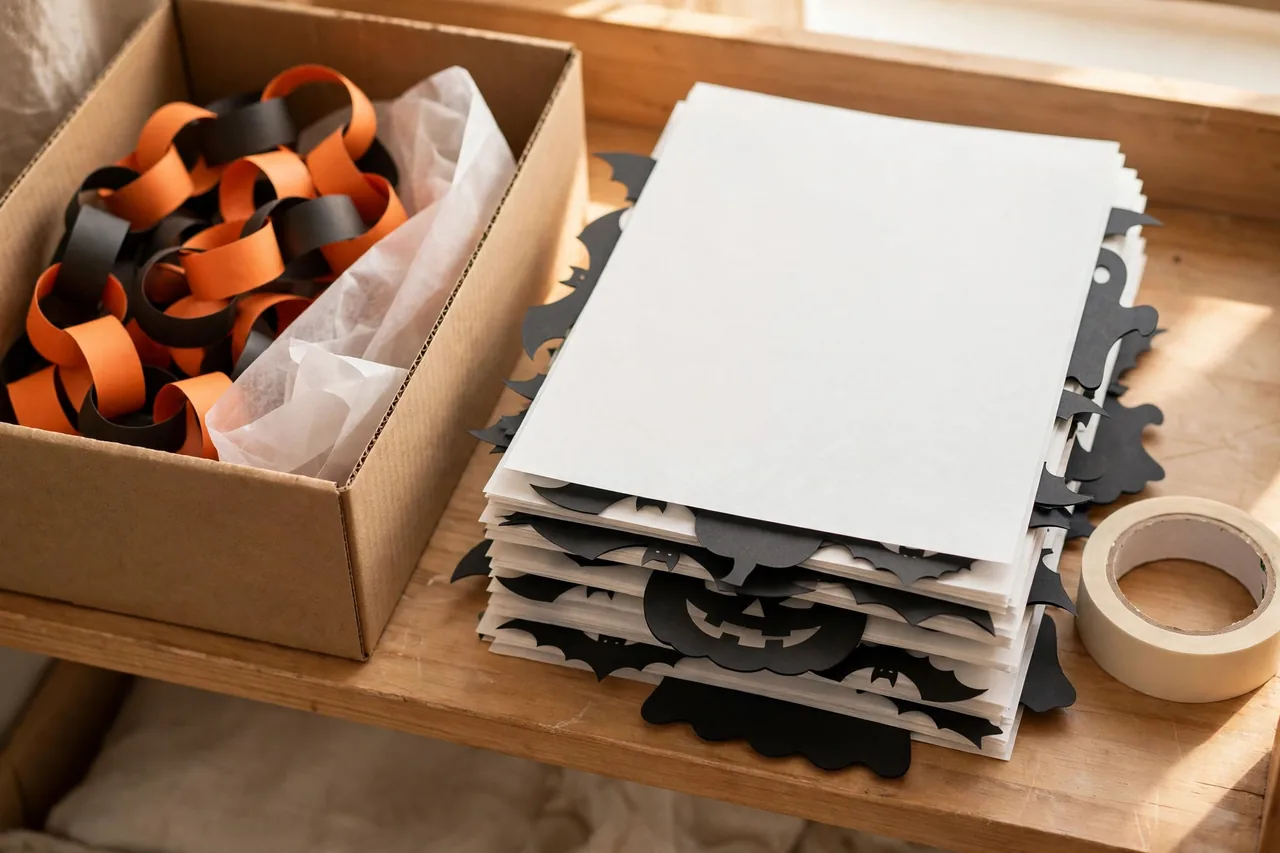
Good paper pieces are worth keeping. Slide flat art and silhouettes between sheets of plain paper or cardboard so colors do not rub or stick together, and store the stack flat in a dry place — never folded, never in a damp garage corner.
Garlands store best coiled loosely in a box with a sheet of tissue or scrap paper between layers. Label the box, and next October starts with a decorating head start instead of a shopping trip.
Making These Crafts With Kids: Age Notes That Help
Construction paper is a natural kids’ material — light, cheap, and safe with the right tools — but the projects above were written for the home, not the classroom. A few age notes make them work smoothly for children too.
For children under about five, adults should do the cutting, or pre-cut shapes ahead of time. Young children can tear paper for collages, glue shapes down, draw faces, and choose colors — the parts they enjoy most anyway. Blunt-tip safety scissors and close supervision are the baseline for any child cutting; the U.S. Consumer Product Safety Commission’s Halloween safety tips are a good quick check before craft day.
School-age children can usually handle templates, chains, and garlands on their own, and the fold-and-cut web with a little help on the thickest folds. Save craft knives and detailed silhouette cutting for adults, always.
If children are the main event, plan the session around them instead: our kids Halloween crafts guide is built children-first, with ages, safety, and supervision for every project. And if your family wants easy projects in many materials beyond paper, start with our easy Halloween crafts collection.
Related Guides
- Easy Halloween Crafts — simple mixed-material projects for adults and families
- Kids Halloween Crafts — children-first projects with ages and safety notes
- How to Make a Halloween Wreath — a fuller door wreath with mixed materials
- How to Make a Mesh Wreath — the deco-mesh ruffle and poof techniques, for any season
- Trunk or Treat Table Ideas — paper garlands and lanterns work here too
Frequently Asked Questions
What kind of paper works best for paper spider webs?
Lightweight construction paper works best, because it folds small and cuts cleanly through several layers. Heavy cardstock becomes hard to cut once folded and can crack along the creases. Regular craft paper also works well. Whatever you choose, fewer folds with lighter paper beat many folds with thick paper, especially for beginners.
Can preschoolers make construction paper spider webs?
Yes, with the cutting split between adult and child. The detailed fold-and-cut work is hard for small hands, so an adult can fold and cut the web — or pre-cut several webs — while preschoolers glue the web onto a backing sheet and add spiders, ghosts, and pumpkins. That division keeps the project fun instead of frustrating.
What colors should I use?
Black, white, and orange make the classic Halloween palette and give the strongest contrast for webs and silhouettes — a white web on orange or black paper is readable from across the room. Purple and lime green are the most common modern additions. Pink and glitter paper work too; there is no wrong palette, only low-contrast pairings to avoid.
What if my spider web tears?
Do not throw it away — a tear is easy to hide. Glue the torn web flat onto a contrasting sheet of construction paper; the backing holds every strand in place and actually makes the web stronger. Then glue a small paper spider or ghost over the torn spot. The repair disappears, and the finished piece looks planned.
Can I make different-sized spider webs?
Yes. The finished web is the size of the square you start with, so begin with different-sized squares for different jobs. Small webs suit cards, garlands, and place settings. Large webs — cut from 12 x 18 inch sheets — carry a whole window, door, or wall. Keep the same folding pattern and simply scale the starting square.
A Quick Safety Note Before You Hang Anything
Paper decorations are flammable. Keep them away from candles, stovetops, heaters, fireplaces, and hot bulbs, use battery-operated lights inside paper lanterns, and keep exits and walkways clear of hanging pieces. Children should always be supervised with scissors, and adults should do any craft-knife cutting.
Start with one project this week — the fold-and-cut web takes under half an hour — and let the garlands, lanterns, and wreath follow as your paper stack shrinks and your windows fill up.