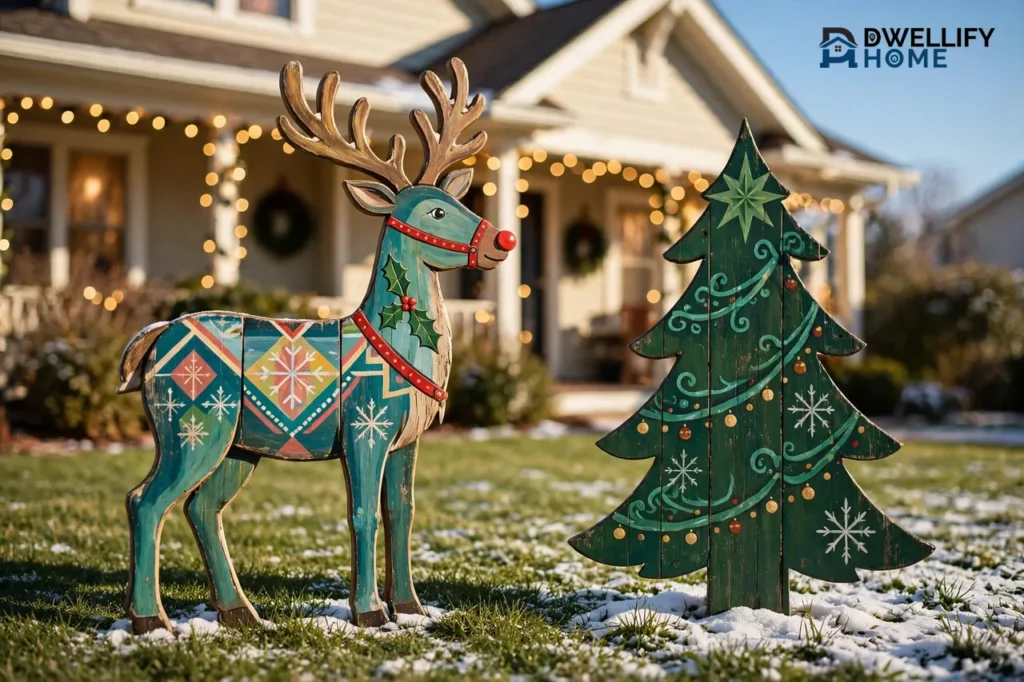
Wooden Christmas yard art is flat or layered wood cut into festive shapes — plywood reindeer, trees, signs, nativity silhouettes, and painted figures — and set out in your yard for the season. You trace a pattern onto plywood, cut it out with a jigsaw, paint it with outdoor paint, seal every edge, and stake or base it so it stands through winter weather. The result looks handmade in daylight and reads clearly from the street, even before you add a single light.
If you love the look of a decorated yard but want something sturdier and more personal than inflatables, wooden Christmas yard art hits the sweet spot. You can build a whole scene in a weekend, store it flat, and bring it back year after year. This guide shows you how to choose a design, pick wood that survives winter, make your first cutout, and place it so it stays put.
What Wooden Christmas Yard Art Really Is
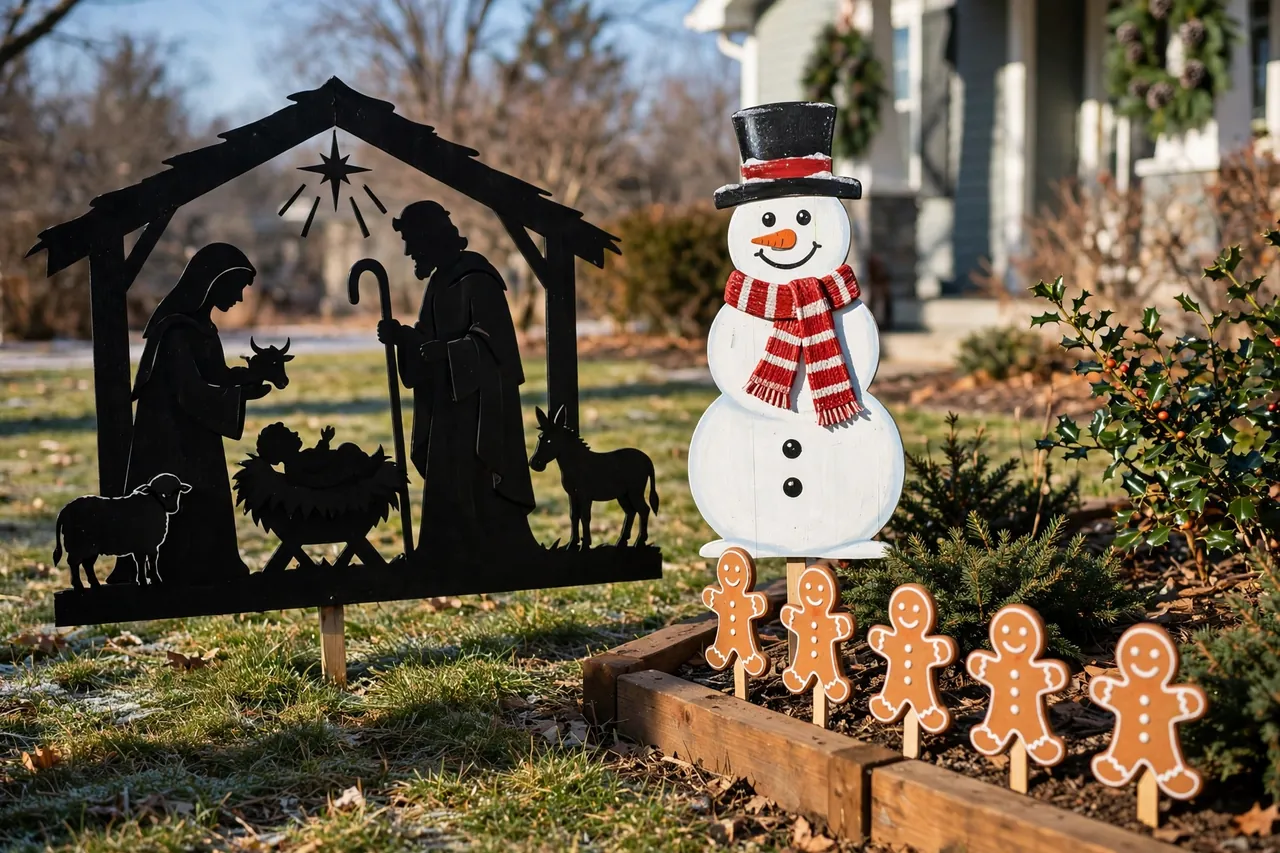
Wooden Christmas yard art means cutout and silhouette art, not every wooden thing you can put outside. Think of a reindeer profile cut from one sheet of plywood, a nativity scene reduced to bold black shapes against the lawn, a painted wooden sign that points toward the North Pole, or a row of gingerbread figures staked along a garden bed.
That narrow focus matters. A wooden crate, a log candle holder, or a stack of firewood with a bow on top may look festive, but none of them is yard art in this sense. Yard art earns its place by its shape. Someone driving past should recognize the figure at a glance, even from across the street.
Most pieces fall into three styles. Painted cutouts show full color and detail, like a red-and-white candy cane or a snowman with a painted scarf. Silhouettes use one solid color, usually black, white, or dark stain, and let the outline do the talking. Layered figures add shallow second layers — a belly on a penguin, a window frame on a village house, a trim strip along a reindeer — for depth without the weight and storage trouble of a full three-dimensional build.
For a broader look at wood used outdoors at Christmas, see our guide to wood Christmas decorations outside. That guide covers the wider world of wooden decor; this article stays on cutout and silhouette art only.
Choose the Right Cutout for Your Yard
Start with your yard, not with a pattern you fell in love with online. A big front lawn can carry a reindeer pair or a nativity scene. A small porch does better with two nutcracker-style figures flanking the door or a single tall tree silhouette. A narrow walkway suits a row of small stakes — gingerbread people, gnomes, or giant ornaments — rather than one wide piece that crowds the path.
Pick one focal point, then add one or two supporting pieces that repeat its colors or wood tone. One strong display with a consistent palette beats a yard full of unrelated figures every time. Leave clear space around walkways, steps, driveways, and sightlines, so nobody trips and drivers can still see.
Here are the cutout families that work best, from easiest to most involved:
- Signs and letter stakes: North Pole signposts, JOY letters, and “Merry Christmas” boards use straight lines and big lettering, so beginners finish them fast.
- Simple figures: Snowmen, gnomes, gingerbread people, and candy canes rely on rounded shapes that read clearly from a distance and forgive small cutting wobbles.
- Trees and stars: Slatted trees, solid tree silhouettes, and open star frames fill empty corners and look good with or without lights.
- Reindeer and sleigh scenes: A reindeer pair, or a sleigh with reindeer, anchors a large yard but needs a solid base and careful anchoring.
- Nativity silhouettes: A stable outline, Mary, Joseph, a manger, and one star tell the whole story in a few bold shapes, and the scene stores flat. A step-by-step outdoor silhouette nativity build shows the same pattern-trace-cut-paint sequence used for most figures.
- Villages and trucks: House facades in a shallow curve, or a vintage truck cutout carrying a tree, suit sheltered spots and patient builders.
If reindeer are your focus, our guide to outdoor animal Christmas decorations gives you more animal-figure ideas. If a sleigh scene tempts you, read our santa and sleigh yard decorations guide before you commit to that size of project.
Pick Wood That Survives Winter Outdoors
Wood choice decides whether your art lasts one season or ten. Interior plywood is the one choice to rule out completely: it uses glue that is not waterproof, so its layers separate once water gets in through cut edges and screw holes, even under paint. Always start with exterior-grade plywood, marked with an X (such as CDX or ACX), which uses waterproof adhesive between its layers. The glue resists water, but the wood itself still absorbs moisture, so sealing matters just as much as the grade you buy.
For wide painted cutouts, exterior-grade plywood gives you a large, flat surface without joining dozens of boards. Cedar suits slatted trees, stars, lanterns, and trim because it stays light and handles outdoor use well. Pine costs less and paints easily, but it needs thorough sealing wherever rain or melting snow reaches it. For the smoothest painted finish, medium-density overlay (MDO) board — exterior plywood with a smooth resin face — takes paint beautifully and hides grain, knots, and patches.
Thickness follows size. Small stakes and ornaments can use thinner sheets, while tall figures need thicker plywood so they do not flex, crack, or snap at narrow points like antlers and legs. Keep delicate shapes thick enough to survive storage and handling, and widen any neck, leg, or antler that looks fragile on paper. A shape that barely holds together in the garage will not survive a windy December night.
Buy clean wood with a known history. Skip mystery pallets, chemically treated boards you cannot identify, badly split lumber, and pieces with hidden fasteners that can wreck a saw blade. Check each sheet for warping, holes, and flaws before you buy, because a warped sheet never cuts into a straight-standing figure.
How to Make Wooden Christmas Yard Art Step by Step
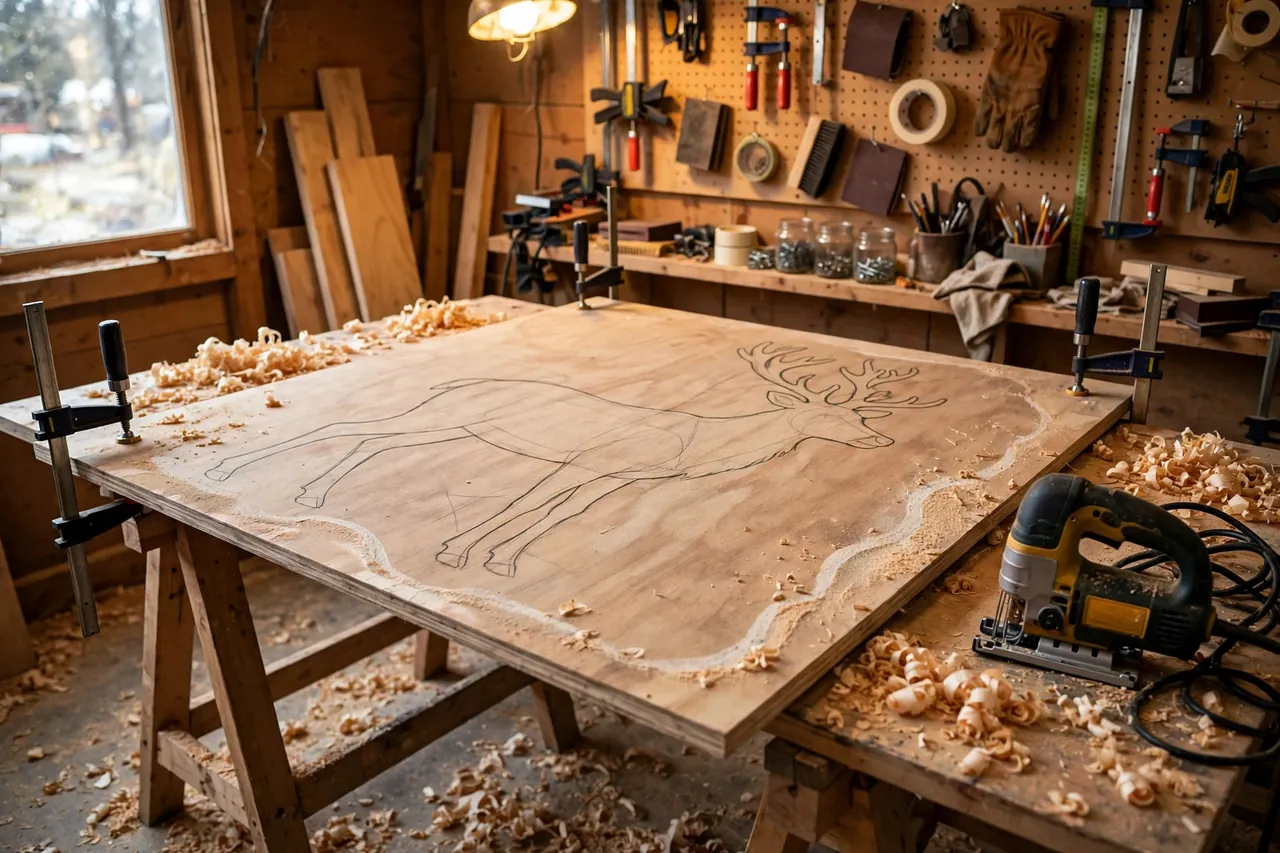
Work through these steps in order, and let every coat dry fully before you move on. Rushing the finish is the fastest way to ruin a good cut.
Caution: Keep children and pets away from the cutting area, wear eye protection and hearing protection, and clamp your work before every cut. If you have never used a jigsaw, ask an experienced adult to guide your first cuts or handle the cutting while you trace, sand, and paint.
- Choose and size your pattern. Pick a full-size pattern or draw your own at the size your spot allows. Measure the spot first, then scale the pattern to it — a six-foot figure needs a very different base than a two-foot stake.
- Transfer the pattern to plywood. Project the image onto the sheet and trace it, tape paper pattern tiles together and trace around them, or draw the shape freehand with a pencil. Make your lines dark and clear, because faint lines lead to wandering cuts.
- Cut the big shapes first. Clamp the sheet firmly to sawhorses, then cut away the excess wood with a jigsaw before you tackle tight curves and details. Let the blade do the work, and slow down around antlers, ears, and narrow joints.
- Sand every edge smooth. Sand the faces lightly, then work the cut edges until no splinters remain. Smooth edges hold paint far better than rough ones, and they keep hands safe during setup and storage.
- Prime front, back, and edges. Brush or roll exterior primer over every surface, including the edges and the back, even on parts nobody sees. Edges soak up water fastest, so give them the same care as the face.
- Paint in thin, even coats. Use exterior latex paint and apply two solid coats per side, plus two coats on the edges. Outline key details with a small brush and a darker color so the figure reads clearly from the street.
- Seal the finished piece. Spray or brush a clear exterior sealant over the front, back, and edges once the paint cures. Seal screw holes and stake joints too, since every hole is a doorway for water.
- Attach the support. Screw a flat landscape stake or a 2×4 support to the back with at least three exterior screws, placed flush so the figure stands straight. For porch pieces, build a wide removable foot or cross base instead of a stake.
- Test the stand before display day. Set the piece up in your yard, step back to the street, and check the shape, the height, and the wobble. Fix problems now, not on a frozen evening in December.
One beginner-friendly trick: build one sturdy template first, then repeat it. A single gingerbread template gives you a whole garden-bed row, and one gnome hat pattern in three sizes gives you a family. Batch your work too — prime all pieces at once, then paint all pieces at once — and your set will look like it belongs together.
Paint, Seal, and Finish Cutouts That Last
Paint does two jobs on yard art: it makes the figure readable, and it protects the wood. For readability, favor bold shapes and limited palettes. Three main colors plus one accent keep a set cohesive, while a different color on every piece turns the yard into visual noise. Repeat the same red, green, cream, or natural wood tone across the group, and use dark outlines to sharpen details that would otherwise blur from the curb.
For protection, the rule is simple: seal every surface, and seal the edges twice. Plywood edges absorb moisture far faster than flat faces, so brush extra paint or sealant along every cut perimeter before you prime. Raise the wood above wet ground with small feet, spacers, or a suitable base, and never let a cutout sit directly in standing water or wet soil. Ground contact wicks water up into the wood, and melting snow does the same damage all winter long.
Silhouettes follow a slightly different finish. A single solid color — black, white, or dark stain — needs the same primer and two-coat treatment, and a semi-gloss finish sheds water better than flat paint. Backlit silhouettes earn their magic at night: light placed behind the figure separates its outline from the dark yard, so keep the front color simple and let the glow do the decorating.
Check the finish during the season, especially after storms. Touch up chips and exposed edges promptly, because a small bare spot becomes a peeling patch within weeks. A ten-minute touch-up in November saves a full repaint next year.
Place and Anchor Yard Art So It Stays Put
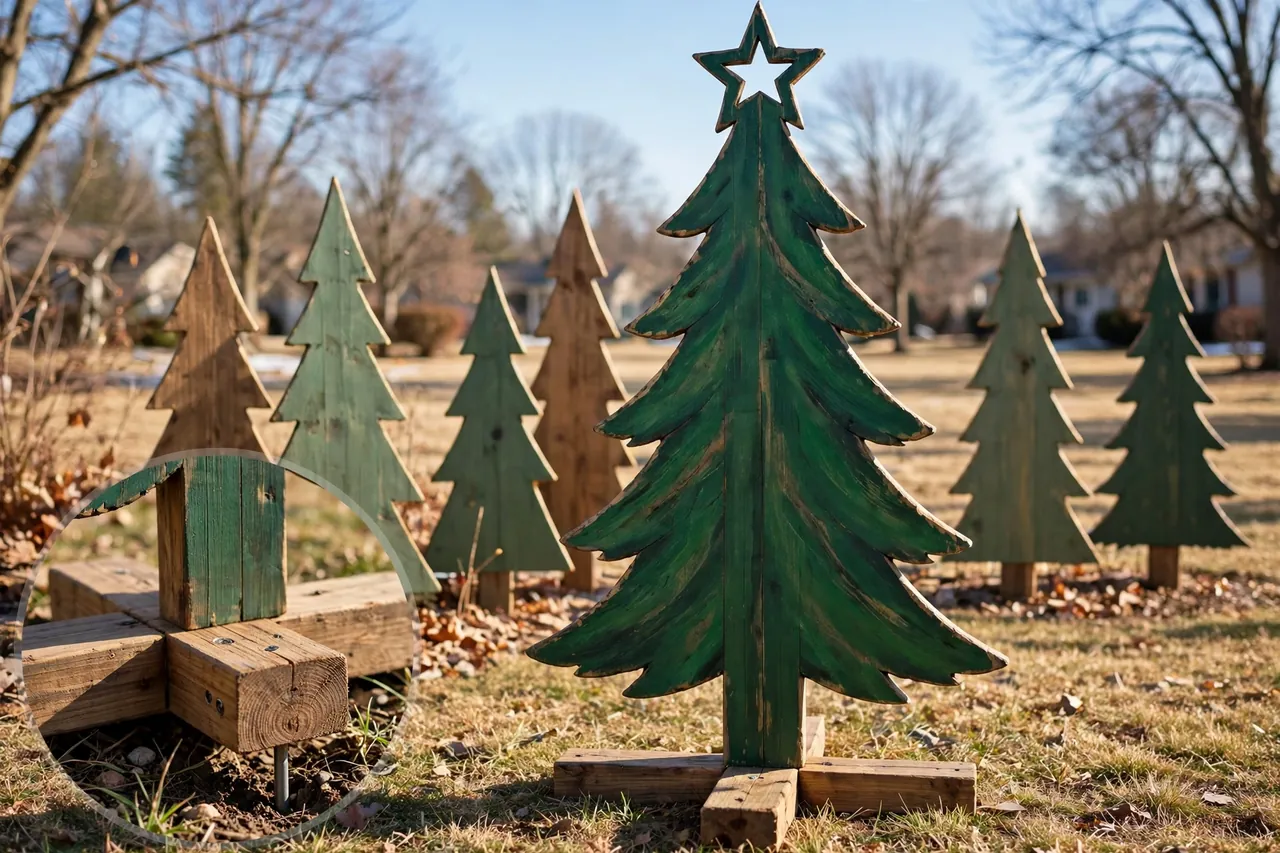
Design the support as part of the piece, not as an afterthought. A tall wooden figure acts like a sail in wind, and a narrow stake in soft soil will lean within days. Wide removable feet suit a covered porch, low cross bases suit flat lawns, and stakes suit garden beds where the ground allows them — but frozen ground will not accept a stake, so plan removable above-ground bases if your soil freezes hard.
Caution: Before you drive stakes or dig, check for buried utilities, sprinkler lines, and shallow cables in that spot. Never block sidewalks, driveway sightlines, or snow-removal routes, and keep every piece clear of walkways where snow can narrow the path.
Match the anchor to the piece and the surface. Small stakes do fine with one solid stake each, while tall or top-heavy figures need a broad, weighted base or a location-suitable anchoring method built for your weather. Our guide to weights for outdoor Christmas decorations walks through weighting options for pieces that catch the wind. After storms, inspect bases, fixings, and exposed edges before you leave the display out again.
Placement also shapes how the art reads. Stagger trees instead of lining them up in a straight row. Put the tallest piece at the back of a group and smaller pieces in front, so every figure stays visible. Set a nativity scene in a quiet focal spot with open space around it, so viewers read it as one scene rather than a clutter of boards. Place a truck cutout against a fence or evergreen backdrop so its silhouette stays easy to read.
If you plan a whole front-yard display, our guide to decorating a driveway for Christmas helps you keep paths, parking, and sightlines safe while the decor goes up.
Light Wooden Silhouettes After Dark
Wooden yard art earns its keep twice: once by day, once at night. The simplest night look uses small battery-powered LEDs. Outline the back edge of a silhouette, tuck a strand behind a village window, or set a warm spotlight behind a nativity scene, and the shape glows without hiding the woodwork. Too many lights can bury the very shapes you spent a weekend cutting, so light the outline or the backdrop — not every edge. HGTV’s backlit wooden Christmas tree shows this effect well: lights fixed behind the silhouette make the shape glow from behind.
If you use plug-in lights, every component and connection must carry an outdoor rating, and an experienced adult should install them exactly as the manufacturer directs. Keep cords away from walkways, standing water, and snow-removal routes, and keep battery packs in accessible, weather-protected spots so you can switch them off without wrestling a frozen compartment. Never use candles or improvised wiring around wood, and never fill a wooden lantern with flammable material.
For lighting ideas that pair well with wood, see our LED Christmas decor guide. And if greenery joins the display, outdoor Christmas greenery shows how to mix wreaths and garlands with wooden pieces without hiding them.
Buy or Build: A Quick Decision Guide
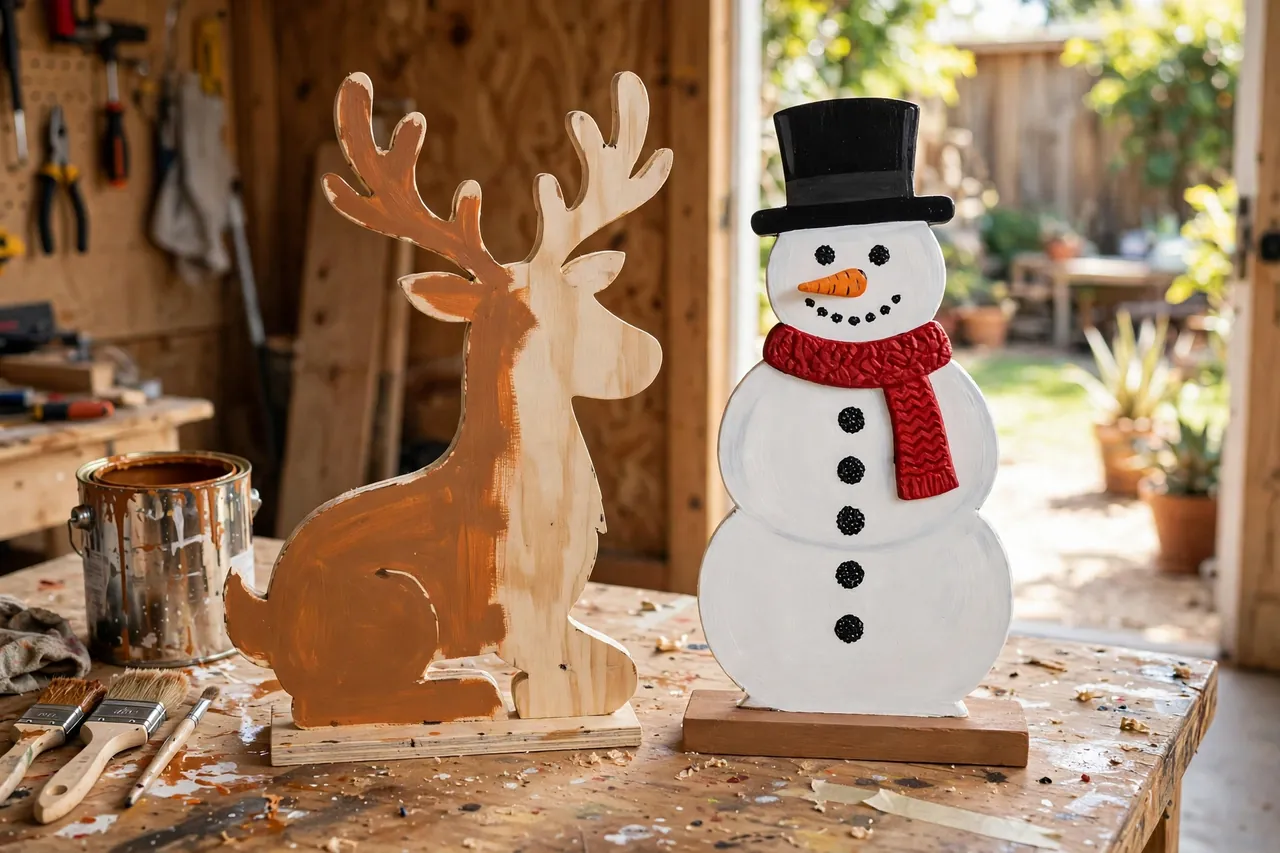
Not every piece needs to come from your saw. Use this comparison to decide where your time pays off and where a finished piece makes more sense.
| Choice | Best when | Watch out for |
|---|---|---|
| Build from a pattern | You want a custom size, a matching set, or a design stores do not sell | Cutting, sealing, and drying take a full weekend |
| Build freehand | You enjoy drawing and want a one-of-a-kind silhouette | Proportions go wrong fast at yard scale, so sketch full-size first |
| Buy a finished cutout | You lack tools, time, or a workspace for cutting | Check the wood grade, finish, and base before you buy |
| Buy a pattern, then build | You want proven proportions without designing from scratch | Confirm the pattern suits outdoor plywood and your climate |
Whichever route you take, judge the finished piece by the same tests: clean wood, sealed edges, a stable base, and a shape that reads from the street. A bargain cutout with raw edges and a flimsy stake costs more in repairs than a well-sealed piece costs up front.
Fix Common Problems
- Peeling paint: Sand the peeling area back to sound paint, prime the bare wood, then repaint and reseal the edges. Peeling almost always starts at an unsealed edge, so seal that edge twice this time.
- Warping or curling: Move the piece to a sheltered spot, let it dry fully, and add a back brace or wider base. Next time, seal both faces equally — a face sealed on one side only pulls as it dries.
- Leaning or falling over: Widen the base, add weight low on the support, or move the piece out of a wind channel between buildings. Tall pieces need their anchoring checked after every storm.
- Faded colors: Wash the piece gently, touch up with matching exterior paint, and add a clear exterior topcoat. Sheltered placement slows fading more than any paint brand alone.
- Soft or dark spots: Dry the piece completely, sand out soft wood, and seal the spot. If the wood feels spongy deep inside, retire that piece — rot inside plywood does not reverse.
- Figure looks wrong from the street: Step back to the curb and check the silhouette, not the details. Thicken thin parts, simplify fussy details, and darken the outline so the shape reads at distance.
Store Your Yard Art for Next Christmas
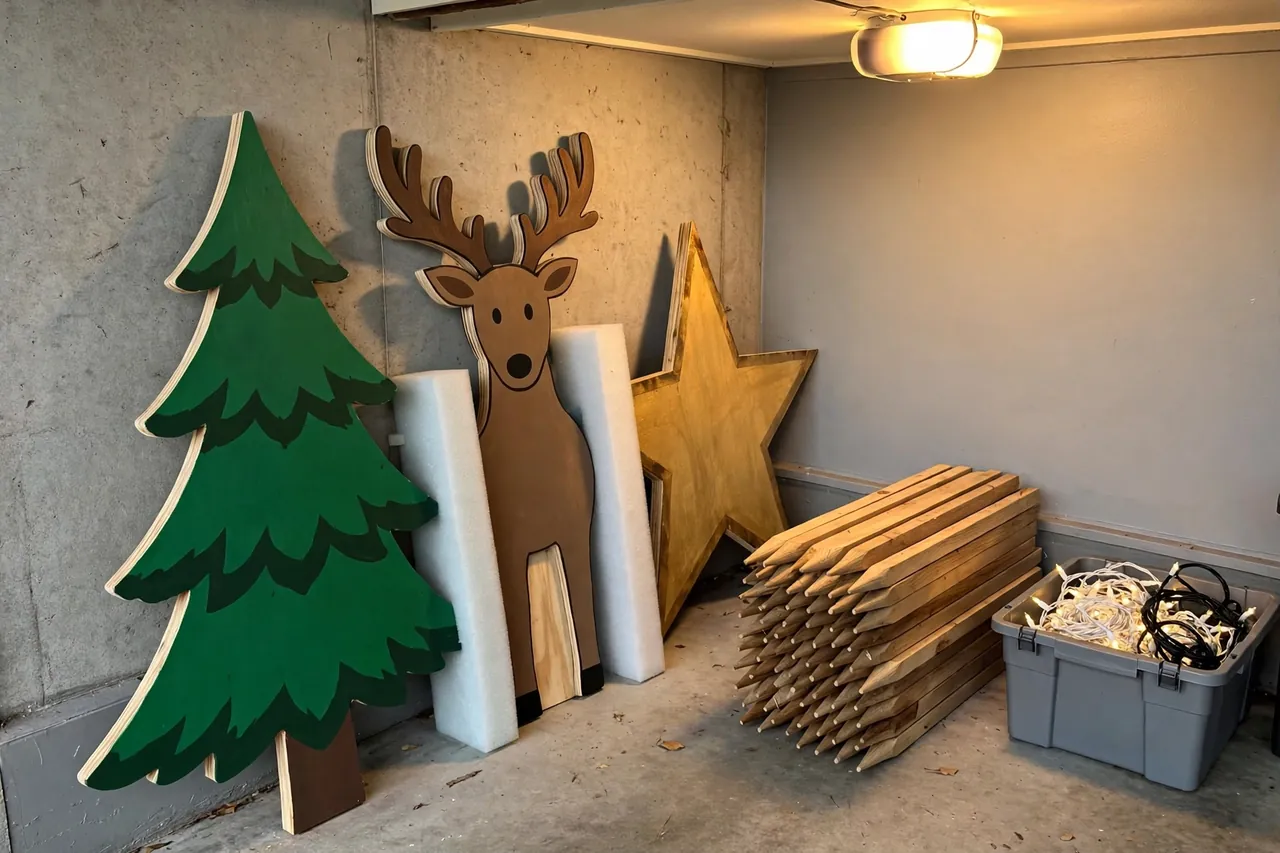
Good storage is what turns a one-season craft into a family tradition. Let every piece dry completely before it goes away — trapped moisture causes stains, peeling paint, and damaged plywood layers over winter. Remove stakes where you can, wipe off dirt, and touch up chips before storage so next December starts with setup, not repairs.
Store flat pieces vertically with support, so they stay straight, and place soft spacers between painted surfaces so faces do not stick together or scuff. Hang small stakes on a wall or stack them with spacers in a dry shed or garage. Label each piece and its stake on the back with a pencil, so next year’s setup takes minutes instead of a guessing game.
Keep lights, battery packs, and cords separate from the wood. Batteries left in a pack all year can leak, and cords wrapped around painted figures can dent the finish. A labeled bin for lights and a dry corner for wood gives every part of the display a home.
Related Guides
Outdoor Animal Christmas Decorations · Santa and Sleigh Yard Decorations: How to Choose, Place, and Light Them · Weights for Outdoor Christmas Decorations
Frequently Asked Questions
What wood is best for outdoor Christmas yard decorations?
Exterior-grade plywood works best for wide cutouts, while cedar suits slatted trees, stars, and trim. Pine costs less and paints easily but needs thorough outdoor sealing. Choose clean wood, seal all faces and edges, and match the thickness to the size and support of the piece.
How do you keep wooden Christmas yard art from blowing over?
Use a broad, weighted base or an anchoring method built for your surface and local weather. Keep large pieces out of exposed wind channels, and design the support as part of the piece from the start. Ask an experienced adult to review and install tall, heavy, or top-heavy figures.
Can plywood Christmas yard decorations stay outside all season?
Yes, exterior-grade plywood can stay outside for the season when you protect its faces, cut edges, and fastener points properly. It still lasts longer in a sheltered spot, and it should never sit in standing water or wet soil. Inspect the finish during the season and let the piece dry fully before storage.
What is the easiest wooden Christmas yard art for beginners?
Signs, candy-cane markers, giant ornament stakes, and simple slatted trees use repetitive shapes and bold finishes that forgive small mistakes. Keep the design visually bold rather than delicate, and have an experienced adult handle or directly supervise any machine cuts.
How many wooden yard art pieces should go in one yard?
A coordinated group usually looks better than many unrelated pieces. Choose one main focal point, such as a reindeer pair, a tree group, or a nativity scene, then add two supporting pieces that repeat its colors or materials. Leave clear space around walkways, steps, driveways, and sightlines.
How do you seal plywood cutouts so they last for years?
Prime and paint every face, then seal the cut edges twice, because edges absorb water fastest. Add a clear exterior topcoat, seal screw holes and stake joints, and raise the piece above wet ground. Let it dry completely before storage, and touch up chips promptly during the season.
Enjoy a Yard That Looks Handmade
Start small this year. Pick one cutout family that fits your yard, build it well, seal every edge, and set it where the street can enjoy it. Next year, add a matching piece, and the year after that, another. Before long, your yard will hold a set that no store sells — figures you cut, painted, and placed yourself, brought out each December like old friends.
Disclaimer: This guide covers general DIY and decorating advice only. Power-tool cutting, tall or heavy displays, and outdoor electrical work carry real risks, so follow manufacturer directions, keep children and pets clear of work areas, and ask a qualified professional for help with any step you feel unsure about.