Stainless steel appliances look sharp when they’re clean — but they have a way of making you feel like you’re fighting a losing battle. You wipe them down, step back, and the fingerprints are already back. You try a new cleaner, and somehow the streaks are worse than before. After years of working with homeowners and kitchen designers, I can tell you: most people aren’t failing because they’re lazy. They’re failing because nobody ever showed them the right method.
This guide covers everything you need — the correct tools, the right techniques for everyday care and deep cleaning, which products genuinely work, and which ones quietly damage your appliances over time. Follow this, and keeping your kitchen looking clean stops feeling like a daily battle.
The Short Answer:
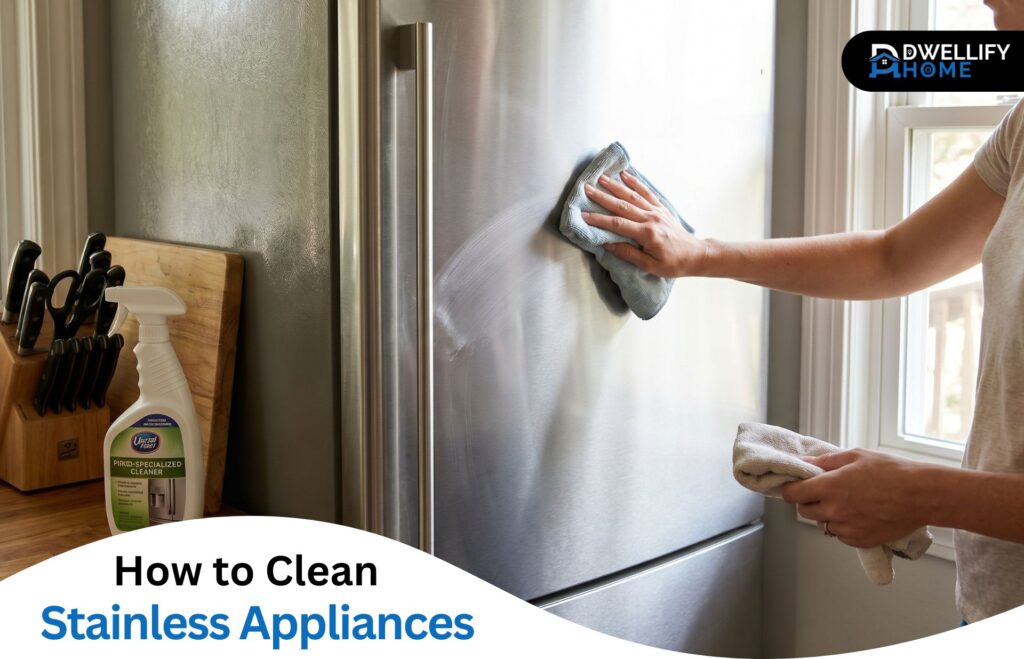
Cleaning stainless steel appliances correctly means wiping with the metal’s grain using a microfiber cloth, mild dish soap, and warm water. It removes fingerprints, grease, and streaks without scratching or damaging the protective surface finish.
Mission Statement:
At Dwellify Home, we help homeowners make practical, confident decisions about their living spaces — from everyday home maintenance to kitchen care, outdoor living, and beyond. Every guide we publish is built around real usefulness: clear information, honest recommendations, and advice that holds up in real kitchens and real homes.
Why Stainless Steel Appliances Show Every Smudge (And What’s Actually Happening)
Stainless steel gets dirty easily because of its smooth, light-reflective surface. The protective oxide layer that prevents rust also reacts with oils from your skin, hard minerals in water, and cleaning residue — all of which become instantly visible. Using the wrong product or motion can compromise that layer, making the surface harder to clean over time.
The Difference Between Brushed and Polished Stainless Steel Finishes
Most home appliances use a brushed finish — you’ll see faint parallel lines running either horizontally or vertically across the surface. This is the grain, and it exists because the steel is physically buffed in one direction during manufacturing.
Polished stainless steel has a smoother, mirror-like surface with less visible grain. It looks more refined but shows smudges even more readily. The cleaning principles are similar for both, but brushed finishes are a little more forgiving with light scratches.
How to Find the Grain Direction on Any Appliance Before You Start
Look at the surface under a light at a slight angle. You’ll see faint lines — they’ll either run left to right or top to bottom. That direction is your grain. Every wipe, every buff, every application of product needs to follow those lines.
Wiping against the grain doesn’t just risk scratching. It pushes dirt and residue into the grooves instead of lifting it out. Most of the streaky, dull-looking stainless steel I’ve seen in homes was caused by this single mistake, repeated over months.
Quick Method Comparison Guide
| Cleaning Need | Best Method | What to Use |
| Daily fingerprints & smudges | Routine wipe-down | Dish soap + warm water + microfiber cloth |
| Grease & stubborn buildup | Deep clean | White vinegar (diluted) or baking soda paste |
| Water spots & mineral deposits | Targeted treatment | 50/50 vinegar-water spray, buff dry |
| Restoring shine after cleaning | Polish & protect | Mineral oil or stainless steel polish |
| Rust, tarnish, discoloration | Specialty treatment | Bar Keepers Friend Soft Cleanser |
| Fingerprint-resistant finishes | Gentle only | Warm water + mild soap — no polish or vinegar |
Key Takeaways
- Always wipe in the direction of the grain — never in circles or against it
- Microfiber cloths are the only safe option; paper towels cause fine surface scratches over time
- Dry the surface completely after every clean to prevent water spots and streaks
- Mineral oil applied after cleaning reduces fingerprint visibility and protects the finish
- Bleach, steel wool, ammonia, and oven cleaner will permanently damage stainless steel
- Specialty finishes like PrintShield and black stainless steel require a gentler approach than standard methods
The Right Tools and Supplies for Cleaning Stainless Steel Appliances
You don’t need a cabinet full of products. The best cleaner for stainless steel appliances is often already in your kitchen. What matters more than the product is having the right applicators and knowing what to pair with what.
Here’s what to keep ready:
- Microfiber cloths (two or three) — one for applying cleaner, one for rinsing, one dry cloth for buffing. Microfiber lifts oils without scratching. Paper towels feel harmless but leave microscopic scratches on the finish over time.
- Mild dish soap and warm water — the foundation of routine cleaning. Gentle, effective, and safe on all standard finishes.
- White vinegar in a spray bottle — cuts through grease and mineral deposits. Use diluted, not straight from the bottle.
- Baking soda — for stubborn buildup and grease. Mixed with water into a paste, it works without abrading the surface.
- Mineral oil or a dedicated stainless steel polish — applied after cleaning to restore shine and create a light barrier against fingerprints.
Keep steel wool, abrasive sponges, bleach, and glass cleaner well away from your appliances. More on why shortly.
How to Clean Stainless Steel Appliances for Everyday Maintenance
For daily upkeep, warm water with a drop of mild dish soap and a microfiber cloth is all you need. Dampen the cloth, wring it out so it’s not dripping, wipe with the grain, then follow immediately with a dry cloth. Done correctly, this takes under two minutes and keeps buildup from setting in.
Step-by-Step: The Soap and Water Routine That Actually Works
- Add two or three drops of dish soap to a bowl of warm water.
- Dampen your microfiber cloth and wring it out — it should feel damp, not wet.
- Wipe the entire surface following the grain direction. Work top to bottom.
- Use a second damp cloth (clean water only) to remove any soap residue.
- Immediately buff dry with a third dry microfiber cloth, again following the grain.
That final dry-buff step is what most people skip — and it’s what causes water spots.
How to Buff for a Streak-Free Finish Every Time
Streaks usually come from two things: residue left by the cleaner, or moisture that dried on the surface before being buffed off. Always dry the surface completely before stepping back. Use a clean, dry microfiber cloth and apply light, consistent pressure in the direction of the grain.
If streaks still appear, a very light wipe with rubbing alcohol on a clean cloth will cut through any lingering residue without damaging the finish.
How to Deep Clean Stainless Steel Appliances and Tackle Stubborn Stains
When routine cleaning isn’t cutting through built-up grease or dried-on residue, it’s time for a deeper approach. The goal is still to dissolve the buildup without any abrasion — not to scrub harder.
Cleaning with Vinegar — The Right Way to Do It Without Causing Damage
Mix equal parts white vinegar and water in a spray bottle. Spray onto a microfiber cloth — not directly onto the appliance. Wipe with the grain and leave it for no more than a minute. Then wipe clean with a damp cloth and dry immediately.
Vinegar’s mild acidity breaks down grease and mineral deposits effectively. The risk comes from leaving it on too long or using it undiluted. Some brands, including KitchenAid, advise against vinegar on their coated finishes — always check your appliance manual if you’re unsure.
Cleaning with Baking Soda — Best for Grease and Heavy Buildup
Mix baking soda with just enough water to form a paste. Apply it to the problem area with a soft cloth, rubbing gently in the direction of the grain. Rinse thoroughly with a damp cloth, then dry. This works well on cooking grease near ranges and cooktops where vinegar alone doesn’t quite get there.
How to Remove Stains from Stainless Steel Appliances That Won’t Budge
For rust spots, tarnish, or heat discoloration, a product containing oxalic acid — such as Bar Keepers Friend Soft Cleanser — is one of the most reliable options available. Use only the liquid version, apply with a damp cloth, rub with the grain, and rinse completely. It’s particularly effective on the areas around burners and sink surrounds where discoloration builds up fastest.
How to Get Rid of Water Spots and Hard Water Stains on Stainless Steel
Water spots form when droplets evaporate and leave behind dissolved minerals — calcium and magnesium most commonly. In areas with hard water, this happens fast and the spots can look almost permanent if left long enough.
Mix equal parts white vinegar and distilled water, spray onto a cloth, and wipe with the grain. Let it sit for 60 to 90 seconds. The mild acid dissolves the mineral deposits without stripping the surface. Wipe clean, then dry thoroughly.
After the spots are gone, apply a thin layer of mineral oil to the affected area and buff it in with the grain. This creates a light barrier that slows down the next round of spotting. If your home has consistently hard water, switching to distilled or filtered water for rinsing appliance surfaces makes a noticeable difference over time.
How to Polish Stainless Steel Appliances and Restore Their Shine
Polishing is the step after cleaning — not a replacement for it. A clean surface polishes well. A dirty surface just seals in the grime.
Mineral Oil vs. Commercial Stainless Steel Polish — Which One Should You Use?
Mineral oil is food-safe, inexpensive, and works well for most households. Apply a few drops to a dry microfiber cloth and buff along the grain until the surface has a light, even sheen. It doesn’t leave a heavy residue and is safe around food prep areas.
Commercial stainless steel polishes — products like Weiman Stainless Steel Cleaner and Polish — go a step further. They clean and polish in one step, often leaving a slightly more durable protective layer. They’re worth using on refrigerators and dishwashers that get handled constantly. For small appliances or infrequent touch-ups, mineral oil does the job.
How to Keep Fingerprints from Coming Back So Quickly
The oil from your hands transfers to the surface every time you touch it — there’s no way to stop that completely. What you can do is reduce how visible it looks. A thin coat of mineral oil or a quality stainless steel polish creates a light barrier that makes fingerprints less stark and easier to wipe off when you do clean.
Getting into the habit of a quick daily wipe-down — 60 seconds with a dry microfiber cloth — prevents fingerprints from setting and building up into the kind of mess that needs real effort to remove.
How to Clean Each Stainless Steel Appliance the Right Way
Each appliance in your kitchen sees different kinds of mess, different amounts of handling, and different exposure to heat and moisture. The core method is the same — right tools, grain direction, dry thoroughly — but the specifics vary.
Refrigerator — Handles, Doors, and the Water Dispenser Area
The refrigerator gets touched more than any other appliance. Handles are the worst offenders — oils, food residue, and constant contact make them the first thing to look grimy. Wipe handles daily with a damp microfiber cloth. For the full door panels, a weekly soap-and-water wipe followed by a dry buff keeps them looking clean.
The water dispenser area is prone to drips and mineral deposits. Use diluted vinegar here and dry it immediately after cleaning.
Dishwasher — Door, Edges, and Control Panel
The dishwasher door collects splashes, detergent residue, and steam marks. Wipe it down weekly with soapy water and follow the grain. Pay attention to the edges and the bottom lip of the door — residue builds up there and gets missed consistently.
Avoid getting moisture near the control panel. Dampen your cloth, wring it well, and wipe carefully. Never spray directly onto the panel.
Range, Oven, and Cooktop — Grease, Splatters, and Heat Discoloration
This is where baking soda earns its place. Cooking grease and heat discoloration are stubborn, and vinegar alone often doesn’t fully cut through them. A baking soda paste, applied gently with the grain and rinsed clean, handles most of it.
Always clean the range when it’s completely cool. And never use oven cleaner on stainless steel surfaces — it will strip and discolor the finish.
Microwave — Exterior Cleaning Without Moisture Near the Vents
Wipe the exterior with a lightly dampened cloth. Keep moisture away from the ventilation areas on the sides and top. A dry buff afterward removes any water marks. The handle and door frame need the most attention — they collect grease from cooking.
Small Appliances — Toasters, Coffee Makers, and Countertop Mixers
Unplug before cleaning — always. Use a barely damp microfiber cloth and wipe with the grain. These appliances tend to have more complex shapes with crevices, so use the corner of the cloth to get into tight areas. Keep moisture completely away from any openings, slots, or electrical components.
Special Stainless Steel Finishes That Need a Different Approach
Standard cleaning methods work well on traditional brushed stainless steel. But a growing number of appliances use specialty coatings that change the rules entirely — and using the wrong product on these finishes causes damage that can’t be undone.
Fingerprint-Resistant Coatings (PrintShield, Smudge-Proof, EasyWipe) — What Not to Use on Them
These finishes have a thin polymer coating applied over the steel to reduce how visible fingerprints appear. It works well — until you use a commercial stainless steel cleaner or polish on it. Those products can degrade the coating, leaving it patchy and permanently dull.
For PrintShield (KitchenAid), Smudge-Proof (Frigidaire), and similar finishes: use only warm water, mild dish soap, and a soft microfiber cloth. That’s it. No vinegar, no mineral oil, no commercial polish.
Black Stainless Steel — Why the PVD Coating Changes Everything
Black stainless steel has a Physical Vapor Deposition (PVD) coating applied over the base metal. It gives the dark, matte appearance — but it’s a surface treatment, not the metal itself. Abrasive cloths, harsh chemicals, or anything acidic can scratch or strip that coating.
Stick to warm soapy water and a soft microfiber cloth. ZLINE’s stainless steel cleaner is one of the few commercial products specifically formulated to be safe on black stainless surfaces.
A Quick Note on Brand-Specific Cleaning — Whirlpool, Samsung, LG, and KitchenAid
If you’re looking at how to clean stainless appliances made by Whirlpool or its family of brands (Maytag, KitchenAid, Amana), mild dish soap and warm water is the universal safe method. Affresh Stainless Steel Brightener is the brand-recommended product for discoloration.
Samsung and LG both use standard brushed stainless steel on most models, so conventional methods apply. Check whether your model has a specialty coating before reaching for anything stronger than soap and water — the appliance manual will tell you.
What to Never Use on Stainless Steel Appliances — And Why It Matters
The wrong product doesn’t just fail to clean — it causes damage that accumulates invisibly until one day the surface looks permanently dull, scratched, or discolored.
Cleaning Products That Can Permanently Damage the Finish
- Steel wool and abrasive sponges — scratch the surface and create grooves where rust and bacteria can settle
- Bleach — corrodes the protective oxide layer that gives stainless steel its resistance to rust
- Ammonia-based cleaners (including most glass cleaners) — weaken the surface over time and cause discoloration
- Oven cleaners — far too caustic for stainless steel exteriors; will strip and stain the finish
- Paper towels — feel harmless but cause fine surface scratches with repeated use
Popular DIY Hacks That Actually Do More Harm Than Good
Olive oil gets shared widely as a natural polish for stainless steel. It does create a temporary shine — but it also goes rancid, leaves a sticky residue that attracts dust and grease, and becomes harder to remove with each application. Mineral oil is the correct choice: it’s stable, odorless, and doesn’t degrade.
Undiluted vinegar applied directly and left to sit is another one. Short contact time, properly diluted — fine. Long exposure or full concentration — it can etch the surface.
What to Do If Your Stainless Steel Already Has Streaks or Scratches
This is an honest answer that most cleaning guides avoid: some damage can be reduced, but not all of it can be reversed. Knowing the difference saves you time and frustration.
How to Deal With Permanent Streaks That Won’t Clean Off
If streaks remain after thorough cleaning and buffing, they’re likely caused by one of two things: residue from a previous cleaner that bonded to the surface, or micro-abrasion from repeated wrong-direction wiping.
For residue-based streaks, try rubbing alcohol on a clean microfiber cloth, wiping with the grain. This cuts through many types of product buildup. Follow with a light application of mineral oil. For streaks caused by prior damage to the finish itself, a dedicated stainless steel polish may reduce their appearance — but won’t fully eliminate them.
Reducing the Appearance of Fine Scratches on Stainless Steel
Very light surface scratches can sometimes be minimized by buffing a small amount of mineral oil into the area with the grain. This doesn’t remove the scratch — it fills it optically and makes it less visible against the surrounding surface.
Deep scratches are permanent. There’s no approved DIY repair for significant scratches on stainless steel. The honest recommendation is to prevent them in the first place by committing to microfiber cloths and grain-direction wiping from day one.
How to Clean Stainless Steel Appliances Naturally
For households with young children, pets, or a preference for non-toxic products, stainless steel is one of the easiest surfaces to maintain without commercial chemicals. The natural methods available are genuinely effective — not just gentle alternatives that perform worse.
Here’s what works:
- Vinegar and water spray (50/50) — wipe with grain, rinse, dry. Cuts grease and dissolves mineral deposits.
- Baking soda paste — mixed with water for stubborn spots. Rinse thoroughly afterward.
- Club soda — spray onto a cloth and wipe with the grain for a quick shine boost between full cleans.
- Mineral oil — food-safe, non-toxic finish protector. A few drops go a long way.
These four cover the full range from daily maintenance to deep cleaning without introducing any harsh chemistry into your kitchen environment.
How Often Should You Clean Stainless Steel Appliances?
Stainless steel appliance maintenance works best as a habit, not a once-in-a-while event. The longer buildup sits, the harder it is to remove without more aggressive methods.
A practical cleaning schedule looks like this:
- Daily — quick wipe of the refrigerator handles and any appliance that was heavily used. A dry microfiber cloth is enough for light touch-ups.
- Weekly — full wipe-down of all appliance exteriors with soap and water, following the grain, dried thoroughly.
- Monthly — polish with mineral oil or a stainless steel polish to restore protective barrier and shine.
- As needed — deep clean with vinegar or baking soda when grease, stains, or water spots appear.
Households with kids or heavy daily cooking will need to go slightly more frequent on the daily and weekly routines. A kitchen that’s used occasionally can stretch the weekly clean to every ten days without issue.
Frequently Asked Questions About Cleaning Stainless Steel Appliances
Can you use vinegar to clean stainless steel appliances?
Yes — diluted white vinegar is effective for removing fingerprints, grease, and hard water stains from standard stainless steel. Mix equal parts vinegar and water, apply to a microfiber cloth, wipe with the grain, and rinse immediately. Do not use undiluted vinegar or leave it on the surface for extended periods, as it can cause etching.
Why does my stainless steel look streaky after I clean it?
Streaks are almost always caused by one of three things: moisture left on the surface before drying, cleaner residue that wasn’t fully rinsed, or wiping against the grain. Always dry the surface completely with a clean microfiber cloth immediately after cleaning. If streaks persist, wipe with a cloth lightly dampened with rubbing alcohol, then buff dry.
Is baking soda safe to use on stainless steel?
Yes, baking soda is safe when mixed with water into a paste and applied gently with a soft cloth in the direction of the grain. It’s mildly abrasive at a level that cleans without scratching. Always rinse it off completely and dry the surface thoroughly afterward to avoid water spots.
Does WD-40 work on stainless steel appliances?
WD-40 can remove fingerprints and add a temporary shine, and some people use it successfully. However, it’s petroleum-based, leaves a residue that attracts dust, and isn’t formulated for kitchen surfaces or food-contact areas. Mineral oil or a dedicated stainless steel polish is a cleaner, safer, and more appropriate choice for home appliances.
How do I stop fingerprints from showing on stainless steel?
You can’t prevent fingerprints entirely — but you can make them far less visible. After cleaning, apply a thin coat of mineral oil or stainless steel polish and buff it in with the grain. This creates a light barrier that makes oils from skin less visible and easier to wipe off. A quick daily dry-buff with a microfiber cloth also keeps buildup from accumulating.
What is the best commercial cleaner for stainless steel appliances?
Weiman Stainless Steel Cleaner and Polish is consistently recommended by cleaning professionals and works well on most standard stainless steel finishes. Bar Keepers Friend Soft Cleanser is the go-to for rust, tarnish, and stubborn discoloration. For Whirlpool-family appliances, Affresh Stainless Steel Brightener is the brand-endorsed option. Always check your appliance manual before using any commercial product, especially if your appliance has a specialty coating.
Conclusion
Keeping stainless steel appliances looking clean doesn’t require special skills or expensive products. It requires the right approach: always wipe with the grain, use gentle tools, dry the surface completely, and know which products are safe for your specific finish. Most of the damage people see on their appliances — streaks, dullness, fine scratches — comes from habits that seemed harmless and were repeated dozens of times.
Take the time once to understand your appliances’ finish type, set up a simple cleaning routine, and you’ll find that stainless steel is actually one of the easier surfaces to maintain. The difference between appliances that look great after years of use and ones that look worn out is rarely the quality of the steel — it’s consistently how they were cleaned.
Disclaimer
The content published on Dwellify Home is intended for general informational purposes only. Cleaning results, product performance, and appliance care needs may vary depending on the brand, finish type, age of the appliance, and individual household conditions. Always consult your appliance manufacturer’s care guide before applying any cleaning method or product.