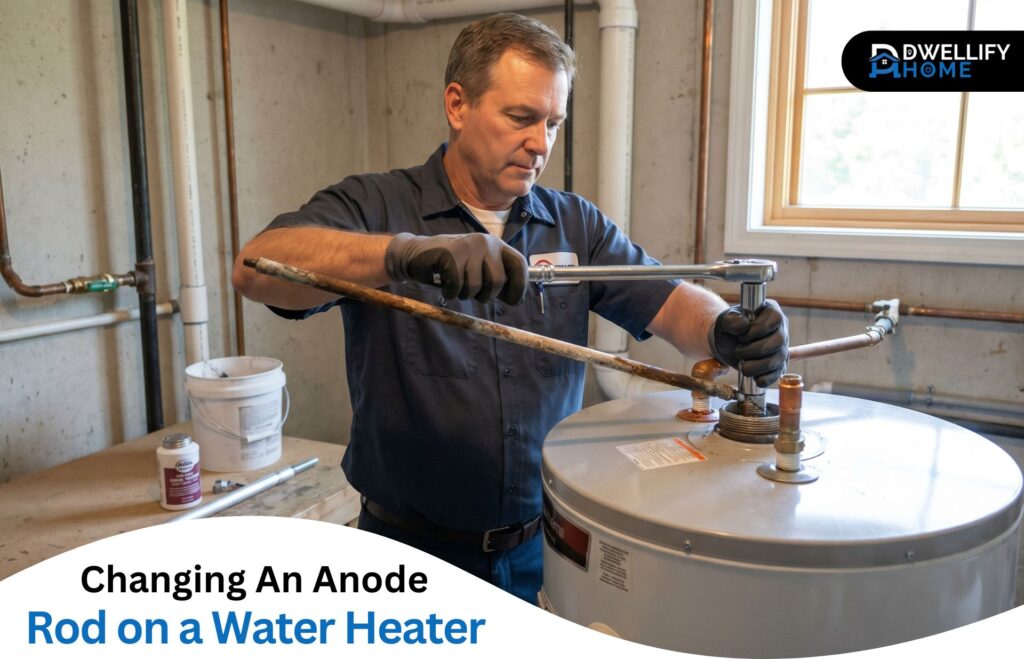
Most water heaters fail quietly. Not because of a dramatic leak or a sudden breakdown — but because one small metal rod inside the tank was never replaced. Over time it simply corrodes away, leaves the steel tank unprotected, and the damage builds until the whole unit needs replacing.
Changing an anode rod on a water heater is one of the highest-value maintenance tasks a homeowner can do. It costs $20 to $50 in parts, takes about an hour, and can add years to a tank that would otherwise rust from the inside out. This guide covers everything you need — from understanding what the rod does to completing the replacement safely on your own.
The Short Answer
Changing an anode rod on a water heater means removing the depleted sacrificial metal rod inside the tank and replacing it with a new one. It prevents internal tank corrosion and significantly extends the working life of the water heater.
Dwellify Home
At Dwellify Home, we help homeowners make practical, confident decisions about their living spaces — from everyday maintenance to considered home improvements. Our goal is to give you clear, honest guidance so every choice you make at home is one you feel good about.
What Is an Anode Rod and Why Does Your Water Heater Need It?
An anode rod is a metal rod — made from magnesium, aluminum, or a zinc-aluminum alloy — that screws into the top of your water heater tank. Its sole purpose is to corrode so that the tank itself doesn’t have to.
How the Sacrificial Anode Protects Your Tank — the Simple Version
Water is naturally corrosive to steel. Your tank has a glass lining to slow that process, but that lining develops microscopic cracks over time. The anode rod acts as a decoy. It’s a less noble metal than steel, so corrosive elements in the water attack the rod first and leave the tank walls alone. Once the rod is fully consumed, the tank becomes the target — and that’s when rust, sediment, and failure follow.
Quick Reference: Anode Rod Types at a Glance
| Rod Type | Best For | Lifespan | Notes |
| Magnesium | Soft water | 2–4 years | Most reactive, strongest protection |
| Aluminum | Hard water | 3–5 years | Long-lasting, good general choice |
| Zinc-Aluminum | Sulfur odor issues | 3–5 years | Suppresses bacterial smell in tank |
| Powered (Electric) | Aggressive water / softeners | Indefinite | No depletion — no replacement needed |
Key Benefits of Replacing the Anode Rod on Schedule
- Prevents rust and internal tank corrosion before it becomes irreversible
- Extends water heater lifespan from 8–12 years to 15–20 years
- Keeps hot water clean and free from metallic taste or discoloration
- Costs $20–$75 DIY vs. $100–$200 with a plumber — significant long-term savings
- Avoids premature full tank replacement, which runs $600–$1,200 or more
Do All Water Heaters Have Anode Rods — and Where Is Yours?
Nearly every tank-style water heater — gas or electric — ships with at least one anode rod installed. Tankless water heaters don’t use them because there’s no standing water tank to protect. If you have a standard storage tank, you have a rod.
Top-Mount Plug Rods vs. Hot Water Outlet Rods
Most tanks have a top-mount plug-style rod. It sits on top of the heater and has a large hexagonal head — essentially a big hex bolt fitting that sometimes sits under a plastic cap. Some brands, including Bradford White, position the anode rod inside the hot water outlet port instead. That version looks like an ordinary pipe nipple and requires a pipe wrench rather than a socket to remove.
What to Do If the Rod Port Is Hidden Under a Cap or Cover
Pry off any plastic cap on top of the tank with a flat screwdriver. Underneath you’ll find the hex head of the rod. Some manufacturers cover the port with a layer of spray foam insulation — cut through it carefully with a utility knife. If you can’t locate it visually, check your water heater’s model number and pull up the spec sheet online. It will show the exact port location.
Signs It’s Time to Replace Your Water Heater Anode Rod
The most reliable sign is pulling the rod out and looking at it. But your hot water supply often gives you early warnings before you ever open the tank.
What to Look For When You Pull It Out
A working anode rod is close to its original thickness — roughly ¾ of an inch in diameter. When it’s depleted, you’ll see heavy pitting, large sections eaten away, or nothing left but the thin steel wire that runs down the center. If more than half the rod material is gone, it needs replacing now.
Hot Water Warning Signs You Might Already Be Noticing
Rust-tinted or brown hot water, a metallic taste that only appears on the hot side of your faucets, and aerators that keep clogging with sediment are all signs the rod has been depleted for some time. Loud popping or rumbling during heating can also indicate that sediment — accelerated by a failing rod — has built up on the tank floor.
How Often Should You Change an Anode Rod on a Water Heater?
Under typical household conditions, plan to inspect or replace the anode rod every 3 to 5 years. Manufacturers often recommend annual inspection, but a 2 to 4-year cycle is realistic for most homes with average water chemistry.
Why Hard Water and Water Softeners Change Your Replacement Schedule
Hard water wears the rod down faster. The elevated mineral content creates a more aggressive corrosive environment, and a rod that might last 5 years in a soft-water home may be gone in 2. Water softeners present a different issue — softened water is actually more corrosive to the rod than hard water because of its low mineral content and higher electrical conductivity. If your home has a water softener, inspect the rod every 12 to 18 months. This is one of the most under-discussed variables in residential water heater maintenance.
Choosing the Right Anode Rod Before You Buy
The replacement rod needs to match your tank’s fitting size — typically ¾-inch NPT — and your water chemistry. Don’t default to the cheapest available option without considering what’s in your water.
Magnesium, Aluminum, and Zinc-Aluminum — Which One Suits Your Water?
Magnesium rods are highly reactive and perform best in soft water. They offer strong corrosion protection but deplete faster. Aluminum rods are better suited for hard water — they last longer but are less aggressive. Zinc-aluminum alloy rods are the best choice for homes where hot water develops a sulfur or rotten egg smell, because zinc inhibits the bacterial activity that causes that odor. For most households, an aluminum or zinc-aluminum rod is a reliable and practical choice.
Standard Rods vs. Flexible Segmented Rods for Tight Spaces
A standard anode rod runs about 44 inches long. If your heater sits in a closet or under a low ceiling, you won’t have the clearance to pull a rigid rod straight out of the port. Flexible segmented rods are built in linked sections that fold as you remove or install them. They cost a few dollars more, but they’re worth every cent in a confined space. Trying to muscle a rigid rod out of a tight spot is exactly how threads get stripped or the tank port gets damaged.
Are Powered Anode Rods Worth the Investment?
Powered anode rods — also called impressed current anode rods — use a small electrical current to protect the tank instead of sacrificing metal. They don’t deplete, so there’s no scheduled replacement. They typically cost $150 to $200 upfront. For homes in areas with aggressive water chemistry where standard rods wear out every year or two, the math works in their favor over time. They’re not essential for every household, but for high-corrosion environments, they’re a sound long-term investment.
Tools and Materials You’ll Need for This Job
- Replacement anode rod (correct material and thread size)
- 1-1/16-inch socket with a breaker bar or cordless impact wrench
- Garden hose for partial draining
- Bucket or floor drain access
- PTFE (Teflon) thread tape
- Flat screwdriver for removing any cap
- A second person to brace the tank if it isn’t wall-strapped
The impact wrench matters more than any other item on this list. Anode rods that have been in place for years seize tight. A standard hand ratchet frequently won’t generate enough torque to break them free, and straining against it puts stress on the tank connections. A mid-torque cordless impact wrench makes the removal straightforward and controlled.
How to Change an Anode Rod on a Water Heater — Step by Step
Step 1 — Shut Off Power and Cold Water Supply
For an electric water heater, flip the dedicated circuit breaker off. If power stays on while the tank drains, the heating element can burn out within minutes — it needs water surrounding it to operate safely. For a gas heater, turn the gas control valve to “pilot” or “vacation” mode. No need for a full gas shutoff unless you’re comfortable relighting the pilot. Close the cold water supply valve on the inlet pipe at the top of the tank.
Step 2 — Release Pressure and Partially Drain the Tank
Open a hot water faucet somewhere in the house. This breaks the vacuum inside the tank and lets it drain properly. Connect a garden hose to the drain valve at the tank’s base and run it to a floor drain or outside. You only need to drain 5 to 10 gallons — enough to drop the water level below the anode port. The water is hot, so keep hands and feet away from the hose outlet.
Step 3 — Locate and Remove the Old Anode Rod
Remove any cap over the rod port. Seat the 1-1/16-inch socket firmly on the hex head and turn counter-clockwise. If the tank isn’t strapped to the wall, have someone hold it steady — you’re applying significant torque and don’t want to stress the supply and gas lines. Once the rod breaks loose, unscrew by hand and lift it straight up and out. In tight spaces, angle the rod slightly as you withdraw it.
Step 4 — What to Do If the Rod Is Stuck or Won’t Turn
This is the most common stumbling block. First, confirm you’re turning counter-clockwise. Apply firm, steady pressure rather than sharp jerks. An impact wrench resolves most stuck rods quickly. If you’re working without one, slip a steel pipe over the breaker bar for extended leverage — but stay controlled. Do not use penetrating oils such as WD-40. Any solvent that seeps past the threads contaminates the tank water. Never strike the rod with a hammer either — the glass lining inside the tank is vulnerable to impact.
Step 5 — Inspect the Old Rod Before You Discard It
This takes under a minute and gives you useful data. A rod that’s corroded down to bare wire tells you the tank has been unprotected for a while — shine a light into the port and look for signs of rust or flaking inside. If the rod looks only moderately worn and is still noticeably thick, it may have more service life. Reinstall it and revisit in 6 to 12 months.
Step 6 — Install the New Rod Correctly
Wrap the threads of the new rod with 4 to 6 layers of PTFE tape, applied clockwise. This creates a proper seal and — importantly — makes future removal much easier. Start threading by hand to avoid cross-threading, then tighten firmly with the socket. Snug and secure is the target. Overtightening risks cracking the port fitting; undertightening risks a slow leak.
Step 7 — Refill the Tank, Purge Air, and Restore Power
Open the cold water supply valve slowly. Keep the hot water faucet you opened earlier running until the flow is steady and air-free — no sputtering or spitting. Inspect the rod port and drain valve for any drips. Once the tank is full and running cleanly, restore power at the breaker or return the gas control to its normal temperature setting.
Electric Water Heater vs. Gas Water Heater — Does the Process Change?
The physical replacement steps are identical for both types. The difference is in how you shut down and restart the unit. For electric heaters, cutting the breaker before draining is non-negotiable — the element will fail fast if it runs dry. For gas heaters, pilot or vacation mode is sufficient; a full gas shutoff isn’t necessary for this task. On restart, electric heaters typically take 60 to 90 minutes to fully reheat a 40-gallon tank. Gas heaters generally recover in 30 to 45 minutes.
Why Your Hot Water Smells Like Rotten Eggs After a Rod Change
You replace the rod, everything goes smoothly, and then the next day the hot water has a sulfur smell. This is more common than most guides acknowledge, and it doesn’t mean something went wrong.
The Magnesium-Sulfur Connection — and the Right Fix
Some water supplies contain sulfate-reducing bacteria. When those bacteria interact with a magnesium anode rod in warm water, the byproduct is hydrogen sulfide gas — the source of that rotten egg odor. The solution is to switch to a zinc-aluminum alloy rod on the next replacement. The zinc component suppresses bacterial activity effectively. A temporary fix is to raise the water heater temperature to 140°F for a few hours to kill the bacteria, then return to 120°F — but if the rod material isn’t changed, the smell typically returns.
How Much Does It Cost to Change an Anode Rod on a Water Heater?
A replacement anode rod costs $20 to $50 depending on material and size. Add $5 for PTFE tape and $15 to $20 for a socket if you don’t already own one. Total DIY cost sits comfortably between $40 and $75.
DIY Parts Cost vs. Hiring a Plumber — A Straight Comparison
Professional plumbers charge $50 to $150 per hour for labor, and this job typically takes an hour including travel time. Factor in a service call fee and expect to pay $100 to $200 for a professional replacement. That’s reasonable if the tank is difficult to access, the rod is severely seized, or you simply prefer not to do it yourself. For a standard accessible tank, though, this is a clear candidate for the DIY column.
How Your Water Quality Affects How Long an Anode Rod Lasts
Water chemistry is the biggest variable in anode rod lifespan — bigger than the brand of the heater, the size of the tank, or how much hot water your household uses.
Soft water is actually more corrosive to the rod than hard water. It’s low in dissolved minerals and more electrically conductive, which accelerates electrochemical corrosion. Hard water, by contrast, can deposit a thin calcium carbonate layer on the rod that slows its depletion — though it also contributes to sediment buildup on the tank floor over time.
Homes with water softeners connected upstream of the water heater should check the anode rod every 12 to 18 months rather than the standard 3 to 5 years. It’s a simple adjustment that prevents an expensive oversight.
What to Check After Replacing the Anode Rod
Once the tank is refilled and power is restored, take five minutes to verify everything is right.
- Check the rod port threads for any moisture or slow seeping
- Inspect the drain valve — it can drip after being disturbed during draining
- Run a hot water tap and smell it within 24 hours to catch any early sulfur activity
- Write the replacement date directly on the tank with a permanent marker, or log it in your home maintenance records
That date is more useful than it seems. It gives you a clear starting point for the next inspection and removes any guesswork later.
When It Makes More Sense to Call a Plumber
This is an accessible DIY job for most homeowners, but there are genuine situations where a professional is the right call.
If the tank is more than 12 years old and the rod has never been replaced, the tank interior may already be significantly corroded. A plumber can assess whether continued maintenance makes sense or whether a replacement is the more practical investment. If the rod breaks during removal and leaves fragments inside the tank, recovery requires professional tools. And if the hot water outlet anode is connected to rigid piping rather than a flexible line, re-piping that connection involves cutting, soldering or pressing, and potentially pulling a permit — that’s plumber territory.
One more consideration: some manufacturer warranties specifically require documented professional servicing to remain valid. If your heater is still under warranty, review the terms before you proceed.
Frequently Asked Questions
Can I change the anode rod without fully draining the water heater?
Yes. You only need to drain 5 to 10 gallons — enough to lower the water level below the anode port. A complete drain is unnecessary for a standard top-mount rod. Open a hot water faucet first to allow airflow, then attach a garden hose to the bottom drain valve and release just enough water into a bucket or floor drain.
What happens if you never replace the anode rod?
Once the rod is fully depleted, the tank’s steel walls become the primary target for corrosion. The glass lining — already cracked in places — provides minimal protection on its own. Rust forms inside the tank, water quality drops, and the tank eventually develops pinhole leaks or fails outright. Most tanks last 8 to 12 years without maintenance. Consistent anode rod replacement can extend that to 15 to 20 years.
How long does a replacement anode rod typically last?
A standard magnesium or aluminum anode rod lasts 3 to 5 years under average conditions. In softened water or highly aggressive water chemistry, that window shrinks to 1 to 3 years. A powered anode rod has no depletion cycle and doesn’t need scheduled replacement.
Will changing the anode rod myself affect my water heater warranty?
It depends on the manufacturer. Some warranties require maintenance to be performed and documented by a licensed plumber. Others place no such restriction. Check the warranty documentation for your specific unit before starting work. If coverage is still active and the terms matter to you, a single professional service call is a reasonable cost to keep the warranty intact.
Conclusion
Changing an anode rod on a water heater is one of those maintenance tasks that seems technical until you understand what’s actually involved — and then it becomes one of the clearest value-for-effort jobs in home upkeep. A $30 to $50 rod, the right socket, and an hour of your time can protect a tank that costs over $1,000 to replace.
The homeowners who get the most out of their water heaters aren’t the ones with the newest equipment. They’re the ones who check the simple things on schedule. A fresh anode rod, recorded and revisited every few years, is as straightforward a layer of protection as a home system gets.
Disclaimer
The content on Dwellify Home is intended for general informational purposes only. While we aim to provide accurate and helpful guidance, individual results, water conditions, equipment types, and local code requirements will vary. Always consult your water heater’s manufacturer documentation and, where necessary, a licensed plumbing professional before carrying out repairs or maintenance.