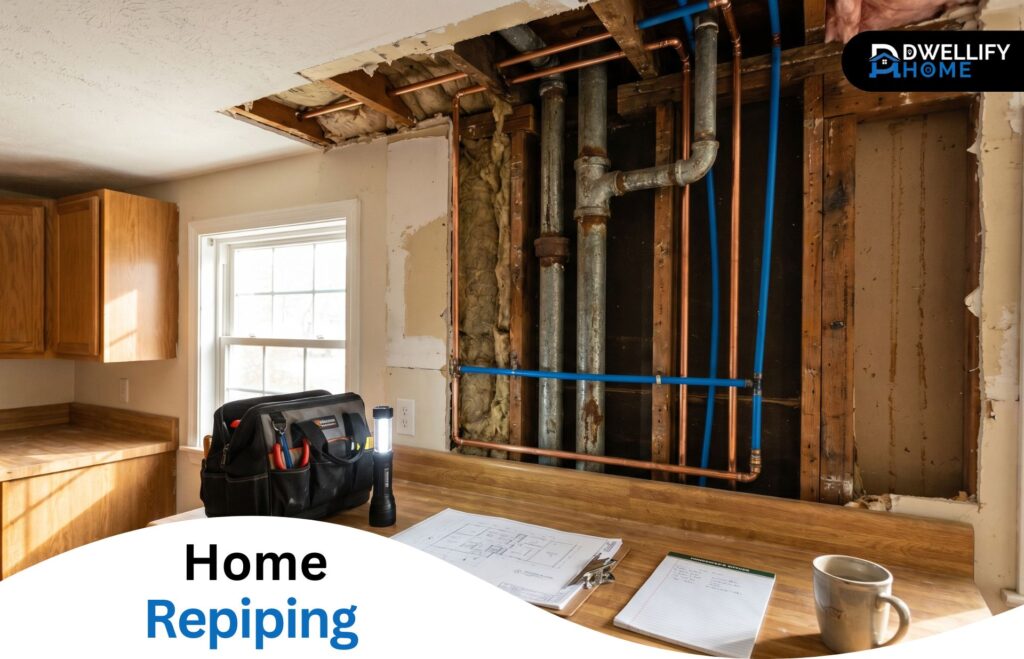
Most homeowners don’t think about their pipes until something goes wrong. Then one morning the water runs brown, or the shower pressure drops to a trickle, or a plumber finds the third leak in the same wall within two years — and suddenly, repiping becomes a very real conversation.
Home repiping is the process of replacing your home’s entire water supply line system — from the main inlet to every faucet and fixture — with new, modern piping materials like PEX or copper. It’s a significant project, but for the right home, it’s also one of the most practical investments you can make. This guide walks through everything: the warning signs, the materials, realistic costs, what the process actually looks like, and how to hire someone who’ll do it properly.
The Short Answer
Home repiping is the process of replacing a home’s entire water supply pipe system with new materials like PEX or copper. It solves persistent problems like low water pressure, discolored water, recurring leaks, and aging or dangerous pipe materials.
Mission Statement
At Dwellify Home, we help homeowners make practical, well-informed decisions about their living spaces — from everyday improvements to larger projects that affect comfort, function, and long-term value. Our goal is to give you clear, honest guidance so every decision you make feels confident and considered.
What Is Home Repiping — And What Does It Actually Include?
Home repiping means replacing all the water supply pipes in your home with new ones. It covers hot and cold supply lines running to every fixture — sinks, showers, toilets, and appliances. It does not typically include your drain, waste, or sewer lines, which are a separate system entirely.
The Difference Between Repiping and Pipe Repair
A pipe repair addresses one specific problem — a single corroded section, a pinhole leak, a joint that’s failed. It makes sense when the issue is isolated and the rest of the system is in reasonable condition.
Repiping replaces the whole water supply network. You’re not patching the old system anymore — you’re starting fresh. It’s a much bigger job, but it also means you won’t be calling a plumber back every six months.
What a Repipe Does NOT Cover (Sewer and Drain Lines)
This is something that trips up a lot of homeowners. Your home has two separate plumbing systems: supply lines (which bring clean water in) and drain-waste-vent lines (which take wastewater out). A standard home repipe only covers the supply side.
If you’re also dealing with slow drains, sewer backups, or cracked cast iron drain lines, that’s a separate scope of work — and a separate cost. Make sure any contractor you speak with is clear on which system they’re quoting.
Quick Comparison Table — Pipe Materials at a Glance
| Material | Lifespan | Cost | Best For |
| PEX | 25–50 years | Low | Most residential repipes |
| Copper | 50+ years | High | Long-term durability |
| CPVC | 25–40 years | Low–Medium | Budget-conscious installs |
Key Benefits of Home Repiping
- Eliminates rust-colored or discolored water from corroded supply lines
- Restores consistent water pressure throughout the entire home
- Removes ongoing risk of hidden leaks damaging walls and structural framing
- Reduces emergency plumbing costs over the following decade
- Increases buyer confidence and removes a common home inspection red flag
8 Signs Your Home Needs to Be Repiped
The most reliable signs your home needs repiping are recurring leaks, rust-colored or discolored water, consistently low water pressure, and pipes made from galvanized steel, polybutylene, or lead. If your home is over 40 to 50 years old and still has its original plumbing, a professional inspection is strongly recommended.
Rust or Discolored Water From Your Taps
Brown or orange-tinted water is almost always a sign of corrosion inside the pipes themselves. Galvanized steel pipes are especially prone to this — they rust from the inside out, and once that process is well underway, no amount of flushing fixes it. If you’re seeing discoloration consistently, it’s worth acting sooner rather than later.
Persistent Low Water Pressure Throughout the House
A single faucet with weak flow can have many causes. But when pressure is low in multiple rooms at once, the problem is usually buildup inside aging pipes — mineral deposits, rust, and corrosion narrowing the internal diameter over decades. Replacing the pipes restores full flow immediately.
Frequent Leaks That Keep Coming Back
One leak is an incident. Two leaks in the same area within a year is a pattern. When pipes are deteriorating throughout the house, you’ll see this repeat at different locations — behind walls, under sinks, near appliances. At that point, patching becomes more expensive and more disruptive than just replacing the system.
Unusual Noises Inside the Walls
Banging, rattling, or gurgling sounds from inside walls when water is running can indicate pressure fluctuations caused by pipe corrosion or failing joints. It’s not always serious on its own, but in an older home, it’s worth having a plumber assess what’s behind the noise.
Your Home Was Built Before the 1970s
Homes built before the early 1970s were commonly fitted with galvanized steel supply lines. These pipes have a typical lifespan of 40 to 70 years — which means a lot of them are at or past the end of their useful life right now. Age alone isn’t a reason to repipe, but in an older home, it’s a strong reason to get an inspection.
You Have Galvanized Steel, Polybutylene, or Lead Pipes
Galvanized steel corrodes internally over time. Lead pipes are a health hazard — full stop. Polybutylene, which was widely installed in the 1970s through the 1990s, is notorious for sudden, unpredictable failures and was the subject of a major class action lawsuit. If your home has any of these materials, replacement isn’t really a question of if — it’s a question of when.
Unexplained Increases in Your Water Bills
A spike in your water bill with no obvious cause often points to a hidden leak somewhere in the supply system. These can go undetected for months inside walls or under slabs. If a leak detection inspection doesn’t find a clear single source, widespread pipe deterioration may be the culprit.
You Are Planning a Major Kitchen or Bathroom Renovation
This is one most homeowners overlook. If you’re opening up walls for a kitchen remodel or a bathroom gut renovation anyway, the incremental cost to repipe those areas — or the whole house — drops significantly. The labor for drywall access is already accounted for. It’s one of the smartest windows to address aging pipes without paying twice.
Full House Repiping vs. Partial Repiping — Which One Do You Actually Need?
If problems are isolated to one area — a single bathroom or section of piping — a partial repipe may be sufficient. If your home has aging pipes throughout, multiple active problems, or problematic materials like polybutylene, a full home repipe is almost always the more cost-effective long-term solution.
The honest way to think about this: if 30 to 40 percent of your pipes are already showing problems, the rest isn’t far behind. Doing a partial repipe saves money today, but many homeowners find themselves back at the same decision 18 months later, having spent more in total than a full repipe would have cost.
A licensed plumber can assess the condition of your whole system and give you a realistic read on how much of it genuinely needs replacement. That assessment should drive the decision — not the quote.
Pipe Material Options — PEX, Copper, and CPVC Explained
The three most common materials used for residential home repiping are PEX (cross-linked polyethylene), copper, and CPVC. PEX is the most popular today due to its flexibility, lower cost, and ease of installation. Copper remains the gold standard for durability. CPVC is a budget-friendly rigid plastic option suited for specific conditions.
PEX Piping — Why It’s the Most Popular Choice for Home Repiping Today
PEX has largely taken over the residential repiping market, and for good reasons. It’s flexible enough to snake through walls with fewer cuts, it doesn’t corrode, it handles freeze-thaw cycles better than rigid materials, and it’s significantly less expensive than copper — both in material cost and labor time.
One thing worth knowing: PEX comes in two main types — PEX-A and PEX-B. PEX-A is more flexible and generally considered superior for residential installations. It’s worth asking your contractor specifically which type they use.
Copper Piping — The Long-Lasting Option Worth Considering
Copper has a proven track record going back decades. It’s naturally antimicrobial, handles high temperatures well, and has an expected lifespan of 50 or more years when properly installed. The downside is cost — copper is considerably more expensive than PEX in both materials and installation labor, since it requires soldering rather than simple crimp or expansion fittings.
For homeowners who plan to stay in the property long-term and want the most durable option available, copper is still a strong choice.
CPVC Piping — When It Makes Sense and When It Doesn’t
CPVC (chlorinated polyvinyl chloride) is a rigid plastic pipe that doesn’t corrode and is cheaper than copper. It’s a reasonable option in certain climates and applications, but it becomes brittle over time and doesn’t handle physical stress as well as copper or PEX. Most experienced plumbers today lean toward PEX for full residential repipes unless there’s a specific reason to choose otherwise.
PEX vs. Copper vs. CPVC — A Side-by-Side Comparison
| Feature | PEX | Copper | CPVC |
| Lifespan | 25–50 years | 50+ years | 25–40 years |
| Cost (material) | Low | High | Low–Medium |
| Installation complexity | Low | High (soldering) | Medium |
| Corrosion resistance | Excellent | Good | Excellent |
| Freeze resistance | Good | Fair | Poor |
| Best use case | Full residential repipe | Long-term durability | Budget installs |
How Much Does Home Repiping Cost? (Honest Breakdown)
Home repiping typically costs between $4,000 and $15,000 for a full house repipe, depending on home size, pipe material, labor rates, and local permit requirements. For a 2,000 sq ft home, most homeowners pay between $5,000 and $10,000. Partial repipes for one area can start as low as $1,500.
Average Cost by Home Size
These are realistic national averages — your region will affect the final number:
- Small home (1 bath, under 1,200 sq ft): $3,500–$6,000
- Medium home (2 baths, 1,500–2,500 sq ft): $5,000–$10,000
- Large home (3+ baths, over 2,500 sq ft): $8,000–$15,000+
What Factors Drive the Price Up or Down
The biggest cost variables are pipe material (copper costs roughly 20 to 30 percent more than PEX), number of bathrooms and fixtures, accessibility of pipes (slab foundations cost more to work on than homes with basements or crawl spaces), local labor rates, and permit fees, which vary by municipality.
Drywall repair and repainting after the repipe is often billed separately — always ask whether it’s included in your quote.
Partial Repipe vs. Full Repipe — How the Costs Compare
A partial repipe of one bathroom or kitchen area typically runs $1,500 to $3,500. It’s less expensive upfront, but if the rest of the house has the same aging pipes, you’ll likely be doing it again. A full repipe done in one project almost always costs less per linear foot than doing it in multiple partial phases.
How to Use a House Repiping Cost Calculator
Several plumbing companies now offer online house repiping cost calculators where you enter your home size, number of bathrooms, and pipe material preference to get an instant ballpark estimate. These are useful for setting realistic expectations before your first contractor call — but they won’t account for local labor rates, existing pipe access, or site-specific complications. Treat them as a starting point, not a final number.
How to Get an Accurate Quote (and Spot a Bad One)
Always get at least three written quotes. A legitimate quote should itemize labor, materials, permit fees, and drywall repair. Watch out for quotes that are suspiciously low — they often exclude permits, use substandard fittings, or plan to skip the inspection. A quote that’s 40 percent cheaper than the others is worth scrutinizing, not celebrating.
The Home Repiping Process — What Happens From Day One to Done
A whole-house repipe typically follows eight stages: plumbing inspection, material selection, permitting, site preparation, old pipe removal, new pipe installation, pressure testing and inspection, and finally wall restoration and cleanup. Most homes are completed within 3 to 7 days depending on size and complexity.
Step 1 — The Initial Plumbing Inspection
A thorough inspection maps the existing pipe layout, identifies the materials in use, checks for current leaks or pressure issues, and determines the full scope of work. This is also when a good plumber will tell you honestly whether a partial repipe might be sufficient — or whether the whole system needs to go.
Step 2 — Choosing Your Pipe Material and Mapping the Route
Once the inspection is done, you’ll discuss material options and the planned pipe route. The goal is to route new lines as efficiently as possible — minimizing wall cuts while covering every fixture. In most modern residential repipes, PEX is mapped out to run from a central manifold or from the main line in long continuous runs, reducing the number of joints and potential leak points.
Step 3 — Permits, Planning, and Scheduling
A repipe requires a plumbing permit in most jurisdictions. A reputable contractor will handle permit applications as part of the job. Don’t work with anyone who suggests skipping permits to save money — unpermitted plumbing work creates serious problems when you sell the home and can void your insurance coverage.
Step 4 — Protecting Your Home and Accessing the Pipes
Before any cutting starts, the crew covers floors, countertops, and furniture with protective sheeting. Strategic openings are then cut in drywall to access the pipe runs — typically at specific points along the route rather than removing entire sections of wall. The goal is to create the minimum access needed to do the job properly.
Step 5 — Removing the Old Pipe System
Old pipes are cut out in sections and removed. In homes with galvanized steel, this can be loud work — reciprocating saws and pipe cutters. The crew works carefully around electrical wiring and structural framing. All removed material is taken out and disposed of properly; metal pipes like copper are often recycled.
Step 6 — Installing the New Pipes and Connecting All Fixtures
New pipes are run through the access points and connected to every fixture — kitchen sink, dishwasher, bathroom sinks, toilets, showers, laundry, and water heater. Each connection is made using the appropriate fitting system for the material chosen. Pipes are strapped and supported at regular intervals to prevent movement and noise.
Step 7 — Pressure Testing and Building Inspection
Before any walls are closed, the system is pressure-tested to confirm there are no leaks at joints or connections. In most jurisdictions, a building inspector will also need to review the installation at this stage. This is a required step — not an optional one. Once the inspection is passed, the walls can be closed.
Step 8 — Drywall Repair, Cleanup, and Final Walkthrough
Access openings are patched, textured, and painted to match the surrounding wall as closely as possible. A thorough cleanup follows. The plumber should then walk you through the completed system — showing you new shutoff valve locations, explaining any maintenance considerations, and confirming the warranty on both materials and labor.
How Long Does Home Repiping Take?
Most home repiping projects take between 2 and 7 days from start to finish. A small one-bath home can be completed in 1 to 2 days. An average 2-bath home typically takes 3 to 5 days. Larger or multi-story homes with complex layouts can take up to a full week, with drywall repairs sometimes adding additional time.
Here’s a simple reference:
- Small home (1 bath): 1–2 days
- Medium home (2 baths): 3–5 days
- Large home (3+ baths, multi-story): 5–7 days
Drywall texture drying and paint matching may add a day or two beyond the plumbing work itself. Ask your contractor for a realistic timeline specific to your home before the project starts.
Can You Stay in Your Home During Repiping?
Yes — in most cases, homeowners can remain in their home throughout the repiping process. Water is typically shut off only during active working hours, and plumbers often stagger the work so at least one bathroom remains functional each day. You should expect noise, dust, and limited access to certain areas.
In practice, most crews will communicate the daily schedule so you know when water will be off. Filling a few containers beforehand on those days is a reasonable precaution. Families with young children or anyone with specific daily water-use needs should discuss the schedule with the contractor in advance.
The Real Benefits of Home Repiping (Beyond Just Fixing Leaks)
Cleaner, Better-Tasting Water
New pipes eliminate the internal rust, scale, and sediment buildup that discolors water and affects its taste. Many homeowners notice the difference immediately after repiping — the water simply looks and tastes cleaner because it no longer has decades of corrosion to pass through.
Consistent Water Pressure in Every Room
Corroded pipes restrict flow. New, clean pipes restore full water pressure throughout the house — including the shower you’ve been tolerating for years. It’s one of the most immediate and noticeable improvements after a repipe.
Lower Water Bills and Fewer Emergency Repairs
Hidden leaks from deteriorating pipes quietly waste water — and money — every day. Eliminating those leaks reduces water waste and removes the unpredictable cost of repeated emergency plumbing calls. Over five to ten years, the savings are real.
Higher Home Resale Value and Buyer Confidence
Updated plumbing is a genuine selling point. Home inspectors flag aging galvanized or polybutylene pipes consistently, and buyers often negotiate heavily or walk away when they see them. A documented repipe removes that objection entirely and adds credible value to the listing.
Protection Against Hidden Water Damage Inside Walls
Slow leaks inside walls cause mold, rot structural framing, and ruin insulation — often before anyone notices. Replacing aging pipes removes the ongoing risk of that kind of damage, which is typically far more expensive to remediate than the repipe itself.
Smart Timing — Should You Repipe During a Home Renovation?
If you’re already planning a major kitchen or bathroom renovation, the overlap with a repipe is worth serious consideration. When walls are already opened for tile work, cabinet installation, or layout changes, accessing the pipes behind them costs essentially nothing extra in labor. You’re paying for that access either way.
Doing the repipe separately means cutting into finished walls, patching them, and paying for drywall work all over again. Combining the two projects eliminates that duplication. For homes with aging pipes and a remodel already planned, this is one of the more efficient decisions a homeowner can make.
Talk to your plumber and your contractor or GC early in the planning process — before design decisions lock in the wall locations.
How to Find and Hire the Right Home Repiping Contractor
What to Look for in a Residential Repiping Specialist
Not every plumber does repipes regularly. Look specifically for licensed plumbers with documented experience in whole-house repiping — not just general plumbing service. Ask how many residential repipes they’ve completed in the past year. A plumber who does three or four a month has workflow and problem-solving experience that someone who does two a year simply doesn’t.
6 Questions to Ask Before You Sign Anything
- Are you licensed and insured for this type of work in my state?
- Will you pull the required permits, and is that included in the quote?
- What pipe material do you recommend for my home, and why?
- Does your quote include drywall repair and painting?
- What warranty do you offer on both labor and materials?
- Will your crew be the ones doing the work, or will it be subcontracted?
That last question matters more than most homeowners realize. Some companies win the job and then hand it off to a subcontractor you’ve never met and can’t vet.
What Licensing, Insurance, and Warranty Should Cover
Your contractor should carry a valid state plumbing license and general liability insurance. Ask to see both before signing anything. On warranty: a credible contractor should offer at least a one-year labor warranty, and most reputable pipe materials carry a manufacturer warranty of 25 years or more. Get the warranty terms in writing.
Red Flags That Signal an Unreliable Contractor
Watch out for these:
- Quotes that don’t include permits or drywall repair
- Pressure to start immediately without a written contract
- No physical address or verifiable license number
- Unwillingness to provide references from recent repipe jobs
- Payment demands of more than 25 to 30 percent upfront
A solid contractor doesn’t need to pressure you. They have the work and the reputation. If someone is pushing hard to close the deal on the first call, that’s worth paying attention to.
Can You Finance Home Repiping? What You Need to Know
A full residential home repiping is a meaningful expense, and financing is a legitimate option worth exploring. The most common routes are personal home improvement loans, home equity lines of credit (HELOCs), and contractor-arranged payment plans.
Personal loans typically have fixed terms and don’t require home equity, making them accessible for a wider range of homeowners. HELOCs often carry lower interest rates but require sufficient equity in the property. Some plumbing companies partner with financing providers to offer on-the-spot payment plans — these can be convenient, but read the terms carefully, particularly the interest rate after any promotional period ends.
The honest advice: avoid deferring a necessary repipe indefinitely because of cost. Hidden leaks and water damage from failing pipes will often cost more to remediate than the repipe itself would have.
Frequently Asked Questions About Home Repiping
Is home repiping covered by homeowners insurance?
Standard homeowners insurance generally does not cover elective repiping. However, if a sudden pipe failure causes water damage to your home, that damage may be covered depending on your policy. Gradual deterioration is typically excluded. Review your policy carefully and speak with your insurer if you’re unsure — coverage varies significantly between policies.
Will the plumber damage my walls during repiping?
Some wall access is unavoidable. Plumbers make strategic cuts at specific points along the pipe route — not full wall removals. A skilled crew minimizes the number and size of openings. Drywall patching and repainting are typically part of the project scope, and in most cases the repairs are nearly invisible after completion.
How do I know if I have galvanized or polybutylene pipes?
Galvanized steel pipes have a dull gray metallic appearance and are rigid, threaded, and heavy. Polybutylene pipes are typically gray, blue, or black plastic — flexible and lighter. If you’re not sure what you have, a licensed plumber can identify your pipe materials during an inspection, often within minutes of looking at exposed lines in your basement, crawl space, or utility area.
Does repiping with PEX affect my home’s value?
Repiping with PEX generally has a neutral to positive effect on home value. It removes a potential inspection red flag, demonstrates updated infrastructure, and is widely accepted by home inspectors and buyers. Some buyers in premium markets may prefer copper, but for most residential sales, PEX is considered a modern, quality material with no negative impact on value.
Do I need to replace sewer lines at the same time?
Not necessarily. Sewer and drain lines are a completely separate system from your water supply lines. If your sewer lines are functioning properly, there’s no reason to replace them during a repipe. If you’re experiencing recurring drain backups, slow drainage, or your home is older with original cast iron drain pipes, it’s worth having those inspected separately — but it’s a different project with a different scope and cost.
Can I repipe my house myself?
Technically, homeowners can do their own plumbing work in many states — but whole-house repiping is genuinely not a DIY project for most people. It requires pulling permits, working inside walls, making dozens of secure connections, passing a municipal pressure inspection, and restoring drywall throughout the home. An error at any stage can result in hidden leaks, failed inspections, or voided warranties. The better use of energy is finding a qualified contractor and asking the right questions before signing.
Conclusion
By the time you’ve read through this guide, you’re in a much better position than most homeowners who start calling plumbers without knowing what questions to ask. You understand what home repiping actually covers, how to recognize the signs that it’s needed, what the materials involve, what realistic costs look like, and how the process unfolds from inspection to final walkthrough.
The next step is straightforward: get a proper inspection from a licensed plumber, gather at least three written quotes, and make the decision based on your home’s actual condition — not pressure or guesswork. Done right, a repipe is a durable fix that most homeowners wish they’d addressed earlier than they did.
Disclaimer
The content on Dwellify Home is provided for general informational purposes only. Costs, timelines, material recommendations, and project details vary based on location, home condition, and individual circumstances. Always consult a licensed professional before making decisions about your home’s plumbing or any major renovation work.