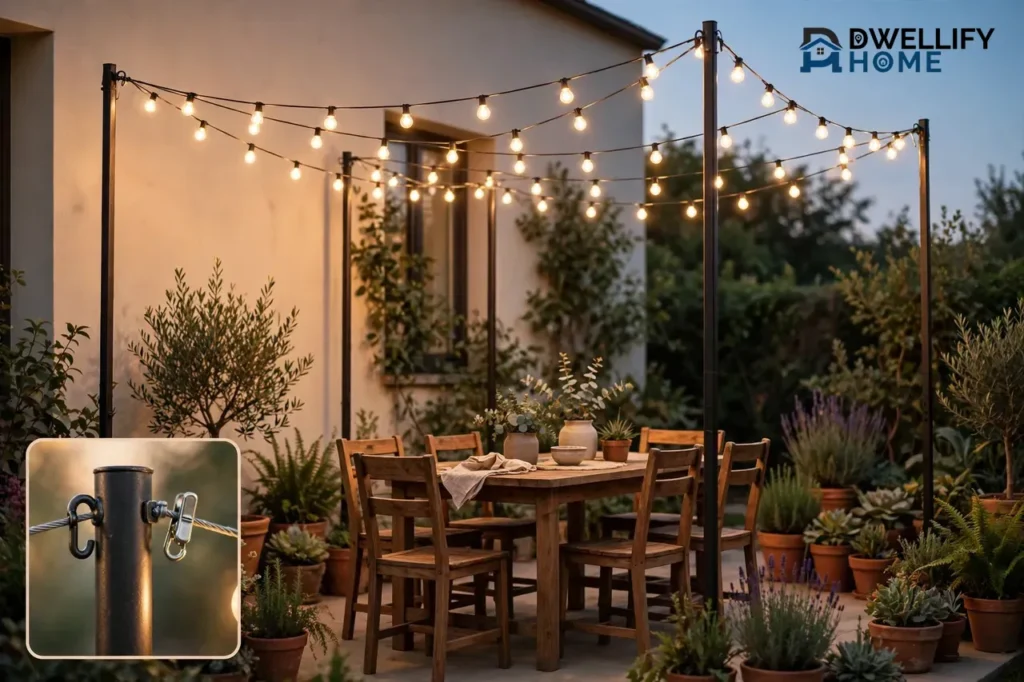
Poles for string lights work best at 8 to 10 feet tall and 10 to 15 feet apart, with the lights hung on a steel guide wire so they hold a gentle curve instead of pulling the poles inward. That one setup solves the two problems most people run into: poles that lean after the first windy night, and lights that sag low enough to bump heads. Pick the pole type that matches your ground, set the base right, and you can light a patio with no trees, no drilling into the house, and no permanent changes.
This guide covers every kind of pole, how high to hang the lights, how far apart to space the poles, how to lay out the pattern, and which mistakes make a whole setup lean.
Poles for String Lights at a Glance
A string light pole is a tall, sturdy post that holds outdoor string lights where no tree, wall, or roof edge exists to hang them from. You set two or more poles around a patio, deck, or yard, run the lights between them, and the poles carry the weight and the pull of the strands. Without poles, most patios have nowhere to hang lights at all.
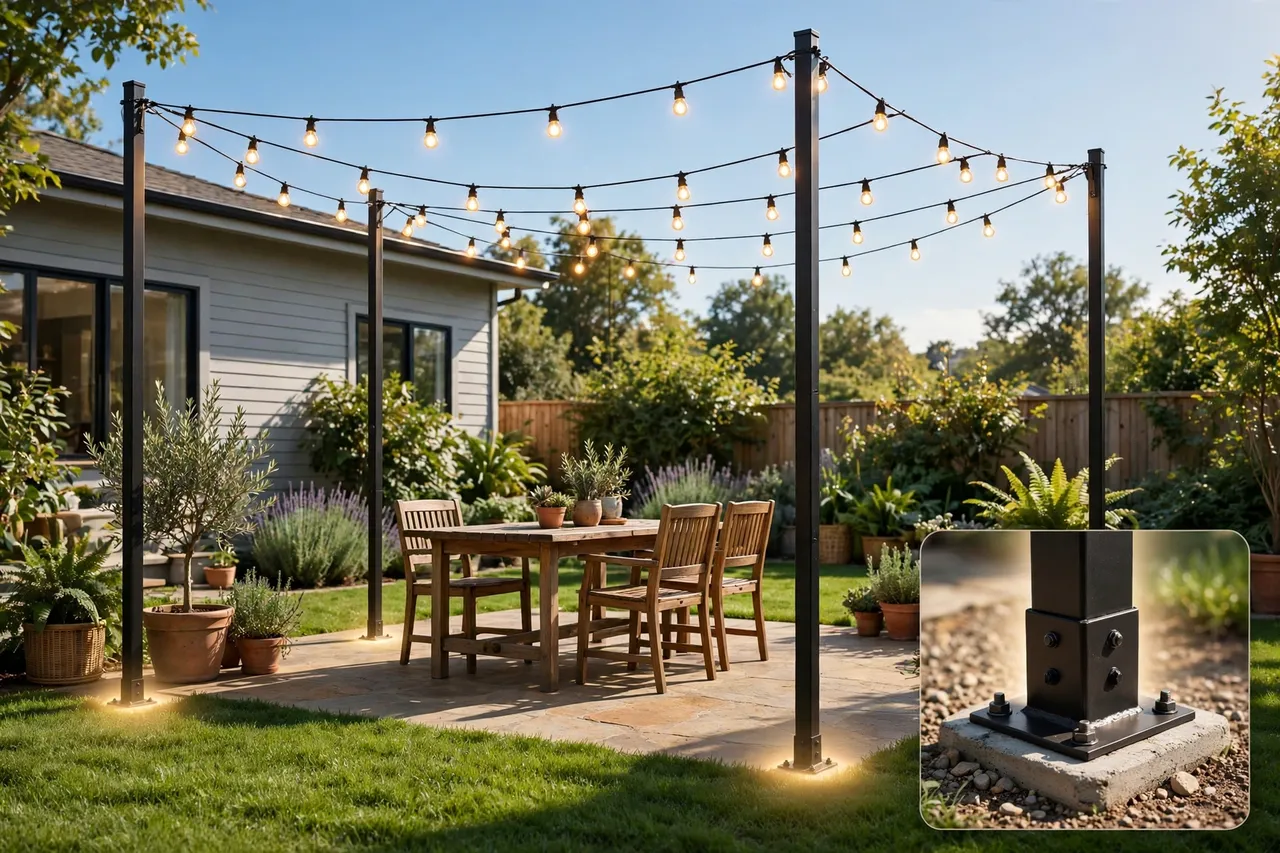
Every setup has the same four parts: the pole, a base or footing, a hook at the top, and the light strand, ideally clipped to a guide wire. The base does most of the work: a tall pole with a weak base is a lever, and the pull of the lights will tip it over time.
String light poles at a glance
| Pole type | Best for | Setup effort | Moves later? |
|---|---|---|---|
| Ready-made metal poles | Renters, parties, quick setups | Low, no tools | Yes |
| Wood 4×4 posts in concrete | Permanent patios, long spans | High, digging and concrete | No |
| Planter posts | Patios with no digging allowed | Medium, concrete in a pot | Yes, with help |
| Deck-mounted poles | Wood decks and concrete slabs | Medium, bolts and brackets | No |
| Stake-in poles | Soft lawn, short-term use | Low, hammer in | Yes |
The base decides whether the pole stays up. Spend your money and effort on a solid footing first, and the pole itself can be simple.
How High Should String Light Poles Be?
Hang your string lights 8 to 10 feet above the ground. That height clears the heads of people walking under the lights, leaves room for the natural dip of the strand between poles, and still keeps the warm glow close enough to feel cozy. Keep at least 7 feet of clearance anywhere people walk, and go a little lower over a dining table if you like a closer feel.
Govee’s outdoor string light guide gives the same range: the ideal height for hanging string lights is usually 7 to 10 feet above the ground, which gives a warm, even glow and keeps the lights out of the way. Read the full planning guide at Govee’s guide to hanging outdoor string lights.
Poles shorter than 7 feet put the lights at head height, and poles taller than 12 feet thin out the glow while giving wind more leverage. For most patios, a 10-foot pole is the sweet spot. Remember the pole must be taller than the hanging height: a 10-foot pole set 2 feet into the ground stands only 8 feet tall.
How Far Apart Should String Light Poles Be?
Space your string light poles 10 to 15 feet apart for the best result. At that distance, a normal strand hangs in a soft, even curve, and the pull on each pole stays low enough for a good base to hold. For heavier commercial-style strands, pull the spacing in to about 10 feet, because the extra weight drags the curve down and pulls harder on the poles.
For light strands on a calm, sheltered patio, you can stretch to 15 or even 20 feet, but only with a steel guide wire carrying the load. Never let the light strand itself carry the tension of a long span: the wire takes the pull, and the lights just clip to it.
Four corner poles give you the classic canopy, and the diagonal run across the middle is always the longest span, so plan a guide wire for it. A V shape with three poles puts more pull on the center pole, so give that pole the strongest base.
Keep every span at 20 feet or less unless you add a guide wire. Past that point, sag grows fast, the pull on the poles jumps, and the lights stop looking like a canopy and start looking like a drooping clothesline.
The 5 Types of Poles for String Lights
Five pole types cover nearly every patio, deck, and yard. Pick by your ground and your plans, not by the photo on the box: a renter on a concrete patio needs a different pole than a homeowner building a permanent canopy.
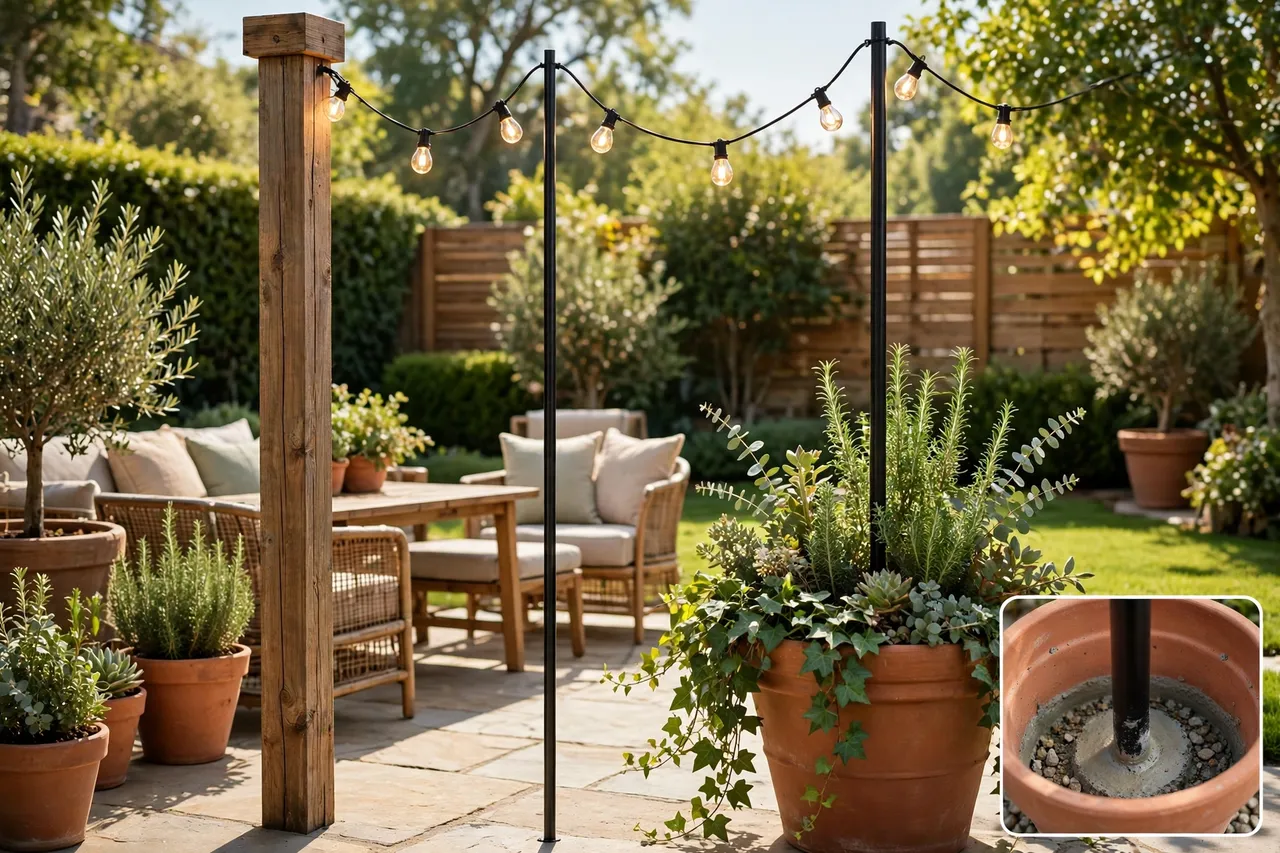
1. Ready-made metal poles
Ready-made poles are the fastest option. Most are powder-coated steel or aluminum, 9 or 10 feet tall, sold in packs of two or four with a stake, a weighted base, or a fence bracket in the box. Push the stake into the lawn or bolt the base to a deck, slide the sections together, and hang the lights the same afternoon.
The trade-off is strength. Lightweight poles flex in wind and struggle with long, heavy spans, so look for thick-walled steel, a forked or hooked top, and a base that matches your ground. A stake base belongs in soil, not on a slab, and in a windy yard add a guy wire from the pole top to a ground stake.
2. Wood 4×4 posts in concrete
A pressure-treated 4×4 wood post set in concrete is the strongest home setup, and the right pick for a permanent patio canopy. The wood looks warm, takes a hook easily, and holds long spans without bending. Use a 6×6 post if one pole will carry several runs or a heavy commercial strand.
The work is real: dig a hole, set the post level, pour concrete, and wait for it to cure. That effort pays off for years, because a concrete footing resists wind and the steady sideways pull of the lights. Paint or stain the post to match the fence, and cap the top so rain does not soak into the end grain.
3. Planter posts
A planter post is a pole set in a big, heavy planter filled with concrete, gravel, or sand. It is the best no-dig option for concrete patios, decks, and rental homes. A wide planter, about 12 to 16 inches across and 15 inches or deeper, gives the leverage and weight the pole needs.
Fill the planter at least half to three-quarters full with concrete, and set the pole dead center while the concrete is wet. A 16-inch planter filled with concrete can weigh over 100 pounds, so place it where you want it before you fill it. Top the concrete with soil and plants, and the base becomes patio decor instead of an eyesore.
4. Deck-mounted poles
Deck-mounted poles bolt to a wood deck or a concrete slab with a metal base plate and brackets. They suit patios with no soil to dig and no room for a big planter: the base plate spreads the load, and the bolts hold the pole against the pull of the lights.
Before you drill, check what sits under the mount. On a wood deck, bolt through a joist or solid blocking, not just one deck board. On concrete, use outdoor-rated wedge anchors. Keep the pole near a deck corner or post, where the structure is strongest, and use a guide wire so the mount never takes the full pull alone.
5. Stake-in poles for lawns
Stake-in poles slide over a steel rebar stake driven into soft ground, or end in a pointed spike you push into the soil. They go up in minutes and cost the least, which makes them popular for parties and seasonal displays, but they are a short-term setup, not a permanent one.
Drive the rebar at least 12 inches deep, and use stake-in poles only for short spans with light strands. Wet soil, wind, and a heavy strand will lean one within a season, so if a pole starts to tilt, move it to firmer ground and shorten the span.
For help picking the lights themselves, not just the poles, see our guide to outdoor string lights, which covers bulb types, lengths, and easy installation steps.
How to Choose the Right Pole for Your Patio
Choose your pole by answering four questions in order: what is under your feet, how far will the lights span, how windy is your yard, and how long will the setup stay up? The answers point to one pole type and one base, and they stop you from buying a pole that looks right and fails in a month.
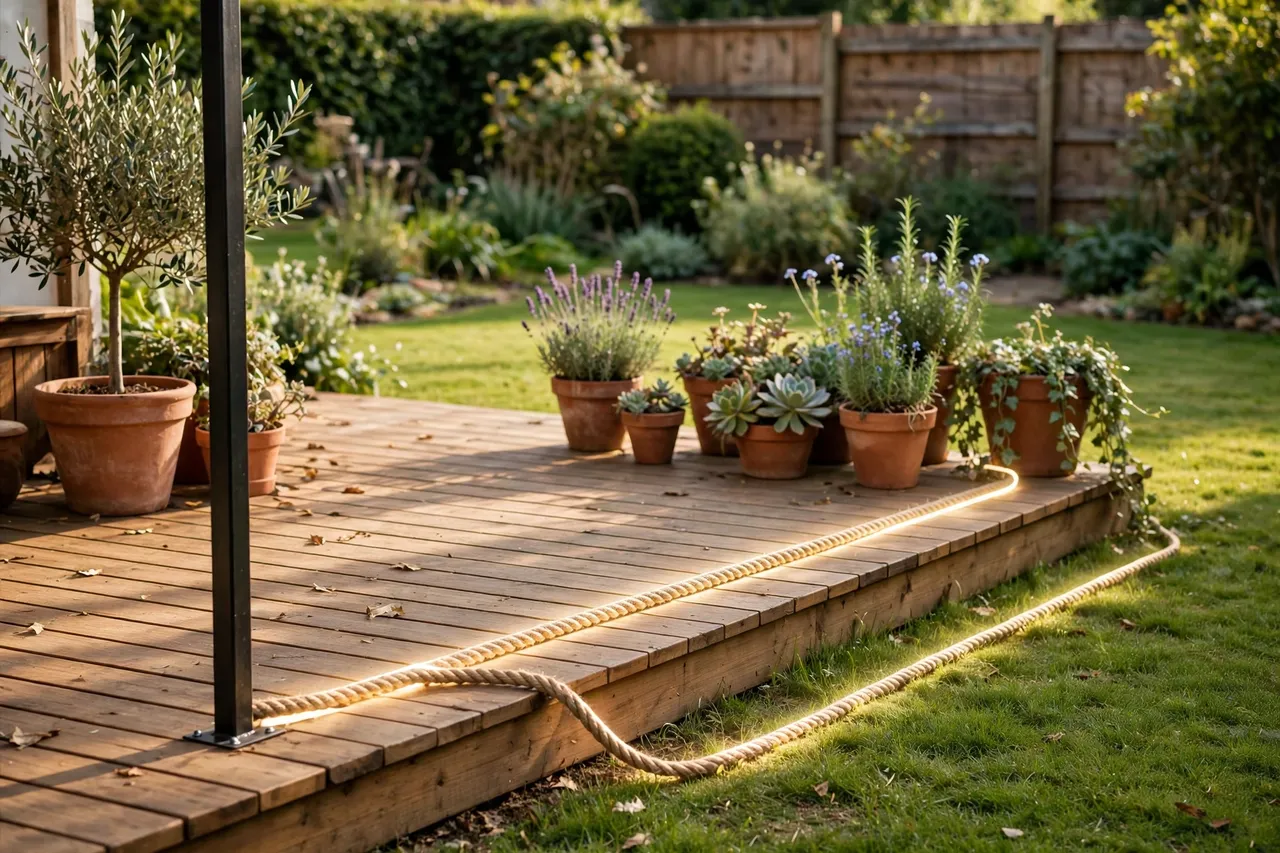
Start with the ground
Soft lawn takes a stake or a dug post. A concrete patio or wood deck needs a planter post or a bolted base, because you cannot dig through it. If you rent, rule out anything that digs or drills, and pick a planter post or a ready-made pole with a freestanding base.
Match the pole to the span
Short spans under 12 feet are easy: almost any pole works. Spans of 15 to 20 feet need a thicker pole, a steel guide wire, and a base with real weight behind it. If your longest run crosses a diagonal or a wide yard, add a middle pole and split the span in two instead of stretching one long run. Two short spans always look better and hold better than one long one.
Think about wind
Wind is the force that leans poles, not the weight of the lights. An open yard, a hilltop, or a gap between houses funnels wind straight into the canopy. In a windy spot, pick a thicker steel pole or a 4×4 post, set the base deeper or heavier, and add guy wires on the windward poles.
Price the whole setup, not just the pole
Price the pole, the base, the hardware, and the guide wire together: a cheap pole with a weak base costs more in the end than a good pole with a solid one.
When in doubt, pick the stronger base. Nobody regrets a pole that stands firm in a storm, and everyone regrets the one that leaned by August.
How to Install Poles for String Lights
Installing poles for string lights takes a free afternoon for a ready-made set and a full weekend for concrete posts. The steps are the same either way: plan the layout, set the bases, let them cure or settle, then hang the lights with a gentle sag. Rushing the base is the one shortcut that always costs you later.
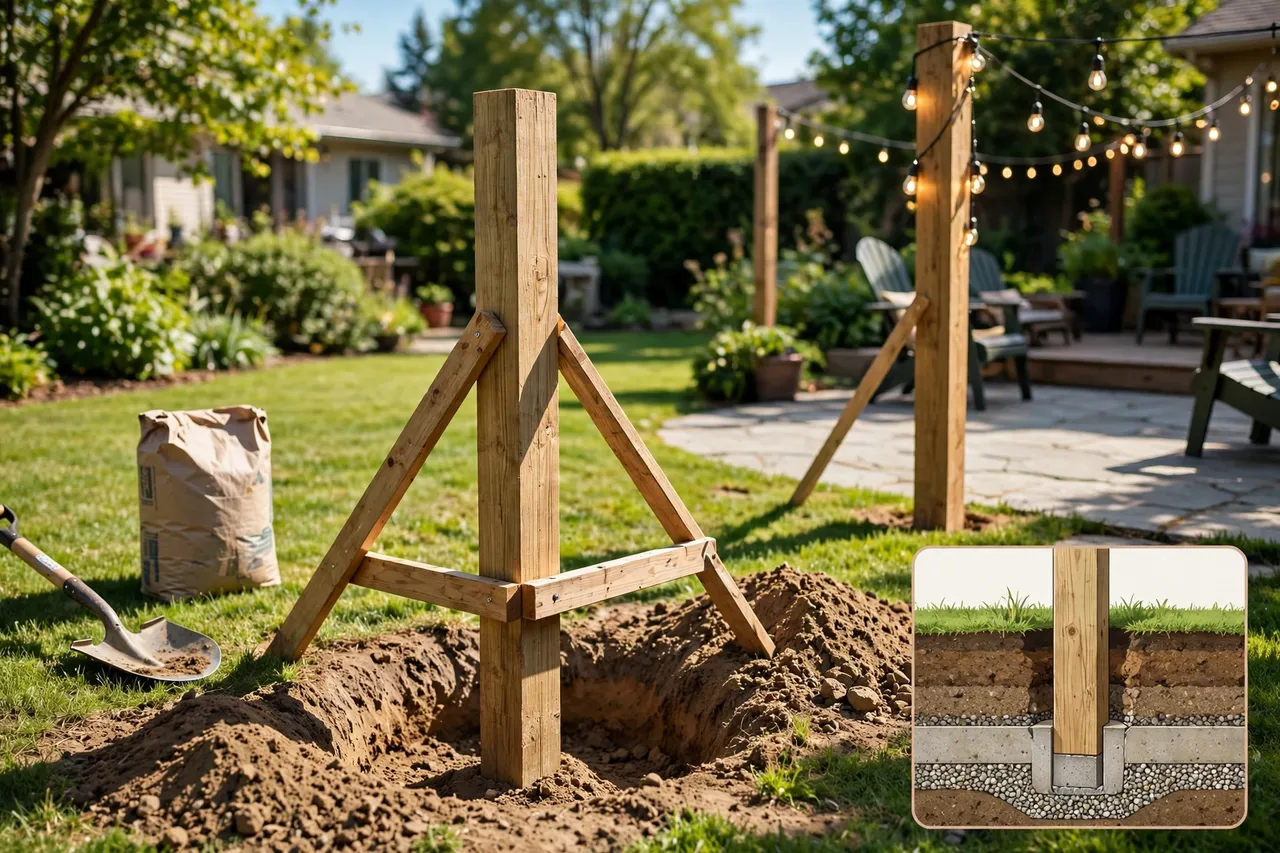
Step 1: Plan the layout on the ground
Measure the patio and mark each pole spot with a stake or chalk. Stretch a rope between the marks to see the real spans and sag, and check that the lights will clear heads, doors, and the grill. A rectangle takes four poles, a V takes three, and a long yard takes a middle pole to split the span. Before you dig anywhere, call 811, the free national before-you-dig service, a few business days ahead so buried lines get marked.
Step 2: Set the posts in the ground
For a permanent post, dig a hole about one-third as deep as the pole stands above ground: a 10-foot pole needs a hole at least 30 inches deep and 8 to 10 inches wide, with gravel at the bottom for drainage. Set the post level, brace it plumb, and pour concrete around it. Christmas Lights Etc, a specialty lighting retailer, gives the same rule: posts 8 to 10 feet off the ground benefit from being sunk about 24 to 36 inches. See their full hanging guide at Christmas Lights Etc’s guide to planning and hanging patio lights. Let the concrete cure at least 24 to 48 hours before you pull any lights tight.
Step 3: Build planter posts without digging
Set the pole in the center of a wide, deep planter and brace it plumb. Pour quick-setting concrete around the base until the planter is half to three-quarters full, and let it set before you move the planter. Top with soil and plants once the concrete has cured. Put the planter in its final spot before you fill it, because a full planter is too heavy to drag across a patio.
Step 4: Hang the guide wire first
Run a galvanized steel guide wire between the pole tops and pull it snug, but not guitar-string tight: a wire pulled too tight puts a huge sideways load on the poles. Clip the light strand to the wire every few feet, and let it dip 6 to 12 inches over a 20-foot span. That soft curve is the look you want, and it gives the wire room to expand and contract.
Step 5: Connect the lights and test at dusk
Plug the strands into an outdoor-rated extension cord and a GFCI-protected outlet, then step back and look at dusk. Check the sag, the height over walkways, and whether any bulb touches a pole, a wall, or fabric. Adjust the wire tension until the curve looks even from every seat, then walk under every run yourself.
Let concrete cure before you hang lights. Pulling on a fresh post can tilt it a few degrees, and a tilted post never straightens itself.
String Light Pole Layout Ideas That Look Good
A good layout makes the lights feel like a ceiling, not a random zigzag. The pattern should follow how people use the patio: over the table where they eat, along the path where they walk, and around the edges where the space ends. Start with the seating area and build outward from there.
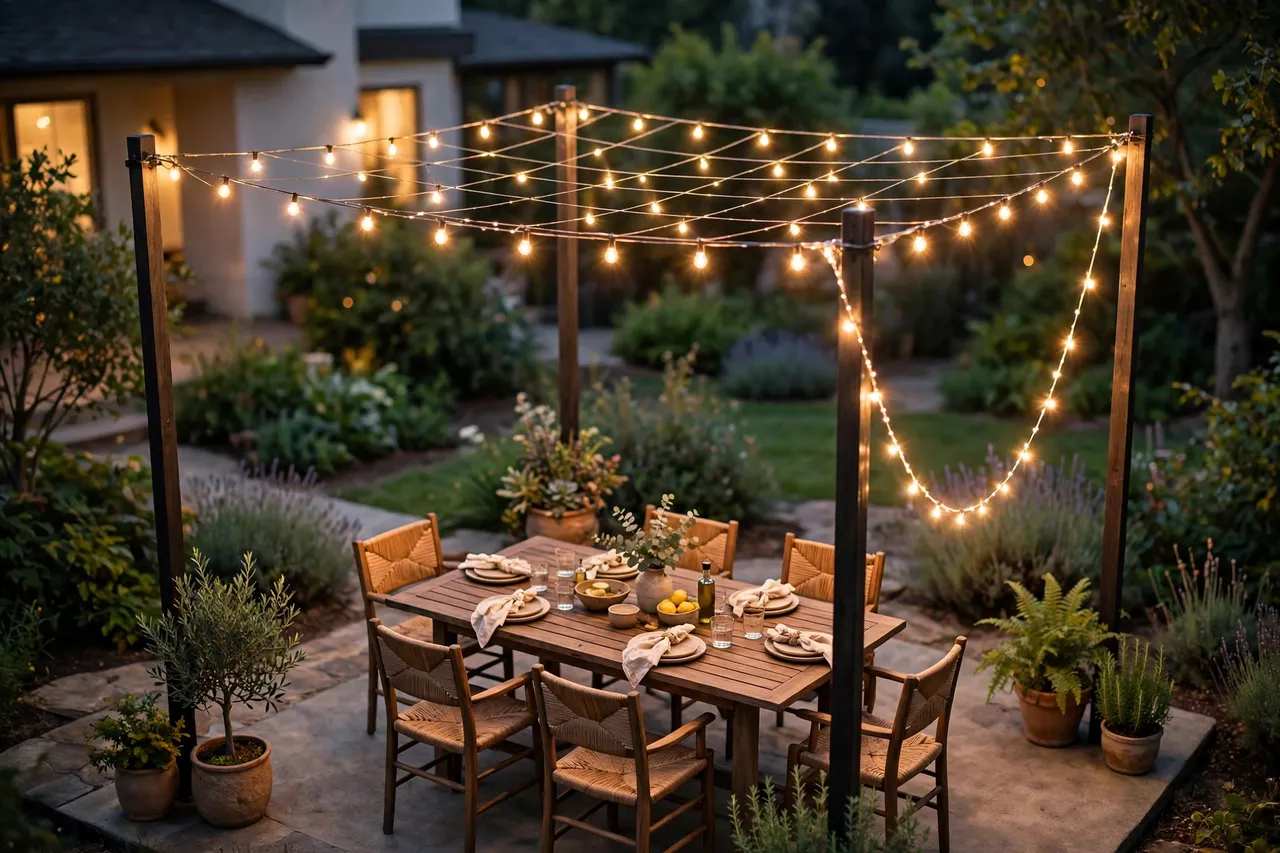
The classic rectangle
Four poles at the corners of the patio, with strands running along the edges and one or two across the middle, give you the café look most people picture. It suits square patios and dining sets, and it lights the table from above without a bulb in anyone’s eyes. Keep the middle runs on a guide wire, because the diagonal is the longest span in the yard.
The cozy V
Three poles in a V shape work well on a small patio or a narrow deck, where four poles would crowd the space. Run two strands from the center pole to the two outer poles, and hang the lights a little lower over the seating for a warm, close feel. Give the center pole your strongest base, since it carries the pull of both runs.
Parallel lines over a long patio
On a long, narrow patio, run two or three parallel strands down its length, with poles along both sides. The lines draw the eye down the patio, and each span stays short. This layout also works under a covered patio roof, where the roof edge holds one side and poles hold the other. For covered-patio layouts, see covered patio ideas and our patio lighting ideas guide.
Zigzag for a party yard
A zigzag runs one long strand back and forth between poles on opposite sides of the yard, covering a big area with fewer poles. The spans are long, so a guide wire is not optional here. Save the zigzag for parties, and use the rectangle for everyday dining.
On a small patio, plan the poles around the furniture. Our small patio designs guide shows seven layouts that make a tiny patio feel bigger.
Mistakes That Make Poles Lean and Lights Sag
Most leaning poles and sagging lights come from a short list of avoidable mistakes. Run your plan past this list before you buy anything, and you will skip the fixes that cost other people a second weekend.
- Using a pole that is too short. A 7-foot pole leaves no room for sag, so the lights end up at head height. Buy 10 feet or taller.
- Setting the base too shallow. A post buried only a foot deep will lean the first time the wind pulls on a full strand. Sink a permanent post 24 to 36 inches deep.
- Spacing the poles too far apart. Spans over 20 feet without a guide wire sag hard and pull poles inward. Add a middle pole or a wire.
- Pulling the strand tight. A tight strand looks neat for a day, then heat, wind, and weight stretch it and bend the poles. Leave a soft dip.
- Skipping the guide wire on long runs. The light strand is not a support cable. Let the wire carry the load and the lights just ride along.
- Using indoor lights outside. Indoor strands are not built for rain and sun, and they fail fast. Buy lights rated for outdoor use.
- Forgetting the wind. A sheltered patio forgives a light pole. An open yard does not. Match the pole and the base to the windiest spot in the yard.
- Hanging lights where people grab them. A strand at head height over a walkway gets pulled, snagged, and broken. Keep walkways clear at 7 feet or higher.
The cheapest fix is the one you never need. A deeper hole and a guide wire cost a little now and save a leaning pole, a torn strand, and a second install later.
Safety and Care for String Light Poles
String light poles are simple, but they hold electrical lights above people’s heads, so a few safety habits matter. Check them once at install time and once a season, and the setup stays safe for years.
Plug outdoor lights only into a GFCI-protected outlet, and use outdoor-rated extension cords with no cuts, splices, or tape repairs. The U.S. Consumer Product Safety Commission advises plugging outdoor lights only into GFCI-protected outlets and checking sets for broken or cracked sockets, frayed or bare wires, and loose connections before use. See the CPSC’s holiday safety guidance at the U.S. Consumer Product Safety Commission holiday safety page. Press the TEST button on the outlet before the season starts: if it does not cut the power, get an electrician before you plug anything in.
Keep every plug and connection off the ground and out of puddles, and use an in-use outlet cover so rain cannot reach the plug. Never connect more strands end to end than the maker allows on the tag, and never run a cord through a door or window that pinches it. For low-voltage garden lighting, see our guide to low voltage landscape lights.
Check the poles each spring for a lean, a loose base, rust on metal, or soft wood at the ground line. Tighten bolts, re-level a planter post, and replace any pole that has rotted or bent. Take temporary poles down before a major storm, and store strands dry and loosely coiled.
Short safety note: this project involves outdoor electrical work and tall poles. Use outdoor-rated lights, plug into a GFCI outlet, anchor every pole so it cannot fall on anyone, and call a licensed electrician for any hardwiring or for an outlet that has no GFCI protection. Never climb a tall ladder alone to hang lights, and never dig without calling 811 first.
Related Guides
If you are planning the whole patio, these guides pick up where this one leaves off:
- Outdoor String Lights — the best string lights for 2026, with ideas, tips, and an easy installation guide.
- Patio Lighting Ideas — warm, layered light for nights you will actually use.
- Patio Ideas — 23 designs that turn a bare backyard into your favorite room.
- Small Patio Designs — seven layouts that make a tiny patio feel bigger.
- Best Outdoor Landscape Lighting Ideas — make your yard safe and beautiful after dark.
- Outdoor Christmas Decorations — wow the whole street without tangled lights or blown fuses.
- Pergola String Lights — the same glow on a pergola frame, when you have beams instead of poles.
- Christmas Light Ideas — seasonal uses for the same pole-and-strand setup.
- Patio Shade Ideas — shade for the same patio your poles light at night.
- Small Patio Decorating Ideas — decorating the small pole-lit patio once the lights are up.
- Apartment Patio Ideas — small patios where no-dig planter posts are the way to hang lights.
Frequently Asked Questions
How tall should poles for string lights be?
Poles for string lights should stand 8 to 10 feet tall above the ground, which keeps the lights above head height while leaving room for their natural dip. Buy a 10- or 12-foot pole, since part of its length goes into the ground or a planter.
How far apart should string light poles be?
Space string light poles 10 to 15 feet apart for the best curve and the least pull on each pole. Heavier commercial strands need spacing closer to 10 feet. You can stretch to 20 feet with a steel guide wire carrying the load, but longer spans sag badly and pull poles inward.
How deep should I set a string light pole in the ground?
Set a permanent string light pole 24 to 36 inches deep for an 8- to 10-foot pole, about one-third of its height above ground. Add gravel at the bottom for drainage, pour concrete around the post, and let it cure 24 to 48 hours. In cold climates, set the footing below the frost line.
What size pole should I use for string lights?
A pressure-treated 4×4 wood post is strong enough for most backyard setups, and a 6×6 post suits heavier displays with several runs from one pole. For metal, look for 1.5- to 2-inch steel conduit, which stays stiff at 8 to 10 feet tall. Thin PVC pipe bends and is not a good pole.
Can I hang string lights without trees or drilling into my house?
Yes. Planter posts, ready-made metal poles with weighted bases, and deck-mounted poles all hold string lights with no trees and no holes in the house. Planter posts suit renters and concrete patios best, since you can move them later. Mark the layout with rope first, so you buy the right number of poles.
Do I need a guide wire for string lights?
Yes, for any span over 15 to 20 feet, and it is a smart idea for every span. A galvanized steel guide wire carries the pull between poles, and the light strand clips to it instead of holding the tension itself. Without a wire, long strands sag, stretch, and pull poles inward over time.
A good pole setup disappears into the evening: all you see is warm light floating over the table and hear the people under it. Pick the pole that matches your ground, set the base deeper than you think you need, hang the lights with a soft dip, and your patio will glow all summer without a single leaning pole.