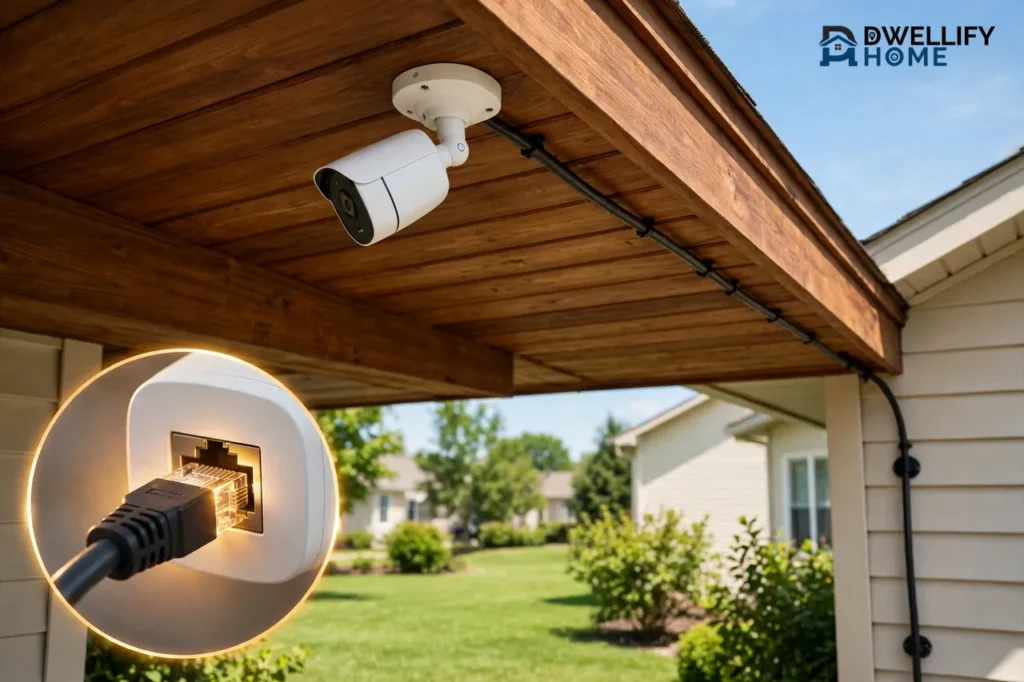
Wiring outdoor security cameras means running one cable from each camera back to a recorder or switch inside your home. For most homes, the best way is PoE: one outdoor-rated Cat5e or Cat6 Ethernet cable carries both power and video to each camera, up to 328 feet (100 meters). If your camera is not PoE, you run an Ethernet cable for video and a separate power cable to a weatherproof outdoor outlet. Plan the route first, test every cable on the ground, and seal every outdoor connection, and the system will last through winter.
This guide covers the whole job in plain steps: the wiring type, the cable and tools, the route, the wall hole, the weatherproofing, and the testing. It also shows you where to stop and call a licensed electrician.
What Wiring Outdoor Security Cameras Actually Means
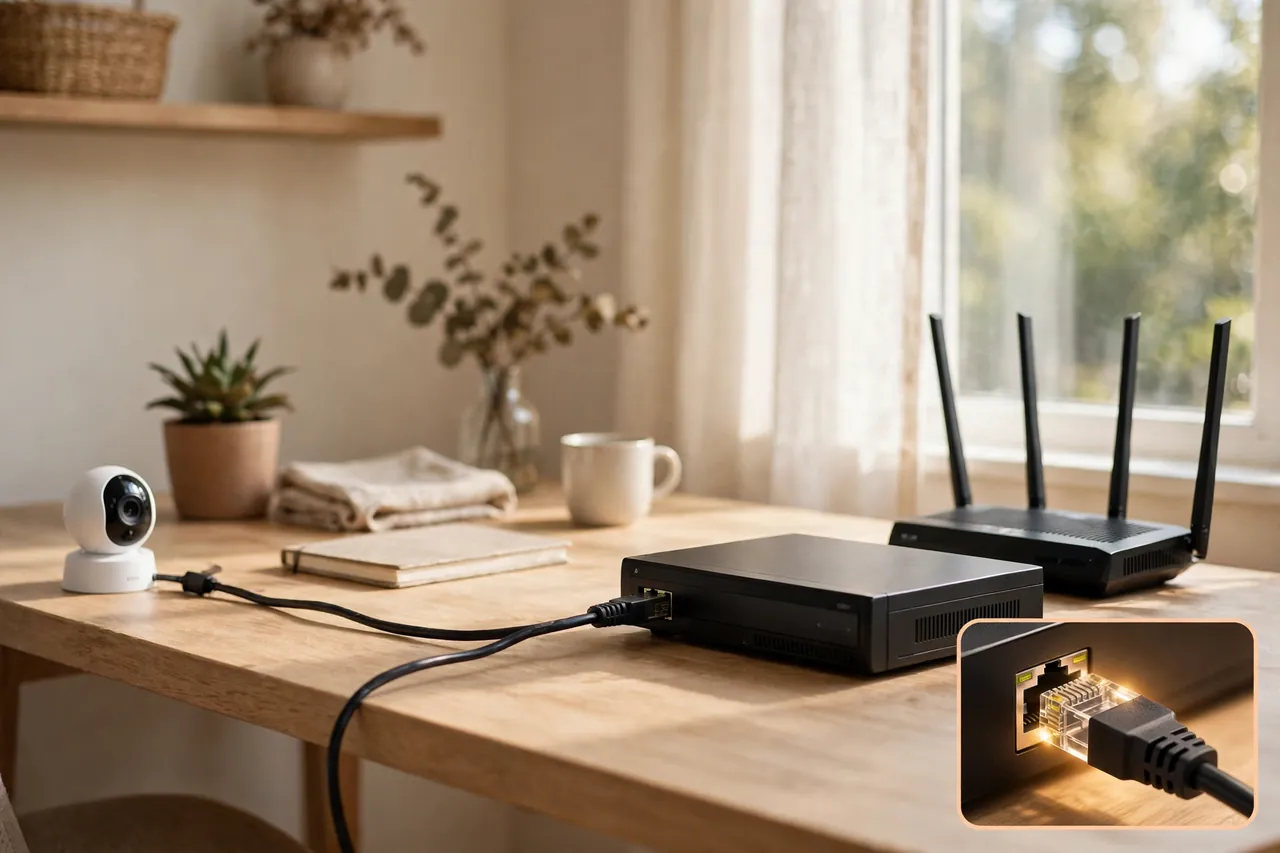
A wired outdoor security camera needs two things from its cable: power and a path for the video to reach its recorder. A wireless camera still needs power, so “wireless” only means the video travels by Wi-Fi. A wired camera gets both power and video through a cable, which is why it stays connected in bad weather and never runs out of battery.
There are three common wired setups. PoE cameras use one Ethernet cable for power and video. Powered wired cameras use an Ethernet or Wi-Fi link for video and a separate power adapter plugged into an outlet. Older analog cameras use coaxial cable for video and a separate power pair, and they connect to a DVR instead of an NVR.
Table: The three ways to wire an outdoor camera
| Setup | Cable to the camera | Power source | Recorder |
|---|---|---|---|
| PoE camera | One Cat5e or Cat6 Ethernet cable | The same Ethernet cable | PoE NVR or PoE switch |
| Powered wired camera | Ethernet cable, or Wi-Fi for video | Power adapter at an outlet | NVR, recorder, or cloud |
| Analog camera | Coaxial cable plus a power pair | Separate low-voltage power pair | DVR |
Most new outdoor installs are PoE, and this guide spends the most time there. The powered-camera section later covers the outlet rules, and the analog notes cover homes that already have coaxial cable in the walls.
Choose Your Wiring Route: PoE, Powered, or Analog
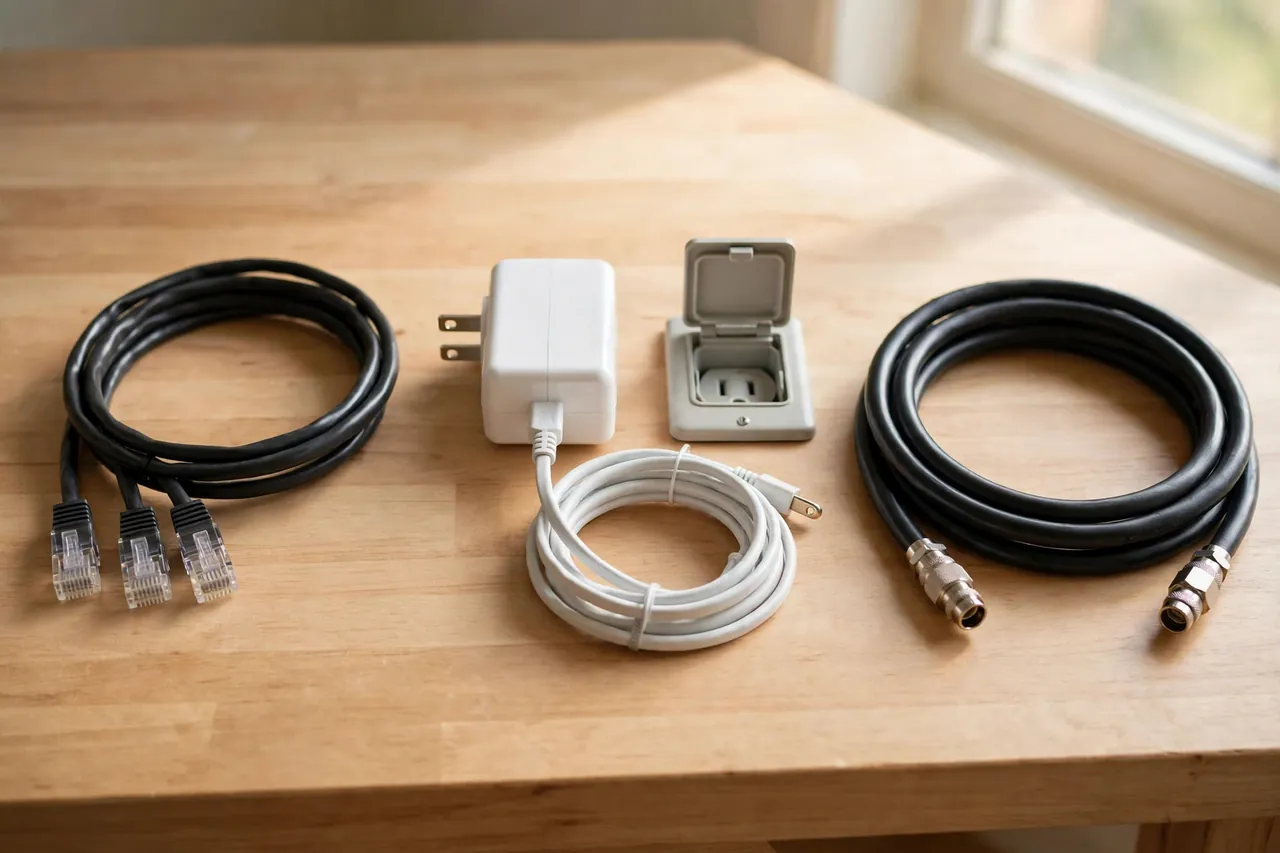
Pick the wiring route before you buy anything, because each one needs different cable, different hardware, and a different amount of work. The wrong choice is the most expensive mistake in this job: a camera bought for one route often cannot switch to another without new parts.
PoE: one cable does both jobs
PoE stands for Power over Ethernet. One Ethernet cable carries power and video together from a PoE switch or a PoE NVR to the camera. There is no outlet or power adapter at the camera end, which keeps the outside of your house clean and gives you a steady connection that Wi-Fi cannot match.
PoE is the best choice for a permanent outdoor setup, and it is the route our PoE security cameras guide explains in full, from power budgets to switch choices. Read that guide before you buy a switch, because the switch must supply enough total power for every camera at once, not just one.
Check two things before you commit to PoE. First, confirm your camera truly supports PoE: look for “PoE” printed by the network port or in the power section of the manual. Some cameras have an Ethernet port for data only and still need their own adapter. Second, measure the run. A standard copper Ethernet run tops out at 100 meters (328 feet), including the patch cords at both ends, as the PoE guide from Verkada confirms. Past that distance, you need a PoE extender, a second switch, or a different route.
Powered wired cameras: an outlet does the power job
A powered wired camera, such as the best wired outdoor security camera models that ship with a plug-in adapter, takes video over Ethernet or Wi-Fi and takes power from an adapter plugged into an outlet. This route fits a single camera near a porch or garage where an outdoor outlet already exists, and it avoids running cable all the way back to a recorder.
The catch is the outlet itself. Outside, the outlet must be a weather-resistant GFCI outlet with an in-use cover that stays closed while a plug is in it. The outlet rules are covered in the powered-camera section below, and any new outlet is electrician work, not a DIY add-on. If you are still weighing a powered camera against a Wi-Fi one, our wireless security cameras outdoor guide compares the two side by side.
Analog cameras: reuse the coax you already have
Analog cameras run on coaxial cable, usually RG59 Siamese cable, which bundles the video line and a separate low-voltage power pair in one jacket. They connect to a DVR, not an NVR. If your house already has coax runs from an old system, reusing them can save a full day of pulling cable.
Do not start a new system on coax. PoE gives you sharper video, simpler wiring, and easier expansion. Keep coax only when the cable is already in the walls and in good shape. Our security camera DVR guide explains how DVR recording works, and our closed-circuit camera guide covers the older CCTV setups that still use it.
What You Need Before You Start
Gather everything before the first hole. A mid-job trip to the store with a half-drilled wall is how small jobs turn into weekend jobs.
For a PoE install, you need:
- Outdoor-rated solid-copper Cat5e or Cat6 Ethernet cable, with slack at both ends
- RJ45 connectors, or pre-made outdoor-rated patch cables if you will not crimp your own
- A PoE NVR, a PoE switch, or a PoE injector, with enough power budget for all cameras
- A cable tester, so you can prove each run before you mount anything
- A drill, the right bit for your wall, a fish tape, and cable clips or conduit
- A weatherproof junction box, the camera’s waterproof connector cover, and exterior-grade sealant
- A sturdy ladder, a helper, and a phone for aiming the camera
For a powered wired camera, add the camera’s own power adapter and its full cord length, measured against the outlet. If no outlet sits within reach, that is electrician work, not a job for an extension cord.
Buy solid-copper cable, never copper-clad aluminum: cheap aluminum-core cable often carries data fine but struggles to carry PoE power over a long run, and it fails sooner outdoors. Choose an outdoor-rated jacket for any cable that sits outside, since indoor jackets crack in sunlight and let water in. Cat5e is enough for most home cameras; choose Cat6 for outdoor, long, or multi-4K runs, for extra headroom at the same 328-foot limit.
Plan the Route First, Then Drill Anything
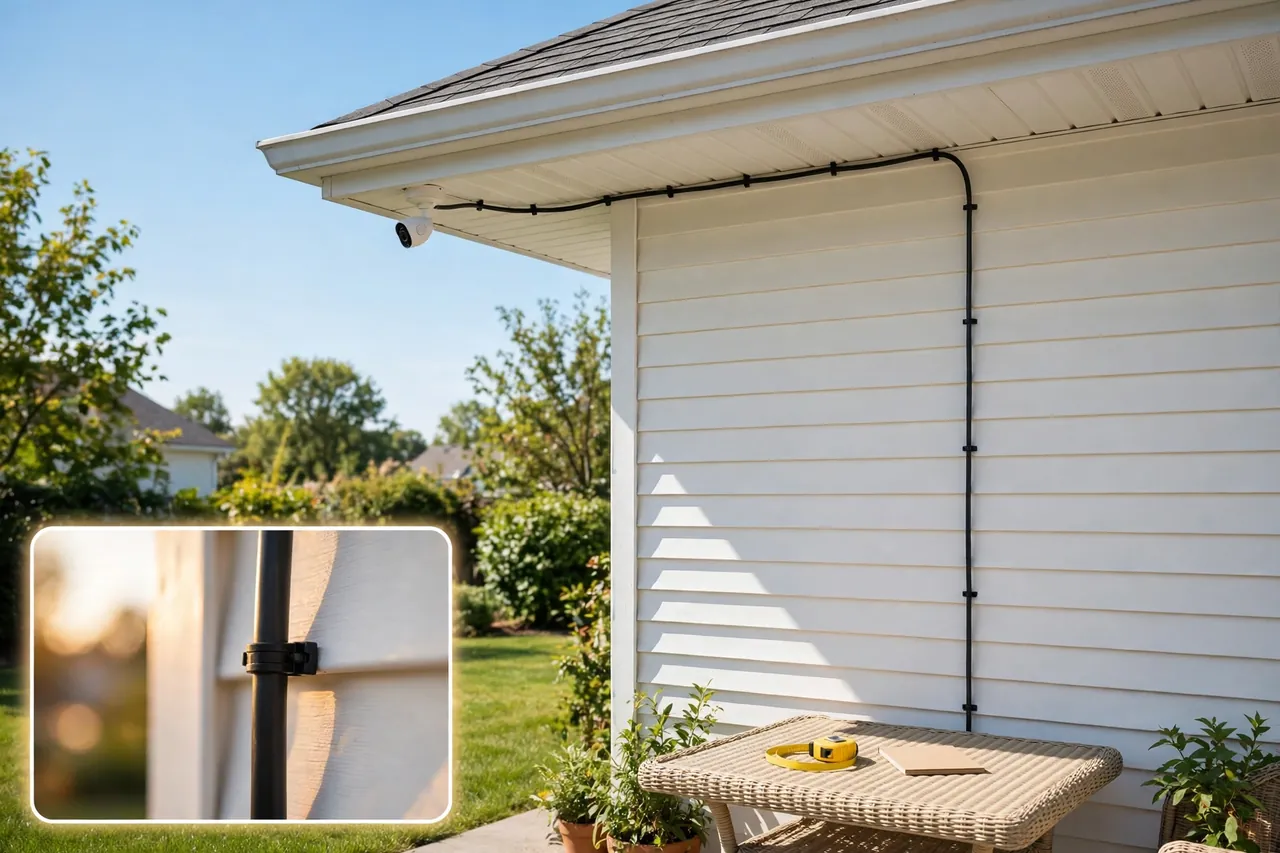
Planning is the step most beginners skip, and it is the step that saves the most time. Walk the house with a tape measure and a notepad before you touch a drill.
Mount outdoor cameras about 8 to 10 feet high. That height gives a wide view, catches faces instead of the tops of heads, and keeps the camera out of easy reach. Point cameras away from direct sun to avoid glare, and keep them out of the path of sprinklers and roof runoff.
Map each cable run from the camera back to the recorder or switch. Shorter is better, and fewer wall crossings are better: every place a cable crosses from outside to inside becomes a hole you must drill and seal. Route through attics, soffits, or eaves where you can, because those protected spaces keep cable out of sun and rain. For a driveway camera, plan the run along the garage wall or under the eaves rather than across open ground; our driveway security camera guide shows the angles that actually catch plates and faces at the driveway.
Measure every run, then add slack: leave 1 to 2 feet extra at the camera end and the same inside the house. Slack lets you re-aim a camera or move a recorder to a different shelf without splicing in new cable. Add up the total length before you buy, and keep every run under 328 feet including patch cords.
Keep camera cable away from mains power cable where you can: a long parallel run can show up later as interference in the picture. Cross mains cable at an angle, and never share a conduit with mains wiring unless a qualified electrician says your local rules allow it. The recorder needs a dry indoor spot near power and your router, with enough airflow that it does not overheat in a closed closet. Label both ends of every cable as you plan.
How to Wire Outdoor Security Cameras Step by Step
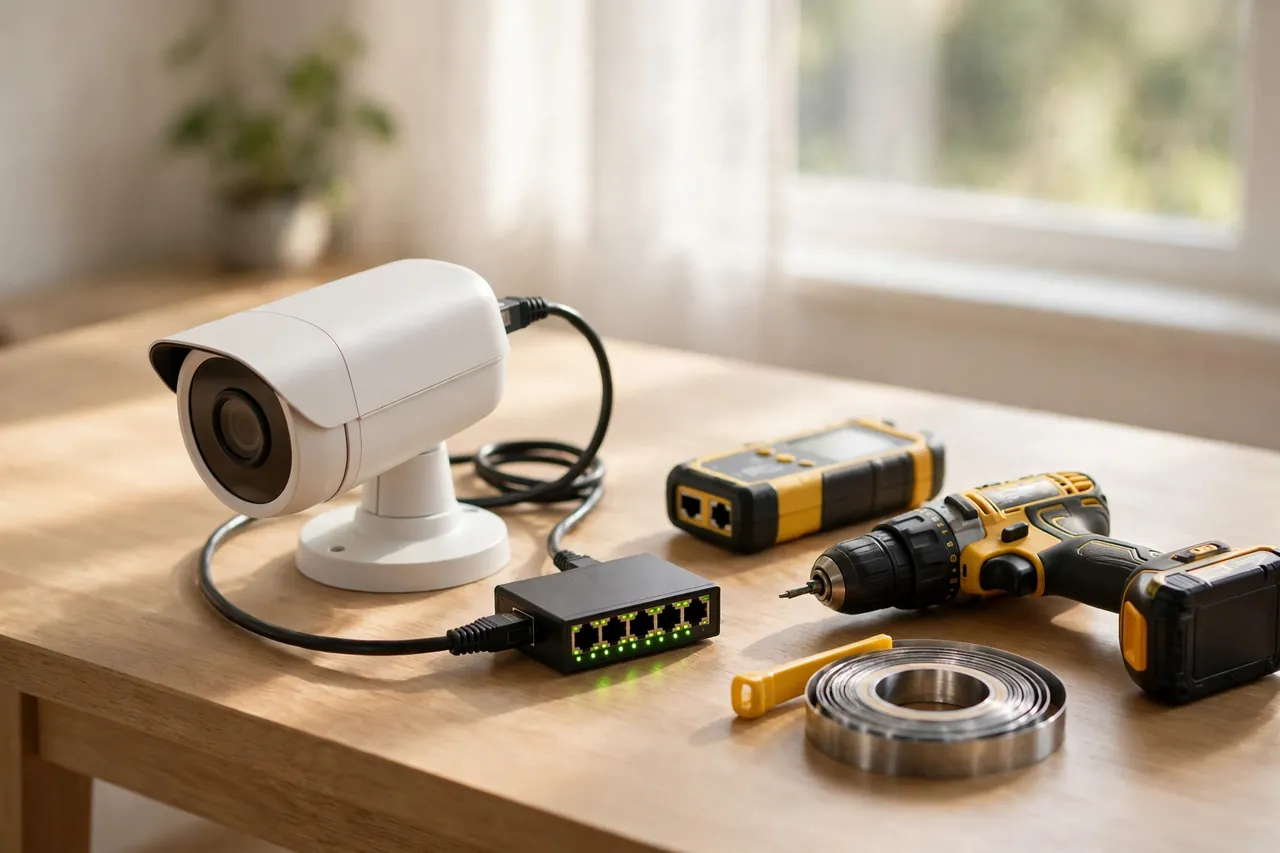
Work in this order: bench-test first, pull cable second, mount third, and connect last. Testing on the ground catches bad crimps and dead cameras while the fix still takes a minute.
Step 1: Bench-test every camera indoors
Before you drill or climb, connect each camera to the NVR, PoE switch, or injector indoors with a short patch cable. Confirm that it powers up, updates its firmware, and records. Check the live view on your phone, and confirm that motion alerts reach you. A camera that fails on the bench is a return, not a roof problem.
Step 2: Mark the camera spot and the wall crossing
Hold the camera at the planned height and check the view on your phone before you mark anything. Move it until the entry, the driveway, or the yard fills the frame without a wall or gutter blocking a corner. Mark the mount holes and the single wall crossing point, keeping the crossing as close to the camera as the route allows.
Step 3: Drill the wall hole safely
Caution first: before you drill, check what is inside the wall. Never drill blind into a wall where you cannot account for electrical wires, gas lines, or water pipes. If you do not know what runs behind that spot, stop and get help from a professional. Shut off the circuit for that wall section if there is any doubt, and keep your hands and the drill clear of any cable you uncover.
Drill at a slight downward angle from inside, so the outside end of the hole sits lower than the inside end. Water that reaches the hole then runs back out instead of tracking indoors. Use a masonry bit for brick or concrete, and a standard bit for wood or vinyl siding. Push a short sleeve through the hole first, a length of conduit or a grommet, and run the cable inside the sleeve rather than letting bare cable rub against the wall edge.
Step 4: Pull the cable to the camera
Run the cable from the recorder end toward the camera, or from the camera back inside, whichever gives you the easier pull. Use a fish tape to guide cable through walls and ceilings, and pull gently: yanking hard can damage the wires inside even when the jacket looks fine. Avoid sharp bends and staples that crush the cable, and clip outdoor cable down every 12 to 18 inches so it cannot swing in the wind.
Leave your slack at both ends, and label each cable the moment it lands. If you crimp your own RJ45 plugs, use the same wiring standard on both ends of every run. Most installers use T568B, in this order: white-orange, orange, white-green, blue, white-blue, green, white-brown, brown. If the two ends do not match, the cable can look finished and still fail. Test every run with a cable tester before you mount anything on the far end.
Step 5: Mount the camera, then connect it
Caution first: ladder work causes more injuries in this job than wiring does. Use a sturdy ladder on flat ground, keep three points of contact, never overreach to one side, and have a helper hold the ladder and pass tools up to you. Do not mount in high wind, rain, or icy conditions, and never stand on the top two rungs.
Fix the mount to solid material, not just siding or trim, and use the hardware that came with the camera. Aim the camera with the live view open on your phone, tighten the mount, and only then plug in the cable. For a PoE camera, plug the Ethernet cable into the camera’s pigtail, fit the waterproof connector cover exactly as the manual shows, and plug the other end into a PoE port on the NVR or switch. A PoE camera plugged into a regular router port will stay dark, because most home routers do not supply PoE power.
Step 6: Seal the wall hole and tidy the cable
Seal around the sleeve on both faces of the wall with exterior-grade sealant, and leave a drip loop outside just before the cable enters the wall or the camera. The drip loop is a small U-shape that hangs below the entry point, so rain running down the cable gathers at the bottom and drips off instead of following the cable inside. Tuck the connection into the weatherproof junction box or soffit cavity, and clip any loose cable so nothing hangs or swings.
Weatherproof the Outdoor Run So It Survives Winter
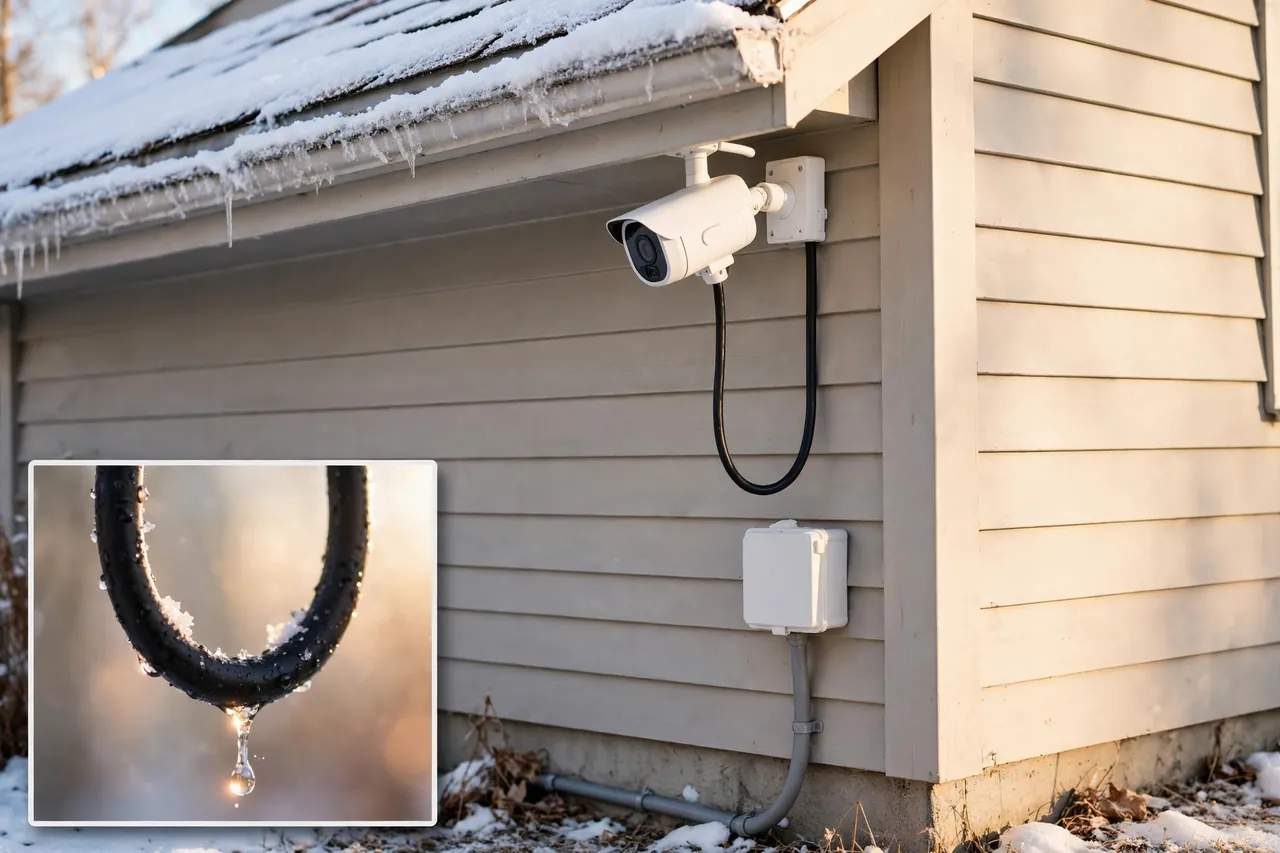
Winter is when outdoor wiring fails. Cold makes jackets stiff, ice adds weight to loose spans, and freeze-thaw cycles push water into any gap you left open. The weatherproofing steps below are the difference between a camera that works for years and one that dies in February.
Use outdoor-rated cable on every exposed section, and run it in conduit where it sits within arm’s reach of the ground, crosses open ground, or faces lawn equipment and animals. Squirrels and birds chew exposed cable, and a mower throws debris at anything near the ground. Conduit costs little and removes both risks.
Protect every connection from weather. Fit the camera’s waterproof connector cover, keep RJ45 and power joints inside a weatherproof junction box, and never leave a connector sitting in the open where rain or sprinkler spray can reach it. Water inside an RJ45 joint corrodes the pins, and that corrosion is one of the most common reasons an outdoor camera fails months after a clean install.
Add a drip loop before every entry point, hanging below the entry so water drips away from it, and seal the wall penetration on both faces. Check the seal again after the first hard rain. If you bury a run, use direct-burial cable or conduit, confirm the depth rules with your local code first, and call your local utility locator before any digging. After the first freeze, check the cameras again: a connection that was fine in autumn can loosen as the cable contracts in the cold.
Wire a Powered Outdoor Camera the Safe Way
A powered wired camera needs an outlet, and an outdoor outlet has rules that an indoor one does not. Get the outlet right, and the camera is simple. Get it wrong, and you have a shock risk every time it rains.
Plug the camera’s adapter into a weatherproof outdoor outlet or an indoor outlet, as the camera maker directs. Never run an indoor extension cord outside as a permanent feed, and never leave an adapter dangling in the rain.
An outdoor outlet must have GFCI protection. The National Electrical Code, in section 210.8, requires GFCI protection for outdoor receptacles, and the National Fire Protection Association publishes the NEC as the standard most US jurisdictions adopt. A GFCI cuts power in a fraction of a second when it senses current leaking to ground, which is what protects you if water reaches the outlet.
The outlet must also be a weather-resistant type, marked “WR,” and it must sit behind an in-use cover in wet locations: a bubble-style cover that stays weatherproof even while a plug is in it. A flat flip lid only protects the outlet when nothing is plugged in, which is useless for a camera that stays plugged in all year. These are the same NEC 210.8 and 406.9 rules that eufy’s security camera wiring guide points readers to when it warns that fixed mains work is a different job from low-voltage camera wiring.
Caution first: adding a new outlet, extending a circuit, or opening a mains panel is electrician work. If your camera spot has no outlet within the adapter cord’s reach, do not improvise with extension cords or tap into a nearby circuit yourself. Hire a licensed electrician to add a proper GFCI outlet, and let them confirm the local code for your area. Our smart home electrician guide explains how to choose the right electrician for exactly this kind of small job.
Connect, Test, and Aim the Finished System
With the cables pulled and the cameras mounted, connect the recorder end. A PoE camera plugs into a PoE port on the NVR or switch. An analog camera plugs into the DVR by its BNC connector, with its power pair on the power supply. A non-PoE IP camera plugs into the network for video and into its own adapter for power.
Power the system on and test each camera in turn. Check the live view for a clear picture, walk through each camera’s view to confirm motion alerts fire, and check that recording actually lands on the NVR, DVR, or memory card. Confirm remote viewing from outside your home network, so you know the system works when you are away, not just on the couch.
Aim each camera with the live view open, and check the view at night too: infrared light reflects off white soffits, siding, and window glass, so a camera that looks perfect by day can wash out at night. Angle it away from bright white surfaces. Then set a strong password on the recorder and each camera, update the firmware, and turn off any default login the system shipped with.
Fix It Fast: What Each Symptom Means
When a camera misbehaves, the symptom points at the fault. Start with the two ends you made yourself, because connectors and terminations are the easiest part of a run to get wrong and the easiest to redo.
Table: Outdoor camera symptoms and first checks
| What you see | Check first |
|---|---|
| Camera stays dark | PoE port, power budget, and the cable tester result |
| Powered up, no picture | The video end and the recorder input |
| Picture drops in and out | Crimps and connector seating at both ends |
| One channel never appears | That run’s terminations only |
| Fine by day, poor at night | Power headroom for infrared and IR glare |
| Works, then dies after rain | Water in the RJ45 joint or a failed seal |
If the cable tester shows a fault, re-terminate the ends before you suspect the cable inside the wall. If a PoE camera stays dark on a known-good port, check the switch’s total power budget: a switch can run out of watts with three cameras even when each port looks fine alone. If a camera works by day and fails at night, suspect power headroom, because infrared LEDs draw more power after dark.
Wiring Mistakes That Kill Cameras in Winter
Most winter failures trace back to a shortcut taken in summer.
- Indoor cable left outside. The jacket cracks in sun and cold, water gets in, and the run fails within a year. Use outdoor-rated cable or conduit on every exposed stretch.
- No drip loop. Rain follows the cable straight into the connector or the wall. A loop costs a few inches of slack and saves the camera.
- Bare hole, no sleeve. The seal fails, the cable rubs on the wall edge, and moisture tracks indoors. Sleeve every wall crossing and seal both faces.
- Connector left in the open. Corrosion builds at the pins all winter and the camera dies in spring. Keep joints in a junction box or soffit cavity.
- Long loose spans. Wind and ice work the connections apart over months. Clip cable every 12 to 18 inches.
- Copper-clad aluminum cable. It carries data but struggles with PoE power on long runs, and it fails sooner in the cold. Buy solid copper.
- Skipped bench test. A bad crimp found on the ladder costs an afternoon. A bad crimp found on the bench costs a minute.
Walk the system once after the first hard freeze and once after the first thaw, and fix anything loose before it becomes a dead camera.
When to Call a Licensed Electrician
Low-voltage camera cable is DIY-friendly. Mains power is not. Call a licensed electrician when any of these apply to your job.
- You need a new outdoor outlet or a new circuit for a camera.
- You must open a mains panel, extend fixed wiring, or tie into an existing circuit.
- You find wiring in the wall you cannot identify, or the wall contains old or damaged mains cable.
- Your local code requires a permit or inspection for the work, or you are unsure what applies.
- The run crosses a detached building, a long buried stretch, or a spot where code and grounding rules get complicated.
An electrician’s visit for a single outlet is a small job, and it is far cheaper than a shock, a fire, or a failed inspection. Tell them the camera locations and the recorder spot in advance, so they can place the outlet where the adapter cord actually reaches.
Wiring Outdoor Security Cameras at a Glance
Use this quick reference as your checklist on install day.
Quick reference: wiring outdoor security cameras
- Pick the route: PoE for new permanent installs, powered for a single camera near an outlet, analog only to reuse existing coax.
- Confirm the camera supports PoE, and measure each run against the 328-foot (100-meter) limit.
- Buy outdoor-rated solid-copper Cat5e or Cat6 cable, with 1 to 2 feet of slack at both ends.
- Bench-test each camera indoors with a short patch cable before you drill.
- Mount cameras 8 to 10 feet high, aimed away from sun, sprinklers, and roof runoff.
- Drill one wall crossing per run at a slight downward angle, sleeve it, and seal both faces.
- Pull cable gently, clip it every 12 to 18 inches, and keep it away from long parallel mains runs.
- Use the same T568B order on both ends, test every run, and fit the waterproof connector cover.
- Add a drip loop before each entry, tuck joints into a weatherproof junction box, and seal the hole.
- Power up, test live view, motion alerts, recording, and remote access, then check the night view.
- For powered cameras, use a GFCI weather-resistant outlet with an in-use cover, and hire an electrician for any new outlet.
- Recheck the system after the first freeze and the first thaw.
Keep this list with your recorder notes, with each cable labeled by camera and run length.
Safety note: This guide covers low-voltage camera wiring only. It is general home guidance, not electrical advice for your specific house, and local codes vary. Do not open a mains panel, extend a circuit, or drill into a wall with unidentified wiring. If any part of the job involves mains power, permits, or wiring you cannot identify, hire a licensed electrician. Work on a ladder with a helper, and stop work in bad weather.
Related Guides
Driveway Security Camera: How to Choose and Place One That Actually Catches Faces and Plates · Security Camera DVR: What It Is and How to Choose One · Closed Circuit Camera: What CCTV Really Means and When It Still Makes Sense
- PoE Security Cameras — the full PoE explainer: power budgets, switches, and NVR choices.
- Wireless Security Cameras Outdoor — when Wi-Fi beats a wire, and when it does not.
- Driveway Security Camera — angles and placement that catch plates and faces at the driveway.
- Security Camera DVR — how DVR recording works for analog and older wired systems.
- Closed-Circuit Camera — the older CCTV setups that still use coaxial cable.
- Smart Home Electrician: How to Choose the Right One — what to ask before you hire an electrician for an outlet or circuit.
- Best Smart Lock for Your Front Door — the next entryway upgrade once your cameras are wired.
- Light Automation for Your Home — pair your cameras with lights that turn on with motion.
Frequently Asked Questions
How are security cameras wired?
Security cameras are wired by running cables from the cameras to a central recording device, a DVR or an NVR. An analog camera uses coax for video and a separate power lead to a DVR. A PoE camera needs only one Ethernet cable to an NVR or PoE switch, since that single run carries video and power together.
What wiring is required for security cameras?
Security cameras typically need a power source and data wiring, often coaxial cables for analog cameras or Ethernet cables for IP cameras. PoE cameras take both through one Ethernet cable. In some non-PoE cameras, additional power cables supply power separately from the data line.
How do I run security camera wires from outside into the house?
Take the cable along the wall or the eaves to a single crossing point. Fit a sleeve through the hole, seal around it on both faces of the wall, and leave a drip loop outside before the cable goes in, so rain drips off rather than tracking in along it. Once inside, carry on to the recorder or switch.
How far can a PoE security camera be from the switch or NVR?
Standard copper Ethernet supports PoE runs up to 100 meters, about 328 feet, using quality solid-copper Cat5e or Cat6 cable. That limit includes patch cords at both ends. Longer runs need an outdoor PoE extender, a second switch, fiber, or a wireless bridge.
Do you need an electrician to install wired security cameras?
While not always necessary, hiring an electrician can help for complex installs, especially if wiring involves power outlets or running cables through walls. Low-voltage PoE cable is DIY-friendly, but any new outlet, circuit work, or unidentified wiring in the wall is a job for a licensed electrician.
Start with the bench test, plan one clean route per camera, and seal every outdoor joint before winter arrives. A wired camera that is planned well, tested on the ground, and weatherproofed at every entry will watch your home for years with almost no attention. If your job needs a new outlet or crosses wiring you cannot identify, book the electrician first and let the cable work follow.