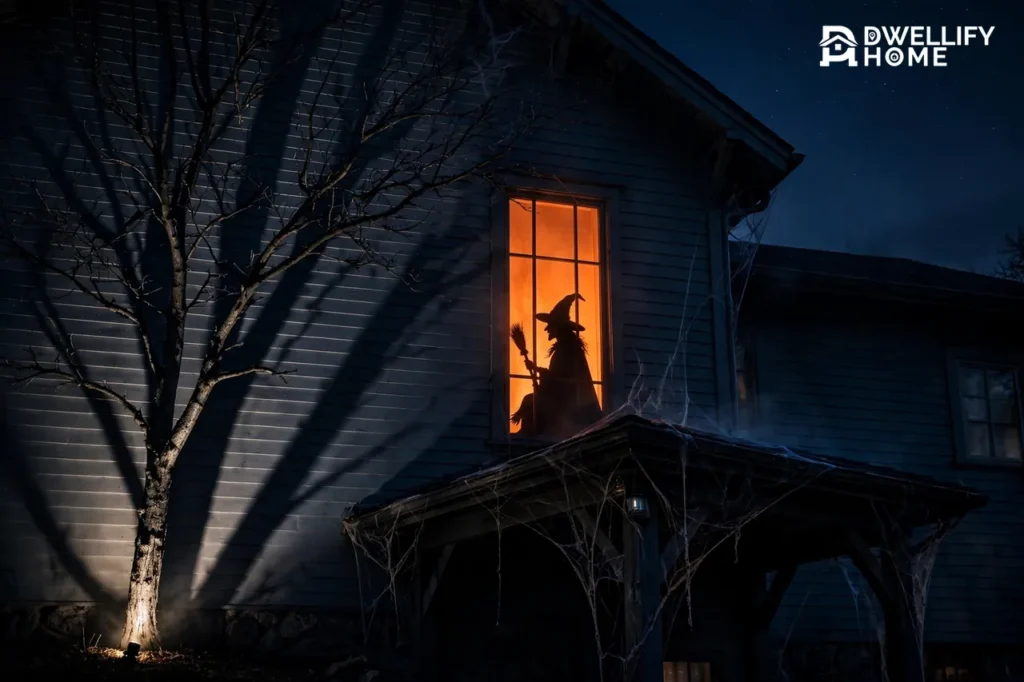
The fastest way to make DIY scary Halloween decorations look genuinely haunted is to design the effect before you build anything: darken the background, choose one eerie color story, backlight simple silhouettes, stretch webs until they nearly disappear, and place a few small glowing details where visitors naturally pause. One clear shape in a dark window often feels scarier than a crowded porch full of props.
Keep the scare visual and family-safe. Use flameless light, leave steps and exits easy to see, and skip gore in favor of contrast, height, shadow, and things that seem slightly out of place. This guide is about the look and ambience, not a room-by-room haunted-house plan or a set of large prop builds.
If your goal is a walk-through, start with the scenes in our guide to DIY haunted house props. For individual figures and objects, use do it yourself Halloween props. This article handles what makes either approach feel haunted: light, color, texture, and spacing.
Start With the Scary Effect, Not More Decorations
A scary display begins with restraint. When every pumpkin, skeleton, sign, spider, and light competes at the same brightness, the eye reads “holiday display,” not “something is wrong here.” Darkness and empty space give the few shapes you keep enough contrast to register.
Stand where a visitor first sees the house. Choose one focal point: a tall window silhouette, a porch corner fading into black, a branch shadow across siding, or a single shape beside the door. Build outward from that point. If a decoration does not strengthen it, move or store the decoration.
Pick a Scare Level Before You Pick Supplies
- Gentle unease: friendly silhouettes, dim amber light, a few webs, and no hidden figures.
- Classic haunted: stronger contrast, larger shadows, layered webs, one accent color, and details that reward a second look.
- Intense but visual: deeper dark areas, oversized silhouettes, and a delayed reveal. Keep faces, paths, and the candy handoff welcoming.
Keep that tone consistent along the whole route.
Use a Five-Minute Effect Plan
- Remove bright or cheerful items that fight the scene.
- Name one motif, such as watching eyes, bats, webs, or shadows.
- Choose where the visitor should look first, second, and last.
- Place the largest silhouette and the strongest light.
- Step back after dark and remove anything that adds clutter without adding mystery.
💡 Practical Home Tip: Take a phone photo from the sidewalk after dark. If the focal point is not obvious in the small preview, simplify before adding anything else.
Build the Look in Three Layers
Layering makes a modest display feel deep. Give the foreground, middle, and background different jobs so a few supplies cover more space without looking repeated.
Three-layer effect plan
| Layer | What the Visitor Notices | Easy Treatment | Why It Works |
|---|---|---|---|
| Foreground | The first hint at the path, fence, or porch edge | Low silhouettes, dim path glow, or one webbed corner | Starts the story without revealing everything |
| Middle | Texture around doors, rails, furniture, or shrubs | Thin webs, torn drapes, paper bats, small details | Connects the hint to the main scene |
| Background | The largest shape or brightest eerie point | Backlit figure, branch shadow, or tall silhouette | Gives the eye a destination |
Leave plain dark space between the layers. A foreground web, a dim doorway, and one figure behind a window create a short visual story. Ten unrelated objects in the same plane create a store shelf.
Repeat the motif, not the exact object. Bats can grow larger as they cross a wall. Eyes can appear at different heights in shrubs. One web pattern can return on the rail, mailbox, and door. Repetition makes the effect feel planned.
For whole-property arrangement, pair this method with our outside Halloween decorating ideas.
Use Color Like a Stage Designer
Color can turn the same silhouette from playful to unsettling. Limit the palette. Black and bone white create the base. Choose one main accent and, at most, one supporting color. When orange, purple, green, red, and blue all glow at full strength, the display becomes busy rather than eerie.
- Black, bone white, and ember orange: classic firelight and deep shadow.
- Black, gray, and deep purple: quieter and more mysterious on porches and windows.
- Black, bone white, and sickly green: strange swamp or laboratory energy without graphic details.
- Black, gray, and icy blue: cold and ghostly with branches and still figures.
Use the accent low and close to the focal point. Amber near the ground feels like a lantern. Green under a shrub makes leaves look unfamiliar. Purple behind a silhouette separates it from a black wall. Use icy blue in one zone; spread across everything, it can flatten the scene.
Keep bright white light out of the scene unless you need it for walking. A separate warm path light can protect steps without destroying the display. If you use smart bulbs, a color-changing light bulb lets you test the palette before buying more decorations.
Test colors on the real surface: purple may vanish against dark siding, while green can look neon on pale paint.
Lighting Placement That Makes Ordinary Decor Look Haunted
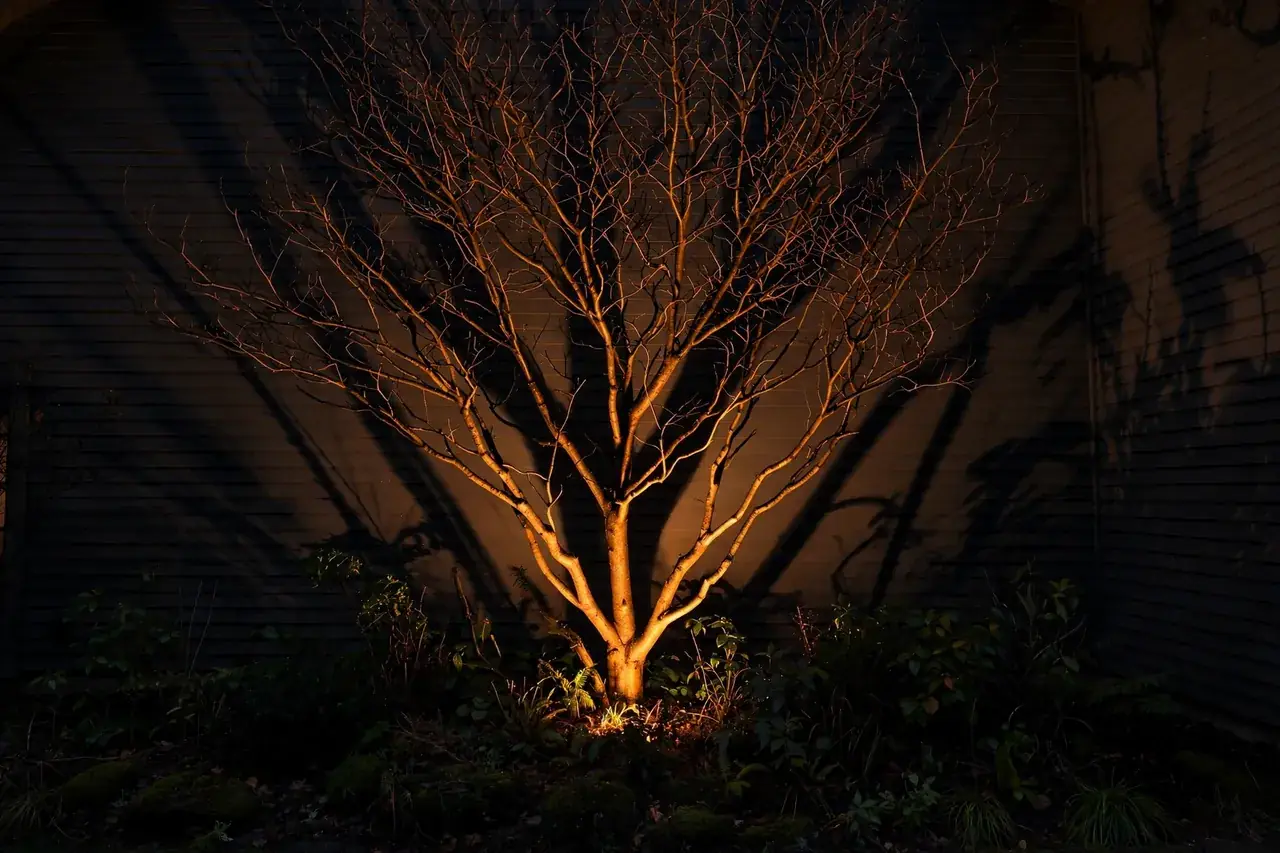
Scary lighting is mostly about direction. Front light makes an object flat and familiar. Light from below, behind, or the side creates long edges and deep shadow. Aim for controlled brightness in a few places, with darkness between them.
Uplight the Shape You Want People to Fear
Place a small light low, angled upward toward a tree, doorway figure, porch post, or bare branch. Uplighting reverses the pattern people expect from sunlight and ceiling lights. Familiar shapes look taller and less friendly.
Shield the bulb from direct view when you can. A planter, low board, or the object itself can hide the source while the glow remains. If visitors see the equipment first, the effect weakens.
Backlight Silhouettes for the Strongest Contrast
Put the light behind a figure and the decoration in front of it. The front stays almost black, so the brain fills in the missing details. This works especially well in windows, behind a sheer curtain, or behind a porch screen.
A low smart LED strip can hide a line of light behind a mantel, rail, window frame, or shelf. Follow its location rating and keep strips, cords, and power supplies away from fabric and foot traffic.
Use Side Light and Gentle Flicker
Side light rakes across webs, bark, rough wood, and torn cloth, making texture visible. Place one light beside a web instead of shining straight through it. The strands cast tiny shadows and stop looking flat.
Flicker should be subtle. Flameless candles at different heights feel like an old room breathing. Rapid flashing can overwhelm the scene and bother guests, so keep movement slow or skip flashing. Our guide to battery candles covers timers, remotes, and styling.
Outdoors, separate display light from walking light. Low, steady markers reveal step edges, while the scary glow stays in shrubs, windows, and background areas. Use outdoor string lights only where their rating allows; never move an indoor-only strand outside because the night is dry.
Window Silhouettes and Shadow Play
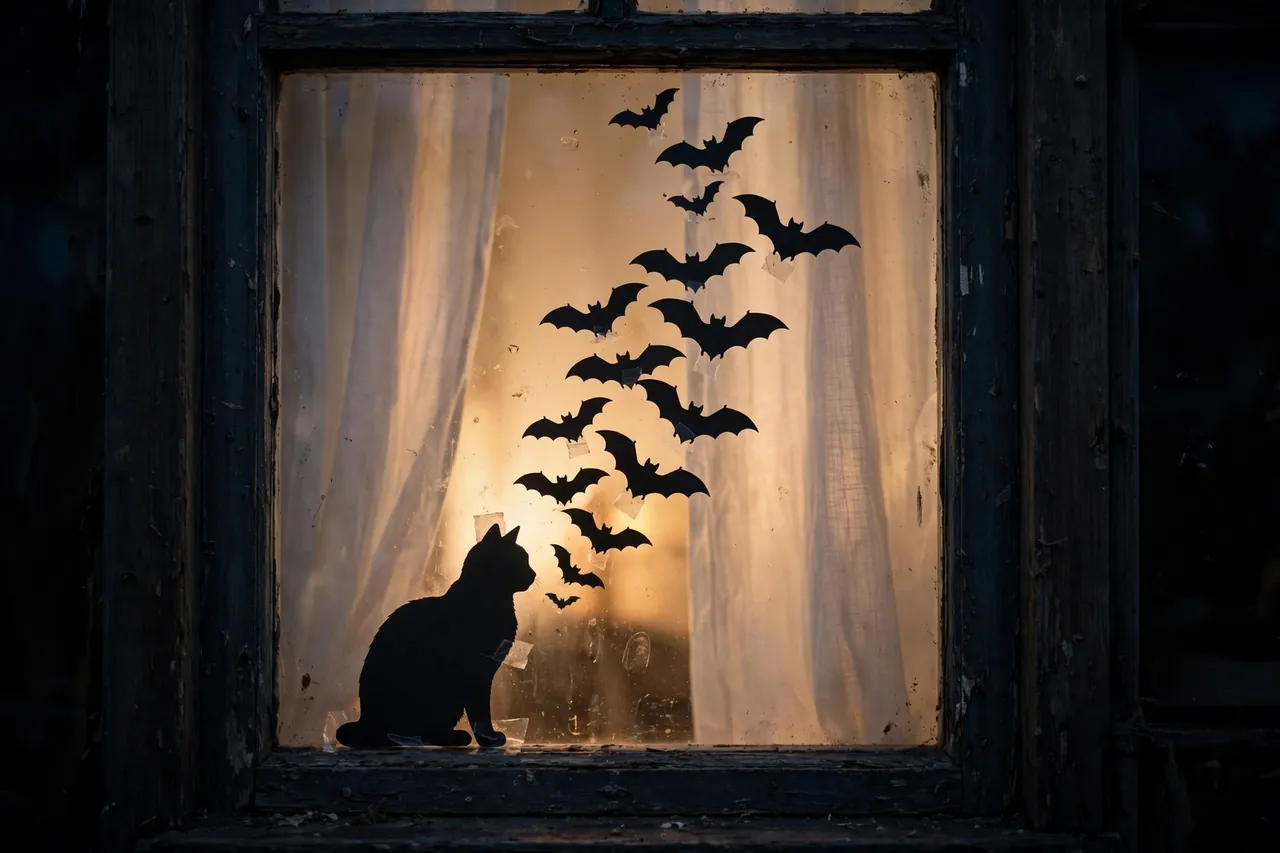
Silhouettes are the highest-impact supporting build in this guide. They need no face, no gore, and no mechanism. A simple shape with a clean outline can look elegant in daylight and unsettling after dark.
Make a Backlit Window Silhouette
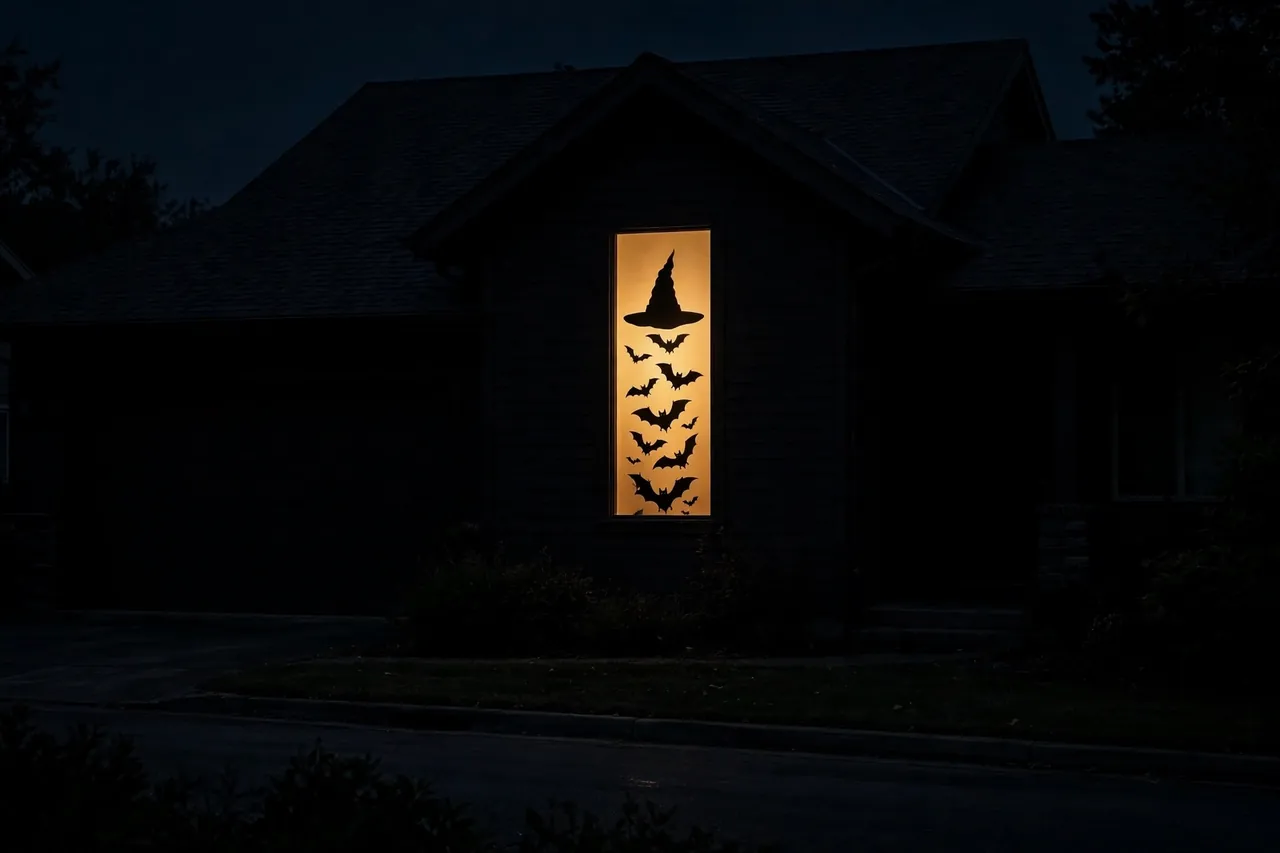
- Choose one bold shape, such as a cat, tree, witch hat, tall figure, or cluster of bats.
- Cut it from matte black cardstock or lightweight cardboard. Keep the outline simple enough to recognize from the street.
- Attach it inside the window with removable strips or painter’s tape where the surface allows.
- Place a soft room light behind the shape, not pressed against the paper.
- Go outside and adjust the size or position until the outline reads clearly.
Several smaller shapes can tell a better story than one crowded scene. Put a cat on one side, branches on the other, and bats rising between them. Leave glass visible so the window still looks lived in.
Project a Larger Shadow
For a wall shadow, place a cutout between a small light and a blank wall. Move the cutout closer to the light to make the shadow larger and softer. Move it closer to the wall to make the shadow smaller and sharper. A crooked branch can become a claw-like pattern without adding a creature at all.
Test the angle from the visitor’s position; a dramatic shadow beside the lamp may vanish from the sidewalk.
Create a Bat Swarm That Seems to Move
Cut bats in three sizes and arrange them as a loose spiral or rising ribbon. Fold each wing slightly so the paper catches light from different angles. Start with a tight group near a corner, then spread the shapes out as if they are escaping. The empty gaps are part of the motion.
Use removable adhesive, tested first on painted walls. Do not cover a peephole, house number, doorbell camera, or moving door edge.
Stretch Webs and Drapes Until They Look Forgotten
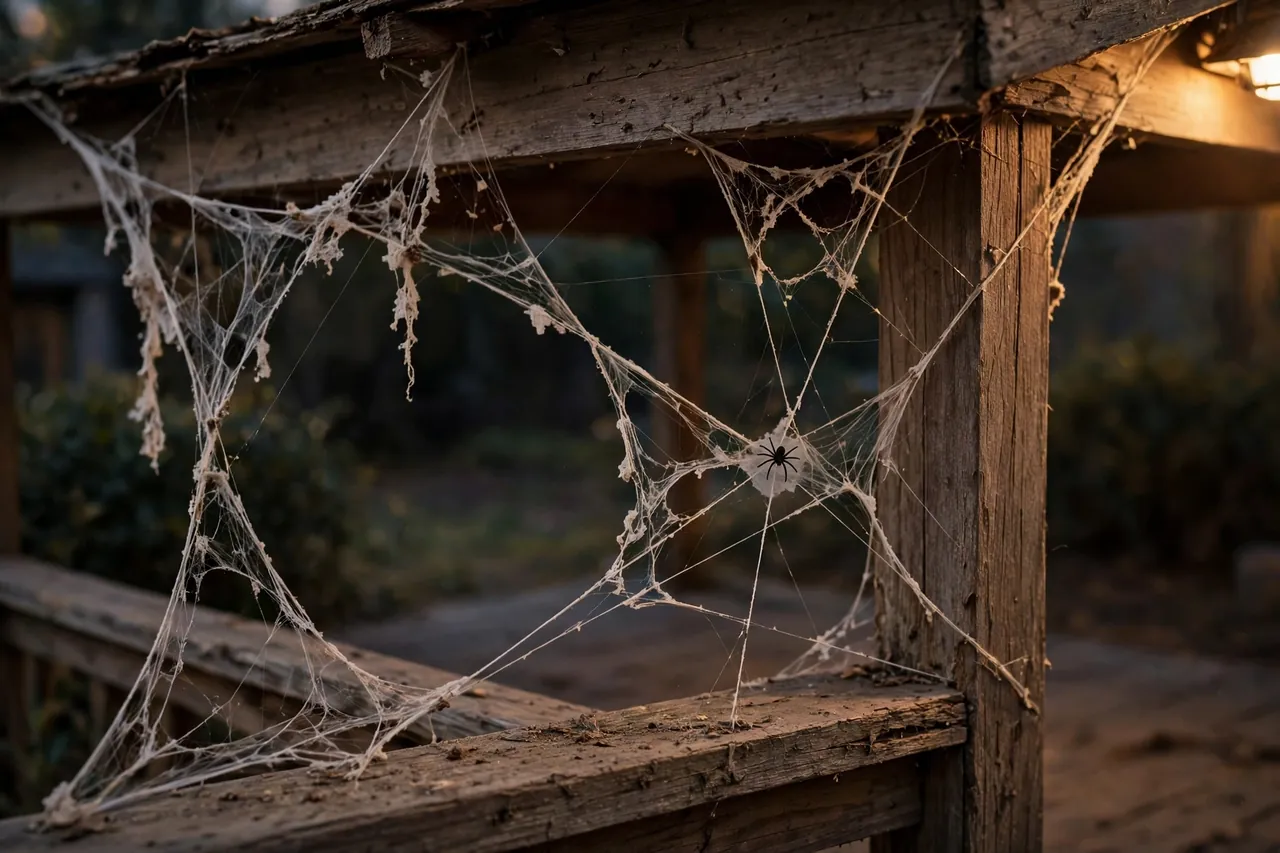
Fake webbing fails when it is used straight from the bag. Thick white clumps look like stuffing, and a neat rectangle looks like a tablecloth. Real visual age comes from thin strands, uneven edges, and a few believable anchor points.
Thin the Web Before You Hang It
Pull a small handful wide, then keep stretching until you can almost see through it. Anchor one corner high, one low, and one to the side so strands form loose triangles. Tuck ends behind a rail, frame, plant, or furniture instead of leaving a straight edge.
Add one spider near a strand intersection, not a crowd in every corner. If the web crosses a doorway, leave a clear opening and keep strands out of faces and the door swing.
Drape Cheesecloth Like It Has Been There for Years
Cheesecloth works best in layers that move a little. Tear or cut uneven lengths, separate the edges, and vary the drops. Drape it over a porch rail, chair back, mantel edge, or dark doorway frame. Layer gray over black for depth, or use off-white against a dark background.
Keep fabric away from candles, heaters, hot bulbs, cooking surfaces, and fireplace openings. Do not drape it over a lamp shade or fixture unless the instructions clearly allow decorative coverings. Put flameless light behind a nearby object instead.
Know When to Stop
One webbed corner can be frightening; every corner webbed the same way becomes wallpaper. Cover about a third of the scene and leave dark gaps visible.
Add Small Eerie Details Where People Pause
Large silhouettes earn the first look. Small details earn the second, where a display becomes memorable. Place them where visitors slow down: beside the doorbell, at the steps, on a mailbox, at a rail joint, on a mantel edge, or near the candy bowl.
Hide Watching Eyes in Dark Places
Cut two eye openings in a short cardboard tube, place a flameless tea light or glow light inside, and tuck the tube into a shrub so only the eyes show. Use only products rated for the location. One pair is subtle; three pairs at different heights make the yard feel watchful.
Turn Clear Jars Into Quiet Specimens
Fill clear jars with water, a few drops of food coloring, and safe nonfood objects such as plastic insects, marbles, or curled paper. Backlight one jar and leave the others dim. Keep jars sealed and away from food service so nobody mistakes the contents for a drink or treat.
Tuck a paper silhouette behind a curtain edge or a small black shape under a stair rail. Let visitors discover only part of it. Then stop. If every pause point contains a surprise, the route becomes a checklist instead of a scene.
Create a Family-Safe Scare Sequence at the Entry
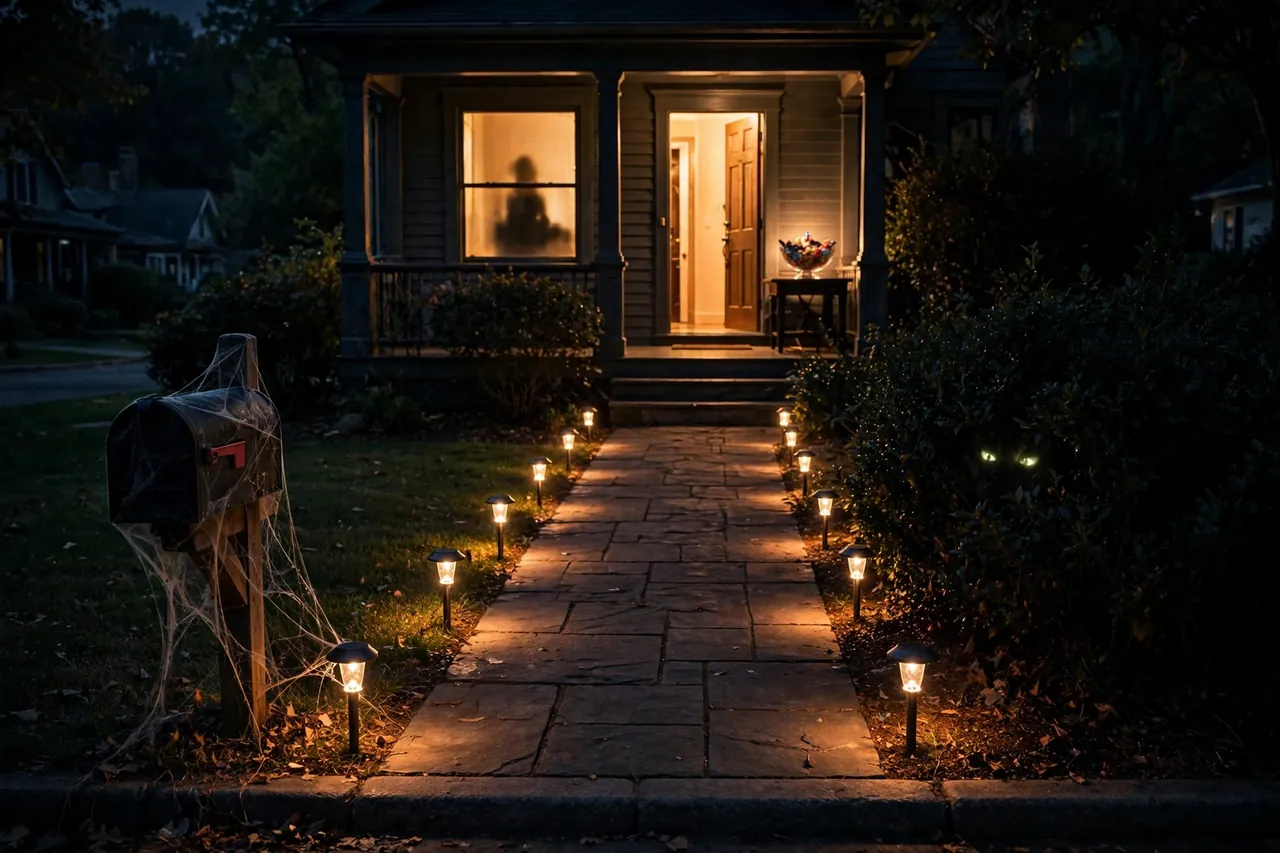
A good entry works like a short story. Visitors see a hint from the sidewalk, notice texture on the path, and reach the main reveal at the porch. The sequence feels intentional and avoids hiding everything until a child is already at the door.
- Sidewalk hint: one dim silhouette, a webbed mailbox, or eyes in a shrub.
- Path: steady edge lighting, a repeated motif, and no cords or decorations in the walking route.
- Porch reveal: the largest backlit shape, layered webs, and the main accent color.
- Door detail: one small surprise near the handle or candy bowl, with bright enough light to see faces and steps.
If the display continues into the yard, use our hands-on do it yourself Halloween yard decorations for projects and our spooky Halloween yard ideas for complete scenes. Then tune color, shadow, and spacing so the yard reads as one display.
A timer can make the scene appear at dusk and shut off before bedtime. Our overview of light automation at home explains schedules and routines. Keep steady scenes for young visitors and skip sudden flashing effects.
Keep the walking route obvious. If the path is confusing, improve its edge or surface rather than hiding the problem with dimmer light. Our cheap DIY garden path ideas offer clearer routes that suit a rustic Halloween look.
Fix the Effects That Look Cute, Flat, or Messy
Most weak displays do not need more supplies. They need one correction: less light, fewer colors, thinner webbing, or a clearer focal point. Use the table below during your after-dark test.
Halloween effect troubleshooting guide
| Problem | Likely Cause | Fast Fix |
|---|---|---|
| The display looks cute, not scary | Bright, even light and too many colors | Turn off one light, choose one accent, and enlarge the silhouette |
| Everything looks flat | Lights face decorations from the front | Move one light below, behind, or beside the focal object |
| The scene looks messy | Every item has equal size and importance | Remove a third of the items and rebuild around one focal point |
| The silhouette disappears | Background is too dark or paper is not matte | Add a soft glow behind it and enlarge the outline |
| Webs look like snow | Webbing is thick and evenly spread | Pull it thinner, use triangular anchors, and leave torn gaps |
| The yard feels unsafe | Scene light is doing the job of path light | Add steady path lights and move cords and props out of the route |
| Colors look neon | Several saturated colors compete | Use black and bone as the base and repeat one accent three times |
Make one change at a time. If you dim the lights, move the silhouette, and remove half the webs together, you cannot tell which change worked.
Keep the Whole Display Safe and Easy to Remove
The safest scary effect is flameless, stable, and clear of the route. The U.S. Consumer Product Safety Commission advises keeping candles and jack-o’-lanterns away from doorsteps, curtains, and decorations. It also advises using lights tested by a recognized laboratory, checking for broken sockets and frayed wires, discarding damaged sets, and not overloading extension cords.
For outdoor displays, use GFCI protection and products rated for outdoor use. Seattle City Light likewise advises inspecting cords, avoiding overloads, and keeping dry vegetation away from electrical lighting. Keep connections out of puddles and never run a cord where visitors must step on it.
Use clips or hooks made for the job. UL Solutions advises plastic hooks or clips for light strings and warns against nailing or stapling them because cord damage can create a shock or fire hazard. Check each product’s certification mark and location rating.
- Keep exits, gates, handrails, and door swings clear.
- Secure lightweight paper and fabric against wind.
- Keep small parts out of reach of toddlers and pets.
- Turn electrical decorations off before bed or when nobody is home, unless rated for unattended timer use.
- Stop using any cord or light with heat, damage, exposed wire, or a loose connection.
For renters, favor battery lights, removable hooks, freestanding silhouettes, and painter’s tape tested in a hidden spot. After Halloween, store paper silhouettes flat and discard webbing that has become a tangled dust trap.
Safety note: This article offers general decorating information, not electrical or fire-safety certification. Follow each product’s instructions and location rating, keep decorations away from heat and flames, and call a qualified electrician for damaged outlets or wiring concerns.
Related Guides
- DIY Haunted House Props
- Do It Yourself Halloween Props
- Outside Halloween Decorating Ideas
- Do It Yourself Halloween Yard Decorations
- Spooky Halloween Yard Ideas
- Color Changing Light Bulb Guide: Colors, Specs, Prices, and Setup
- Smart LED Strip: A Beginner’s Complete Guide to Types, Placement, and Setup
- Battery Candles: Best Picks, Timers, Remotes, Styling Ideas
Frequently Asked Questions
How to make scary DIY Halloween decorations?
Start with the effect, not a pile of props. Darken the background, pick one accent color, and make one large silhouette the focal point. Add thin webs, a backlight or uplight, and two or three small details where visitors pause. Keep the walking route bright enough for safe steps.
What are some budget-friendly homemade Halloween decoration ideas?
Use black cardstock silhouettes, stretched webbing, torn cheesecloth, clear jars, cardboard tubes, and flameless tea lights. These materials change light and shadow, so a few pieces can cover a window, porch, or mantel. Reuse the silhouettes and jars next year, and spend first on safe lights rather than novelty props.
How can I make my Halloween decorations look cohesive?
Choose one motif and one accent color, then repeat them in three places at different sizes. Keep black, gray, or bone as the base, and arrange each area with a foreground hint, middle texture, and background focal point. Remove decorations that introduce a new theme or a competing bright color.
What are safe decoration options for homes with children?
Use flameless candles, soft paper shapes, large lightweight silhouettes, and steady lighting. Keep small parts away from toddlers, secure anything that could fall, and leave steps, handrails, exits, and the candy area clear. Avoid jump scares in the walking route and let children approach a brighter, friendlier version of the display.
How do I incorporate lighting in homemade Halloween decorations?
Place light where it changes the shape: below a figure for uplight, behind paper for a silhouette, or to the side of webs for texture. Add flameless candles in jars or pumpkins for small points of glow. Keep a separate steady light on steps and walkways so the scene can stay dark safely.
How do I make my yard decorations look spooky at night?
Build depth instead of brightness. Put a dim hint near the sidewalk, thin webs or drapes in the middle, and one backlit silhouette near the house. Use one accent color and leave dark gaps between zones. Check the view from the street, then adjust any light that shines into visitors’ eyes.
Start With One Dark Corner
Pick one window, porch corner, or doorway tonight. Give it a limited palette, one strong silhouette, one web or drape, and one light placed below, behind, or beside it. Step outside after dark before buying or building more.
That small test reveals the secret of scary decorating: fear comes from contrast and expectation. Once one corner feels haunted, repeat the effect gently across the route and let the rest of the house stay dark.