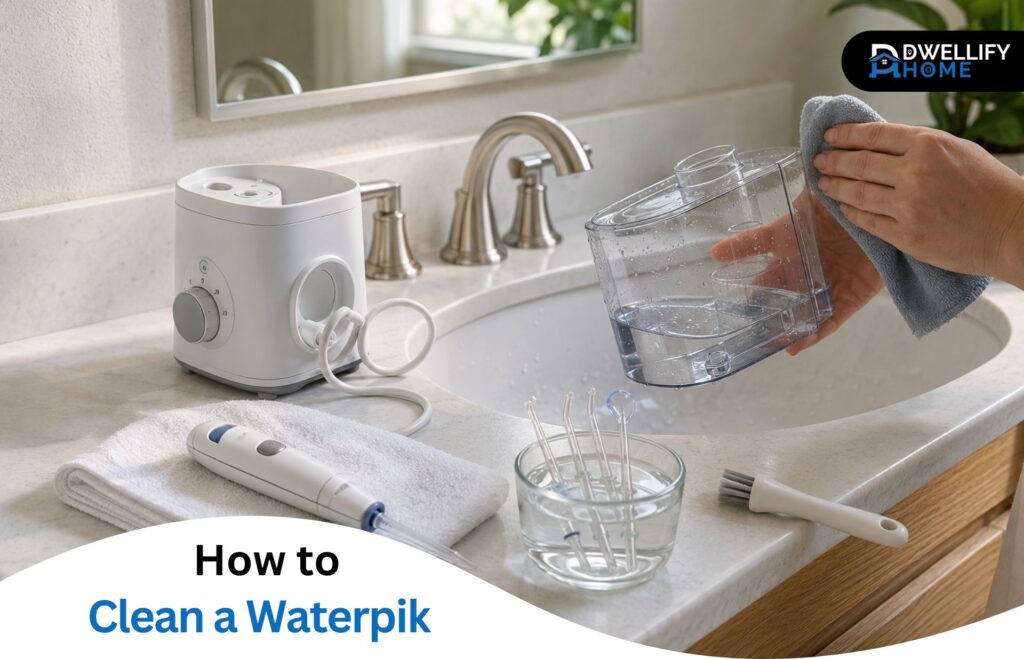
A Waterpik can look clean on the bathroom counter while mineral residue collects in the reservoir, tip, and internal water path. Learning how to clean a Waterpik safely means treating each component differently: wipe powered parts, wash removable pieces, and flush the inside with an approved cleaning solution.
The process is straightforward, but model details matter. Reservoir designs, dishwasher compatibility, vinegar quantities, and handle-soaking instructions can differ between countertop and cordless units.
Short Definition
Cleaning a Waterpik means washing its removable reservoir and tip, wiping powered surfaces, and flushing the internal water path to remove residue and mineral buildup without damaging the unit.
Mission Statement
DwellifyHome helps homeowners, renters, and home lovers create practical, comfortable, and stylish living spaces through clear, trustworthy guidance.
Quick Cleaning Checklist
- Check the model-specific instructions.
- Switch off and unplug the unit.
- Wipe the exterior and clean the tip.
- Wash the removable reservoir and valve.
- Flush the internal pathway with the approved vinegar mixture.
- Run a full reservoir of clean warm water.
- Let removable parts air-dry.
How Do You Clean a Waterpik Safely?
To clean a Waterpik safely, switch off and unplug the unit, wipe its exterior, wash the removable reservoir, and clean the tip and compatible countertop handle. Run the model-approved diluted white-vinegar solution through the internal water path, then flush it with a full reservoir of clean warm water.
Never immerse a powered base or cordless handle. Check the model’s instructions before soaking a handle or placing a reservoir in the dishwasher.
Before You Start: Check the Model and Gather Supplies
Find Your Model-Specific Cleaning Instructions
Look for the model number on the bottom or back of the unit. Use it to find the correct guide on Waterpik’s instruction manuals page.
This check matters because general cleaning advice does not override the manual. One model may use a specific number of tablespoons of vinegar, while another may use a different amount. A removable reservoir on one unit may be dishwasher-safe, while a similar-looking tank may require hand-washing.
Safe Cleaning Supplies
Most Waterpik cleaning jobs require only a few items:
- A soft cloth
- A mild, non-abrasive cleanser
- Warm water
- Mild dish soap for compatible removable reservoirs
- A small, soft bottle brush
- Distilled white vinegar
- A clean towel or drying rack
Use warm rather than hot water. Excessive heat may affect plastic parts, valves, or seals.
Apply exterior cleaner to the cloth instead of spraying it directly around buttons, charging points, or openings. Use vinegar in the quantity stated by the model manual or Waterpik’s current support instructions.
What Not to Soak, Heat, or Put in the Dishwasher
Avoid treating the entire Waterpik as one washable object. Different parts require different methods.
- Don’t submerge the powered base or cordless body.
- Don’t soak a handle unless the manual expressly permits it.
- Don’t put a reservoir in the dishwasher unless it is confirmed dishwasher-safe.
- Don’t use a heated drying cycle unless the manual allows it.
- Don’t use boiling water, abrasive pads, or unapproved descalers.
- Never mix vinegar with bleach or another cleaning chemical.
- Don’t force a valve, reservoir, or tip-eject mechanism.
- Don’t open a sealed motor or battery compartment to reach internal residue.
A unit described as waterproof or suitable for shower use is not automatically safe to soak in cleaning solution.
How to Clean Every Part of a Waterpik in 3 Steps
Step 1: Clean the Exterior, Tip, and Compatible Handle
Switch off the unit and unplug a countertop model before cleaning.
Wipe the exterior with a soft cloth and mild, non-abrasive cleanser. Pay attention to the base, controls, reservoir platform, and areas regularly touched by wet hands. Keep moisture away from electrical openings.
Next, press the tip-eject button and remove the flosser tip. Waterpik’s general cleaning instructions recommend soaking the tip—and a compatible countertop handle—in one part white vinegar and two parts warm water for five minutes. Rinse both thoroughly under warm water afterward.
Check the manual before soaking any handle. A cordless handle contains the pump, battery, and controls, while some countertop handles may also have powered components that must remain dry.
Step 2: Wash the Reservoir and Valve
Remove the reservoir according to the model instructions. Pour out any standing water before inspecting the corners and lower edges for residue.
For a dishwasher-safe reservoir:
- Remove the black reservoir valve if the manual directs you to do so.
- Place the reservoir securely on the top rack.
- Turn off the heated dry cycle or remove the reservoir before that stage.
- Let it air-dry completely.
For hand-washing, use warm soapy water and a soft bottle brush. The brush is useful for narrow cordless tanks and corners that a cloth cannot reach. Rinse carefully so no soap remains.
Some countertop reservoirs have a small black valve underneath. If present, Waterpik advises removing it from below and massaging it under warm water for 30–45 seconds. Reinstall it in the orientation shown in the manual; on common designs, the dome faces upward.
Do not assume every reservoir contains this valve or force one that does not release easily.
Step 3: Flush the Internal Water Path and Rinse
The internal pathway includes the pump, hose, and channels that carry water from the reservoir to the tip. Mineral deposits can collect here even when the removable tank appears clean.
For models covered by Waterpik’s general instructions:
- Add one part white vinegar and two parts warm water to the reservoir.
- Point the handle and tip into the sink.
- Turn on the unit and run the mixture through the internal pathway.
- Refill the reservoir with clean warm water.
- Run the complete reservoir through to rinse away the vinegar.
Some manuals specify a smaller measured quantity of vinegar in a full reservoir. Follow that amount instead of assuming the general ratio applies to every model.
Don’t pause the solution inside the pump or hose unless the manual specifically instructs you to do so. After the clean-water flush, remove compatible parts and let them air-dry with adequate airflow.
Countertop vs. Cordless Waterpik Cleaning
Countertop and cordless models use the same basic wipe, wash, and flush approach, but their components require different handling.
| Cleaning concern | Countertop Waterpik | Cordless Waterpik |
| Powered component | Keep the base dry and unplug it before cleaning | Do not immerse the powered body or charging area |
| Handle | Some models permit a short diluted-vinegar soak | Generally wipe only unless the manual says otherwise |
| Reservoir | Usually larger and commonly removable | May be smaller, integrated, or removable |
| Black valve | Present on some countertop reservoirs | Often absent, but designs vary |
| Dishwasher | Use only when the reservoir is approved for the top rack | Confirm compatibility in the model manual |
| Vinegar quantity | Follow the countertop model instructions | Follow the cordless model instructions |
Model-specific guidance is particularly important for Waterpik Aquarius, Cordless, Radiance, and combination units. Similar-looking components may contain different electronics or seals.
Troubleshooting Mold, Odors, Buildup, and Low Pressure
Suspected Mold, Odors, or Inaccessible Residue
Dark residue cannot be identified as a particular type of mold from appearance alone. Remove and clean every accessible part using the approved method, flush the internal pathway, rinse with clean water, and allow the unit to dry.
A stale smell after storage may come from water or mouthwash residue trapped in the reservoir or internal pathway. If visible material or odor remains inside a sealed tube after proper cleaning, stop using the unit and contact Waterpik. Don’t open the motor or battery housing to reach it.
Routine household cleaning can remove residue and mineral buildup, but it should not be described as sterilizing the appliance.
Hard-Water Buildup and Clogged Tips
White or chalky residue is often consistent with hard-water mineral deposits. Clean the reservoir and complete the approved vinegar flush. Remove and soak the tip according to its care instructions.
Avoid pushing needles or metal objects into the nozzle opening. These can alter the opening or damage the tip. Replace a tip that remains clogged, cracked, or misshapen after cleaning.
Low Pressure After Cleaning: What to Check Next
Mineral buildup is only one possible cause of low pressure. Check the following:
- Clean or replace a clogged flosser tip.
- Confirm that the reservoir sits correctly on the base.
- Reinstall the reservoir valve in the correct position.
- Prime the pump if the stream sputters or contains air.
- Charge a rechargeable model or check replaceable batteries.
- Inspect an exposed hose for leaks, kinks, or damage.
Waterpik’s low-pressure troubleshooting guidance separates cleaning problems from charging and battery issues. Contact the manufacturer if pressure remains weak or the unit leaks, sounds abnormal, or has a damaged hose.
How Often Should You Clean a Waterpik?
Waterpik’s current general guidance recommends a full cleaning once a month. Some model manuals specify every one to three months, so the schedule supplied with the unit should control. Daily emptying and drying still matter between deeper cleanings.
After Every Use
Empty any water left in the reservoir. Rinse the tank when practical and leave its lid or fill door open so air can circulate.
If the manual recommends clearing the line, point the tip into the sink and run the unit briefly. Wipe exterior splashes and let removable parts dry before placing the Waterpik in a cabinet or travel case.
After using mouthwash or another approved additive, partially fill the reservoir with plain warm water and run it through the unit. This helps remove residue from the internal pathway.
Periodic Deep Cleaning
Complete the three-step routine on the schedule given in the manual. Cleaning may be needed sooner when:
- The home has hard water.
- White residue appears in the reservoir.
- The spray pattern becomes uneven.
- Pressure begins to fall.
- The unit develops a persistent odor.
- Mouthwash is used frequently.
More vinegar is not necessarily better. Use the approved amount and complete the clean-water rinse every time.
When to Replace the Flosser Tip
Waterpik generally recommends replacing tips every three to six months, although the interval can vary by tip type. Replace one sooner if it is cracked, deformed, worn, or still clogged after cleaning.
Frequently Asked Questions
Can You Clean a Waterpik Without Vinegar?
The exterior and compatible removable reservoir can be cleaned without vinegar using a soft cloth, mild non-abrasive cleanser, or warm soapy water. However, Waterpik commonly recommends diluted vinegar for internal mineral deposits. Check the model manual or contact Waterpik before running an alternative cleaner through the pump and hose.
Can You Use Hydrogen Peroxide to Clean a Waterpik?
Waterpik permits hydrogen peroxide for certain applications, including cleaning some flosser tips, but that does not make every homemade peroxide flush suitable. Follow the concentration and method in the current manual or manufacturer guidance. Never mix hydrogen peroxide with vinegar, bleach, or another cleaner, and rinse cleaned parts thoroughly.
Can a Waterpik Reservoir Go in the Dishwasher?
A Waterpik reservoir can go in the dishwasher only when its model instructions confirm that it is dishwasher-safe. Use the top rack, remove the valve when directed, and follow the heated-dry instructions. Never place the powered base, countertop handle, or cordless body in the dishwasher.
What Should You Do After Using Mouthwash in a Waterpik?
Partially fill the reservoir with plain warm water, point the tip into the sink, and run the water through the unit. This clears mouthwash residue from the internal path and helps prevent clogging. Waterpik’s additive guidance should be checked before using concentrated rinses or other solutions.
How Do You Clean a Waterpik That Has Not Been Used for a While?
Inspect the reservoir, tip, valve, and visible pathway for residue or damage. Wash removable parts, clean the tip, and complete the model-approved vinegar flush followed by clean warm water. Allow everything to dry. Don’t use the unit if persistent contamination, cracking, leaks, or odors remain in inaccessible components.
Keep Your Waterpik Clean Without Damaging It
Safe Waterpik cleaning follows a simple pattern: wipe powered surfaces, wash removable parts, and flush the internal pathway with the model-approved solution. Checking the manual, avoiding immersion, and completing the final clean-water rinse matter more than using stronger cleaners.
Emptying the reservoir after use and following a regular maintenance schedule will also make each deep clean easier.
Disclaimer
DwellifyHome content is for general informational purposes only. Homes, needs, preferences, budgets, and circumstances vary; consult a qualified professional for safety, installation, repair, legal, structural, electrical, plumbing, HVAC, or major property decisions.