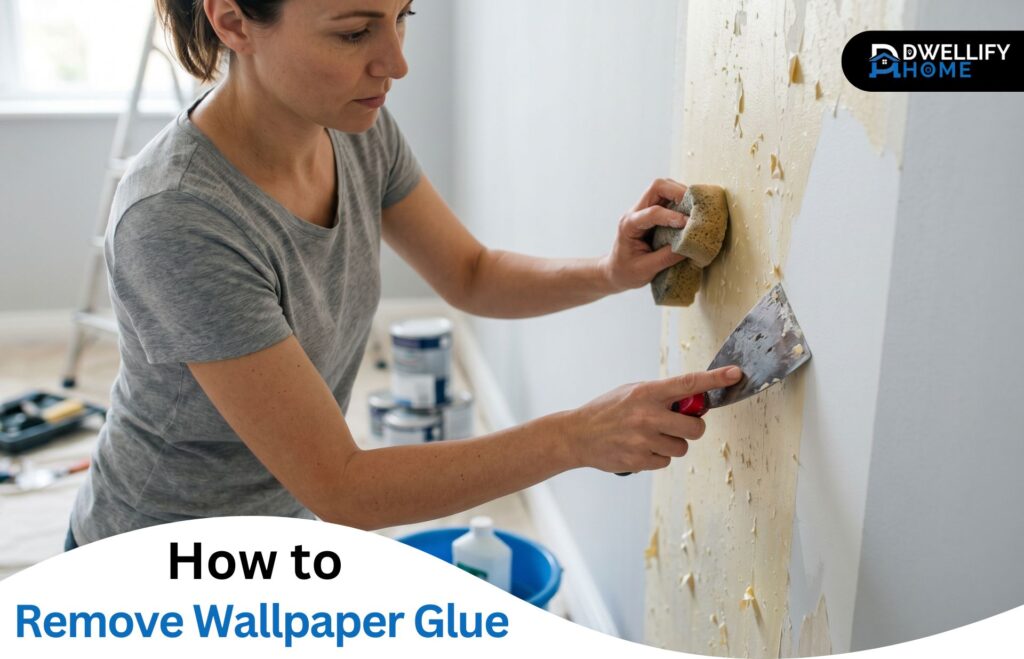
Pulling wallpaper down feels like a win. Then you run your hand along the wall, feel that sticky, gritty residue, and realize the real job hasn’t even started. That leftover paste is the part most homeowners underestimate — and the part that quietly ruins paint jobs, peel-and-stick projects, and brand-new wallpaper installs.
After years of stripping paste off walls in 1920s plaster homes, 1970s drywall builds, and freshly renovated rooms where someone clearly painted over the glue and hoped for the best, one thing is clear: none of it ends well without proper removal. This guide walks through exactly how to remove wallpaper glue the right way, what tools actually work, what to avoid, and how to leave your walls genuinely ready for whatever comes next.
The Short Answer
Removing wallpaper glue means softening leftover paste with hot water mixed with vinegar, dish soap, or a commercial stripper, then scraping and rinsing the wall. It prepares the surface for a smooth, lasting paint or wallpaper finish.
Mission Statement
At Dwellify Home, we help homeowners create spaces they truly enjoy — through practical, stylish, and well-informed décor decisions. Our guides are built to make every project, big or small, feel approachable and rewarding.
Why You Should Remove Wallpaper Glue Before Painting or Re-Wallpapering
Wallpaper paste is mostly water-based. The moment you roll fresh paint over it, the moisture in the paint reactivates the glue. The wall turns gummy, the paint puckers, and within hours you’re looking at bubbles, ridges, or peeling.
Re-wallpapering over residue isn’t safer either. Old paste creates an uneven base, and new adhesive won’t grip properly. Seams lift, edges curl, and the new paper starts releasing from corners within weeks. Skipping this step almost always costs more time than doing it properly the first round.
Quick Solution Guide
| Glue Condition | Best Solution | Dwell Time |
| Light, modern paste | Hot water + dish soap | 5–10 minutes |
| Moderate residue | Vinegar + hot water (1:1) | 10–15 minutes |
| Stubborn or older paste | Fabric softener + water (1:3) | 15–20 minutes |
| Hardened, decades-old glue | Commercial stripper (DIF, Roman) | 20–30 minutes |
| Painted-over wallpaper | Steamer + scraper combo | Apply heat in passes |
Key Benefits of Proper Wallpaper Glue Removal
- Prevents paint from bubbling, cracking, or peeling
- Creates a smooth base for new wallpaper or peel-and-stick designs
- Avoids costly re-painting or wall repairs later
- Improves adhesion of primers and sealers
- Restores walls to a clean, ready-to-decorate condition
Understanding the Type of Wallpaper Glue on Your Walls
Most modern wallpaper uses water-based paste — easier to soften, easier to remove. Older homes often have heavy-duty or clay-based adhesives that have hardened over decades. These cling tightly and resist plain hot water.
Pre-pasted wallpaper leaves a thinner film, while professionally hung wallpaper sometimes has paste applied to both the wall and the back of the paper. That double layer is what slows people down. Knowing what era your wallpaper is from gives you a realistic sense of how much work to expect.
How to Identify Your Wall Surface Before You Begin
Drywall and plaster look similar from a distance but behave very differently under moisture. Drywall absorbs water quickly and can soften or crumble if oversaturated. Plaster is harder, denser, and tolerates more wetting without damage.
A quick way to check: unscrew an outlet cover and look at the cut edge. Drywall shows a paper-faced gypsum core. Plaster looks solid, gritty, and often sits over wood lath. Textured walls need a gentler touch — too much scrubbing flattens the texture. Painted walls under the glue need protection from harsh scrapers.
Safety Checks for Older Homes: Lead and Asbestos Awareness
Homes built before 1978 may have lead paint sitting under the wallpaper. Pre-1990s wallpaper paste sometimes contained asbestos fibers as well. Disturbing either without precautions creates real health risks — not theoretical ones.
Buy an inexpensive lead test kit from a hardware store and check painted layers before scraping. For older paste, send a small sample to a certified asbestos lab if you’re unsure. Wear a fitted respirator (N95 minimum), safety goggles, and gloves throughout. Skipping this step isn’t worth the savings.
Tools and Supplies You’ll Need
A short, reliable kit handles most jobs:
- Pump sprayer or sturdy spray bottle
- Plastic putty knife and a wider drywall scraper
- Wallpaper scoring tool
- Dobie-style scrub sponges and a 100-grit sanding sponge
- Microfiber cloths and paper towels
- Bucket of warm water for rinsing
- Heavy-duty drop cloths and painter’s tape
- Rubber gloves and safety goggles
- Press-N-Seal or plastic sheeting for outlets
Avoid sharp metal scrapers — they gouge drywall fast. The sponges actually matter more than the cleaning solution does.
How to Prepare the Room for Wallpaper Glue Removal
Move furniture out completely if you can. Anything that stays gets pushed to the center and covered with plastic. Lay drop cloths along the baseboards because drips will happen no matter how careful you are.
Turn off power to the room at the breaker, then seal outlets and switches with Press-N-Seal or painter’s tape. Close HVAC vents — air movement dries the solution before it can soften the paste. A still, slightly humid room works in your favor here.
Best Solutions to Soften Wallpaper Glue
Several solutions work well, and the right one depends on how stubborn the paste is:
- Hot water and dish soap — A few drops of Dawn in a bucket of hot water handles light, modern paste.
- Vinegar and hot water — Equal parts white vinegar and hot water cuts through tougher residue.
- Baking soda mix — Two tablespoons of baking soda per gallon of hot water dissolves dried paste.
- Fabric softener and water — One part softener to three parts hot water; works gently on most adhesives.
- Commercial strippers — Zinsser DIF, Roman Piranha, or TSP for old, hardened glue.
- Soy-based strippers — A safer option for households with kids, pets, or chemical sensitivities.
Start with the gentlest mix that works. Stronger isn’t always better; it just creates more cleanup.
How to Remove Wallpaper Glue from Walls: Step-by-Step
Work in sections of about three feet by three feet. Larger areas dry before you can scrape them.
- Spray your chosen solution generously onto the section.
- Wait 5 to 15 minutes. The glue should turn soft and slightly gel-like.
- Scrape gently with a plastic putty knife held at a low angle.
- Scrub remaining residue with a Dobie sponge, then follow with a sanding sponge for stubborn patches.
- Rinse the section with clean warm water and a fresh sponge.
- Wipe dry with a microfiber cloth or paper towel.
- Move to the next section and repeat.
Patience matters more than pressure. Forcing a scraper into softened glue almost always leaves a gouge.
How to Tell When All the Wallpaper Glue Is Gone
Run your fingernail across the dried wall. If it feels smooth and your nail glides without catching, the glue is gone. If it feels tacky, gritty, or rubbery, residue remains.
The wet test is more reliable. Spray a small patch with clean water. Truly clean walls absorb evenly and feel smooth within a minute. Walls with leftover paste feel slick or jelly-like under wet fingers. Trust this test — it has saved more paint jobs than any product on the market.
How to Remove Stubborn or Dried-On Wallpaper Glue
Hardened glue needs heat or steam. A handheld clothes steamer works surprisingly well for small areas. Hold it close, let the steam soak the patch for 30 seconds, then scrape immediately while it’s warm.
For larger jobs, a rented commercial wallpaper steamer covers more ground. A heat gun also softens stubborn spots, but keep it moving — holding it still scorches drywall paper. When nothing else works, switch to a stronger commercial stripper and give it longer dwell time, sometimes 20 to 30 minutes.
How to Remove Wallpaper Glue from Different Wall Surfaces
Drywall demands restraint. Use minimal water, work fast, and rinse with a barely damp sponge. Oversaturating drywall causes the paper face to bubble.
Plaster handles wetting better, so you can soak longer and scrape harder. Textured walls call for sponges only — scrapers flatten the texture permanently. For wood trim and baseboards, use a soft cloth with vinegar water; never sand. Previously painted walls under the glue need gentle scrubbing, since aggressive scraping strips paint along with paste.
Common Mistakes to Avoid When Removing Wallpaper Glue
A few mistakes turn a one-day job into a week-long fix:
- Soaking drywall until it softens or crumbles
- Using sharp metal scrapers that gouge the surface
- Scraping before the glue has fully softened
- Skipping the clean-water rinse — leftover film blocks paint adhesion
- Painting too soon, before walls are bone-dry
- Trying to cover residue with primer instead of removing it first
Most of these come from rushing. The wall doesn’t care about your timeline.
How to Prep Your Walls After Removing Wallpaper Glue
Once the walls are clean and dry, lightly sand any rough patches with 120-grit paper. Fill nail holes, dings, and small chips with spackle, then sand smooth.
Prime before painting — and choose the right primer. An oil-based primer like INSL-X Prime Lock Plus or a problem-surface sealer like Zinsser Gardz locks down any invisible residue you missed. Skip standard latex primer here; it doesn’t seal paste reliably. Let primer cure overnight before paint or new wallpaper.
How Professionals Remove Wallpaper Glue
Pros bring backpack pump sprayers filled with very hot water mixed with commercial stripper. They cover an entire wall at once, work in pairs, and use wide drywall scrapers to clear paste in long, smooth passes.
For badly damaged walls, professionals sometimes skim-coat with joint compound after stripping, which gives a fresh, flat surface without removing every speck of glue. Hiring a pro makes sense for whole-house projects, painted-over wallpaper, or walls you suspect have lead or asbestos.
How Long It Takes and What It Costs
A standard 12 by 12 foot room takes one experienced person about one to two days from start to clean walls. Add half a day for prep, sanding, and priming.
DIY costs usually run $30 to $80 in supplies. Professional wallpaper glue removal averages $1 to $3 per square foot, depending on glue age, wall surface, and regional labor rates. Older homes with painted-over wallpaper sit at the higher end. A clean, modern paste job is typically a one-day weekend project.
How to Make Wallpaper Removal Easier Next Time
Before installing new wallpaper, apply a coat of wallpaper sizing or a quality primer to the wall. Sizing creates a barrier between the drywall and the paste, which makes the next removal far less painful.
Strippable and peel-and-stick wallpapers are also worth considering. They release cleanly without soaking or scraping, leaving little to no residue. The few extra dollars upfront save hours of work down the road.
Frequently Asked Questions
Can you paint over wallpaper glue?
No. Paint contains water that reactivates the paste, causing the surface to bubble, crack, or peel. Even premium primer won’t fully hide the issue. Removing the glue first is the only reliable way to get a smooth, lasting paint finish.
Does fabric softener really work on wallpaper glue?
Yes, for most modern water-based pastes. Mix one part fabric softener with three parts hot water, spray the wall, and let it sit 15 to 20 minutes. The softener breaks down the adhesive, making it easier to scrape and wipe away.
Can I use acetone or sugar soap to remove wallpaper glue?
Acetone can dissolve some adhesives but is harsh, flammable, and risky on painted walls. Sugar soap helps clean residue and prep walls but isn’t strong enough on its own for thick paste. Both work better as finishing tools than primary removers.
What’s the best wallpaper glue remover at Home Depot or Lowe’s?
Zinsser DIF (gel or liquid) and Roman Piranha are the most reliable retail options. Both break down paste quickly and rinse clean. The gel version sticks to walls better and reduces drips compared with the liquid formula.
How do you remove wallpaper glue from wood trim?
Use a soft cloth dampened with warm vinegar water and gently wipe along the grain. Avoid scrapers and sandpaper, which damage the finish. For stubborn spots, apply a small amount of fabric softener mix and let it sit briefly before wiping.
Will a steamer damage drywall?
A steamer can damage drywall if held too close or too long. Keep it moving, work in short bursts, and stop the moment the paper face feels soft. Plaster tolerates steam much better than drywall does.
How long should the cleaning solution sit on the wall?
Most solutions need 5 to 15 minutes to soften paste. Old or hardened glue may need 20 to 30 minutes and a second application. Don’t let the wall fully dry between applications — re-mist as needed.
Conclusion
Removing wallpaper glue isn’t complicated, but it rewards patience over speed. The right solution, the right tools, and a steady, section-by-section approach beat any shortcut every time. Walls that are properly cleaned and primed take paint and new wallpaper beautifully, and they stay that way for years.
The job feels long while you’re in it. Once it’s done, you’ll forget the hours and just enjoy a smooth, clean wall ready for whatever you have planned next.
Disclaimer
This content is provided for general informational purposes only. Individual results, wall conditions, and product performance may vary. Always follow manufacturer instructions and take appropriate safety precautions when handling tools, chemicals, or older home materials.