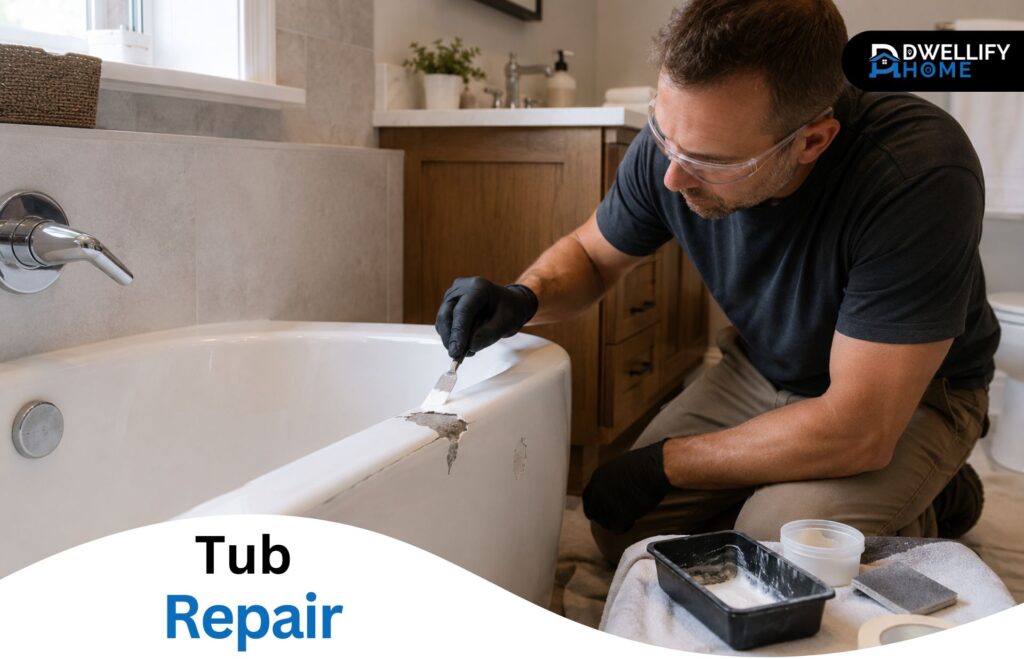
A small chip on the rim and a crack that moves underfoot are two very different problems. Good tub repair starts by identifying the bathtub material, checking whether the damage moves or leaks, and choosing a method that addresses the cause—not merely the visible mark.
This guide explains which problems may be suitable for DIY work and which deserve professional attention.
Short Definition
Tub repair restores localized bathtub damage—such as cracks, chips, holes, rust, or peeling—through material-compatible repairs, refinishing, or professional reinforcement instead of immediate replacement.
Mission Statement
DwellifyHome helps homeowners, renters, and home lovers make practical, stylish, and informed choices for safer, more comfortable living spaces.
Can a Damaged Bathtub Be Repaired?
Most localized chips, scratches, and stable surface cracks can be repaired when the bathtub remains firm and watertight. Moving cracks, large holes, active leaks, severe corrosion, or widespread structural deterioration require closer assessment. Stop using the tub if water may be escaping into the floor, wall, or ceiling below.
Cosmetic Damage vs. Structural Damage
Cosmetic damage affects the finish without weakening the tub body. Examples include a small rim chip, light scratch, or isolated area of peeling coating.
Possible structural trouble includes:
- A crack that opens when weight is placed in the tub
- A floor that flexes or feels soft
- A hole passing through the tub shell
- A crack near the drain, overflow, or built-in jets
- Repeated cracking after an earlier repair
Warning Signs That Mean You Should Stop Using the Tub
Arrange an assessment before using the tub again when you notice dripping, a damp smell, ceiling stains below the bathroom, soft surrounding flooring, or a crack that changes under pressure. A dry-looking surface does not necessarily rule out moisture beneath the tub.
Identify Your Tub Material and Type of Damage
The correct repair compound depends on the substrate beneath the finish. Color alone won’t identify it, and two white tubs may require completely different products.
Fiberglass, Acrylic, and Plastic Tubs
Fiberglass tubs are lightweight and may reveal visible fibers or a textured backing through an access opening. Acrylic normally has a smooth, molded surface and is frequently reinforced underneath with fiberglass.
“Plastic tub” is a broad description, not a precise material. Check the manufacturer’s label, model information, installation documents, or exposed underside before buying a kit. Avoid drilling, scraping, or otherwise damaging the tub merely to identify it.
Porcelain, Enamel, Steel, and Cast-Iron Tubs
Enamel or porcelain is often the finish over a steel or cast-iron body. A magnet may help identify a metal tub, although it won’t reliably distinguish steel from cast iron. A deep chip may expose dark metal beneath the glossy coating.
Cast iron is extremely heavy and usually sounds solid when tapped. Steel tends to sound thinner. Because repairs must bond to the coating and protect any exposed metal, use a product specifically approved for that surface.
Cracks, Chips, Holes, Rust, or Peeling?
- Chip: A localized piece of finish is missing.
- Crack: A line has formed in the coating or tub shell. Movement and depth determine its seriousness.
- Hole: The damage passes through the tub body.
- Rust: Exposed steel or iron has begun corroding.
- Peeling or bubbling: A coating is losing adhesion, often after an earlier refinishing job.
- Scratch: The surface is marked but may not be broken through.
How to Repair Small Tub Cracks and Chips
A small DIY bathtub repair is most realistic when the area is stable, localized, dry, and away from plumbing connections. Renters should notify the property owner first, while owners should check whether an unauthorized repair could affect the manufacturer’s warranty.
Choose a Compatible Bathtub Repair Kit
Select a kit that names your bathtub material and the type of damage being repaired. Depending on the system, it may contain a two-part epoxy, resin and hardener, filler, touch-up coating, or finishing materials.
Check the current product label and Safety Data Sheet for mixing, ventilation, protective equipment, application temperature, and cure requirements. Don’t combine unrelated fillers, paints, or coatings.
Clean and Prepare the Damaged Area
Preparation often determines whether a patch bonds or lifts later.
- Remove soap film, body oils, and residue using a cleaner allowed by the repair-kit manufacturer.
- Rinse and dry the area completely.
- Remove only loose coating or crumbling material.
- Mask the surrounding finish.
- Sand or roughen the surface only as directed by the product instructions.
Fill, Shape, Sand, and Finish the Repair
Mix the compound in the specified ratio and apply it within the stated working time. Build up deep chips in the manner directed by the kit rather than forcing excessive filler into one coat.
After the compound cures, level and finish it using the recommended sanding sequence. Apply a compatible topcoat or polish only if the system requires one. A DIY patch can be functional without matching the surrounding color, sheen, and texture perfectly.
Chips That Expose Metal or Show Rust
Remove loose corrosion using the method approved for the repair system, then seal the exposed area with a compatible product. Extensive rust, thinning metal, or corrosion spreading beneath the finish calls for professional assessment rather than a cosmetic touch-up.
What to Do About Holes, Deep Cracks, or a Flexing Tub Floor
A hole or moving floor crack is not an ordinary surface repair. Filler may cover the opening temporarily, but continuing movement can split the patch. These problems may require access beneath the tub, structural reinforcement, leak assessment, and correction of inadequate support before the visible surface is restored.
Why a Surface Patch May Fail
A repair can reopen when the tub shell continues bending under a person’s weight. Poor adhesion is not always the cause; the patch may be trying to hold together a surface that still moves.
When the Tub Base or Support Needs Attention
Stop using the tub and consult a suitable professional when the floor flexes, the crack reaches through the shell, or the area has failed before. Blindly adding filler or foam without understanding the installation can conceal the problem rather than correct it.
How to Repair a Peeling Bathtub Finish
A small isolated edge in a previously refinished coating may accept a compatible touch-up when the surrounding finish remains firmly bonded. Widespread bubbles, lifting sheets, or peeling across several areas usually indicate broader adhesion failure. Spot repair rarely solves that condition for long.
Spot Repair for a Small Peeling Area
Confirm that the damage is a peeling coating rather than failing original enamel. Remove loose material without enlarging the area unnecessarily, prepare the surface as directed, and use a touch-up product compatible with the existing coating.
When the Entire Tub Needs Refinishing
Full refinishing may be more sensible when failure is widespread but the bathtub remains structurally sound. Because stripping and recoating can involve hazardous chemicals, avoid improvised online methods. The EPA now prohibits methylene chloride for consumer uses, and NIOSH has documented deadly exposure during bathtub refinishing. Follow current product documentation or hire a properly equipped refinisher.
Should You Repair, Refinish, or Replace the Tub?
Choose based on the tub’s structure and the extent of the damage—not appearance alone.
| Option | Best suited to | Main limitation |
| Spot repair | One stable chip, scratch, or small crack | The patch may remain visible |
| Refinishing | A sound tub with widespread wear, discoloration, or coating failure | It does not correct failed support or structural damage |
| Replacement | Severe corrosion, recurring movement, major leaks, extensive damage, or a planned bathroom redesign | Greater cost, disruption, and related plumbing or finish work |
Contractors may use “refinishing,” “resurfacing,” and “reglazing” differently. Ask what preparation, damage repair, coating, cure period, and warranty are actually included.
When to Call a Tub Repair Professional
Professional assessment is appropriate for large holes, moving or recurring cracks, damage near plumbing openings, widespread peeling, hidden water damage, uncertain tub materials, or repairs that must blend closely with an unusual color.
Tub Refinisher vs. Plumber vs. Remodeling Contractor
- Tub refinisher: Surface cracks, chips, fiberglass repairs, color blending, and recoating
- Plumber: Leaking drains, overflows, faucets, supply lines, or plumbing connections
- Remodeling contractor: Tub replacement, damaged subflooring, failed surrounds, or wider bathroom repairs
Some jobs require more than one trade.
Questions to Ask a Tub Repair Company
Ask how the damage and underlying support will be assessed, which materials will be used, how fumes and dust will be controlled, when the tub can be used, and what the warranty excludes. Photos of comparable completed repairs are more useful than stock images.
How Much Does Tub Repair Cost?
Published 2026 estimates vary by repair type and location. Angi reports approximately $10–$35 for a basic DIY chip kit and $195–$300 for professional chip repair. This Old House reports a typical professional refinishing range of $335–$630. Treat these as planning figures, not quotes.
Costs rise with larger damage, structural reinforcement, difficult access, custom color matching, extensive preparation, and regional labor rates. Send clear photographs and measurements to several qualified providers, then compare the proposed process—not just the total price.
Common Tub Repair Mistakes That Lead to Repeat Failure
- Guessing the bathtub material
- Treating silicone caulk as a structural repair
- Covering a crack while ignoring floor movement
- Applying filler over moisture, soap film, or loose coating
- Using an incompatible repair product
- Rushing sanding, coating, or cure time
- Expecting an exact DIY color and gloss match
- Continuing to use a tub that may be leaking
- Repeating a failed patch without investigating the cause
How to Care for a Repaired or Refinished Tub
A coating that feels dry may not be fully cured. Keep the area free from water and cleaning products for the entire period stated by the manufacturer or contractor.
Afterward, use cleaners and tools approved for the repaired finish. Mild, nonabrasive cleaning is commonly recommended, but the repair-system instructions should control. Inspect the area periodically for lifting edges, discoloration, movement, or renewed cracking.
Tub Repair FAQs
Can a Plastic Bathtub Be Repaired?
Often, yes—but “plastic” may refer to acrylic, ABS, or another molded material. A small stable chip or crack may accept a compatible repair system. A through-crack, moving floor, or unknown substrate needs closer assessment because a surface patch may not restore the tub’s strength.
Can a Cracked Fiberglass Tub Be Repaired?
A stable fiberglass crack can often be repaired with a system designed for fiberglass. Floor cracks and holes may need reinforcement and correction of the support underneath. Continued flexing can cause the repaired area to reopen, so movement should be addressed before the surface is finished.
Do Bathtub Repair Kits Really Work?
Repair kits can work on the material and damage listed by the manufacturer when the surface is properly prepared and allowed to cure fully. They’re less reliable for moving cracks, large holes, widespread peeling, or active leaks. Even a sound DIY repair may remain visible under bathroom lighting.
Can Silicone Fix a Crack in a Bathtub?
Silicone is useful for designated joints and caulk lines, but it does not restore a cracked tub shell or correct failed support. Covering a crack with silicone can also make later surface preparation more difficult. Don’t rely on it as permission to keep using a tub that may leak.
Does a Chipped Bathtub Need Immediate Repair?
A tiny stable chip is not always an emergency, but it should not be ignored indefinitely. Address it sooner when it has sharp edges, exposes metal, begins rusting, grows, or sits in a heavily used area. Leaking, movement, or damage through the tub body requires faster action.
Final Takeaway: Choose the Repair That Fits the Damage
A durable result begins with the correct diagnosis. Small, stable surface damage may suit a compatible DIY repair, while movement, leakage, deep damage, or widespread coating failure calls for professional judgment. Fixing the cause is more valuable than simply hiding the mark.
Disclaimer
DwellifyHome content is for general informational purposes only. Homes, needs, preferences, budgets, and circumstances vary. Consult a qualified professional for safety-sensitive repairs, installations, legal matters, or structural, electrical, plumbing, HVAC, and other major property decisions.