Mold doesn’t just grow — it waits. A small patch on your bathroom ceiling or behind a cabinet looks manageable, but the moment you grab a dry cloth and start scrubbing, you’ve already made the problem worse. I’ve walked into homes where a tiny two-inch spot turned into a cross-room contamination issue because the owner cleaned it the way most people would. The process matters far more than the effort.
This guide walks you through exactly how to clean mold without spreading spores — from the first containment step all the way through prevention — so you don’t end up fighting mold twice.
Snippet-Ready Definition
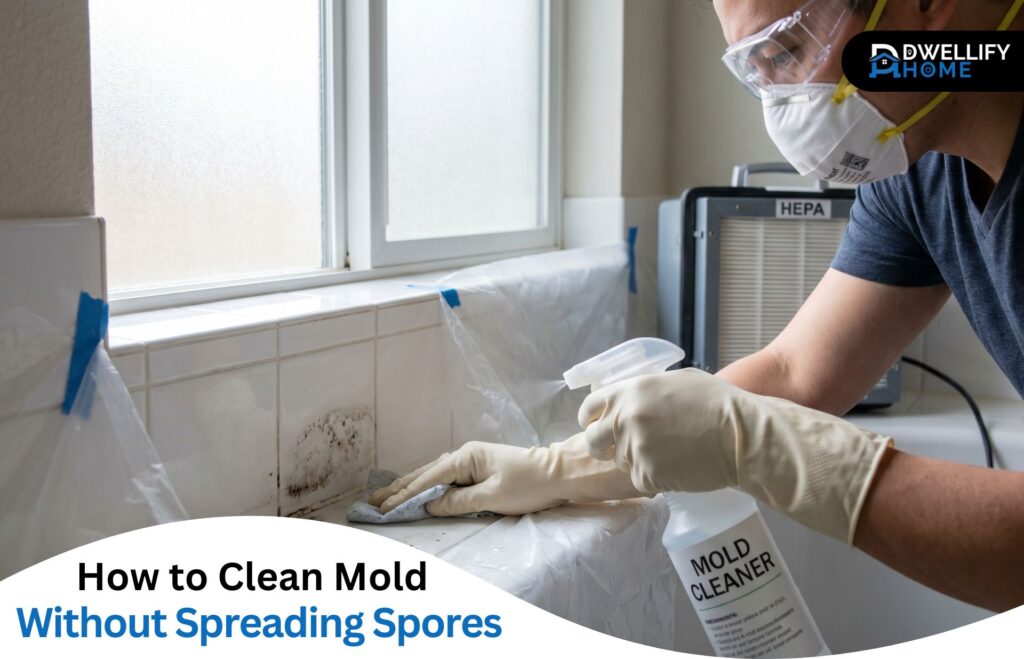
To clean mold without spreading spores, dampen the surface first to weigh down spores, wear an N-95 respirator and goggles, contain the area, and wipe gently with vinegar or hydrogen peroxide. This prevents airborne spores from relocating and restarting mold growth elsewhere.
Mission Statement
Dwellify Home exists to help homeowners make practical, well-informed decisions about their living spaces — from solving everyday home problems to creating spaces that feel genuinely livable. Every guide we publish is written to be clear, honest, and actually useful, not just searchable.
Why Cleaning Mold the Wrong Way Makes Everything Worse
Mold holds its spores loosely. They’re designed to travel — that’s how mold reproduces. When conditions are calm and the colony is undisturbed, most of those spores stay in place. The moment you disturb the surface without preparation, you release them.
This is why so many people clean visible mold and find it back within weeks, often in new locations they didn’t expect.
What Actually Happens When Mold Spores Go Airborne
Mold spores are microscopic — invisible to the eye and light enough to drift on the gentlest air current. Once they’re airborne, they travel through vents, settle on furniture and clothing, and find new damp surfaces where the whole cycle begins again.
A single colony can release thousands of spores during one cleaning session. Those spores don’t disappear. They relocate.
The Most Common Cleaning Mistakes That Spread Mold Spores
Most of these mistakes feel instinctively correct — which is what makes them dangerous:
- Dry brushing or sweeping — Directly launches spores into the air. Never do this.
- Using a regular vacuum without HEPA filtration — Pulls spores through the machine and exhausts them right back into the room.
- Turning on a fan for ventilation — Moves air aggressively and scatters spores throughout the space.
- Scrubbing hard and fast — Creates friction and airflow that lifts spores off the surface.
- Using bleach on porous surfaces — Bleaches the color away so you can’t see the mold, but doesn’t kill the roots. The mold returns.
- Skipping containment — Leaving doors open and vents running turns a bathroom problem into a whole-house problem.
Quick Comparison: Mold Cleaning Products by Surface Type
| Product | Best Surface | Kills Roots? | Safe on Porous? |
| White Vinegar | All surfaces | Yes | Yes |
| Hydrogen Peroxide | Tile, grout, walls | Yes | Yes |
| Baking Soda | Grout, light mold | Partial | Yes |
| Bleach | Glass, glazed tile only | No | No |
| Commercial Mold Spray (EPA-registered) | Most surfaces | Yes | Check label |
Key Steps at a Glance
- Shut off HVAC and seal vents before starting
- Mist the mold surface lightly before any scrubbing
- Work from the outer edges of the patch inward
- Use disposable cloths and bag materials inside the room
- Apply a final vinegar mist and let it air-dry without rinsing
- Run a HEPA air purifier for several hours after cleaning
What You Need Before You Start Cleaning
Getting the right gear together before you touch anything is not optional. Rushing straight to cleaning without preparation is the number one reason mold problems get worse.
Protective Gear That Actually Keeps You Safe
- N-95 respirator — Standard dust masks don’t filter mold spores effectively. An N-95 does.
- Goggles without ventilation holes — Vented goggles allow spores to reach your eyes. Use solid-seal goggles.
- Rubber gloves — Forearm-length if you’re dealing with a large area or a spray-heavy cleaning process.
- Disposable clothing or dedicated work clothes — Spores cling to fabric. Either wear clothes you’ll bag and wash separately in hot water, or use disposable coveralls.
Cleaning Supplies That Contain Spores Instead of Spreading Them
- Spray bottle (for dampening mold before scrubbing)
- HEPA-filter vacuum (kept nearby during cleaning to catch disturbed particles)
- Disposable paper towels or microfiber cloths
- Heavy-duty sealed disposal bags
- Stiff-bristle brush
- A secondary bucket for rinsing cloths — separate from your cleaning solution
Step 1: Seal and Contain the Area First
Before touching the mold, shut off your HVAC system and seal the vents in the affected room with plastic sheeting. Close all interior doors. If you can, open one window directly to the outside — this gives you fresh air intake without pushing spores toward the rest of the home.
This containment step is what separates a controlled cleanup from a contamination event. Your HVAC system can carry airborne spores to every room in the house within minutes if it’s running during a disturbance. Sealing vents takes two minutes and makes an enormous difference.
For larger mold areas, seal the room doorway with plastic sheeting as well, leaving only a small exit point for yourself.
Step 2: Dampen the Mold Before You Touch It
This is the step that most guides either skip or mention too briefly — and it’s arguably the most important part of the whole process.
Before any scrubbing or wiping, lightly mist the moldy area with plain water, undiluted white vinegar, or a mold control spray. The goal is simple: wet spores are heavy. They can’t float. By dampening the surface first, you prevent the majority of spores from becoming airborne when you start cleaning.
Don’t soak the surface — a light, even mist is enough. You want the mold colony to be damp, not the surrounding wall soaked through. Let it sit for a minute before you proceed.
This one step alone can dramatically reduce how many spores end up in the air during cleanup.
Step 3: How to Scrub Mold Without Sending Spores Into the Air
Work slowly and deliberately. Use a stiff-bristle brush and your chosen cleaning solution, and always start from the outer edges of the mold patch, working inward. Starting from the center pushes spores outward. Starting from the edges keeps the disturbance contained.
Keep the surface damp throughout the scrubbing process. If the area starts to dry out, mist it again before continuing.
Place your HEPA vacuum nearby with the nozzle positioned close to — but not touching — the work area. It acts as a passive spore catcher while you clean.
Rinse your cloth or brush in a separate bucket of clean water rather than dipping it back into your cleaning solution. Contaminating your solution spreads spores right back onto the surface you just cleaned.
Step 4: Wipe, Bag, and Seal — Disposing of Materials the Right Way
Once the scrubbing is done, wipe the surface with disposable paper towels or a clean cloth. Don’t reuse them. Each wipe should be folded inward (dirty side in) and placed directly into a sealed bag.
Bag everything before it leaves the room — gloves, cloths, paper towels, and any other materials that touched the mold. Seal the bag inside the room, not in the hallway. Never shake, squeeze, or air out contaminated materials before bagging them.
For heavily contaminated cleanups, use a second outer bag. This double-bagging practice is standard in professional remediation and costs almost nothing.
Step 5: Final Disinfection and Clearing the Air After Cleaning
After the surface is cleaned and materials are bagged, apply one final light mist of white vinegar or an EPA-registered mold control spray to the cleaned area. Do not rinse it off. Let it air-dry — this final coat addresses any residual mold roots on the surface.
Then focus on the air. Run a HEPA air purifier in the room for several hours to filter out any spores still suspended in the air. If you have a dehumidifier, run it until the area is completely dry. Mold cannot grow in properly dry conditions.
Leave the room ventilated before declaring it done. Forty-eight hours later, go back and inspect the area under good lighting. If you see any regrowth starting, the moisture source hasn’t been resolved.
Which Cleaning Products Actually Kill Mold — And Which Ones Don’t
Not all mold cleaners work the same way, and choosing the wrong one for the wrong surface is a very common mistake.
White Vinegar — The Safest All-Surface Option
Undiluted white vinegar kills approximately 82% of mold species and is safe to use on most surfaces including grout, tile, painted walls, and wood. Apply it directly, let it sit for at least an hour, then scrub gently. It has a strong smell that fades quickly as it dries.
Hydrogen Peroxide — Stronger and More Effective on Stubborn Growth
A 3% hydrogen peroxide solution (standard pharmacy strength) is effective on harder-to-remove mold. Spray it on, leave it for 10 minutes, then scrub and wipe. It works well on bathroom surfaces, tiles, and non-porous walls.
Baking Soda — For Gentle Scrubbing and Moisture Absorption
Baking soda is gentler than vinegar or peroxide and works well as a light abrasive on grout and tile. Mix one teaspoon with two cups of warm water, spray on the area, and scrub with a soft brush. It also neutralizes musty odors and helps absorb residual moisture.
Bleach — When It Works and When It Makes Things Worse
Bleach is effective on hard, non-porous surfaces like glass and glazed tile. On porous materials — drywall, grout, unsealed wood, caulk — bleach removes the visible color of mold but cannot penetrate deep enough to kill the roots. The mold returns, often within weeks, and looks like it never left.
This is the most misunderstood fact in DIY mold removal: bleach makes porous surface mold invisible, not gone.
Commercial Mold Control Sprays — What to Look For on the Label
Look for products that carry an EPA registration number. Terms like “mold control” or “mold remediation” on the label with an EPA number indicate the product has been tested for effectiveness. Avoid anything that only says “mold resistant” — that’s a coating for prevention, not an active mold killer.
How to Clean Mold in the Bathroom Without Spreading Spores
Bathrooms are the most common location for household mold because they combine heat, moisture, and limited ventilation in a small space. The techniques are the same as above, but the surfaces require some specific attention.
How to Clean Mold in the Shower Without Spreading Spores
Grout lines and caulk seams are where shower mold takes hold first. These are porous surfaces, which means bleach is the wrong tool. Use white vinegar or hydrogen peroxide, let it sit for a full hour, then scrub with a narrow stiff brush along the grout lines.
In an enclosed shower space, keep the door open while cleaning — but seal off the bathroom door to keep spores from leaving the room. The enclosed space will concentrate airborne spores quickly, so work in short sessions if needed and step out for fresh air.
Bathroom Ceiling Mold — Why It Behaves Differently and How to Handle It
Ceiling mold presents an extra challenge: gravity. When you disturb it, spores fall directly down onto you and the surfaces below. Dampen the area thoroughly before you touch it — this is even more important on ceilings than on walls.
Use a long-handled brush so you can work at arm’s length, and wear your goggles without exception. Lay plastic sheeting on the floor below to catch any falling debris.
How to Remove Mold from Walls Without Spreading Spores
Wall mold is common after humidity problems, leaks, or poor ventilation — and the wall type completely changes how you approach it.
How to Clean Mold from Painted Walls Safely
Painted walls can be cleaned with white vinegar or hydrogen peroxide, but avoid prolonged contact that lifts the paint. Apply the solution, let it sit for 10 to 15 minutes, then wipe gently with a damp cloth. Avoid scrubbing too hard — you want to remove the mold without stripping the paint layer that protects the wall underneath.
To remove mold from walls without bleach, vinegar is the most reliable option that won’t damage paint or surrounding surfaces.
When Mold on Drywall Means the Wall Has to Come Out
Drywall is porous and absorbs mold deeply. If you press on a moldy section and it feels soft, or if the mold keeps coming back in the same spot despite repeated cleaning, the mold has penetrated the paper layer and likely into the gypsum core.
Surface cleaning will not fix this. The affected section needs to be cut out, disposed of, and replaced. This is not a failure — it’s the correct call, and delaying it usually leads to a larger, more expensive repair later.
How to Clean Up After Mold Removal Is Done
The job doesn’t end when the surface looks clean. Everything you used during cleanup is now a contamination risk.
Soak brushes in a bleach solution for at least one hour before rinsing. Clean other tools with hot water and dish soap or rubbing alcohol. Wash the clothes you worked in separately in hot water — don’t add them to a regular laundry load.
Dry everything completely before storing it. A damp brush in a closed cabinet is a mold habitat.
Return to the area 24 to 48 hours later and inspect it again in good light. If the surface looks clean and smells neutral, the cleanup was successful. If there’s any regrowth or lingering odor, the moisture source hasn’t been addressed.
Does Mold Come Back After Cleaning? What “Permanently Killing Mold” Actually Means
Cleaning mold removes the active colony. It does not change the conditions that allowed it to grow. If the moisture problem — a leak, condensation, poor ventilation, or humidity above 60% — is still present, mold will return. Usually within weeks.
There is no product that permanently kills mold in the way that antibiotics kill bacteria. The goal of proper mold cleanup is to remove the colony and then eliminate the environment that supports growth. Both steps are required. Only fixing the second one makes the difference permanent.
How to Stop Mold from Coming Back After You’ve Cleaned It
The Humidity Level That Stops Mold Before It Starts
Mold needs humidity above roughly 60% to grow and thrive. Keep indoor humidity between 30% and 50% and you remove one of mold’s core requirements. An inexpensive hygrometer (humidity monitor) can be placed in bathrooms and basements to track this.
A portable dehumidifier in a consistently damp room is one of the most effective long-term prevention tools available. It doesn’t need to run constantly — just enough to keep levels in range.
Ventilation and Moisture Control Fixes That Actually Work
- Run your bathroom exhaust fan during every shower and for 15 minutes afterward
- Fix dripping pipes and slow leaks immediately — mold can begin growing within 24 to 48 hours of water exposure
- In kitchens, use the range hood when cooking to reduce steam
- Wipe down wet shower walls and bathroom surfaces after use
- Check window seals and condensation-prone areas during cold months
These habits cost nothing and reduce mold risk more reliably than any spray product.
When Should You Stop and Call a Professional?
If the mold-affected area is larger than 10 square feet — roughly the size of a standard sheet of plywood — the EPA recommends professional remediation rather than DIY cleanup. At that scale, containment becomes significantly more complex and the health risk during cleanup is substantially higher.
Call a licensed mold remediation professional if:
- The mold is inside your HVAC system or ductwork
- The mold appeared following flooding or water damage
- The same area keeps growing back despite correct cleaning
- Anyone in the household has respiratory conditions, a compromised immune system, or is very young or elderly
Professional remediators use negative air pressure systems and industrial HEPA filtration to ensure spores don’t escape the work zone. For large or recurring problems, that level of control is worth the cost.
Frequently Asked Questions
Can I clean mold myself, or do I always need a professional?
You can handle mold yourself if the affected area is smaller than 10 square feet, you have proper protective gear, and there’s no structural involvement. For anything larger, recurring growth, or mold in HVAC systems, professional remediation is the safer and more effective choice.
Does vinegar kill mold completely or just remove the surface growth?
Undiluted white vinegar kills approximately 82% of mold species by penetrating the surface and disrupting the mold’s cellular structure. It’s more effective than bleach on porous surfaces because it doesn’t just bleach away the color — it kills the root. Leave it on for at least an hour for best results.
How do I know if the mold is actually gone after cleaning?
Return 48 hours after cleaning and inspect the area closely in good lighting. No visible regrowth and no musty odor are the two main indicators. If either is present, the moisture source hasn’t been resolved, or the cleaning didn’t fully penetrate the growth.
Is it safe to sleep in a room after cleaning mold?
Wait until the room is fully dry and well-ventilated — typically 24 hours after cleaning with a HEPA air purifier running. If a significant amount of mold was removed, airing out the room for an additional night is a reasonable precaution, particularly for anyone with respiratory sensitivities.
What should I do if I accidentally spread mold spores during cleaning?
Stop, seal the room, and run a HEPA air purifier immediately. Wipe down any surfaces spores may have landed on using a damp cloth and vinegar. Change your clothing and shower. Then go back and re-clean the original area using proper containment from the start.
How long does it take for mold to grow back if the moisture problem isn’t fixed?
Mold can begin growing on damp surfaces within 24 to 48 hours under the right conditions. In a consistently humid space like an unventilated bathroom, regrowth after cleaning is often visible within one to two weeks if the moisture source is still active.
Final Thoughts — The Right Process Makes All the Difference
Knowing how to clean mold without spreading spores comes down to one core principle: slow, deliberate, contained. Dampen before you disturb. Protect before you touch. Seal before you open anything up. The biology of mold makes the process non-negotiable — skip a step and the spores simply move somewhere new.
Fix the moisture source, and you fix the real problem. Everything else is just maintenance.
Disclaimer: The content on Dwellify Home is provided for general informational purposes only. Results, surface conditions, and mold situations vary by home. For large infestations, structural mold, or health concerns, always consult a licensed mold remediation professional. This content does not constitute professional health or remediation advice.